New Life For Old Wagons
Posted
#193046
(In Topic #10753)

Inactive Member
Weathering basic plastic no frills old Hornby wagons
G`day Folks,This is not an in depth topic on weathering techniques and I am only a mug at weathering, a newbie and I don`t have any before shots, only afters…..so sorry `bout that, but here we go.
Right, I was lucky enough the other day to win some wagons on that well known auction site. My fleet of goods wagons is severely lacking and I`m in the process of building it up. The wagons I purchased are in near new condition and were obtained at a very good price.
Here they are below


So that started me thinking on more additions. I have two quite old Hornby wagons. The plastic coloured, no frills, wide wheeled, big flanges, large tension lock suckers that you would see on every young lads train set. The thing is they have all the detail…the planks and bracing and rivets are all clearly defined……they just need a lick of paint.
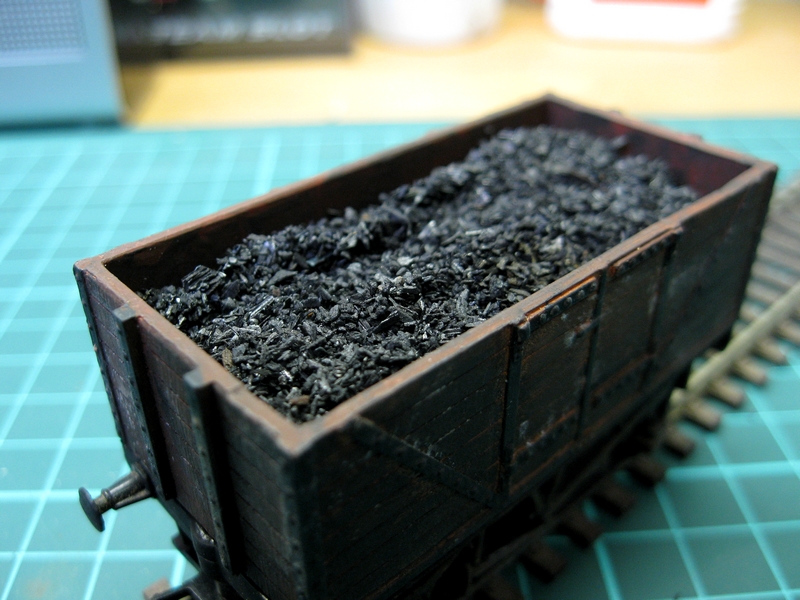
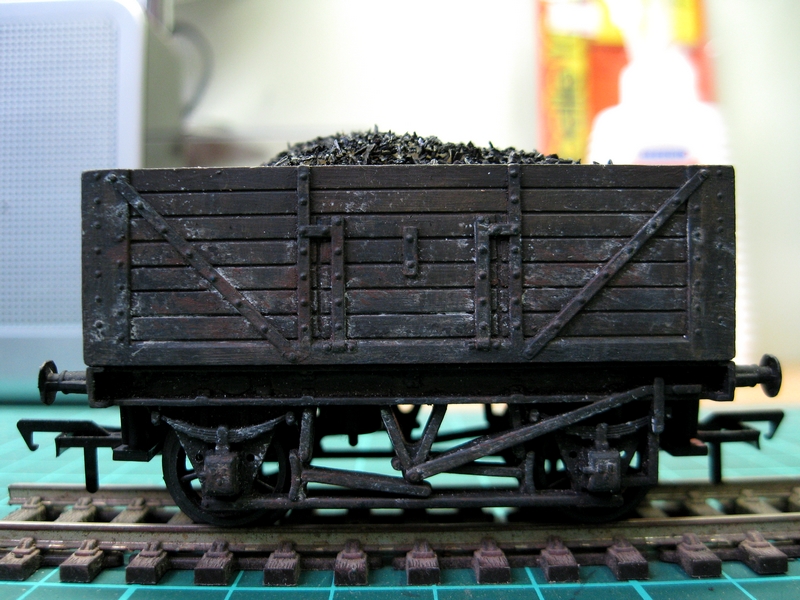
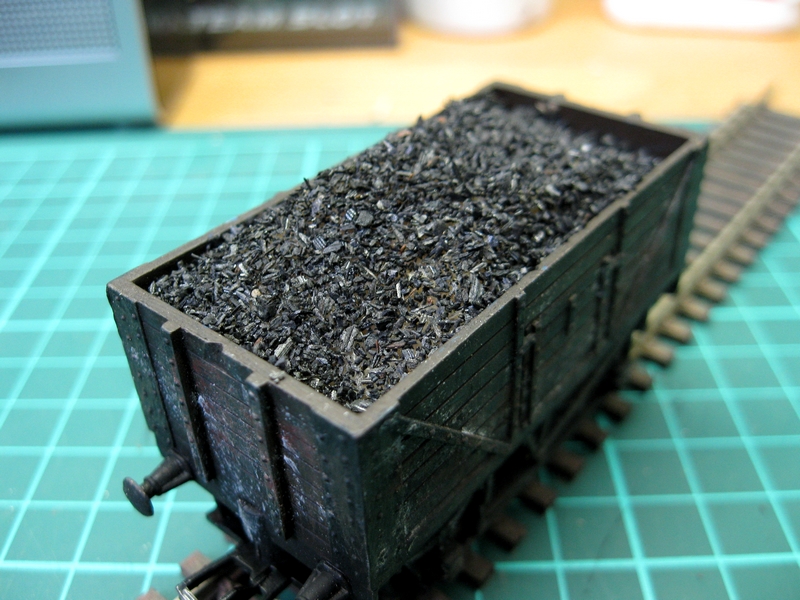
I went to work on the first one with acrylic paint…brushed on…no airbrushing…and used the brush for the first base colour as a way of imparting a timber grain to the planks. I then added thin layers of different colours in different areas to achieve the look I wanted……dirty…been through the mill a few times too many and had a hard life look…..isn`t that what weathering is all about??…I also added new small tension lock couplings and a load of coal. The coal load is the added using the foam rubber fill method, with a thin layer of coal glued to the top of the foam rubber.
Here`s the first one……originally this was a bright orange plastic colour and the wagon and the chassis needed fixing together.
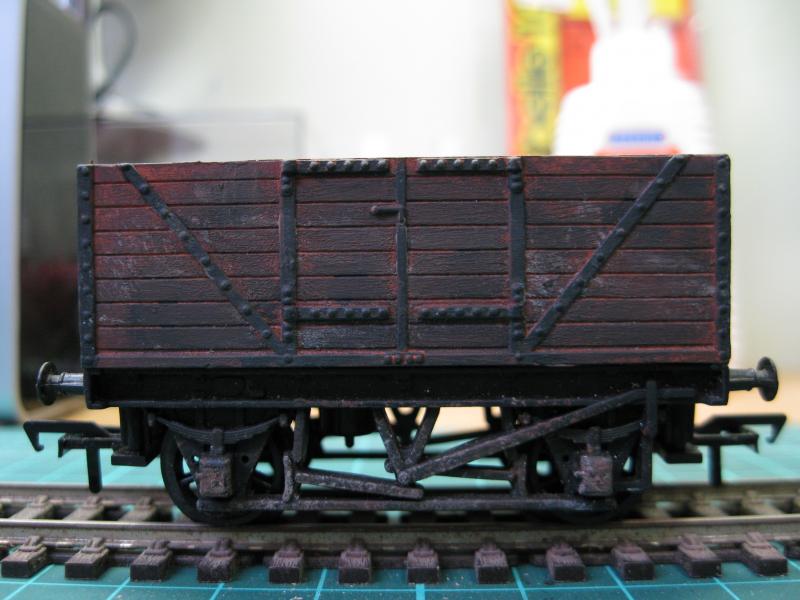
I have to go out and get some grade OOOO steel wool to remove the moulding lines on the buffers and then detail them accordingly. I also need some transfers to add some number details.
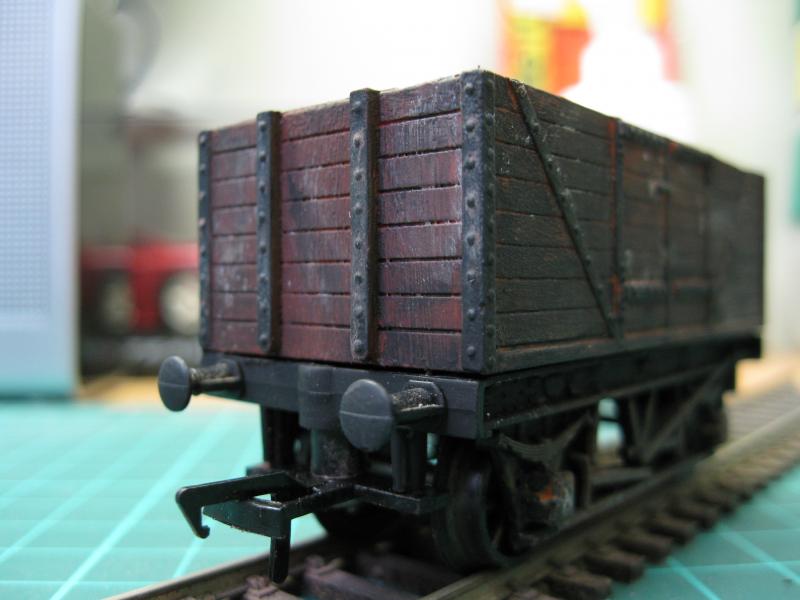
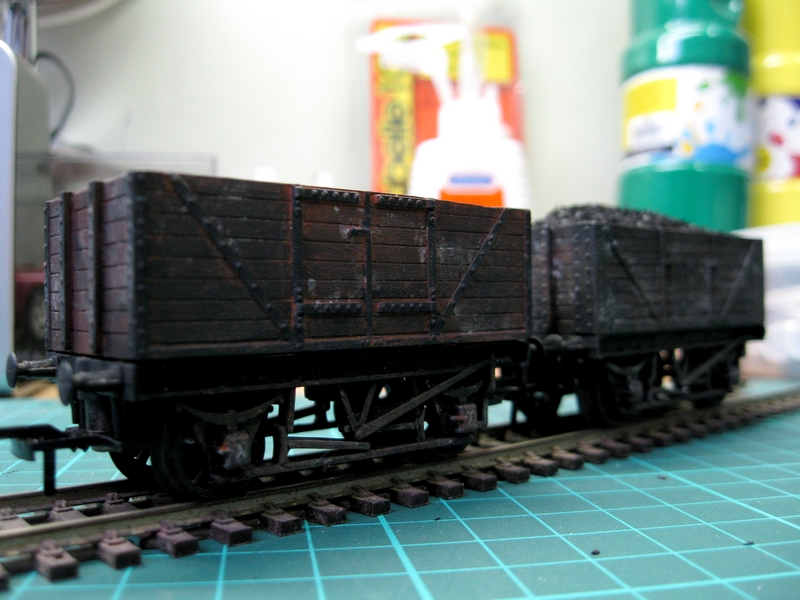
Armed with confidence, I had a go at the second one. This one was a medium blue plastic colour…like the McVities wagons….and it had a couple of issues with the buffers. I`ve sorted one out but I don`t think I`ll bother with the other…..these wagons are rustic work horses.
Here`s the second wagon.
Notice the broken buffer on the right

Here are some shots of the two together
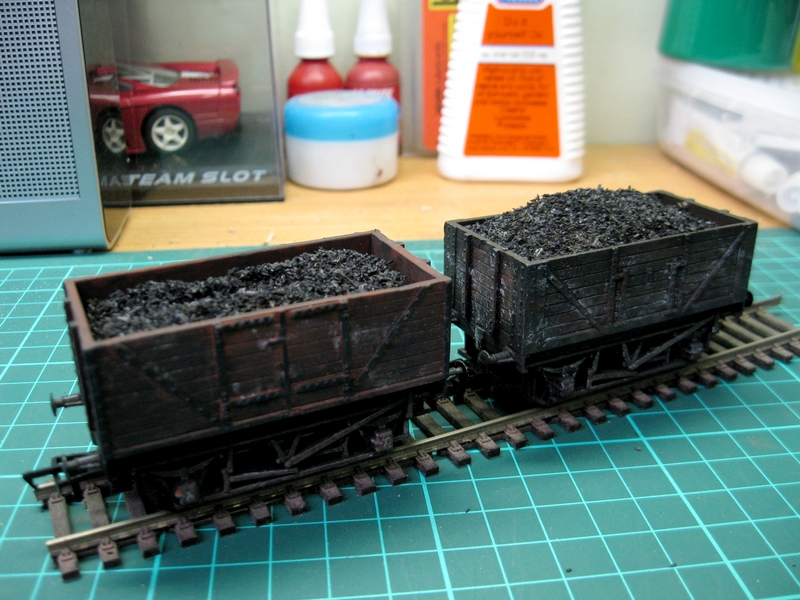
There you have it. This is done with artists acrylics brushed on intially. The dirty effects are done by using a sponge with the acrylics and creating a stippled effect and then smearing the stippled area with the dry end of the sponge. It can be done quite quickly as well.
Now I have to see if I can take the plunge and dirty up my new wagons???
Anyway….the point I am trying to make here is that old stock can be given new life and look pretty good next to the crop of new products we have at our disposal. It just takes a little patience.
:cheers Gormo
 Last edit: by gormo
"Anyone who claims to have never made a mistake, never made anything!!"
https://sites.google.com/site/greatchesterfordmodelrailway/home
https://sites.google.com/site/greatchesterfordmodelrailway/home

Posted

Full Member
Posted
Guest user
Matt
Posted

Site staff
I bet they would have been priced at twice as much looking like that.
Are you going to have a go at a loco ?
Ed
Posted
Inactive Member
Thanks Bob, Matt & Ed.
Yes Ed…I am going to have a go at a loco. I have my son`s little Smokey Joe from his childhood days. He`s told me to do what I like with it. So far I`ve added weight inside the boiler and also removed the front coupling and replaced it with a small Bachmann tension lock…..it looks better already. I want to rub it back and remove the obvious joint lines and the lettering and respray this one. Then there`s cab detail and a crew etc… Then dirty it up a bit.
:cheers Gormo
PS…this is exactly like what I`ve just been weathering.
http://www.ebay.com.au/itm/Triang-Hornby-Railways-OO-Scale-open-plank-freight-wagon-Scrap-yard-7459/121286434630?hash=item1c3d3c1f46
Last edit: by gormo
"Anyone who claims to have never made a mistake, never made anything!!"
https://sites.google.com/site/greatchesterfordmodelrailway/home
https://sites.google.com/site/greatchesterfordmodelrailway/home
Posted
Site staff
This is an example of what I mean about buying whethered wagons.
http://www.ebay.co.uk/itm/Lot-of-3-x-Hornby-PCA-Cement-V-tank-wagons-Unboxed-Weathered-/281619649185?pt=LH_DefaultDomain_3&hash=item4191d6d2a1
I make it just over Au$64
Ed
Posted

Banned
Whilst weathering, why not give the isopropyl alcohol and weathering powders technique a go as another option for weathering. These wagons below were treated with isopropyl and powders.
Cheers, Gary.
Posted
Guest user


photos added apologies for the quality, they were snapped on my phone and I havent had time time to go back with a decent camera
Matt
Posted
Inactive Member
Yes I see what you mean Ed, weathering equals premium pricing. I guess you`re paying for someones time and effort but I like the satisfaction of doing it myself and let`s face it….it`s not that hard???. I think the hardest part is to get over putting muck all over a brand new wagon. With these old cheap wagons it doesn`t matter, they can only be improved, so we can use them to condition ourselves and improve our skills and then move into the big time.!!!:roll::roll::roll:
Gary you method is tops and I will eventually move into that method or a combination of methods. I remember seeing your tank engine in the flesh with the realistic stains and rust etc….brilliant…pictures don`t do it justice. So now I`m crawling into weathering…eventually I will walk…but I`ll get there. Thanks for your assessment….I agree with what you say…I think #2 is better as well.
Matt your idea is a good one …..all sources of information are useful as reference material especially pics. These days it`s unlikely to see working vintage rolling stock in a weathered state, they are usually pristine, straight out of the box jobs, fully restored all sparkly and shiny. Therefore any pics showing weathered vehicles would be a bonus. I think it should be a stand alone topic though then members can add to the resource. Actually I may have some pics somewhere too.????
Time to hit the sack…..#3 Grandson, the littlest one, is coming early tomorrow for babysitting with Gran & Pop, whilst Mum goes off to work.
:cheers Gormo
"Anyone who claims to have never made a mistake, never made anything!!"
https://sites.google.com/site/greatchesterfordmodelrailway/home
https://sites.google.com/site/greatchesterfordmodelrailway/home
Posted
Guest user
Matt
Posted
Guest user
You've made a great inroad into mastering the art of weathering. These wagons look really convincing.
Top job.:pathead
Toto
Posted

Inactive Member
Very convincing. :thumbs
Max
Port Elderley
Port Elderley
Posted

Site staff
Ron
NCE DCC ; 00 scale UK outline.
NCE DCC ; 00 scale UK outline.
Posted
Inactive Member
:cheers Gormo
"Anyone who claims to have never made a mistake, never made anything!!"
https://sites.google.com/site/greatchesterfordmodelrailway/home
https://sites.google.com/site/greatchesterfordmodelrailway/home
Posted
Full Member
Tom
'HOWZAT'
Posted
Inactive Member
Thanks for the comments.
Yes mate …have a go….with old wagons it doesn`t matter really. As I mentioned I`ve used artists acrylics brushed on, but brushed on thin. If you think you`ve overloaded your brush, wipe some off onto some scrap card or whatever first , and then take the brush to the wagon.
Actually it`s probably a good idea to have a couple of practice runs on the scrap card so that you get the feel for it.
Something I don`t think I`ve mentioned earlier, is that to make your muck stains look even more convincing, you can moisten the end of your finger and smear the area with a downward stroke. Not too much moisture though, just enough to smear the top layer a little.
Post some results on here when you`ve had a go at it.
:cheers Gormo
"Anyone who claims to have never made a mistake, never made anything!!"
https://sites.google.com/site/greatchesterfordmodelrailway/home
https://sites.google.com/site/greatchesterfordmodelrailway/home
Posted

Full Member
'Petermac
Posted
Inactive Member
Yes I am pleased. The result is good but the boost to confidence with such projects is even better.
:cheers Gormo
"Anyone who claims to have never made a mistake, never made anything!!"
https://sites.google.com/site/greatchesterfordmodelrailway/home
https://sites.google.com/site/greatchesterfordmodelrailway/home
Posted
Inactive Member
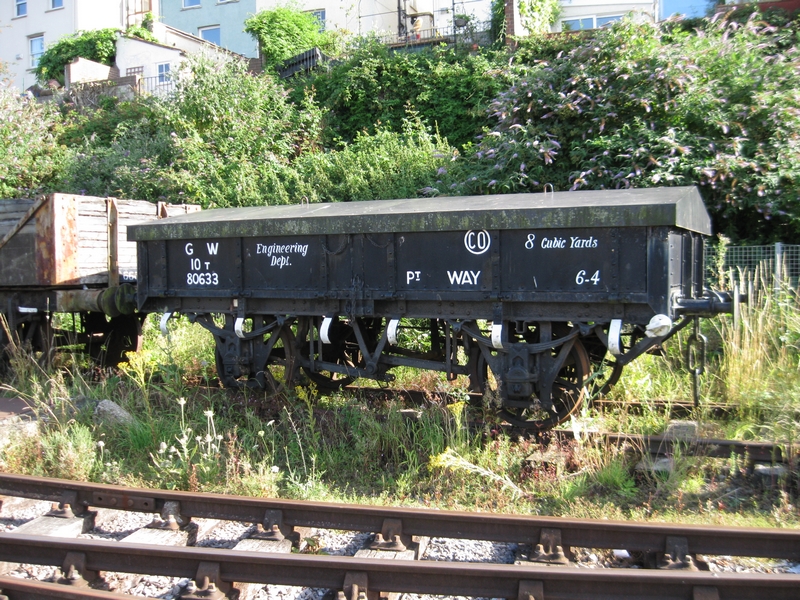
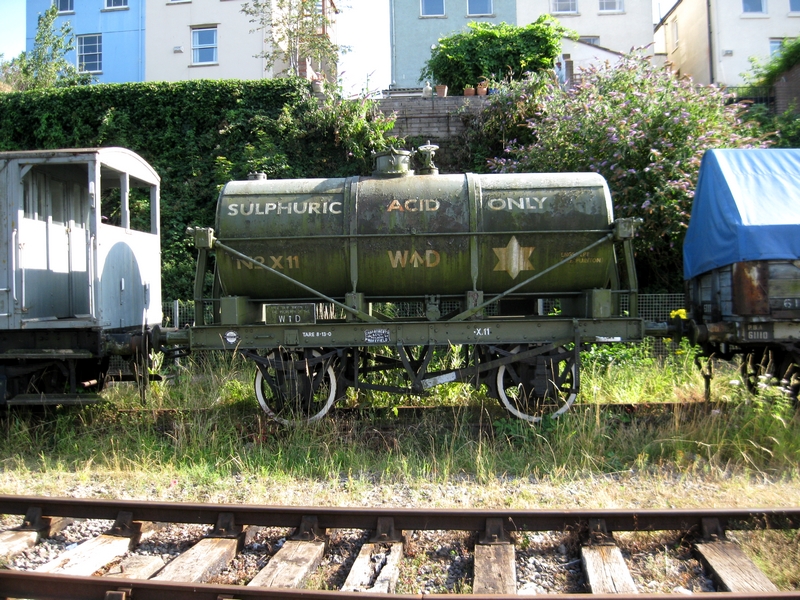
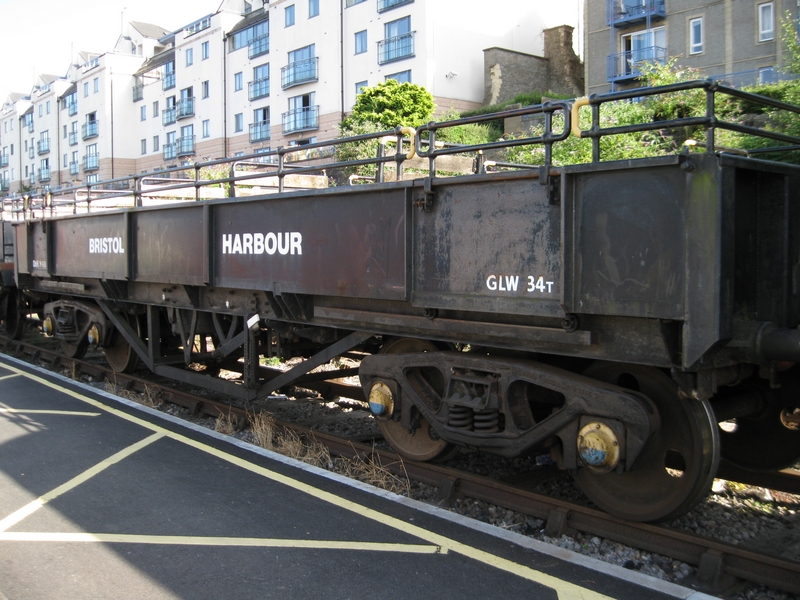
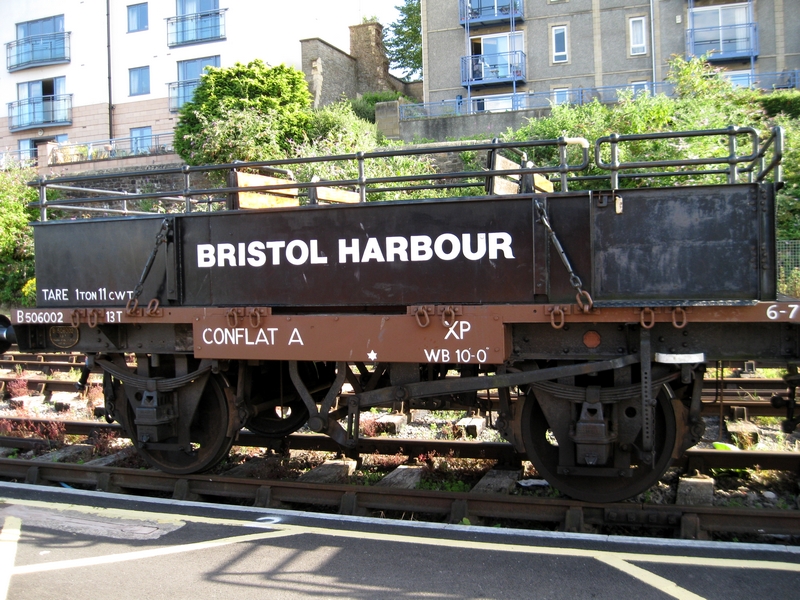
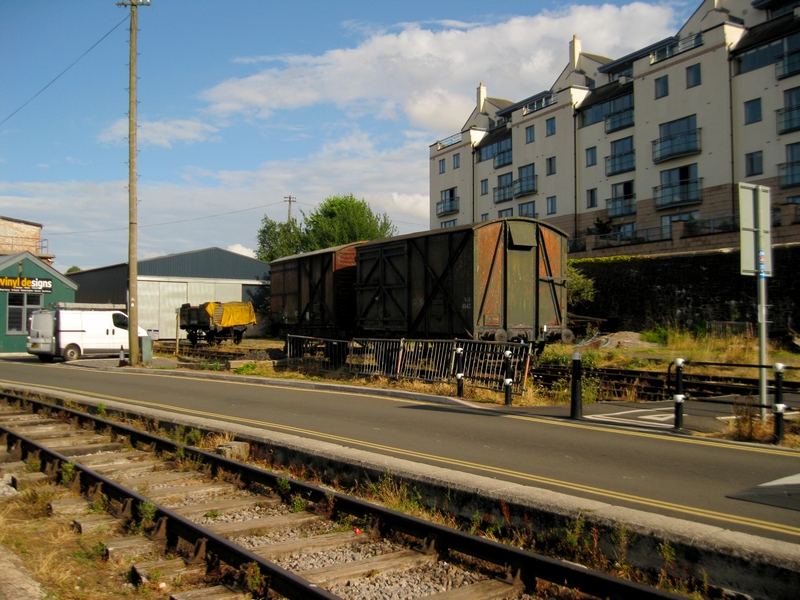
Some pics from Bristol docks 2013…..may be helpful for weathering.


:cheers Gormo
"Anyone who claims to have never made a mistake, never made anything!!"
https://sites.google.com/site/greatchesterfordmodelrailway/home
https://sites.google.com/site/greatchesterfordmodelrailway/home
Posted
Banned
I have many pics of New South Wales rollingstock, unfortunately no one here models the NSWGR.. :sad:
For a complete file of BR rollingstock photos, don't forget Paul Bartlett's site :
http://paulbartlett.zenfolio.com/paulbartlettsrailwaywagons
Cheers, Gary.
Last edit: by Gary
1 guest and 0 members have just viewed this.