Scalescenes Corner Shop/Pub
Posted

Full Member
Nice B&W shot, John. INteriors, the bane of my life, I always say I'm not going to do any detailed interiors on the next one…..
Doug
'You may share the labours of the great, but you will not share the spoil…' Aesop's Fables
"Beer is proof that God loves us and wants us to be happy" - Benjamin Franklin
In the land of the slap-dash and implausible, mediocrity is king
"Beer is proof that God loves us and wants us to be happy" - Benjamin Franklin
In the land of the slap-dash and implausible, mediocrity is king

Posted

Full Member
I guess I will have to check your next Market Havering update rather more closely TrevorHa, ha ! I know exactly where you're coming from on the subject of interior detailing John.
I also get carried away sometimes and have been known to fully furnish and populate N Gauge buildings when I know full well they will never be seen.
Perhaps it's as well sometimes as I have incorporated some 'cheeky' bedroom scenes in some of my buildings, including the Station Master's House attached to Market Havering Station. :cool wink
 Bedroom scenes in N :roll:
Ed wrote:
I decided that as the "Great Eastern" was designed by Brunel that was a suitable Great Western connectionDoesn't matter they can't be seen John, you know they're there.
Thought you were going to change the name of the pub.
Ed
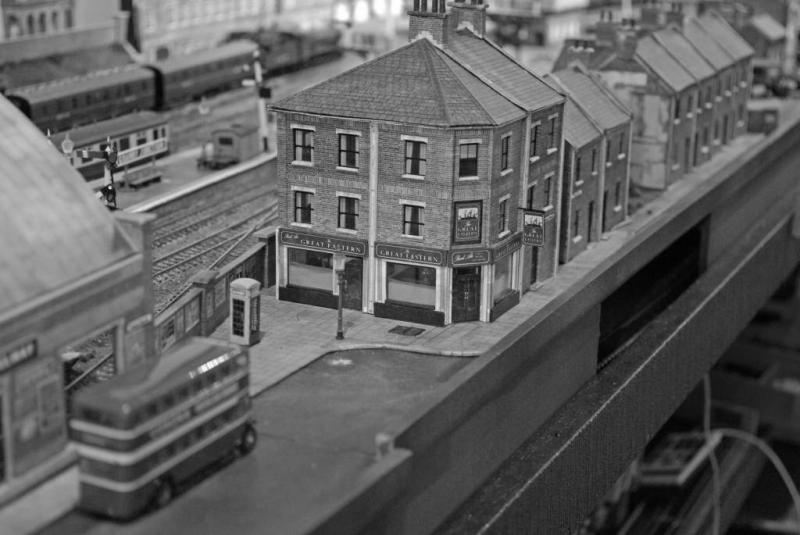
PS like the black and white shot :thumbs
 The colouring and Fonts arent too bad……its the "Real Ale" sign that is wrong for the period……. mind you its almost as inconspicuous as Bronwen so maybe I can get away with it
Chubber wrote:
Thanks Doug…….glad you and Ed liked the B&W shot…….I must confess I did feel that for once I had captured that 40s look…I wouldn't argue with Bronwen…..
Nice B&W shot, John. INteriors, the bane of my life, I always say I'm not going to do any detailed interiors on the next one…..
Doug
Your interors are in a different league Doug………I remember, in particular, a quite exquisite detailed interior of a branch engine shed……….brilliant modelling
Regards to all from a very sunny Vancouver
Posted
Full Member
http://yourmodelrailway.net/view_topic.php?id=13210&forum_id=101&jump_to=234851#p234851
Comparisons they say are odious………certainly so in my case…….I toyed with postponing the completion of this thread and then it occurred to me that this thread neatly complements Doug's by firstly identifying things one should NOT do and then suggesting bodging remedies:).
Time to add the finishing trim:

I had a genuine
 moment when covering the centre wall edge shown below:
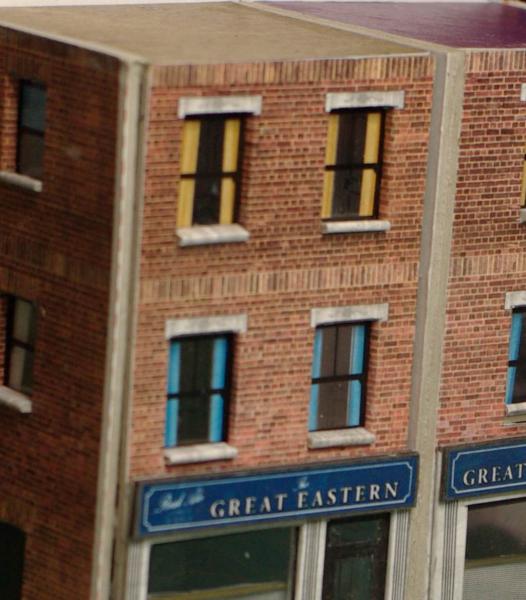
The exposed sides are not printed
 ……..hastily re-read the manual and there , right at the beginning,……..wrap and glue the cover layer before fitting the inside walls

Dew's bodging solution :
Insert sliver of Brick paper into fortuitous gap between side panel and wall. Trim down centre wall cover layer (which should have been fitted three weeks ago) and fit
Attic floor with wrap round guttering added……..one of the key things I have learned from both this build and the terraced houses (which have a similar construction) is that it is absolutely essential that the attic floor fits precisely over the side walls………any cutting error or variation in board thickness of the internal walls and floors can prevent this.
I kept checking by dry fitting the side panels…..when I got to the second floor I realised I had a problem…….so the second floor bedrooms lost their skirting boards…..2mm trimmed off solved the problem…….no gap:)
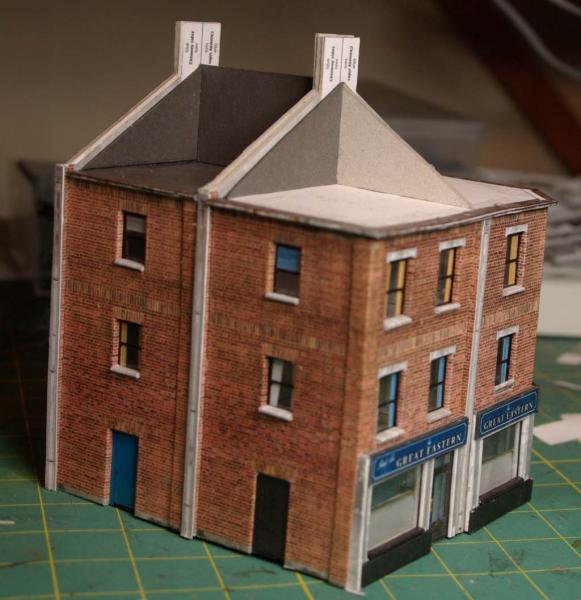
Having fitted the roof supports (I added some additional ones) it was time to start tiling…….a job second only to ballasting in terms of boredom
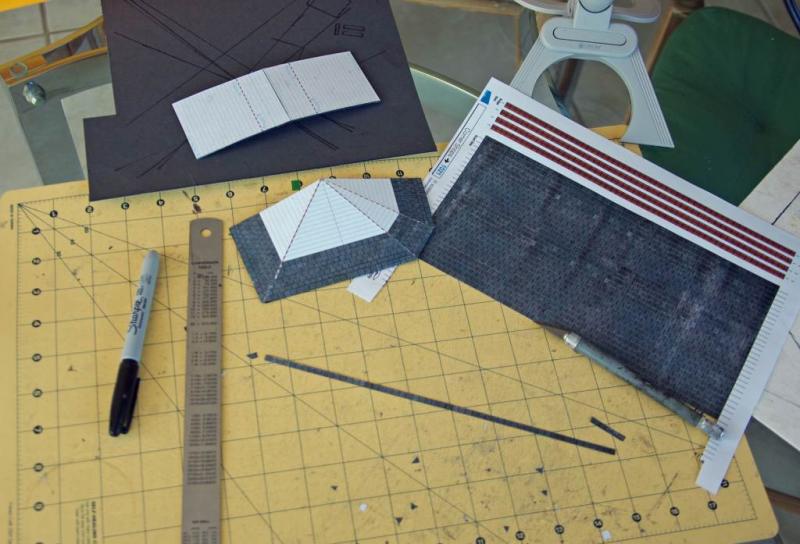
Initially I used to tile with entire sheets but it is undoubtedly better to lay in single strips…….provided you keep them in order to preserve John's weathering effects.
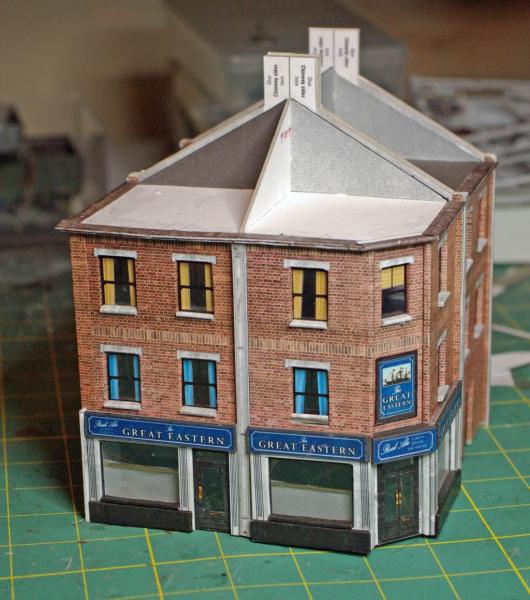
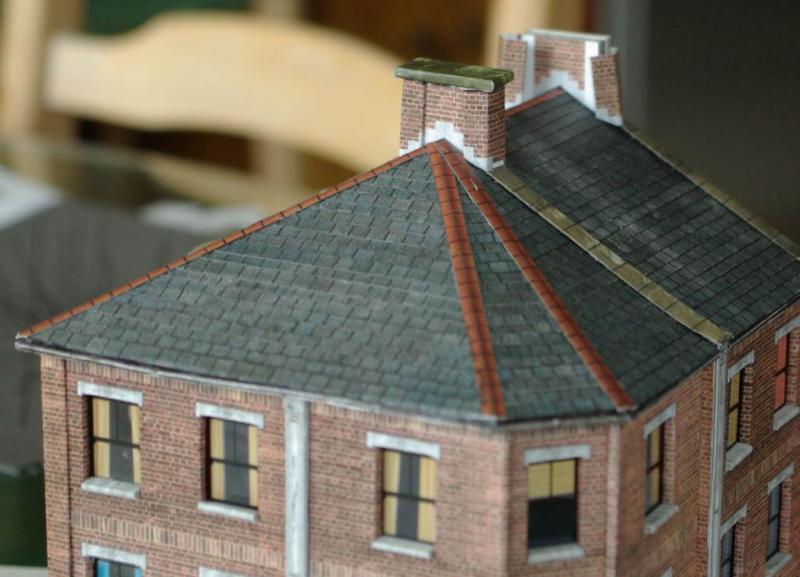
Here is the roof finally done with one chimney stack complete and the other showing the wrap around cover layer about to be fitted
I had a problem with the supplied roof cover strips…..too narrow…..or perhaps my gap was too wide
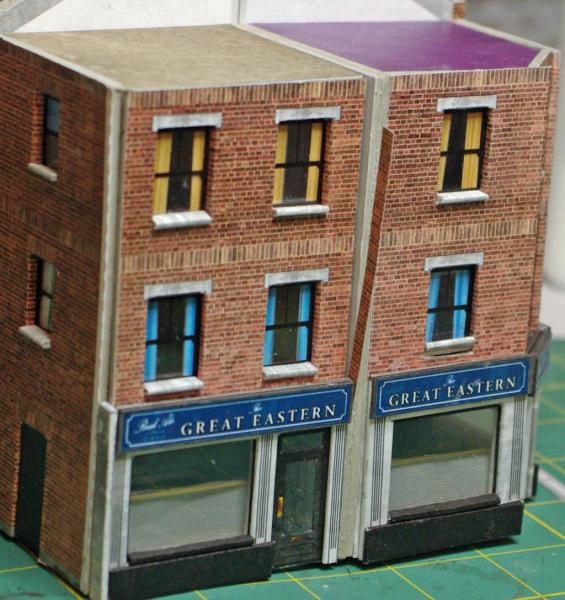
So I substituted trimmed down coping stone strips left over from the warehouseSo here is the finished pub in situ
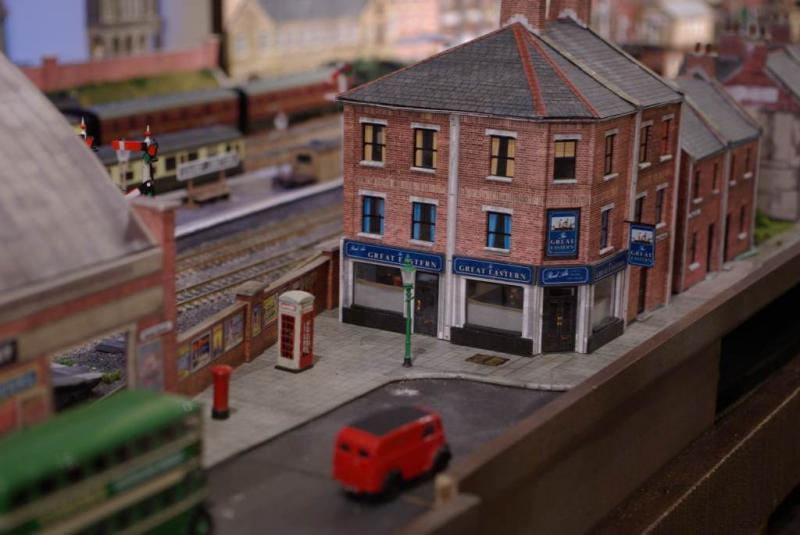
Street detail added….Lampost, Pillar Box ,Phone Booth…….pedestrians to follow.

It was time a Pannier got into this thread……even if it is out of focus
!
Hanging Pub Sign plus I replaced the first floor entrance window with a similar sign……..its shown like that on the two storey shops but not the three storey.
Narrow alley way separating Pub building from terraced houses……there are two home made street signs …..I am trying to suggest Chapel street ,the main road, chicanes away off the baseboard while the narrow street (Penny Lane!) of railway cottages leads to the Parcels Depot

Side view showing poster on large blank wall that can be seen by all the trains entering and leaving Granby. Veteran members may recall Sam the Ram featuring in the Winter Olympics in the Matilda Thread…….
Thats it……all done
In summary, its a very versatile kit kit…..which, despite my various mishaps, I thoroughly enjoyed building……….hope you found the thread useful.

 Last edit: by John Dew
Posted

Full Member
So what's next ?
Regards,
Trevor
Trevor
Posted
Guest user
Thanks again for a very informative thread !
Cheers
Matt
Posted
Full Member
Thanks Trevor………………..back to the layout thread and finish the bomb site……..still waiting for my replacement controller so I guess then I will try and finish the station area:roll:so what's next ?
Kind Regards
Posted
Full Member
Thanks Matt……glad you found it useful……….there does seem to be a touch of Ying and Yang with Doug's thread and this one……..or maybe Sweet and Sour?Thanks John, great thread and love the end result. And those wee mistakes and recoveries on the way give courage to the rest of us to give it a go ! Now going over to that other thread to see how the "machine" that is Doug is getting on :)
Thanks again for a very informative thread !
Cheers
Matt
Regards from Vancouver
Posted
Full Member
I'm very sorry that you feel like this,but want to congratulate you on overcoming lots of hurdles to achieve convincing scene from out of a small space.
I look at your layout and I am so impressed with your vision and achievement, not to mention your grasp of the 'electronicals' that you practice.
You have a railway, I have a collection of cardboard houses, big difference!
Poop-poop!
Doug
'You may share the labours of the great, but you will not share the spoil…' Aesop's Fables
"Beer is proof that God loves us and wants us to be happy" - Benjamin Franklin
In the land of the slap-dash and implausible, mediocrity is king
"Beer is proof that God loves us and wants us to be happy" - Benjamin Franklin
In the land of the slap-dash and implausible, mediocrity is king
Posted

Full Member
Like you I've had fun with the slates, I now cover the roof with a 5x4 mm grid (created & printed in Excel - finally found a use for the program), the 4mm gives the slate spacing, the 5mm just provides a convinient verticle line to cut for alignment.
When I use Scalescene slates I print 2 sheets, and cut the slates in to double rows, overlapping the top row with each the bottom row of the next layer. Before sticking them down, I also run the scalpel between each tile on the bottom row, then run a marker pen along the white edge, this allows the ink to leech up the cut between the slates. And also cut the odd broken slate.
Paul
Posted

Full Member
Mike
Pig Hill Yard - a small Inglenook shunting layout for my boys, in 00.
Pig Hill Yard - a small Inglenook shunting layout for my boys, in 00.
Posted
Full Member
Oh dear……you dont have to feel sorry Doug…….you should know by nowthat I rather enjoy poking fun at myself. Nevertheless it is very charming of you to write such nice things about GranbyJohn,
I'm very sorry that you feel like this,but want to congratulate you on overcoming lots of hurdles to achieve convincing scene from out of a small space.
I look at your layout and I am so impressed with your vision and achievement, not to mention your grasp of the 'electronicals' that you practice.
You have a railway, I have a collection of cardboard houses, big difference!
Poop-poop!
Doug
Kind Regards
Posted
Full Member
Thanks Paul……….I must remember to use that technique with a spreadsheet it sounds very useful………I keep meaning to introduce the odd broken slate and then I get into a routine and forget!Nice one John.
Like you I've had fun with the slates, I now cover the roof with a 5x4 mm grid (created & printed in Excel - finally found a use for the program), the 4mm gives the slate spacing, the 5mm just provides a convinient verticle line to cut for alignment.
When I use Scalescene slates I print 2 sheets, and cut the slates in to double rows, overlapping the top row with each the bottom row of the next layer. Before sticking them down, I also run the scalpel between each tile on the bottom row, then run a marker pen along the white edge, this allows the ink to leech up the cut between the slates. And also cut the odd broken slate.
Paul
Kind Regards
Posted
Legacy Member
reg
Posted
Full Member
Thanks Mike……glad you enjoyed it……….the bodges are there……I havent mastered photo shop yet but I am getting quite adept at judicious croppingFantastic end result, and if anything, shows that one of the beautiful things about card modelling is that it is easy (!!?) to remedy mistakes as you go. Those last photos look fantastic (especially the one with the overall roof in the background), and not a bodge to be seen. I only hope that my future street scenes can look like this! :)
1 guest and 0 members have just viewed this.