Scalescenes Corner Shop/Pub
Posted

Full Member
Watching your build, I wonder if I too followed Doug's method and didn't read the instructions ……………
When I built - or rather, started to build (it's still not finished :oops:) - my row of shops, and the terraced houses, I glued the internal wall panels to the gables and centre wall before glueing anything else together. That created slots (recesses) for the components to "plug" together. I found that, in a few places, the recess was either too narrow or too wide for the panels to either plug in or make a tight fit. That cause all sorts of problems and reprints !!!
Your method of starting with the "T" then working from the bottom up would overcome that.
 thumbs
I'm waiting until you add the roof to the corner unit now ……………………………:roll::roll::roll::roll::roll:
Once built, they are unbelievably strong.
'Petermac

Posted

Full Member
That's a very nice combination of kits that you've put together also Paul. It's amazing what can be achieved by kit-bashing these kits.
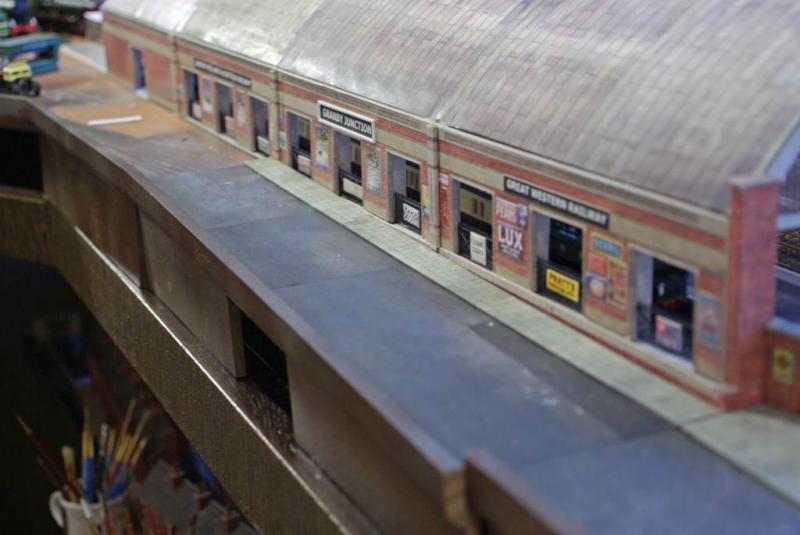
As your thread seems to have been well and truly hijacked John I thought I would post a couple of pictures of what I've been doing for the last few evenings. It did start out as a Scalescenes kit and it doesn't look all that complicated but, as you will see I had need of a tunnel entrance spanning 3 tracks which, to the best of my knowledge, doesn't even have a prototype. For those of you you may not be aware of it, all tunnels which are not made with a tunnel boring machine, are formed in an elliptical shape because the ground forces are spread downwards so that it is self-supporting during excavation.
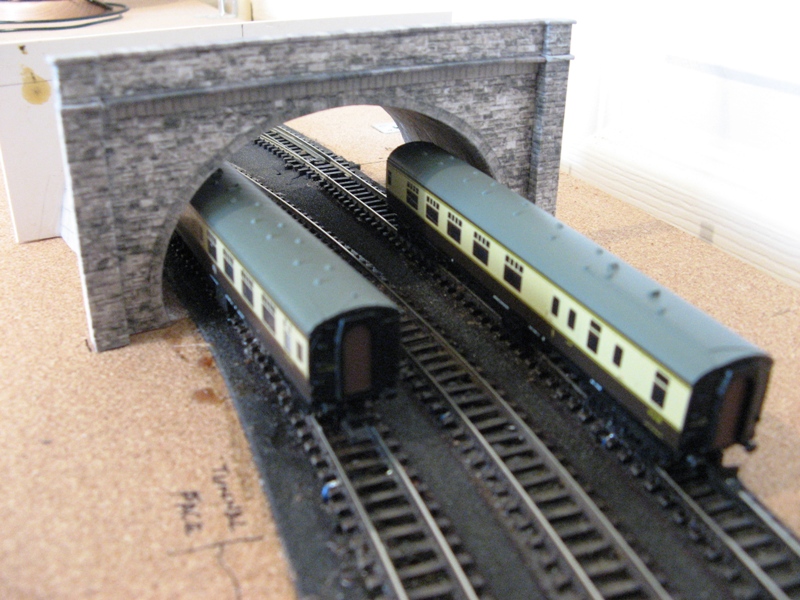
The problem I had was to find an ellipse which spanned 3 tracks and gave sufficient height and width to accommodate my longest carriages. To add to the complexity the 3 tracks diverge as they pass through the tunnel into the storage sidings so I needed a completely different shape for the exit side of the tunnel. Anyway, after several failed trial shapes, this is what I eventually produced using some parts from a Scalescenes Tunnel kit and some scratch built with Scalescenes papers.
This is the tunnel entrance with 2 carriages in position on the outside tracks to show that they will pass through.
This is the view from above to show the quite complex tapering of the tunnel lining piece.

And finally this is what will be the hidden inner tunnel face.

Now that I have established the optimum position of the tunnel face I can fit the wing walls at an angle to suit the track alignment. Although it is 3" long I might also have to extend the tunnel lining to avoid seeing the hidden board area. However, as it can only be seen when looking directly into the tunnel I might not bother. I now have 2 more 'one-off' tunnel entrances to do.
I do make life difficult for myself at times.

 Last edit: by Chinahand
Regards,
Trevor
Trevor
Posted
Full Member
Not only is it very complex Trevor but it's beautifully made. :thumbs I presume you've stre-e-etched the arch somehow but it still looks perfectly formed without any apparent increase in height. Excellent bit of modelling sir. :cheers:cheers:cheers
'Petermac
Posted

Full Member
John, your'e getting there, the worst bits over, well at least thats what I found, for me once I've completed the first one the rest are plain sailing, apart from the 2mm card cuts. :roll:
And from the first one you can quickly identify where the mass production flow will occur.
Paul
Posted

Full Member
Thanks Doug……you were the guy who converted me from plastic so, compliments from you are always much appreciated.You mare making a good job of this, John, as usual.
These Wiffenations can certainly be fiddly, I have just come to grief with the latest, the Edwardian school building. I'm trying it to see if it will make the basis for a free-lance station or cottage hospital kit-bash. "No problems here!" thought I, as I have done one or two of these…only to come a cropper.
Above all, Rule number one should be RFI [ ' Read the Flippen' Instructions!']
I have a slightly different translation for RFI but I guess ex foot soldiers are a little coarser than ex matelots

I have been looking at that school kit……I will be very interested to see the results of your bashing……I was going to comment on the lack of cornflakes in Chez Bisto but someone beat me to it
:cheers:cheers
Posted
Full Member
Thanks PeterIt's coming along very well John. :thumbs
Watching your build, I wonder if I too followed Doug's method and didn't read the instructions ……………
When I built - or rather, started to build (it's still not finished :oops:) - my row of shops, and the terraced houses, I glued the internal wall panels to the gables and centre wall before glueing anything else together. That created slots (recesses) for the components to "plug" together. I found that, in a few places, the recess was either too narrow or too wide for the panels to either plug in or make a tight fit. That cause all sorts of problems and reprints !!!
Your method of starting with the "T" then working from the bottom up would overcome that.
I'm waiting until you add the roof to the corner unit now ……………………………:roll::roll::roll::roll::roll:
Once built, they are unbelievably strong.
I am pretty sure the instructions (Doug would no doubt say destructions) are in the sequence you describe. Its certainly the method that I followed for the terraced houses……….it was only after the mess I got into there that I decided to do it this way……I must admit I find it much more comfortable
I agree with you about the strength…..they are very solid……..I am going to weigh mine once the roof is on.
I share your anticipation about the corner roof…….but I have been dry fitting that as well so I am moderately (??) confident
Cheers
Posted
Full Member
Hi TrevorThat's coming on really well John. Scalescenes kits are very good but you do need patience and accurate cutting skills to get them spot on.
That's a very nice combination of kits that you've put together also Paul. It's amazing what can be achieved by kit-bashing these kits.
As your thread seems to have been well and truly hijacked John I thought I would post a couple of pictures of what I've been doing for the last few evenings. It did start out as a Scalescenes kit and it doesn't look all that complicated but, as you will see I had need of a tunnel entrance spanning 3 tracks which, to the best of my knowledge, doesn't even have a prototype. For those of you you may not be aware of it, all tunnels which are not made with a tunnel boring machine, are formed in an elliptical shape because the ground forces are spread downwards so that it is self-supporting during excavation.
Thanks for the kind comments. No problem with the hi jack……the more discussion on card modelling the better.
Super job on the tunnel particularly the way you managed the diverging exit…….very impressive
I know the feeling …..all too wellI do make life difficult for myself at times.:
:cheers:cheers
Posted

Full Member
I love that tunnel portal - very nicely done. Looking forward to more tips, especially since I have been part-way through an N-Gauge build of the small corner pub since before the 00 Pig Hill Yard came along! :)
Mike
Pig Hill Yard - a small Inglenook shunting layout for my boys, in 00.
Pig Hill Yard - a small Inglenook shunting layout for my boys, in 00.
Posted

Full Member
[user=1560]emmess[/user] wrote:
I'm following this thread with interest as making the Scalescenes kits is one of my favourite aspects of the hobby. I love the tip on how to prevent 'window bulge', and will be trying the 'cut standing up' tip too as my cuts are seldom at right angles.
I love that tunnel portal - very nicely done. Looking forward to more tips, especially since I have been part-way through an N-Gauge build of the small corner pub since before the 00 Pig Hill Yard came along! :)
E, just in case you haven't found this link Post #0
Last edit: by Chubber
'You may share the labours of the great, but you will not share the spoil…' Aesop's Fables
"Beer is proof that God loves us and wants us to be happy" - Benjamin Franklin
In the land of the slap-dash and implausible, mediocrity is king
"Beer is proof that God loves us and wants us to be happy" - Benjamin Franklin
In the land of the slap-dash and implausible, mediocrity is king
Posted
Full Member
I thoroughly enjoyed re-reading those articles……in fact I rather wish I had done so before I started the project……….I keep looking at my less than sharp corners…..:twisted:
Kind Regards
Posted
Full Member
Hi JohnNot Piracy at all Doug :thumbs …………. a very helpful intervention.
I thoroughly enjoyed re-reading those articles……in fact I rather wish I had done so before I started the project……….I keep looking at my less than sharp corners…..:twisted:
Kind Regards
On this forum, I get that feeling over and over, or as Doug and Peter may pu it - De ja vu
Paul
Posted
Full Member
What makes you think we can speak French Paul ? Just because we live here doesn't mean we have to speak to them ……………………………………………………………………………………On this forum, I get that feeling over and over, or as Doug and Peter may pu it - De ja vu
Paul
 :pedal(That's supposed to be a joke of course - before the "do gooders" take me to court ……:roll:)
'Petermac
Posted
Full Member
Ca marche
Ca marche pas
Me***
Boff - complete with shrugged shoulders
What more do I need
Strange, I get emails in French, normally means I can ignore them, cos, if they're important, (read they need something), then its in english.
Paul
Posted
Full Member
In fact, most around here would say "Ca'n marche pas" …….. Strangely, whilst I was plying our Mayor with some of my best wine yesterday, it appears he worked for "National Security" in Nicaragua many years ago as par of a "European Delegation". As you'd expect, they had people for Italy, Germany, France, Spain and Holland, all working in the same office. Their common language was English - mainly because they frequently had to liase with the US authorities who absolutely refused to speak anything but English …………… That's when he had to learn his, what is pretty darned good, English. He's about the first Frenchman I've met who can say "th" as in "the" rather than "zee". His 16 year old son doesn't speak English !!
Here, they still take a dim view if you don't speak to them in French and in fact, not too many of them can speak much English.
Now how did we get here from Scalescenes buildings :hmm………………………very, very sorry John :oops::oops::oops::oops:
'Petermac
Posted
Guest user
cheers
Matt
Posted

Full Member
Cheers MIKE
I'm like my avatar - a local ruin!
I'm like my avatar - a local ruin!
Posted
Guest user
Posted
Full Member
Normal service will be resumed shortlyFor those who dont follow my Granby thread, I should explain that the pub will be part of a narrow scenic strip at the front of the layout. Part of this strip covers a lower level storage area which will need to be removed from time to time
Originally I had planned to mount the terraced houses and pub on their individual Scalescene foundations and make them removeable sub units on top of the lift off section…….this didnt work out too well with the terraced houses…..the corners tended to curl.
So I glued a larger street foundation on the lift off section which overlaps on to the baseboard

I guess this segues neatly into interiors!
John Wiffen is very enthusiastic about interiors and provides all manner of printed accessories …..book shelves , pictures, rugs etc.
I must confess that normally I dont bother but in this instance, bearing in mind the large pub windows, I thought I had better install some detail
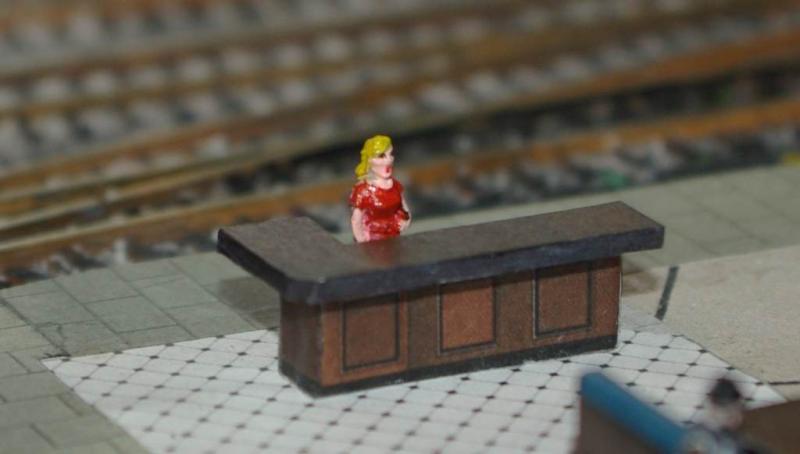
So that lone edifice above is John's very cleverly designed bar counter……..complete with wash up sink!
To which I added:
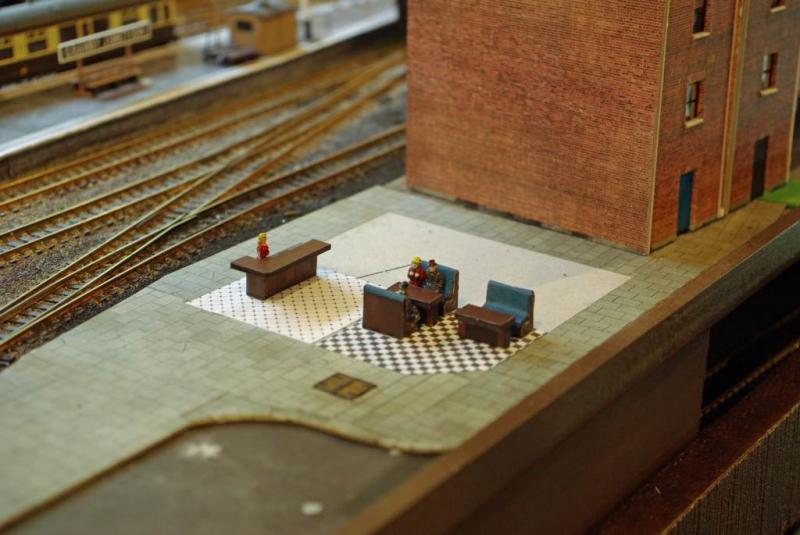
Benches, tables and a few customers and of course Bronwen the blonde bombshell barmaid
I was getting quite carried away with all this. Most people are familiar with the Airfix/Dapol figures……..there are a couple of signal men……one pulling a lever: pulling a pint perhaps……the other arm outstretched: just like a dart player……..and I had cut out the facsimile dartboard and glued it to the wall. The people painting factory was in full swing……….then a reality check……I wondered how much one could actually see once the pub was in position:roll:
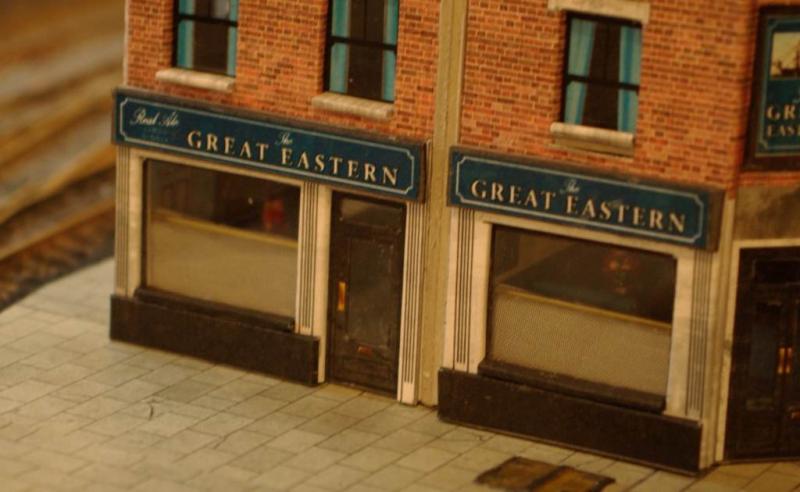
The answer…………not a lot

Even with flash and a mega zoom:
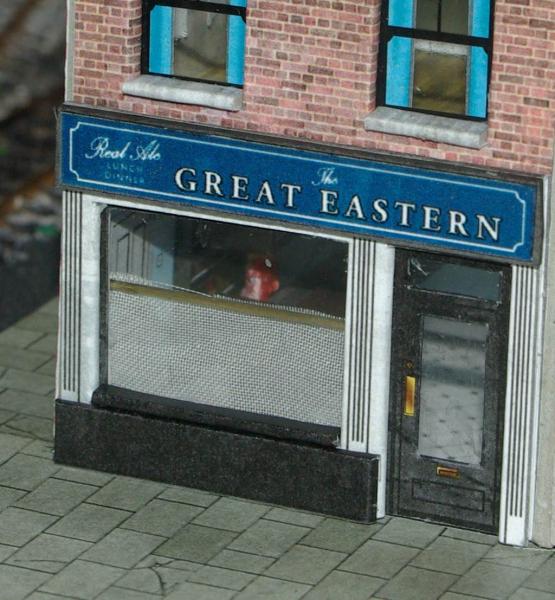
Not sure I want people to look that closely anyway……they might spot that the net curtains are not hung very well :oops:
So work on the people painting factory stopped abruptly…….if anyone would like to buy a half painted Dapol signalman holding a 4mm scale dart……send me a PM
Moving right along

Here is the wall finally separating the pub and Bronwen from the track……….on the left you can see the join of the next lift off section…..the narrow ramp running along side the station. Hopefully I can conceal that with a Belisha Beacon style pedestrian Xing
Meandering further off topic
The street is fairly narrow and will only allow two lanes of traffic …….I kind of like the idea of bus stops similar to Skelhorne Street at Liverpool Lime Street. I need a fair number of people but its surprising how few models there are in walking or running mode…….bus queues might well work to populate this long stretch………I am going to leave a decision on this until I model the square outside the main Station Building…….thats a couple of months away
Finally and still totally unrelated to the Pub…….here is what it might have looked like…..just imagine the people

Ok I am done…….feel free to discuss this and any other subject while I write the bit I promised last time about finishing trim.
Posted
Full Member
I also get carried away sometimes and have been known to fully furnish and populate N Gauge buildings when I know full well they will never be seen.
Perhaps it's as well sometimes as I have incorporated some 'cheeky' bedroom scenes in some of my buildings, including the Station Master's House attached to Market Havering Station. :cool wink
Regards,
Trevor
Trevor
Posted

Site staff
Thought you were going to change the name of the pub.
Ed
PS like the black and white shot :thumbs
1 guest and 0 members have just viewed this.