Glen Ogle control panel.
Posted
Full Member
How I set about designing and building a control panel for my Glen Ogle layout.
Wow - that looks highly complex Brian. :shock::shock::shock:I hope you have kept a note of all the wires …………….:roll::roll: I get lost beyond black and red ….:oops::oops:

'Petermac
Posted
Full Member
It only looks complicated because there are a lot of wires in a smallish space, it's really only old fashioned relays and switches connected with a lot of wire, something I am quite comfortable with.
Now electronics, that's a different matter
I have still to connect all those wire ends to the track and point motors, and cut all the section breaks in the track, that's going to be fun.
Especially positioning the mini holding sections.
I will probably cut the rails using my mini-rotary drill with a cutting disc fitted.
I need to make a gadget to hold the rotary drill horizontal and yet be able to be pushed down so that the slitting disc approaches the to be cut rail, squarely and without any movement.
I find that if I try to hold the rotary drill unsupported in my hand, my unsteady hands allow the cutting disc to wander resulting in over wide cuts.
I will then fill the cuts with araldite and build up a little of the epoxy to the rail either side of the cut to stabilise and support the cuts.
I seem to have rambled on again, I must curb my typing finger.
Regards,
BrianT.
 Last edit: by gtmspyder
Posted
Full Member
I tried with my Dremel but, like you, just couldn't get a fine enough cut nor keep it vertical because of the drill body being about the same diameter as the disc ……….

'Petermac
Posted
Full Member
We will see when the time comes.
Regards,
BrianT.
Posted
Site staff

Country selection | Dremel
Ron
NCE DCC ; 00 scale UK outline.
NCE DCC ; 00 scale UK outline.
Posted
Full Member
Presumably, the diameter of the drill head is less than that of the slitting disc……….:roll:
'Petermac
Posted
Site staff

it is on my version of the flexible shaft Peter.
Presumably, the diameter of the drill head is less than that of the slitting disc……….:roll:
Ron
NCE DCC ; 00 scale UK outline.
NCE DCC ; 00 scale UK outline.
Posted
Full Member
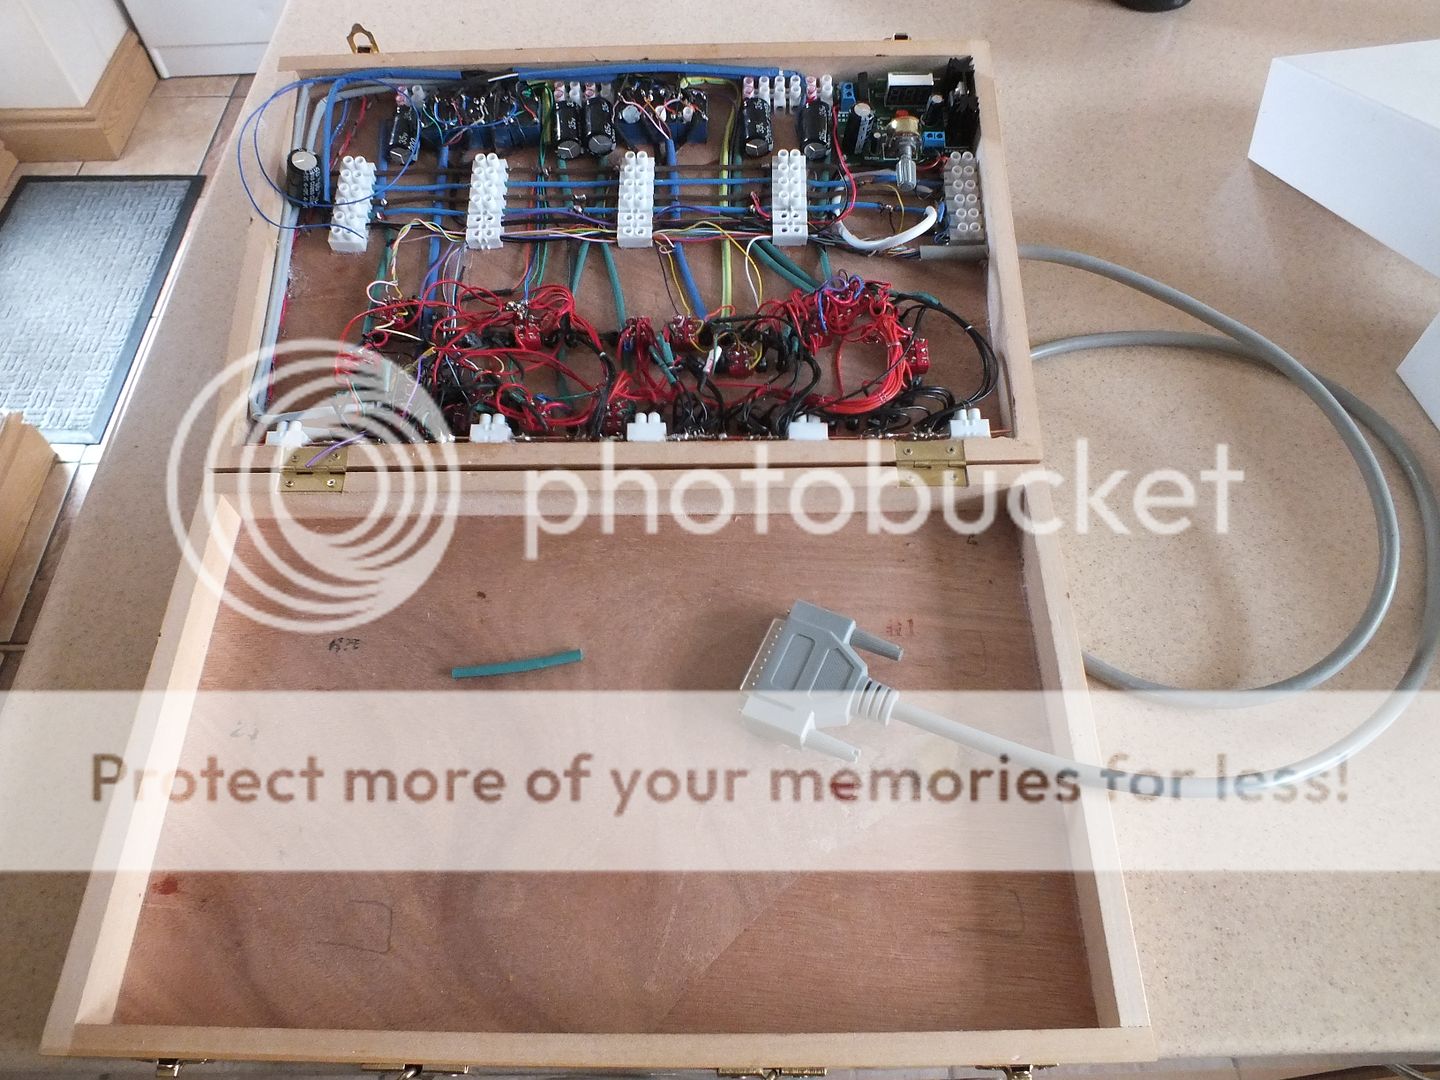
I took Hugh Norwood's advice, (A fellow 009 modeller on another forum I occasionally litter .) and added a latching circuit to the already fitted single pole changeover relays that change the mini storage section diodes from green to red when a loco occupies the section.
Hugh's provided circuit is very simple and elegant, needing only a reduced voltage permanent feed to the relays that require latching, which, while incapable of pulling the relay on, will hold a relay latched if it is pulled on by a greater voltage, which, momentarily the reed switches provide as the loco passes above them does.
We now have the track indicator diode turned from green to red by the SPCO relay, and latched permanently on, until the circuit to the relay is momentarily broke.
The short storage section had a momentary action push to make switched feed from the track circuit feeding it, now if this had been a double pole switch, I could have used the second unused pole to break the latched relay's circuitry, thus letting the relay drop out.
Unfortunately, I could find no supplier of miniature double pole momentary push to make switches, so I have scrapped the push switches and used instead, momentary action double pole toggle switches, which now feed the short isolating sections with power to move the loco off the short dead section of track, whilst at the same time, cancelling the latch circuit to the relay, and thus resetting the red/green track diagram indicating LED back to green until the next actuation.
All this wiring I was able to carry out within the control panel itself, thus requiring no extra wires back to the layout.
It did get rather complicated within the control panel, wiring in the resistors to each of the seven fitted relays, and getting a stable controlled voltage feeding the resistor feed circuit, changing the seven mini section switches buried in among all the diode wires plus the additional wiring required, I prevailed in the end.
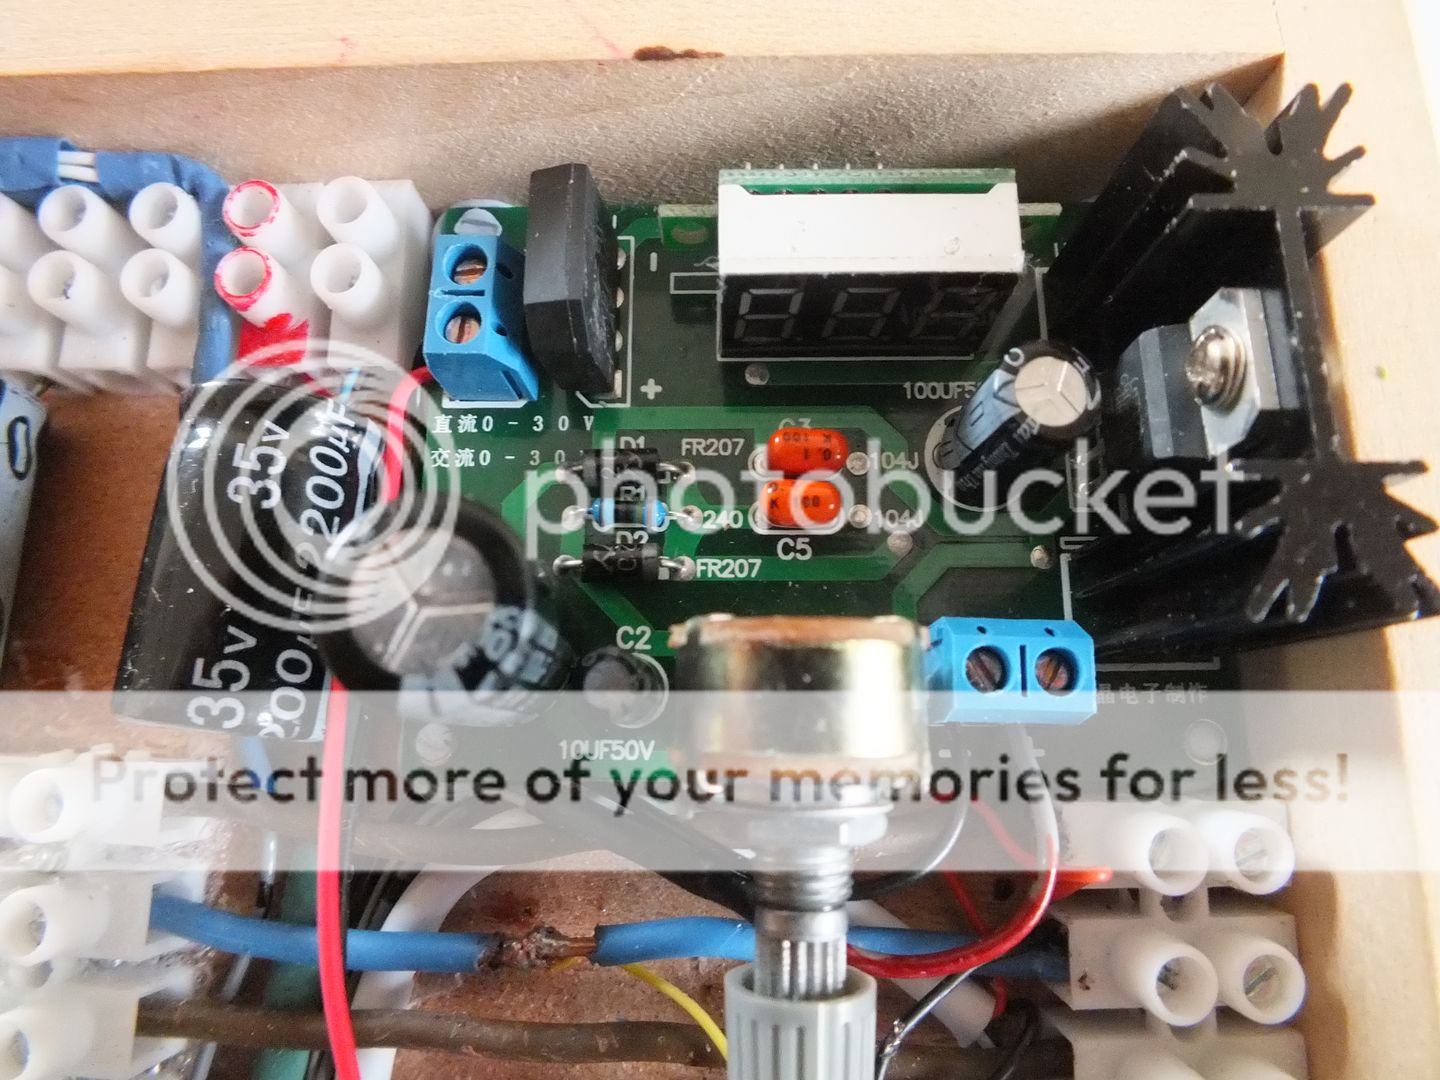
I found on Ebay a voltage reducer that would drop the voltage from the 20v I had available to 12v, and it even had a readout showing the voltage adjustments as I made them, all for less than £10.
You will see this in the accompanying pictures of the control panel interior in the top right hand of the picture.

A close up of the PCB.

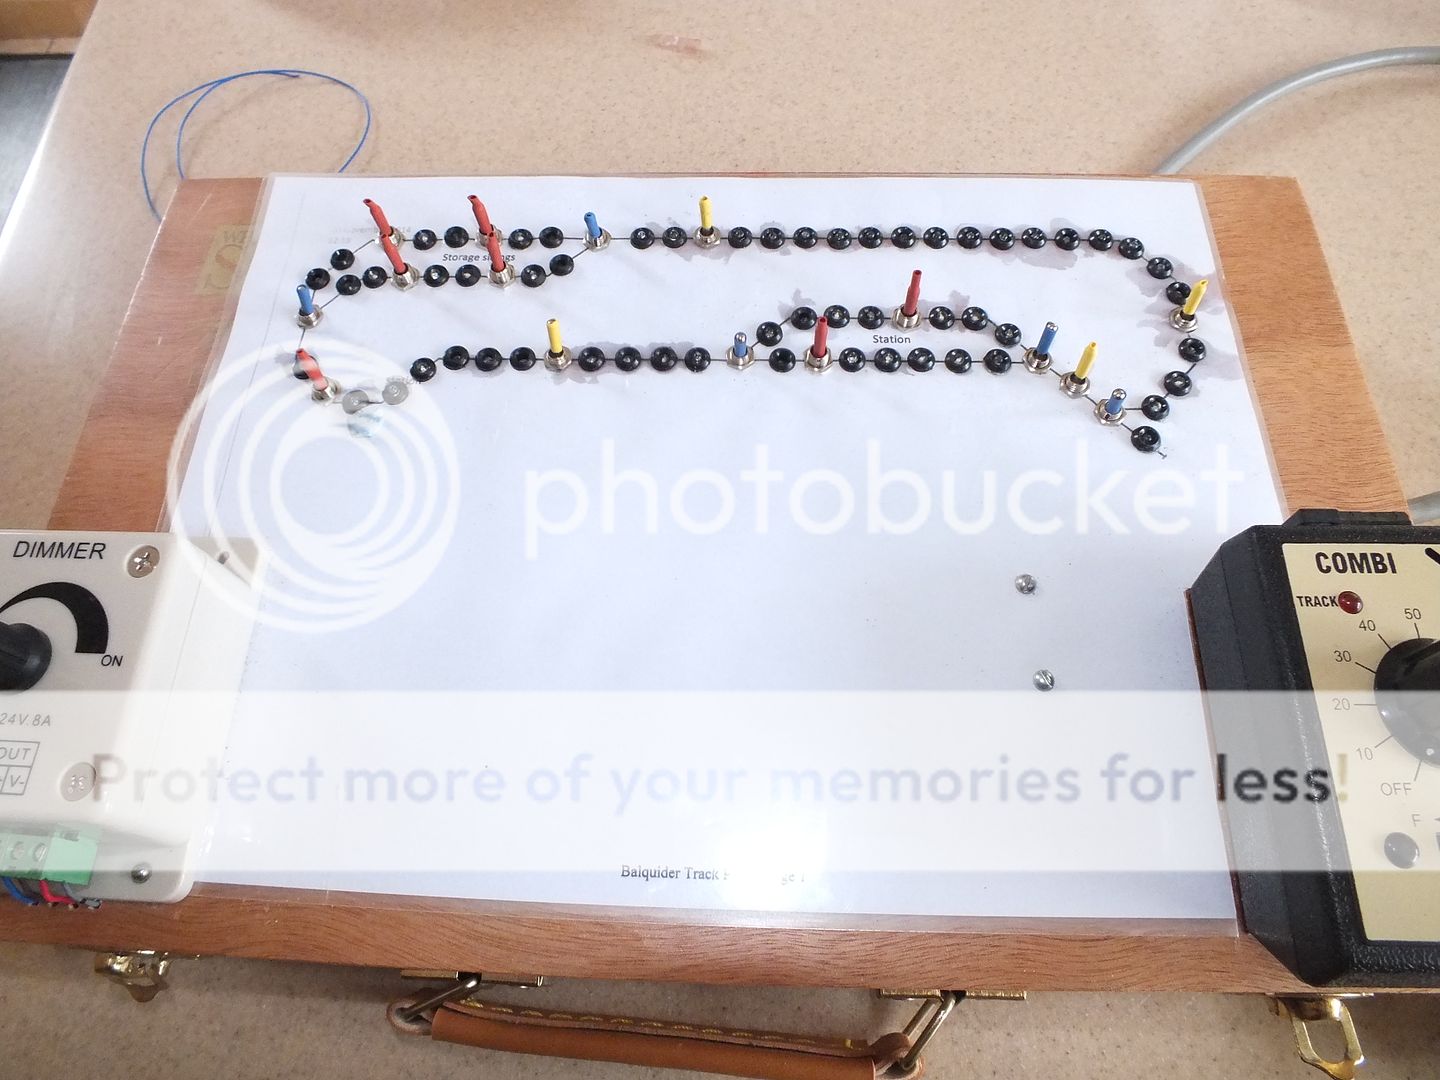
A view of the modified top showing the colour coded toggle switches, blue for the point motors, yellow for the four section feeds, and red for the dual purpose mini-section feeds cum relay latch cancelling switches.

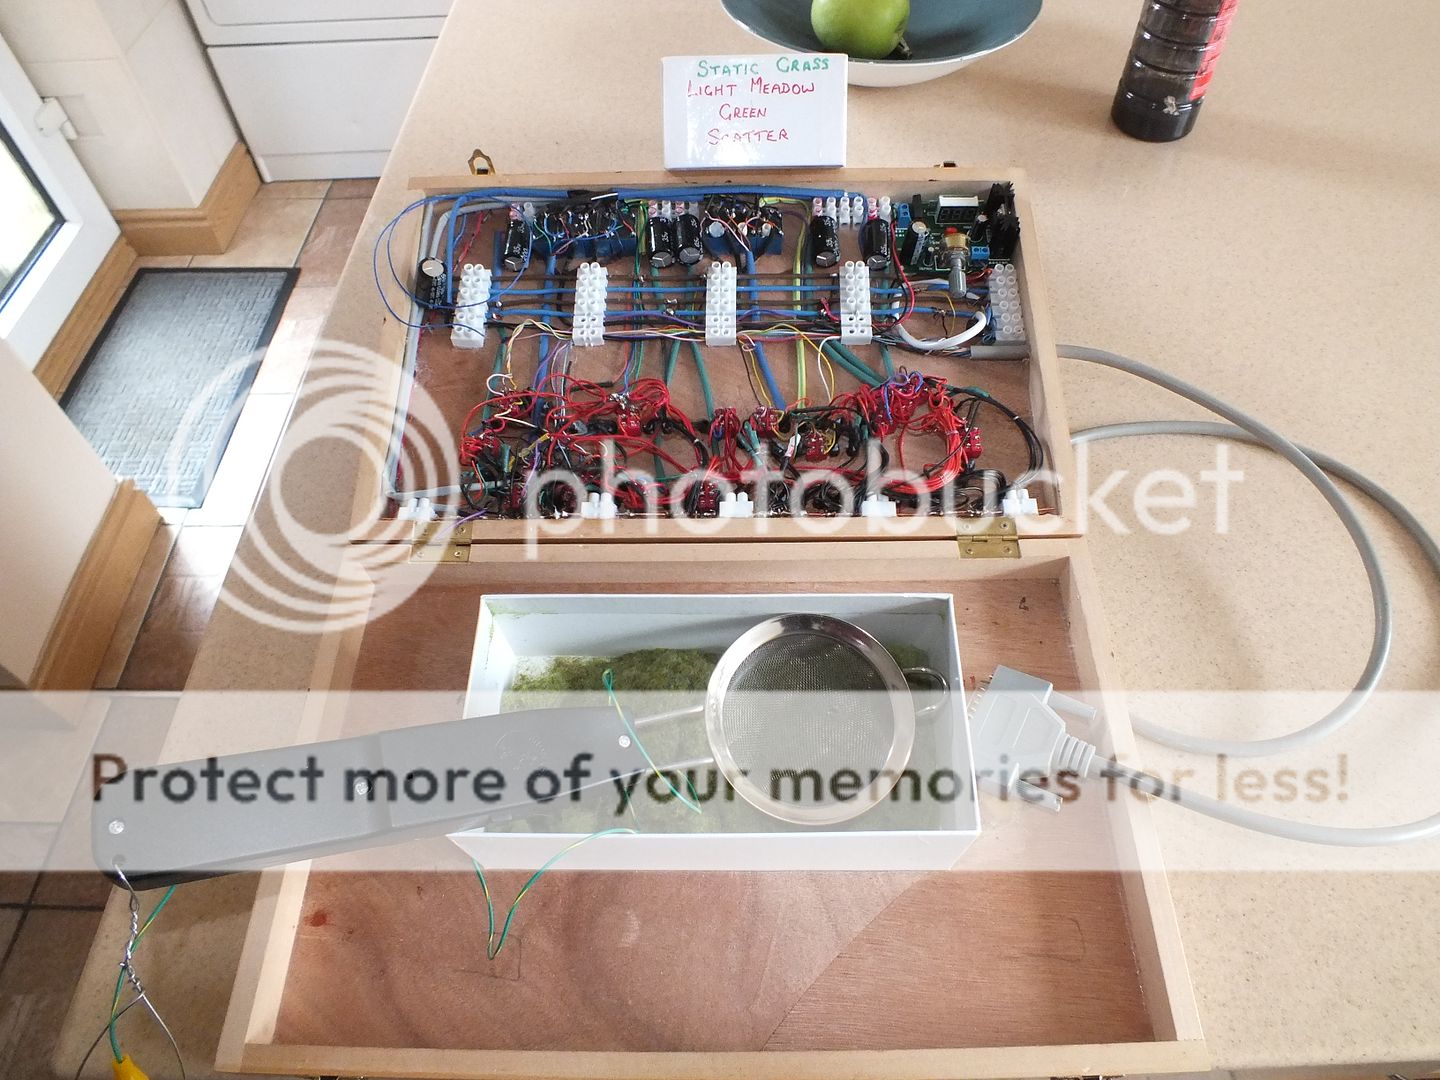
And finally, the new static grass applicator I made from a tea strainer and fly killing bat, ready to grass Glen Ogle.

That's about it for this episode.
Regards,
BrianT.
 Last edit: by Sol
Posted
Site staff

Ron
NCE DCC ; 00 scale UK outline.
NCE DCC ; 00 scale UK outline.
Posted
1 guest and 0 members have just viewed this.

