Scalescenes Cargo Ship

Post

Posted
Rating:
#184252 (In Topic #10369)
Full Member

Building a ship in card.

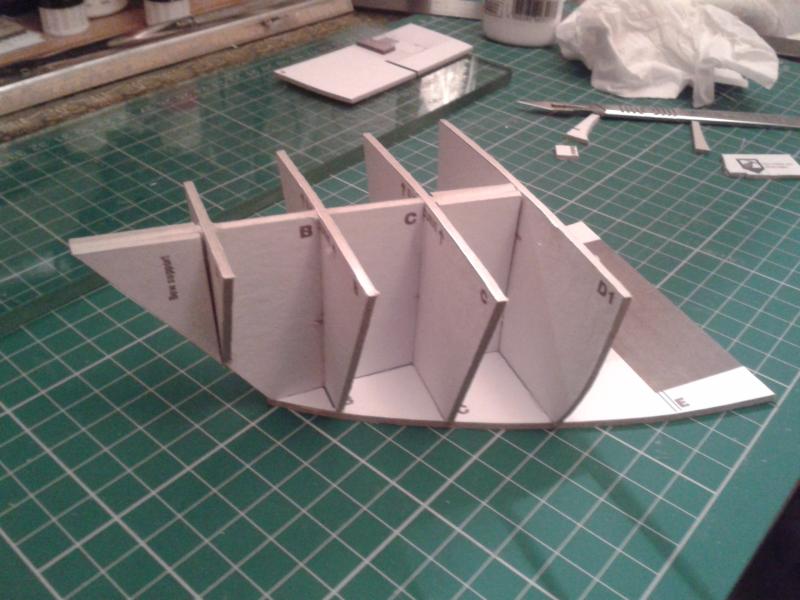
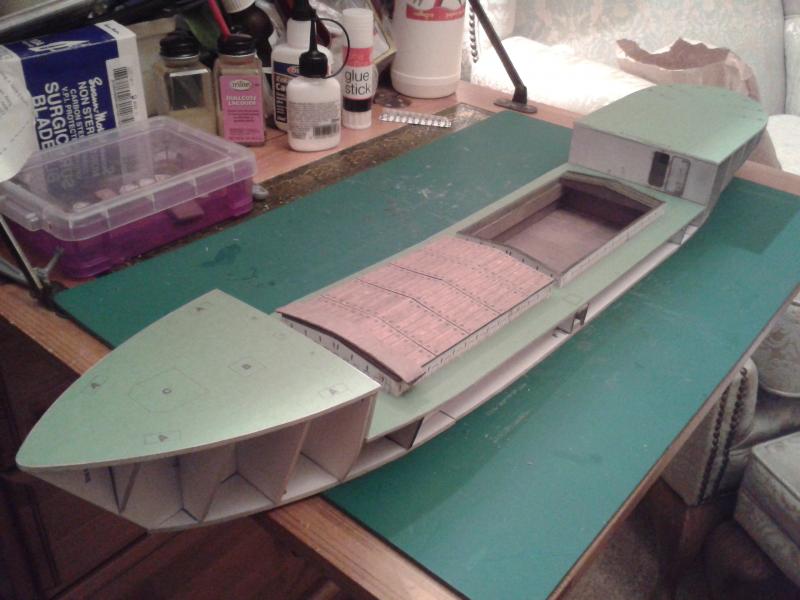
I downloaded this interesting kit when it was released and decided that it was time to take up the challenge.  I must say that, so far, this has been a very interesting and enjoyable model to make.  It is well-designed and every step has been easily accomplished. There are 152 separate instructions and I am currently on 64, so a bit of a way to go.  Here are some photos taken at various stages of construction:

First off, the bow (pointed bit at the front, for you 'land-lubbers') is constructed.


Followed by the stern.


The stern is attached to the Midship.


The two holds are then constructed and glued in place, the Midship deck is fitted and the bow is attached.


Detail is now added to the holds.  I have decided to cover one hold with the hatch boards with a tarpaulin draped over one end, and the other hold will be open with (eventually) goods being loaded.


The stern and forecastle decks are then added.


Work is now taking place on the upper deck and bridge.  This is constructed separately and then glued to the stern deck.  I haven't finished it as yet, but have placed it in position, just to give you a flavour of how it is shaping-up.


That's it so far folks.  More soon.

Terry 


Last edit: by col.stephens

Online now: No Back to the top

Post

Posted
Rating:
#184256
Avatar
Banned
Looking good so far Terry. :thumbs Ideal model for a dock-side/wharf plank… ;-)

Cheers, Gary.

Last edit: by Gary

Online now: No Back to the top

Post

Posted
Rating:
#184264
Avatar
Full Member
Excellent stuff Terry.  I've wondered whether anyone actually built this kit since I've never before seen it documented.  It does look good.  The other thing I wondered was whether the model might benefit from bought in ship fittings.  I'm tempted by this (well to be honest I'm tempted by a lot of Scalescenes kits but I have to prioritise) and very interested in  the outcome.

John

John
 
Online now: No Back to the top

Post

Posted
Rating:
#184280
Legacy Member
Shaping up very nicely i reckon.  You are making a nice job of this Terry.  looking forward to the next bit.:thumbs

reg
Online now: No Back to the top

Post

Posted
Rating:
#184288
Full Member
Thank you gentlemen.  As usual, all credit must go to the designer, John Wiffen of Scalescenes.

John, the instructions do suggest that some optional commercial fittings could be used, such as handrails.

Terry
Online now: No Back to the top

Post

Posted
Rating:
#184298
Sol
Avatar
Site staff
Sol is in the usergroup ‘Super-moderators’
Very nice Terry.

John Wiffen has a lot to answer for  :mutley

Ron
NCE DCC ; 00 scale UK outline.
Online now: No Back to the top

Post

Posted
Rating:
#184308
Avatar
Full Member
Nice job Terry……..it looks to be a typical John Wiffen design…….very robust. I am intrigued about your plans for the model once completed.

Out of interest has John given you choices about the Ship's name and port of registration (and I guess ensigns)?

Regards

John
Granby III
Lenz DCC,RR&Co Gold V10 A4 Windows 10
Online now: No Back to the top

Post

Posted
Rating:
#184347
Full Member
Thank you Ron and John.  The completed model might feature in a dock layout.  I've always had a desire to model one.

The kit does allow you to choose the name for the ship and home port. There is a choice of civilian ensigns for the UK, Australia, the Netherlands, Germany and Norway. There are also four shipping line flags.

Terry


Last edit: by col.stephens

Online now: No Back to the top

Post

Posted
Rating:
#184355
Avatar
Full Member
That's a big beast Terry, not often you see 'em that big on a layout as they take up a fair bit of real estate.  Impressive though… following along with the build. Keep it coming.

cheers
Marty

Marty
N Gauge, GWR West Wales
Newcastle Emlyn Layout.
Newcastle Emlyn Station is "Under construction"
Online now: No Back to the top

Post

Posted
Rating:
#184357
Avatar
Full Member
[user=711]col.stephens[/user] wrote:
Thank you Ron and John.  The completed model might feature in a dock layout.  I've always had a desire to model one.

The kit does allow you to choose the name for the ship and home port. There is a choice of civilian ensigns for the UK, Australia, the Netherlands, Germany and Norway. There are also four shipping line flags.

Terry


Thanks Terry…….I shall look forward to following your dock layout thread

I wondered how John would handle the detail on the stern…..I suppose he has covered his major markets although here in Vancouver you will mostly see Panama, Malta or Liberia although I guess ,despite her apparent size, she is in reality a coastal vessel

Regards  

Last edit: by John Dew


John
Granby III
Lenz DCC,RR&Co Gold V10 A4 Windows 10
Online now: No Back to the top

Post

Posted
Rating:
#184840
Full Member
The upper deck, bridge and funnel were built as a separate unit and fitted to the stern deck.  The section of the hull adjacent to the bridge has been stuck in place.  A slight problem was encountered here as the opening for the side light on the hull has to match up with the corresponding hole in the bridge front edge. Mine didn't, so, using a scalpel, I had to remove the upper deck and bridge unit and trim the underside in an effort to lower it slightly.  It also appeared to me that the lower edge of the hull would not reach the bottom of the model.  I glued the top of the hull into place first, ensuring that the side light openings lined-up.  I worked my way down the hull side and, much to my surprise, it actually reached, well almost, the bottom of the ship.


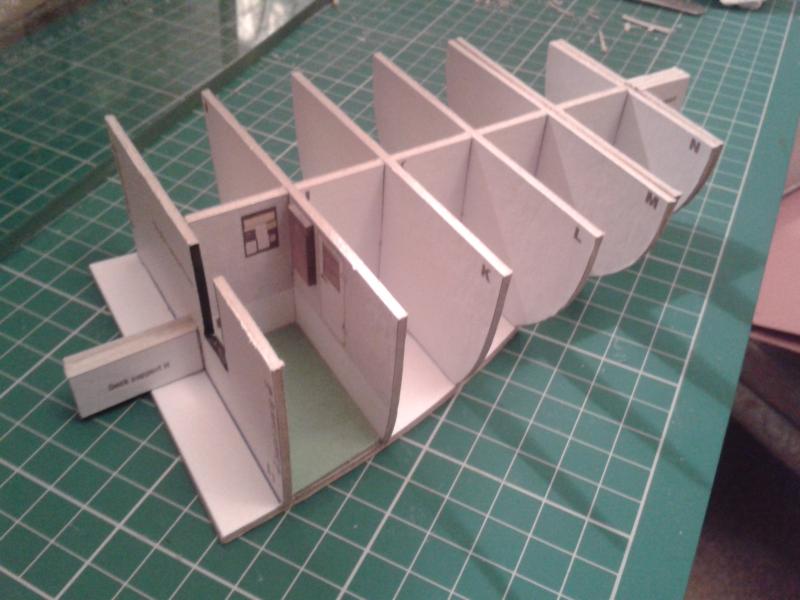
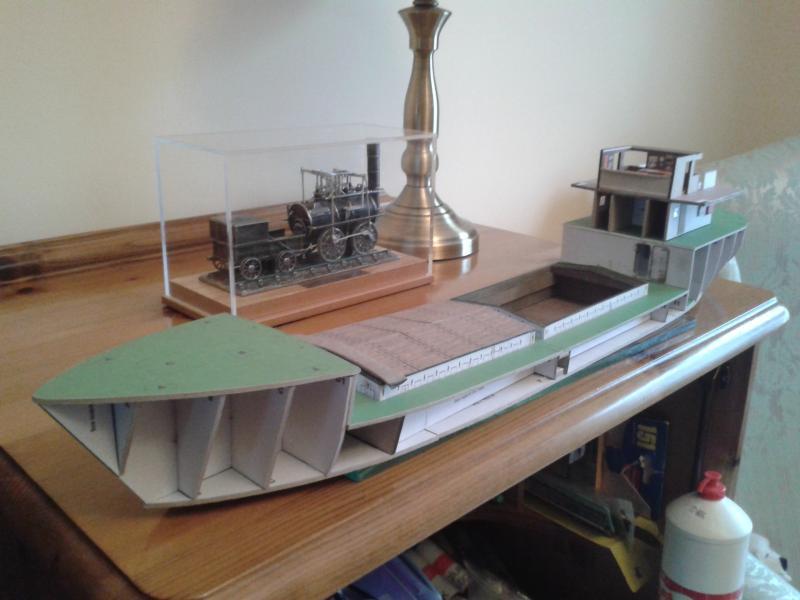
The remaining hull sides have to be attached next.

Terry

Last edit: by col.stephens

Online now: No Back to the top

Post

Posted
Rating:
#184841
Avatar
Inactive Member
I'm loving this, Terry.  :thumbs

The beauty of this method is that the finishes are on the paper.  No painting.     :cool wink
Online now: No Back to the top

Post

Posted
Rating:
#184843
Guest user
Hi Terry,

Another excellent build.

Toto
Back to the top

Post

Posted
Rating:
#184848
Avatar
Full Member
Looking great Terry. :thumbs

As Marty said, she looks a big beast ………..:shock:  In her favour, she's fortunately an "older design" when ships had some grace about their lines rather than the ugly modern platforms only built to carry tin boxes…………….;-)

'Petermac
Online now: No Back to the top

Post

Posted
Rating:
#184855
Avatar
Full Member
[user=711]col.stephens[/user] wrote: 
A slight problem was encountered here as the opening for the side light on the hull has to match up with the corresponding hole in the bridge front edge. Mine didn't, so, using a scalpel, I had to remove the upper deck and bridge unit and trim the underside in an effort to lower it slightly.  It also appeared to me that the lower edge of the hull would not reach the bottom of the model.  I glued the top of the hull into place first, ensuring that the side light openings lined-up.  I worked my way down the hull side and, much to my surprise, it actually reached, well almost, the bottom of the ship.

Terry
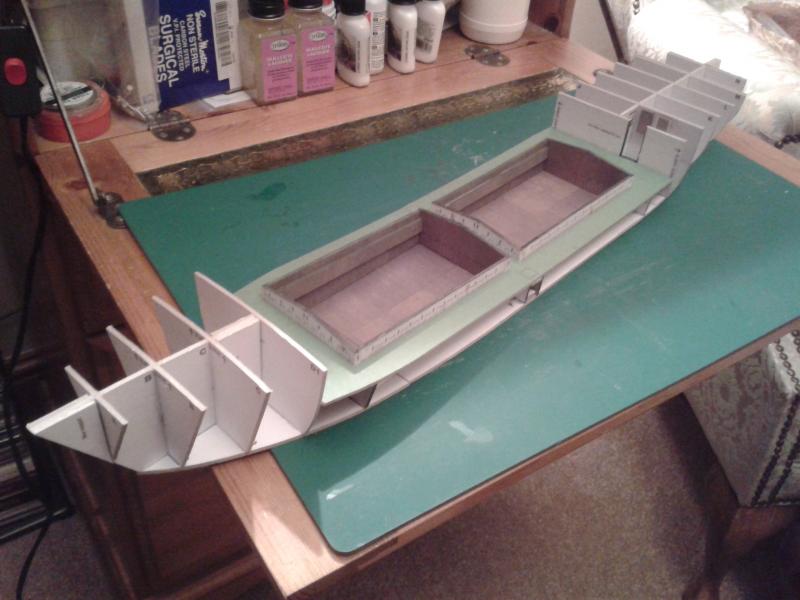
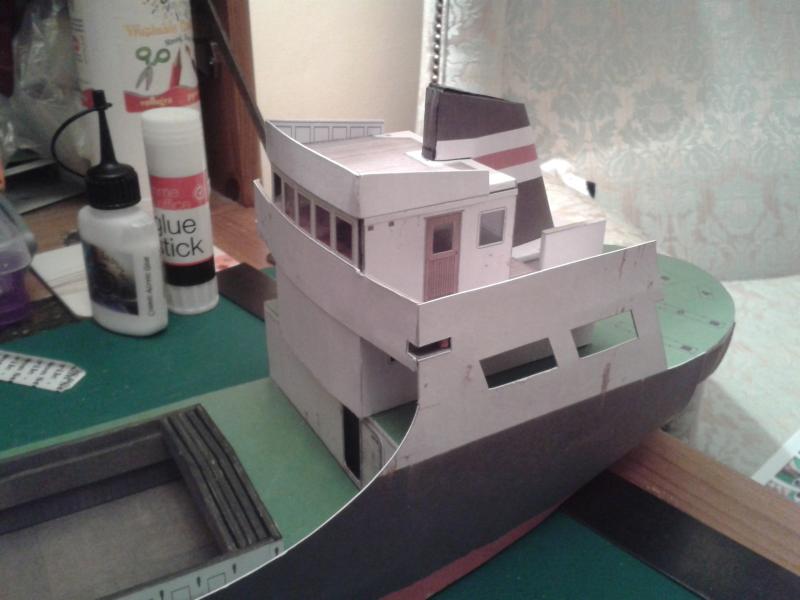
I can totally relate to the above Terry. If I had one criticism of Scalscenes it is that John's instructions dont always emphasise enough the critical importance of certain, sometimes quite obscure, components.

Regardless, you are making a splendid job of this particular model.

Kind Regards

John
Granby III
Lenz DCC,RR&Co Gold V10 A4 Windows 10
Online now: No Back to the top

Post

Posted
Rating:
#184856
Avatar
Full Member
I've found that the kits are so precisely designed that if you don't use exactly the right thickness of card you can end up with slight discontinuities.

John

John
 
Online now: No Back to the top

Post

Posted
Rating:
#184870
Full Member
Thank you all.  I have noticed that the ribs of the stern are showing through the hull. Nothing I can do about this, I'm afraid. The next piece of the hull is obviously supposed to butt up against the hull already fitted.  However, it appears to me that it won't reach the very tip of the bow.  On the other hand, maybe it's not supposed to as there is a bow front and overlays to be attached.  The instructions are not very clear as to what you are aiming to achieve here.  Oh well, jump in feet first!

Terry
Online now: No Back to the top

Post

Posted
Rating:
#184887
Avatar
Full Member
Ribs showing through the card hull plating on this type of structure is a common problem Terry - you should see a warship I built some time ago …………..:shock::shock::shock::shock::cry::cry::cry::cry::oops::oops:

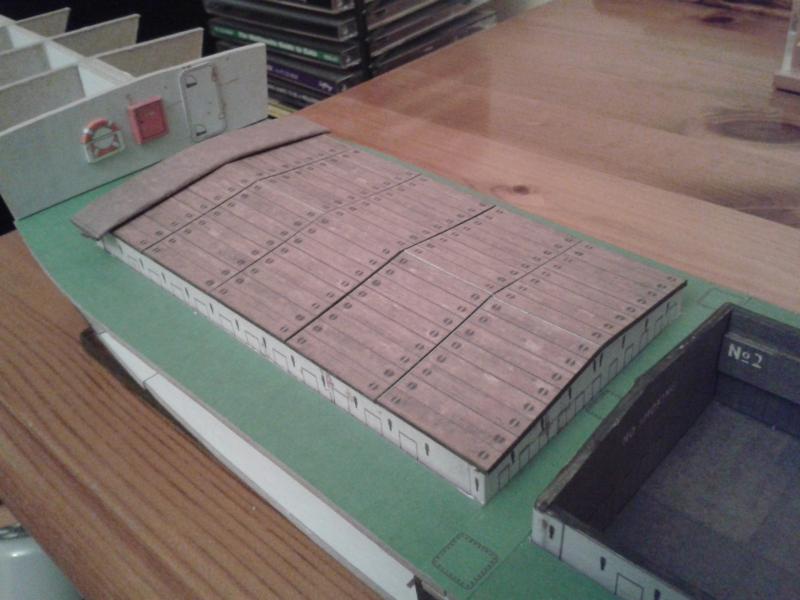
A friend who builds lots of card ships tells me the secret is to use only enough glue to tack the plating to the ribs - dots of glue here and there rather than coating the whole rib edge and to "pre-bend" the plating so that the glue is only required to stop it falling off rather than to hold it to shape.

'Petermac
Online now: No Back to the top

Post

Posted
Rating:
#184905
Avatar
Inactive Member
Coming along nicely Terry. Looking forward to the next instalment.

I'm old, that's why I'm allowed to change my mind, when I can find it.

My Website: index
Online now: No Back to the top

Post

Posted
Rating:
#184908
Avatar
Full Member
[user=6]Petermac[/user] wrote:
Ribs showing through the card hull plating on this type of structure is a common problem Terry - you should see a warship I built some time ago …………

Its not uncommon in real life with fibreglass sailboats!

John
Granby III
Lenz DCC,RR&Co Gold V10 A4 Windows 10
Online now: No Back to the top
1 guest and 0 members have just viewed this.