Kingsway Models
Posted
#180950
(In Topic #10215)

Full Member
Low relief Georgian Terrace
I'm starting this thread here because, in a way, it is kit bashing but also, because there doesn't seem anywhere more suitable for it.I was impressed by a model of the Kingsway Georgian terrace I saw in the modelling press a year or so ago. I decided to have a go at it myself.
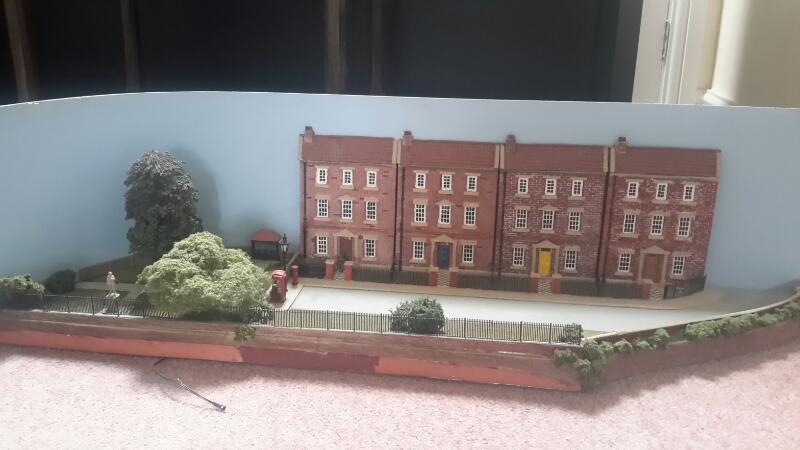
Here's what it should turn out like :

The kit wasn't cheap and I was a little disappointed at the overall quality of the finish - printed window panes which shouted "I'm cardboard" and flat glazing bars which also souted cardboard.
At that point, our own Wizmacnz stepped onto the scene and suggested 3D printed windows.
Measurements were duly sent off and before you could stick your tongue out at an "All Black", a package arrived from Shapeway containing the following :
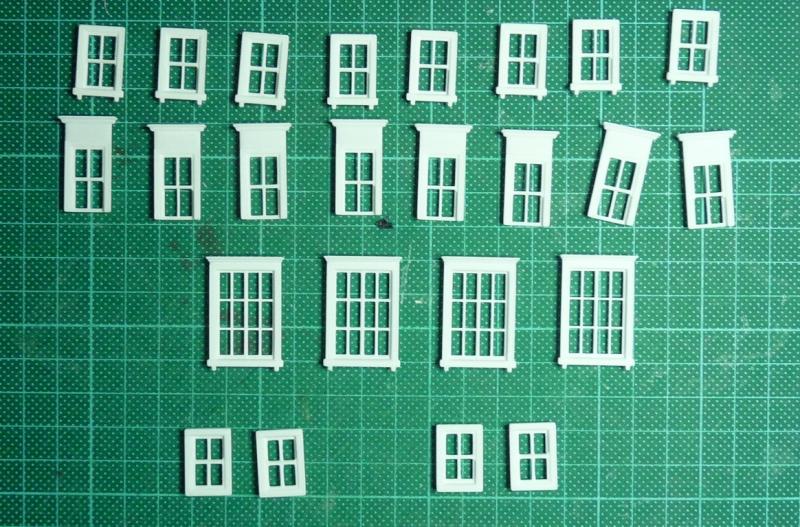
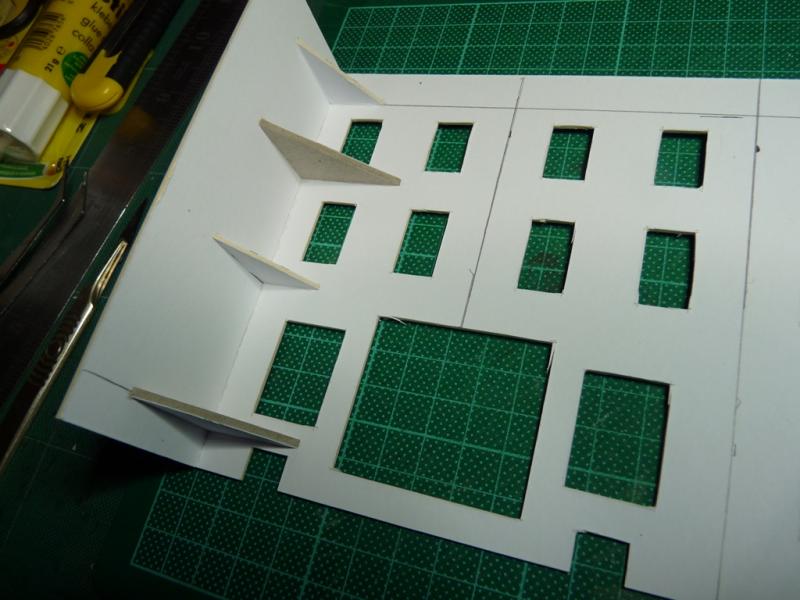
The first job was to cut out the window openings on the facade. Kingsway Models are ready mounted on a high quality Bristol Board. After cutting my rough old "grey board" I use for the Scalescenes kits, cutting this stuff was an absolute pleasure. A new No 11 blade in the scalpel and it cut as clean as a whistle.
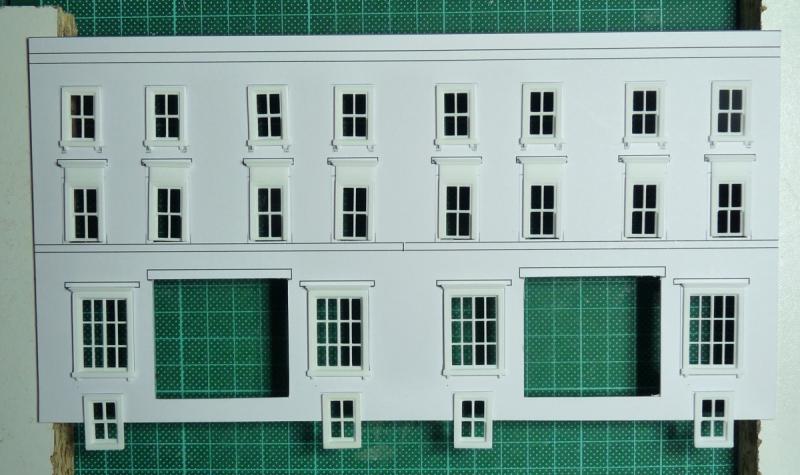
Here's the facade with the windows cut out. The kit is designed to have a "below baseboard" basement but, if this isn't possible, then two arrows mark where to cut the bottom off at ground level leaving just the top half of the basement windows to model :

I tried the 3D windows for size. Here they are just laid in their openings. They fit easily and make it look like a really smart "Hampstead" type terrace compared with the supplied card offerings. The large openings are for the doors and their porches :
to be continued ……………………………………..
'Petermac

Posted

Inactive Member
Posted

Inactive Member

Posted
Full Member
My measurements weren't perfect Peter - they're a "slack fit" - maybe 1mm too small overall but nothing to worry about.I'm glad the windows fit. I was going to blame your measurements if they didn't.
I was wondering about doors ………………………….:roll::roll::roll::roll: I'll check the dimensions of your current prints and see if they'd do - the kit ones are like the windows - flat and boring.
'Petermac
Posted
Inactive Member
Posted
Full Member
The doors in the kit are a single panel glued from inside over the large hole. The porch isn't so much of a problem but if I could make the door fit, then that might be ideal.
 thumbs
Back later …………..:cheers
'Petermac
Posted
Full Member
If you look at this shot, you can see there's room to just cut out the doors (and fanlights) themselves and pop some replacements in leaving the surround untouched. It's not very clear on the photo, but the squared sections are for glueing behind the facade. Literally, just cut out the black door with it's attached fanlight :
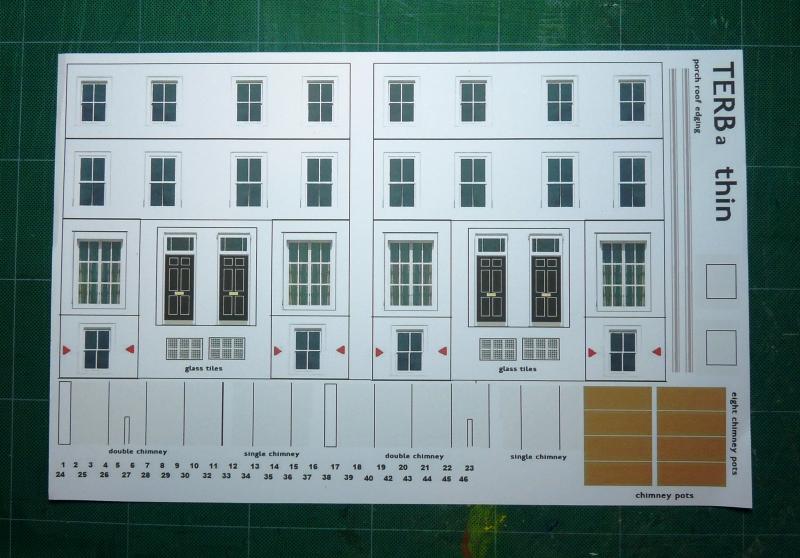
The door dimensions are:
Height (including fanlight but excluding doorstep): 36mm
Width: 12mm
Fanlight height (including it's frame) 9mm
Door height (excluding doorstep) 27mm
I'll have a look at your shop Peter to see what you've already got……………………..
p.s. Didn't I see a chimney breast and fireplace somewhere ?
I might also "furnish" some of the rooms which are to be lit up. :hmm
p.p.s. Checked your doors and there doesn't seem to be anything suitable at present ……………in fact, some of the dimensions look a little strange (almost square ………….:roll::roll:)
'Petermac
Posted
Inactive Member
This is the door type that I thought would be a good starting point. It's door type 15, although I think I may have made two different type 15's.

I'm not sure what you mean by the almost square dimensions. The doors are all based around standard door dimensions. The double doors may be close to square, but the others shouldn't be. I think maybe Shapeways has squashed some of the thumbnail pictures.
Anyway I'll make a start on a door type 16 (6 panel door with fanlight)
Posted
Inactive Member
Here is my take on the entrance doors.
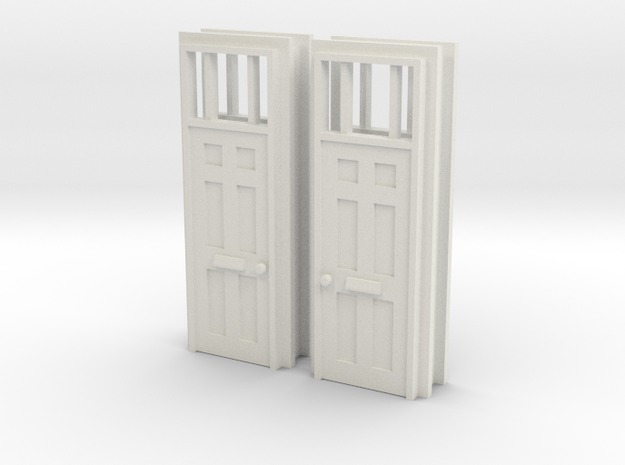
The dimensions are as per the drawing below. I model in real size so you have to divide by 76. I think it is as per your dimensions, but I'm not sure if your dimension for the door width included the frame. These doors should fit into a hole in card 36mm high by 12mm wide. Fitted from the inside with the architrave holding them in place. (with some glue). Let me know if I have a dimension wrong and I will make the adjustment.
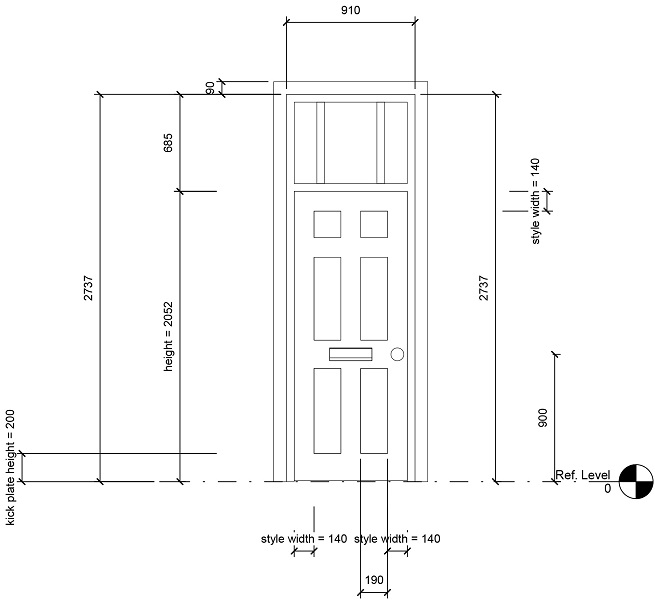
If you want a smooth glossy finish to the door you will need to use some wet and dry sand paper to bring down the texture.
Shapeways price is currently 5.28 Euros inc GST for the four. I put together also a batch of 10 (I know you only need four for the kit) and that comes in at 9.63 Euros.
I can see I'm going to have to find out how to type the Euro symbol.
As always Peter, no pressure to buy. I was going to make one of these doors sometime anyway.
Posted
Inactive Member
Posted

Inactive Member
4 = ♦ on my keypad
Max
Port Elderley
Port Elderley
Posted
Full Member
Your keypad's faulty Max …………….0128 = € if 4 doesn't work.
4 = ♦ on my keypad
I've always used a Qwerty keyboard although here in France, they are normally Xerty with a few odd accent keys etc. Are Australian keyboards based on US/Europe practice or Asia ?
€ is "AltGr" and "4" on mine. "Shift" and "4" gives me $. Rather surprisingly, "0128" gives me 0128 …………….:cheers:cheers
p.s. the doors look spot on Peter - many thanks - I'll order some. :thumbs
'Petermac
Posted
Inactive Member
This one is a Logitech wireless - although I use a plug in mouse for sound and photo editing.
There are many alt/options. Just Google alt-codes and there are pages of them.
It's a matter of finding the set that works for you.
♥
Max
Port Elderley
Port Elderley
Posted
Full Member
When you try to mix Apple with PC, then it gets even more confusing. Liz has just got an iPad for her birthday and trying to fathom that out isn't easy. When it arrived, there wasn't even an instruction telling you how to turn it on !!!! Apparently everything is "online" - you first have to get the thing "online" ………………………:twisted::twisted::twisted::twisted:
'Petermac
Posted
Full Member
To this end, I need to create some light-tight "rooms" in the otherwise hollow structure. Not only will this allow me to light up some rooms, hopefully without "bleed" into other, unlit, parts, but it has also strengthened the fairly flimsy structure which is normally just a box without a lid.
I've used a mixture of 2mm and 1mm card offcuts although I'd guess Doug's Corn Flake packets would have done the job just as well - and cheaper ……………..
The "rooms" don't need to be perfect cubes (fortunately …….:oops::oops:) - they're only somewhere to hang a LED. The walls, visible through the windows, will be suitably painted and have some pictures etc. - courtesy of Scalescenes.
The instructions seem to rely on just a butt joint for the side walls. :roll: I've strengthened the joint with corner gussets cut from the discarded window openings:
An added central diving wall between the two houses will (IMHO) help to support the odd shaped roof supports:
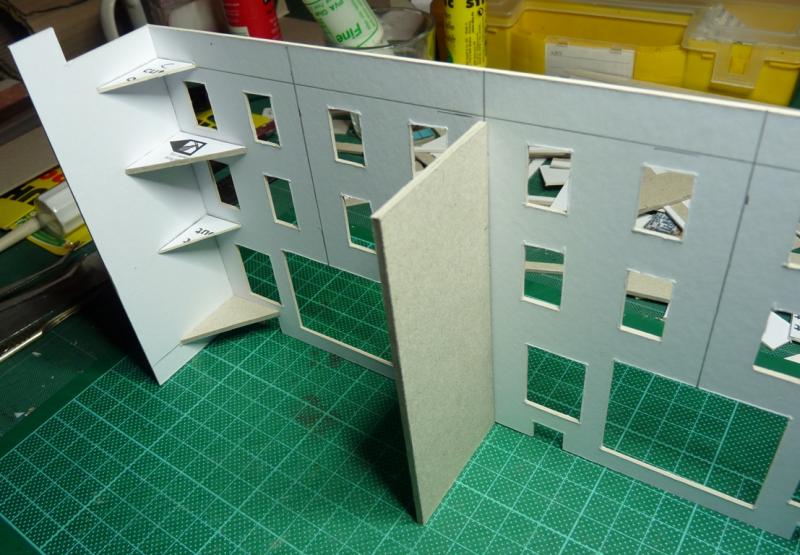
Here you can see the "rooms" taking shape and those odd shaped roof supports - just cantilevered out from the front wall and again, I've added lateral gusset supports to them. Not a very strong design if you follow the instructions methinks :

To be continued …………………………………..
'Petermac
Posted
Inactive Member
One suggestion I would make is that you will possibly need to paint the inside of your "rooms" to stop the light showing through the card on the front of the building.
It's one of the reasons I use MDF to build my carcasses.
If you've got a LED tester you can use it to hold a LED behind the wall to check if any light is bleeding through.
Just a thought. :cool:
Max
Port Elderley
Port Elderley
Posted
Full Member
I was going to paint the room walls (and floors) but hadn't planned to paint the front wall - it's 1mm Bristol Board so I hoped it would be light-tight …………:thumbs
I might invest in a LED tester and see what happens - I suppose they're always useful things to have …………………….:roll::roll:
'Petermac
Posted
Inactive Member
Long wires, of course - and turn the Lenz on as well.

Either way around will do, as it's AC.
Max
Port Elderley
Port Elderley
Posted
Full Member
thumbs Will do.
'Petermac
Posted
Full Member
I'm looking to repalce the 20 year old plaster terrace on my layout and was looking at your card model particularly the windows

However the price seems to have gone up a bit to 47 euro is that right??
Probably too expensive now
1 guest and 0 members have just viewed this.