New part work

Post

Posted
Rating:
#185982
Avatar
Inactive Member
Thanks John. It's neat more by luck than judgement. I'm not looking forward to fitting all the pipework later on. There's tons of it.

I'm old, that's why I'm allowed to change my mind, when I can find it.

My Website: index
Online now: No Back to the top

Post

Posted
Rating:
#186363
Avatar
Inactive Member
Collected the cab roof parts on Wednesday and set to and made them up. There are no real problems as it is basically super gluing on some etches onto the Mazak rook casting. However, (Isn't there always one), the detail strips inside the cab roof are a pain to fit and it might be easier to solder them together before fixing the parts onto the roof. The rain strips on the outside of the roof are a bit fiddly as well. Next issue will be a variety of springs to fit onto the chassis but they won't be done till after the break.

I'm old, that's why I'm allowed to change my mind, when I can find it.

My Website: index
Online now: No Back to the top

Post

Posted
Rating:
#187605
Avatar
Inactive Member
Back to reality. Got the stuff from the last two issues which have been lingering in Smiths waiting for collection. The first of the two issues contained some springs for one side of the chassis but of the three supplied only two have to be fitted now, the rear one and the central one. Nothing difficult, a straight forward super glue job. The second issue contained more detail stuff for the cab roof. This is a lot more complicated as some of the bits need forming to the same curvature as the roof and then constructed so that the cab roof ventilators slide open. Will report back on this once I get my head around it. I'll put up some pics later.

Last edit: by 60019Bittern


I'm old, that's why I'm allowed to change my mind, when I can find it.

My Website: index
Online now: No Back to the top

Post

Posted
Rating:
#187610
Avatar
Full Member
Hi Bittern, just caught your thread and read through it very interesting! I had considered building one of these locos from weekly parts but I couldn,t justify the cost and I,m not sure I would finished it. Looking at your photos I must say your modelling is excellent the only thing I would say is personally Iwould have waited for the coupling rods before soldering in the wheel bearings as you can use the rods as a jig for setting the axles in line however as parts are made by D.J.H. everything should line up well. as an aside when using a pin vice for any length of time I stick drawing pin in the end, it makes a very good pivot! saves a sore hand. I will be following your progress with much interest. Cheers Pete.

it was already on fire when I got here, honest!
Online now: No Back to the top

Post

Posted
Rating:
#187612
Avatar
Inactive Member
Thanks Pete. Yes the cost is a bit on the high side but being a poor pensioner I can't afford the cost of the kit in one go. Still I am a bit better off on this one as I'm only building the one and not three like I did with the Scotsman they issued some years ago and are still being built. One day perhaps, they will be finished.

I'm old, that's why I'm allowed to change my mind, when I can find it.

My Website: index
Online now: No Back to the top

Post

Posted
Rating:
#188414
Avatar
Inactive Member
Another set of parts collected today but again it is going to be better to wait for further issues to come in as what is due to be done today will get in the way of finishing the cab interior. Next weeks parts are chassis detailing bits so will keep pics till then.

I'm old, that's why I'm allowed to change my mind, when I can find it.

My Website: index
Online now: No Back to the top

Post

Posted
Rating:
#189825
Avatar
Inactive Member
It's been almost a month since I have posted any updates so here goes.

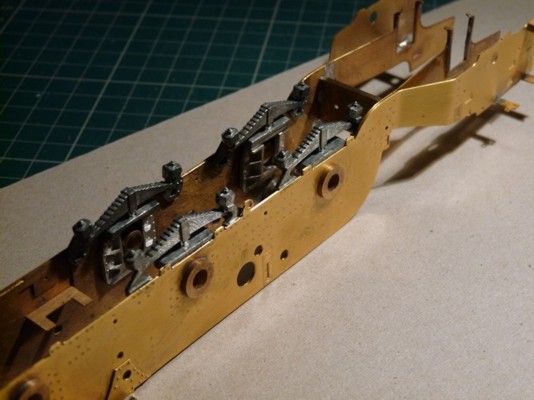
Main Chassis: Fitting of rear and centre springs and rear and center horn blocks and repaired a broken solder joint on the rear chassis inner bit.
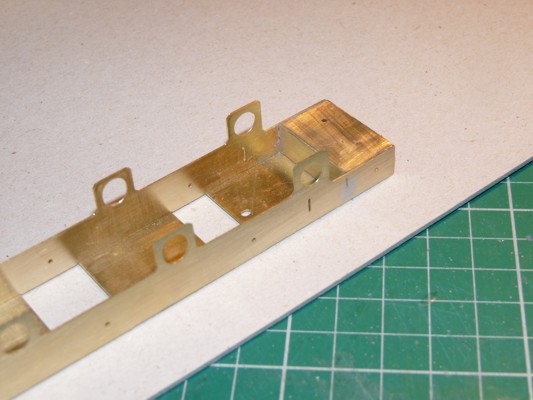
Tender Chassis: Fitting front and end spacers and soldeing it all up. The trickiest bit was soldering the nut onto one of the spacers without soldering up the thread as well. I did but was able to re-thread it with a set of taps and dies.

The springs and hornblocks in place


Tender innder chassis spacers in place.


That's it for now folks. Come back soon for another thrilling instalment.


I'm old, that's why I'm allowed to change my mind, when I can find it.

My Website: index
Online now: No Back to the top

Post

Posted
Rating:
#189841
Full Member
Very neat job there Mick. :thumbs

Terry
Online now: No Back to the top

Post

Posted
Rating:
#195928
Avatar
Inactive Member
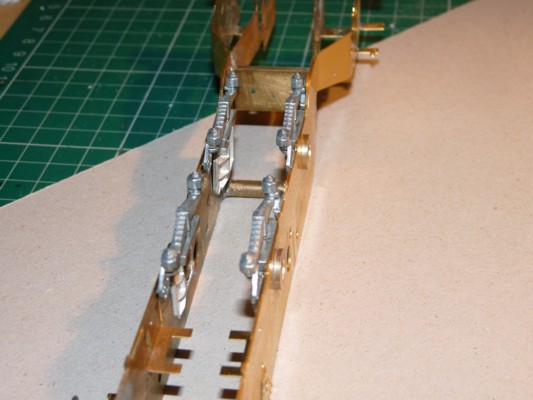
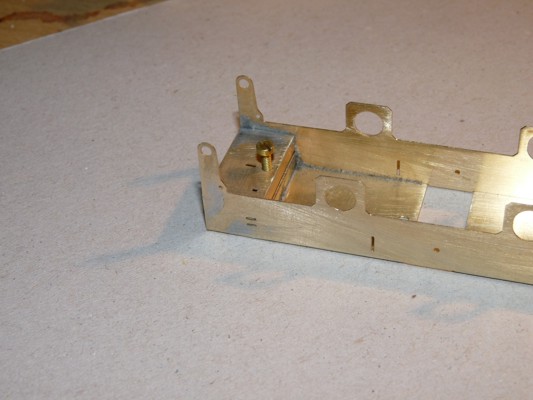
It's been a while since I did anything on this so made another start today and managed to catch up on the main chassis so now all the hornblocks (cosmetic only), brake cylinders, brake lever support, sand boxes, the rear spacer and the front springs are now fitted. There was no real problems encountered apart from the odd toasted fingers from soldering in the rear spacer. Why did God only give modellers two hands when he must know we need three at least. Herewith a couple of pics to show progress.


Chassis from the front and downside up, showing all the hornblocks, springs etc.
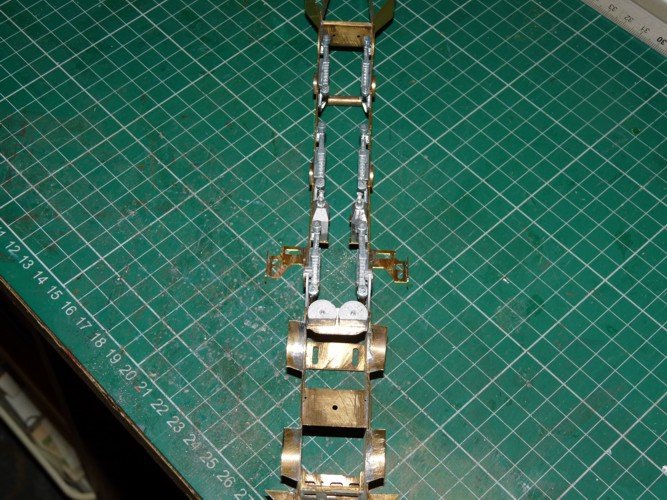


The rear spacer in position.
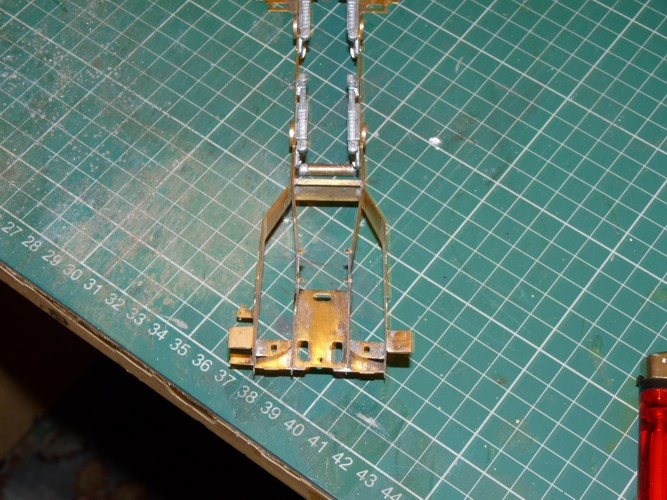


Next wet day (I'm out with camera on dry ones), I will carry on with the tender inner chassis. Will keep you all informed.

Last edit: by 60019Bittern


I'm old, that's why I'm allowed to change my mind, when I can find it.

My Website: index
Online now: No Back to the top

Post

Posted
Rating:
#196160
Avatar
Inactive Member
Continued on the Tender Inner Chassis today and all I can say is that it's testing to the utmost. Some of the detail parts are incredibly small and after removal from the etch they are almost impossible to hold to file of the pips. Fortunately I didn't need to use the spare as I decided to mount them first then use a drill to remove the pip as it lined up nicely witha hole in the chassis. This part of the job is where the extra pair of hands would be needed. Fitting the operating levers wasn't to bad but the Water Scoop itself and its supporting rods were a bit awkward. The easiest parts were the Brake Cylinders and the Air Tank as these were just a straight forward superglue job


Herewith the results. They still have to be cleaned up yet but next week there are more bits to add for the brake gear so will leave the cleaning till then.

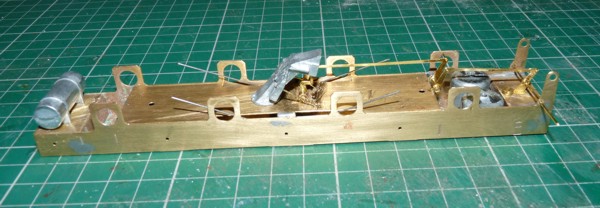


The bits of wire pointing skywards near the centre axle bearing holes is a rudimentary springing system when the wheel bearings and wheels are fitted.


More later.

Last edit: by 60019Bittern


I'm old, that's why I'm allowed to change my mind, when I can find it.

My Website: index
Online now: No Back to the top

Post

Posted
Rating:
#196199
Ed
Avatar
Site staff
Ed is in the usergroup ‘Super-moderators’
Not something I'd want to try at present Mick, but I am finding this very interesting :thumbs

You've mentioned you super glued the brake cylinders and air tank, any reason why you didn't solder these?


Ed

Online now: No Back to the top

Post

Posted
Rating:
#196205
Avatar
Inactive Member
Hi Ed. The reason was simple really. There isn't an awful lot of room to get the iron in and secondly I'm not too sure as to what the parts are made of. They look like white metal but certainly didn't drill or file like it. Another thing of course is that they are purely cosmetic and don't do any real work.

Last edit: by 60019Bittern


I'm old, that's why I'm allowed to change my mind, when I can find it.

My Website: index
Online now: No Back to the top

Post

Posted
Rating:
#208293
Avatar
Inactive Member
The weather for the next few days looks really grotty so I decided to resurrect the A4 build as I now have all the parts available up to issue 62 so there is a lot too do. I shall take some pics tomorrow to show what progress has been made and some of the latest work. It has not been easy. All the driving wheels issued were faulty and would not quarter so the sent out replacements and guess what, they didn't quarter either so had to rob one of the A3 kits for a set of drivers. These are ok so thee wheels with crankpins and balance weights will be added tomorrow. Will try and do a bit each week now that the longer nights are in so by the end of the year I might well have caught up on a fair bit of what needs doing.

I'm old, that's why I'm allowed to change my mind, when I can find it.

My Website: index
Online now: No Back to the top

Post

Posted
Rating:
#208299
Avatar
Inactive Member
Managed to take a couple of pics this evening.

The body so far, resting on the chassis
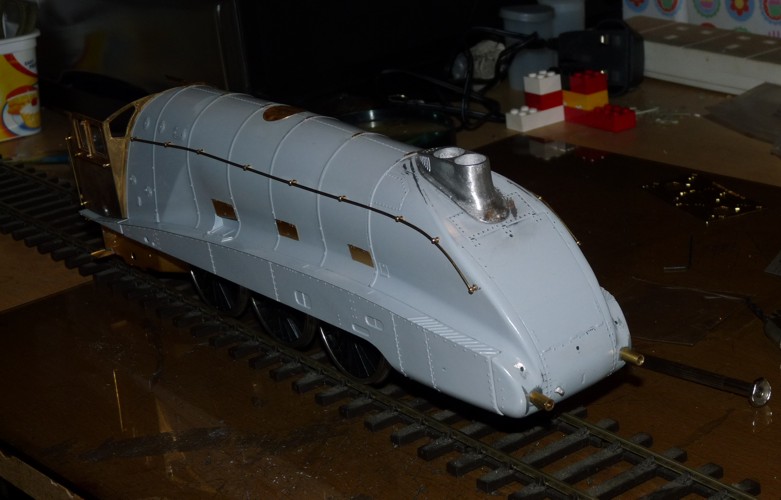


Side shot of body


The chassis so far
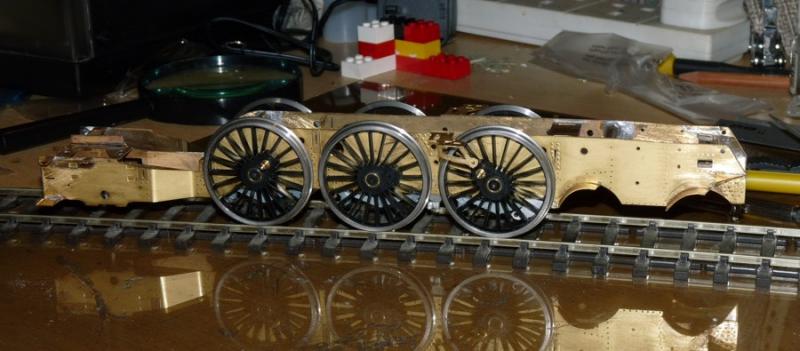


More later.

I'm old, that's why I'm allowed to change my mind, when I can find it.

My Website: index
Online now: No Back to the top

Post

Posted
Rating:
#208543
Avatar
Inactive Member
Progress is slow at the moment. Lots of fiddly little bits to work on, especially some of the chassis brackets, cover plates and detail etchings. At least at the moment the wheels are red with the crankpins and balance weights on. They run ok as well which is a good start. Onwards and upwards I suppose. Pics tomorrow if I haven't binned it all. I know, patience is a virtue, but not one I'm too familiar with when I'm trying to work on tiny things with big fingers and eyesight that would miss a barn door at 5 yards.

Last edit: by 60019Bittern


I'm old, that's why I'm allowed to change my mind, when I can find it.

My Website: index
Online now: No Back to the top

Post

Posted
Rating:
#208551
Avatar
Full Member
its looking good this far, don,t lose the faith at least you haven,t got to cut the fiddly bits out of a sheet of metal ;-).

Keep up the good work! Cheers, Pete. 

it was already on fire when I got here, honest!
Online now: No Back to the top

Post

Posted
Rating:
#208553
Avatar
Inactive Member
I won't loose the faith Pete. I want to see this beast done. Glad I don't have to cut the bits out, some of them are miniscule. Still, I knew when I started that it wouldn't be easy.

I'm old, that's why I'm allowed to change my mind, when I can find it.

My Website: index
Online now: No Back to the top
1 guest and 0 members have just viewed this.