New part work

Post

Posted
Rating:
#180541
Avatar
Full Member
1000 quid is a lot to spend on a mantelpiece ornament that, in my mother's words, "only harbours dust".  Even then, the probability of Joe Average finishing the thing, let alone having it painted and lined to a decent standard is pretty remote I think.  Come to think of it, I wonder how many of these are languishing in a part built state.  Mind you, isn't that the fate of most loco kits?

I wonder if such things don't harm the hobby since the erstwhile modeller is likely to be put off doing metal models in the future.

A 0-4-0 industrial loco would be a better starting point (I believe DJH do at least one), but it wouldn't have the cachet of a Pacific.

John

John
 
Online now: No Back to the top

Post

Posted
Rating:
#180543
Avatar
Inactive Member
Yes, I think so. I've got quite a few knocking around here that need work on them. Still, the long winter days are coming soon. May be time to get the finger out again.

Last edit: by 60019Bittern


I'm old, that's why I'm allowed to change my mind, when I can find it.

My Website: index
Online now: No Back to the top

Post

Posted
Rating:
#180546
Avatar
Full Member
I'm no different, I have several locos needing attention.  Trying to focus on coaches at the moment.

John

John
 
Online now: No Back to the top

Post

Posted
Rating:
#180576
Avatar
Inactive Member
Here are the promised photos of the cab section so far.


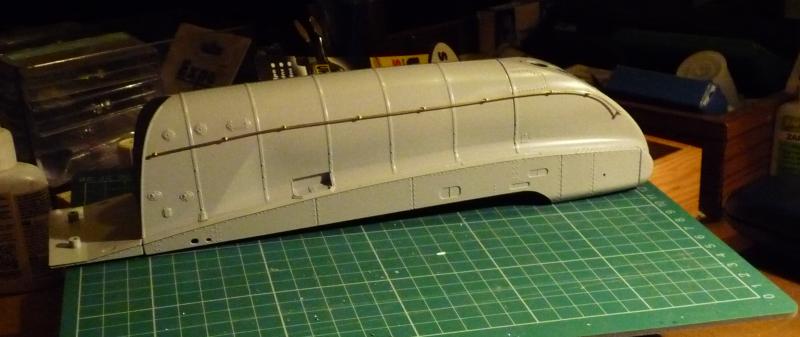
A little more cleaning up to do then it can be put away till next needed.

Next episode next week sometime.

Last edit: by 60019Bittern


I'm old, that's why I'm allowed to change my mind, when I can find it.

My Website: index
Online now: No Back to the top

Post

Posted
Rating:
#180578
Avatar
Full Member
Looking good.  I'm not sure doing a bit a week would do for me.  I tend to get in a groove when making a model and don't like to interrupt the work flow.

John

John
 
Online now: No Back to the top

Post

Posted
Rating:
#180580
Avatar
Inactive Member
I sort of like the idea as it gives me time to do other things in between, especially if the weather is nice and I can get out photographing, visiting preserved railways and the like. And it also gives me time for my stamps, coins, minerals and website building and working on some of the other railway modelling that needs doing.

Last edit: by 60019Bittern


I'm old, that's why I'm allowed to change my mind, when I can find it.

My Website: index
Online now: No Back to the top

Post

Posted
Rating:
#180612
Avatar
Full Member
If you build the entire model can you please post the pictures as you go as I would love to see it built one bit at a time.
Online now: No Back to the top

Post

Posted
Rating:
#180613
Avatar
Inactive Member
That is what I intend to do Jimmy. The step by step guide in the magazine needs a lot to be desired, and it's nice to know where any pitfalls could take place. Not so much with the bodywork but later, with the chassis there are bound to be several little hiccups awaiting the unwary.

I'm old, that's why I'm allowed to change my mind, when I can find it.

My Website: index
Online now: No Back to the top

Post

Posted
Rating:
#180614
Avatar
Full Member
Boy, that'll be a long running series won't it?  Around 2 years. :shock:
John

John
 
Online now: No Back to the top

Post

Posted
Rating:
#180615
Avatar
Inactive Member
Yep, I guess it will. Still it keeps me off the streets. Not only that it will make me do each bit as it comes out, not put it all in a box then wonder when I will ever get round to it. In fact starting this off has encouraged me to start doing some work on the Scotsman again, to which end I have been sorting out all three tenders to get them out of the way first. The tender chassis have already been done and painted, they seem to run ok as well. Hope to get the first one to the primed state by the end of the week if all goes well, if not by the middle of September. Will post on here when it's done, and no, I'm not doing a blow by blow account on the Scotsman.

Last edit: by 60019Bittern


I'm old, that's why I'm allowed to change my mind, when I can find it.

My Website: index
Online now: No Back to the top

Post

Posted
Rating:
#180968
Avatar
Inactive Member
Next issue of the magazine is on Wednesday so will try and get the next stage ready by the weekend. Bear with me though as if the weather continues as it is I might be out and about with the camera. Best laid plans of mice and men and all that.

Last edit: by 60019Bittern


I'm old, that's why I'm allowed to change my mind, when I can find it.

My Website: index
Online now: No Back to the top

Post

Posted
Rating:
#181045
Avatar
Inactive Member
Collected the magazine this morning and opened it up. There isn't a lot to do on this occasion. The parts consist of the nose cone, the side valances and a sprue of detail parts. The cone and valances are die cast so the finished item should have a fair bit of weight to it. Of the detail parts this session only the nose cone and the four lamp brackets are needed. You also need a 1.1mm drill and some fine emery or wet and dry. On the nose cone front there are 4 dimples marked. one near the top for the top bracket. One above the buffer beam for the bottom centre and two on the sides above the buffer holes for the side ones. These have to be drilled out. I used a pin vice to hold the drill and took it very slowly. Mazac is a difficult thing to drill. They recomend something like a mini-drill but I feel doing it by hand is probably safer as the metal does tend to snag now and then. Once drilled and cleaned up I took off the lamp brackets from the sprue and tidied them up a bit and tried them in position. You could fit them now but they are a bit on the delicate side so I'm holding off till later in the build. A tip. I have a series of those A4 pockets for letters etc. and take the magazine apart and seperate the instruction pages. These go into the sleeve, you might have to chop a bit of the page to make it fit. They go in the sleeve  along with the stored parts which are put into small clear plastic envelopes with the part number written on. The not used parts of the sprue is left intact with its parts and that also goes in clear plastic bag and is depositied in the folder as well. Keeps everything together. The body parts seem to have a primer coating on them to protect them so when the time comes to paint it I will probably soak it all off and start again.
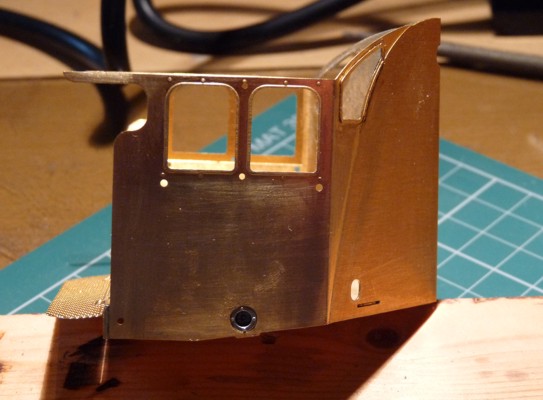
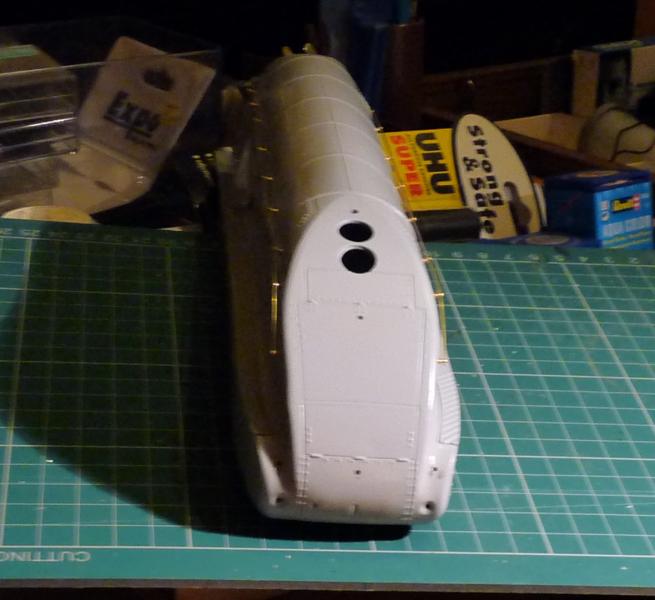
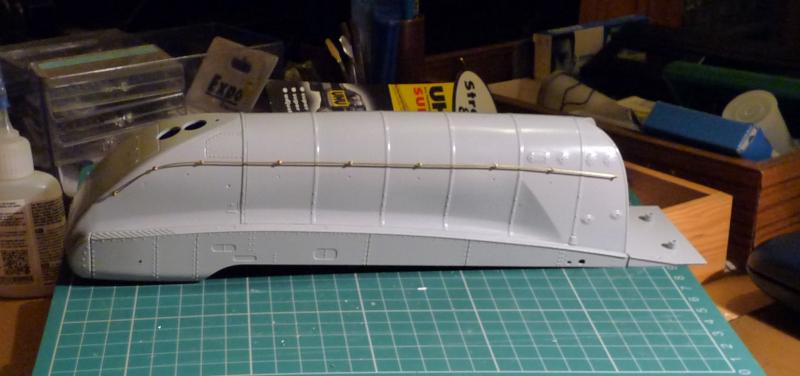
Anyway, here's a pic of today's progress.

The nose cone showing the four drilled holes for the lamp brackets.


Next weeks parts are the boiler and some more detail parts and hopefully the eight screws that should have been in this weeks issue. It looks like the body screws together to make one solid unit.


Last edit: by 60019Bittern


I'm old, that's why I'm allowed to change my mind, when I can find it.

My Website: index
Online now: No Back to the top

Post

Posted
Rating:
#181047
Avatar
Full Member
That looks the part Mick. :thumbs

I suspect, as time goes on, you'll get just a coupling rod one week …………:roll::roll:

Throwing some "good stuff" in early on in the series, hooks people so they continue to buy.  Once they get so far down the line, backing out is not an option so they start to put the insignificant parts in on a weekly basis.  That's when they make their money …………:roll::roll:

'Petermac
Online now: No Back to the top

Post

Posted
Rating:
#181051
Avatar
Inactive Member
I took the Flying Scotsman when that was out and throughout the series there were plenty of really good bits regularly. Things like the wheels, chassis frames etc. came pretty quickly so after about 12 weeks you could see you had the good basics of the loco. We shall see of course. Till then I'll soldier on.

I'm old, that's why I'm allowed to change my mind, when I can find it.

My Website: index
Online now: No Back to the top

Post

Posted
Rating:
#181064
Avatar
Inactive Member
One thing about it, Mick getting it on a drip feed allows you time to progress without rushing.

This thread will keep us all entertained over the journey.  :thumbs
Online now: No Back to the top

Post

Posted
Rating:
#181072
Avatar
Inactive Member
That is the basic idea Max, but I have found in reality it doesn't always work that way. Still, upwards and onwards.

I'm old, that's why I'm allowed to change my mind, when I can find it.

My Website: index
Online now: No Back to the top

Post

Posted
Rating:
#181255
Avatar
Inactive Member
Collected part 3 today which consisted of the boiler section, some wire and handrail knobs. There was also the screws that should have been in last weeks issue. The work needed to be done this issue was quite straight forward in that the nose cone, the boiler and the valances had to be fitted and screwed together. The fit was reasonably good although a couple of the holes needed opening up a bit to get a good fit, and even then there will be an amount of seam filling to be done later. The next job was to drill out 18 handrail knob holes with a 1.3mm drill. ( A tip. If you are using a hand held pin vice put a pad or something in the middle of your hand. It gets sore after a while). Most of the holes drill reasonably easily but the two at the back of the unit need a little care as they break through as there is a large chunk of metal that the drill will crash into. The third hole from the back on the left hand side needs a bit of care as well as the metal here is a bit thicker than anywhere else. In the instructions they recommend fitting the knobs seperatley then threading the wire through them. I decided to fit the front knob onto the wire first and then carefully shape it between my fingers then slide on the next knob etc and work from the front to the back.

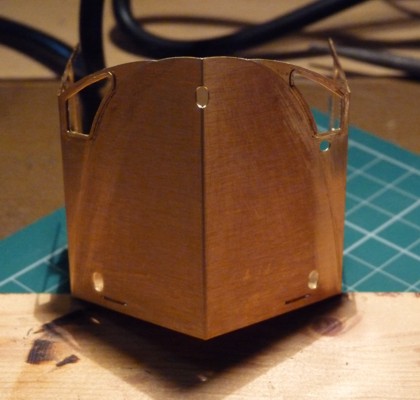
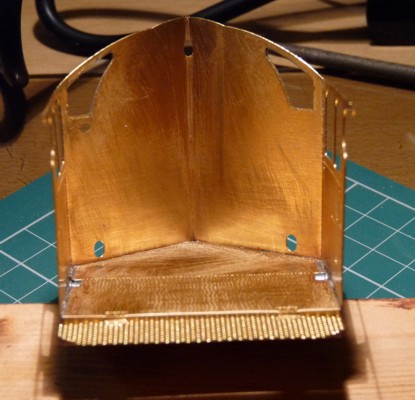
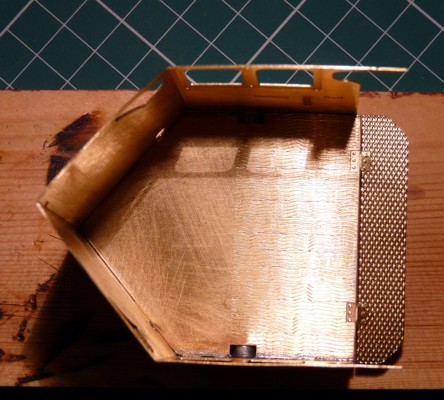
Here's the pics so far. The cab has not been fixed down yet. It is only resting in place to give some idea of what it will all look like eventually.


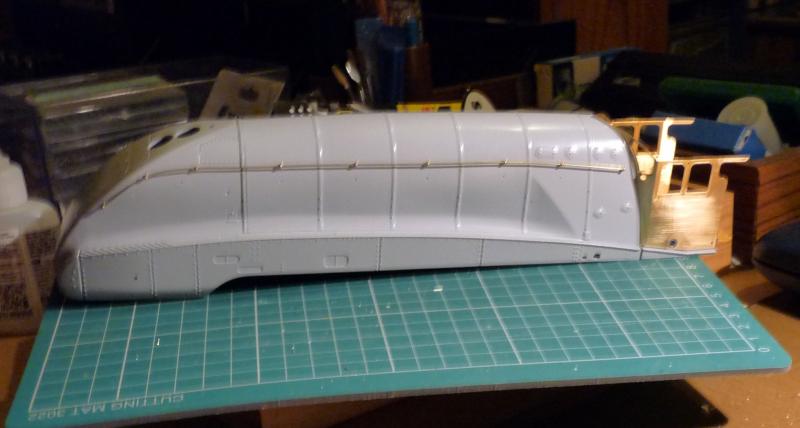
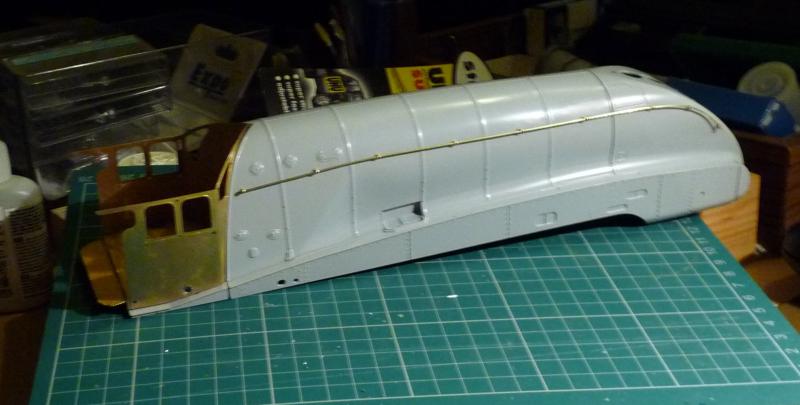
That's it till next week when the next offerings will be some more bits for the cab.

Last edit: by 60019Bittern


I'm old, that's why I'm allowed to change my mind, when I can find it.

My Website: index
Online now: No Back to the top

Post

Posted
Rating:
#181278
Avatar
Full Member
I look forward to seeing thenext installment. Nice tip with the handrail
Online now: No Back to the top

Post

Posted
Rating:
#181508
Avatar
Inactive Member
Issue 4 in hand and some work done. Will be out filming today so next instalment will be put up tomorrow. This time its extra cab parts and joining the cab to the remaining bodywork.  

I'm old, that's why I'm allowed to change my mind, when I can find it.

My Website: index
Online now: No Back to the top

Post

Posted
Rating:
#181757
Avatar
Inactive Member
Been out filming for virtually the whole of last week so nothing more done on the loco. Collected the latest parts this morning so as the weather isn't to conducive to filming will spend a day or two on Mallard to catch up. This weeks offerings are some access panel doors for the boiler which shouldn't take too long. Next weeks bits are the start of the chassis. More later in the week.

I'm old, that's why I'm allowed to change my mind, when I can find it.

My Website: index
Online now: No Back to the top
1 guest and 0 members have just viewed this.