Cutting and Shutting a Bachmann Cattle Van
Posted
#177878
(In Topic #10072)

Full Member
To get an accurate length vehicle
I had a moan on my other thread (Tragedy of Dapol Wagons) about Bachmann's LMS Cattle Van and how it had been seriously shortened to suit their standard 10' WB underframe. I sort of challenged myself to take a van that I've had for ages and make it right.The plan gelled into cutting up the van body and substituting a Slater's 11' WB underframe.

I started work today and the first thing I did was remove the roof:

This involved a Dremel to cut the bulk of it away and then shaving away with the edge of my knife and filing until I had it gone. Made a right mess.
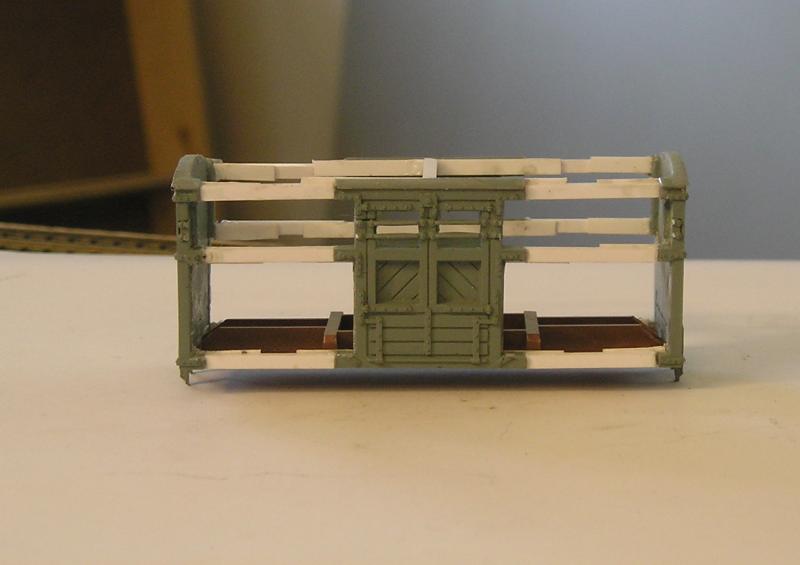
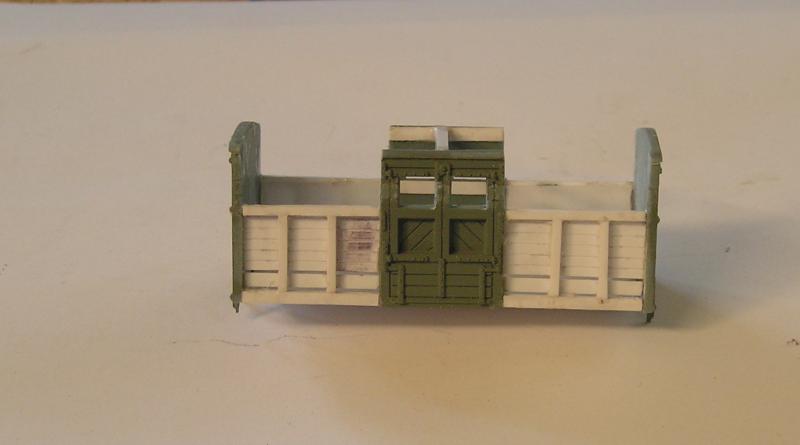
Next, I cut the body up:

I wanted to preserve the strapping and bolt detail. The doors are a smidge undersize, but I'll live with that.
John
 Last edit: by Brossard
John

Posted

Inactive Member
I'm looking forward to seeing how you do the sides.
No doubt it will be elegant. :cool:
Max
Port Elderley
Port Elderley
Posted
Full Member
John
John
Posted

Banned
I guess that Bachmann own the old Mainline tooling for this wagon, so it would be useful to anyone (me included) to modifying the old stock. Looking foward to this.
Cheers, Gary.
Posted
Full Member
John
John
Posted

Full Member
Sellers on ebygum must be waiting with baited breath.

Nigel
©Nigel C. Phillips
Posted
Full Member
I have a Slater's kit of the MR van and two on order from Coopercraft. I bought some Bill Bedford 11' WB underframes from Eileen's.
I'm curious to know what your approach would be.
John
John
Posted
Full Member
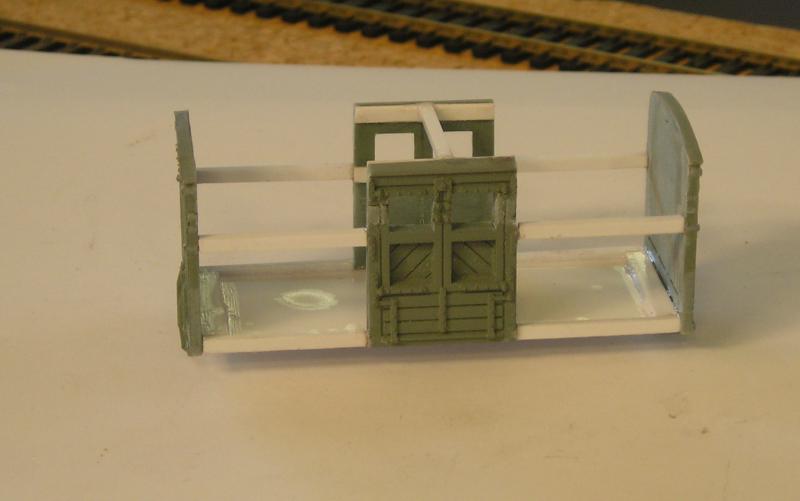
You can see I added .080 x .080" filler strips. These are supported by thin plastic strips. You can see how untidy these look but I can trim the excess away when things have hardened. Adding a floor was a major improvement to stability although in hindsight I probably should have used some 0.040" plastic sheet instead of the Slater's floor :roll:.

I also added a brace to the top since it seemed to be bowing.
I'll just soldier on.

John
Last edit: by Brossard
John
Posted
Full Member
My approach? We're talking skinning cats here. I think I would have tried to save the roof by not removing it or by removing it in toto. The issue is the diagonal framing at the ends. Tough to move out as I believe they are molded with the horizontal planking. If you do move it out the angle of the framing will change. I'd leave as is.
The doors appears to be undersized, that vertical line between the 2 doors is where I would have cut through, roof, sides and floor. Building some new wider doors (from scratch or by extending the frames and planks) and a new ramp from styrene strip (or even wood) would probably be easier than rebuilding the ends.
I'd try and keep the inner frame of the doors with the rivet and hinge detail by reusing it. Make up new doors to the required width, and fix each half to one side. This will mean cutting out the diagonal planking and replacing with new, slightly longer planking. Keep the ramp supports with rivet/hinge detail. The new ramp should go on last as a separate fitting.
With the body now in 2 halves fabricate some supports from styrene sheet or bars, shorter than the planned length. Glue to the floor and underside of roof (at least 3, one in the middle, one at either side. Fabricate new floor and roof inserts (for the roof bend the styrene to shape in hot water and let cool). Glue the floor and and roof inserts to the supports and the cut ends (floor and roof) of one half of the body. For the other half drill undersize holes for some short self-tapping screws in the roof and floor, and drill same in the supports. Glue up the surfaces (supports, floor and roof), mate the other half,and screw up to ensure good contact between the supports, the body and the glue. Remove screws when set, fill with modelling putty.
Fabricate a new ramp to the desired width reusing the supports with rivet/hinge detail. Golden opportunity here to have working doors and ramp (on one side) using brass pins as hinge bolts and some narrow diameter styrene tube cut in half as hinges. Or have the doors open and the ramp down as a montage at the cattle dock.
Wit the exception of the roof (my comment re a spare body, although any Mainline/Bachmann van roof would do) the above would have been feasible at the stage you are at now.I see you've gone the other way and decided to rebuild both ends. You're a brave man. I have to say it's looking really good.
Very similar to what we used to do with BMC minivans where the monocoque body was never strong enough to carry a decent load, and the rear sub-frame was too far from the front.
Nigel
©Nigel C. Phillips
Posted
Full Member
I measured up the doors against the drawing in Essery and, as I mentioned, they are a bit undersize but just a smidge.
I had resolved to eliminate the diagonals. On this model they are moulded but in reality they are steel strap.
My decision to preserve the bolt detail, I think, was wrong now I look at it. One of my next jobs will be to sand everything smooth and fill any cracks in the replacement horizontals. I can reinstate the strapping with strip and, laboriously, add bolt heads using Archer transfers. Another method would be to drill holes and stick 0.020" rod in them, but I have tried this in the past and my drilling accuracy isn't there.
I also need to bulk up the horizontals because I should probably have gone for 0.100 x 0.100" instead of 0.080 x 0.080". Oh well.
I agree, it is looking doable now.
Thanks for the differing approach, there are few things in this hobby that are "wrong", just different.
John
John
Posted
Full Member
Nail biting project this one.
One of the issues that I've found in the past with Mainline/Bachmann offerings is that the roof is required to stop bowing of the body.
Had a look at some pictures of LMS cattle wagons, as well as the Slaters offering. See what you mean about the diagonals (angle) and the bars.
Nigel
©Nigel C. Phillips
Posted
Full Member
John
John
Posted

Full Member
Posted
Full Member
I agree about the timbers being heavy on the Bachmann model - I'll be replacing these (on the sides anyway) with slightly finer 0.080 x 0.080" strip.
Thanks for your views on this.
I've been working on the van again this morning, starting from the beginning but taking a more rational approach (I think).
John
John
Posted
Full Member
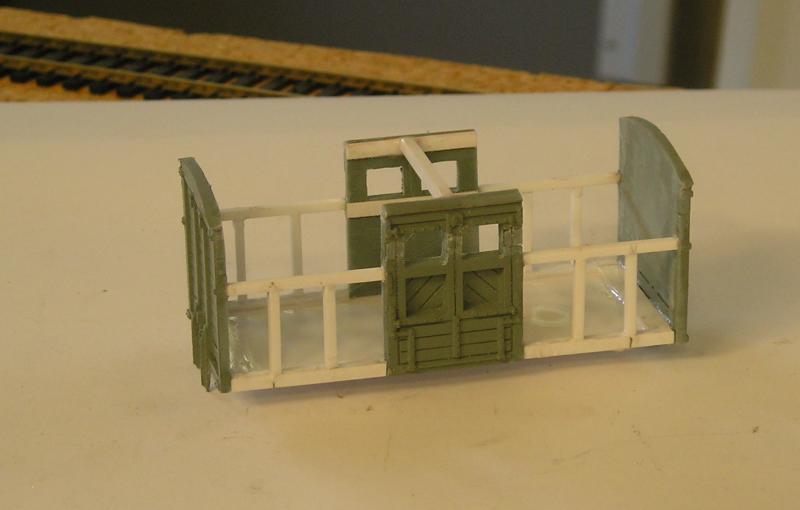
So, what's different? Well, I gave up on those extensions and sanded off the strap detail. By having ends that are flush dimensions are more easily measured.
I replaced the floor with 0.040" plastic sheet (26 x 72mm). I beefed up the ends of the floor by 0.040" to give the ends more support.
The center section was similarly flushed down like the ends (22mm wide). The doors are about 1mm too narrow relative to the drawing in Essery.
I next found the center section and floor centerlines and glued these sections on. This gives me a datum. I glued a cross member to the top of the center section.
The horizontals are 0.080 x 0.080" strip. These are very close to the drawing. Nominal length is 25mm.
Next step was to glue horizontals to the floor and make sure they were flush to the ends. There's fraction of a mm tolerance so some slight fettling is needed.
After that the ends were glued on.
Finally, I glued on the central horizontals. Paying particular attention to their being in line with the door horizontal.
BTW, this wasn't all done at once. After each step, it's a good idea to do something else for half an hour or so before gluing the next bits.
I'm feeling a tad happier about this and laying the result shown on the drawing shows that it is extremely close lengthwise.
John
Last edit: by Brossard
John
Posted
Full Member
Earlier I said that the horizontals should be 0.080 x 0.080" strip. I took another look at the drawing and realized that while the bottom horizontal looks right the top one is too heavy. I found that 0.060 x 0.060" strip is dead on to the drawing.
So, here we are:
I also added a spacer strip of 0.080 x 0.010" to the bottom horizontals to make them flush to the ends.
I've got the uprights on now. These are spaced at 9mm centers from the edge of the center section.
It all needs sanding and cleaning up.
John
Last edit: by Brossard
John
Posted
Full Member
The lower plank is 0.080 x 0.020". I spaced it using strips of scrap brass.
The rest of the planks are 0.060 x 0.015" (I wanted 0.020" but didn't have any). There should be 5 narrow planks and I'm pretty close. It ocurred to me as I was close to finishing that a piece of plastic sheet suitably scribed would give the same if not better effect. The only trick would be getting the plank widths the same.
John
Last edit: by Brossard
John
Posted
Full Member
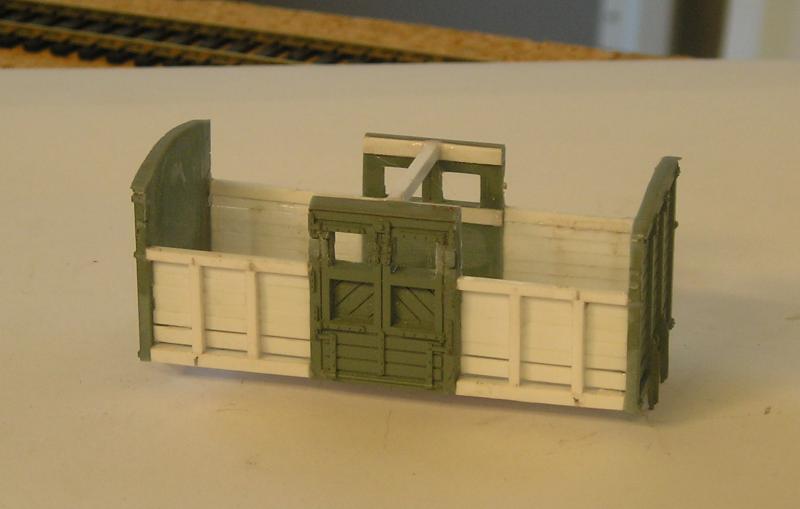
I actually took my own advice and redid the planking with scribed panels. I think it looks better:
A bit tricky to get just right - you have to get 6 planks into 12mm and allow for the thickness of the scribed line. It took me three tries.
I broke one of the doobie dobs that stick down on the ends. :oops: I saved it so I should be able to stick it to the underframe later.
John
Last edit: by Brossard
John
Posted
Inactive Member
Worth the extra effort. :thumbs
Max
Port Elderley
Port Elderley
Posted
Full Member
I thought I'd better look into into the nether regions of the van and explore my underframe options. I had thought to use a Slater's underframe,having an extra kit. However, on examination and comparison with the D1661 u/f I find it won't do. The Slater's u/f has wooden solebars which bear no resemblance to the D1661 solebars in terms of bolt and strapping. They also have MR axleboxes. Oh dear, what to do. I had a look at a Bachmann 10' WB u/f and thought of chopping that in half and lengthening, but decided in the end not to. The Bachmann u/f will donate LMS axleboxes and perhaps buffers.
I finally opted to look at one of the three Bill Bedford etched 11' WB wooden solebar u/f's that I got from Eileen's recently. This looks to be ideal, so I forged ahead and started erecting it.

I still need to do a bit of work to get a good fit. The angles on the van ends may need to be replaced.
John
Last edit: by Brossard
John
1 guest and 0 members have just viewed this.