A few weathered wagons for Linden Ford
Posted
#177677
(In Topic #10059)

Banned
My attempt at weathering and how...
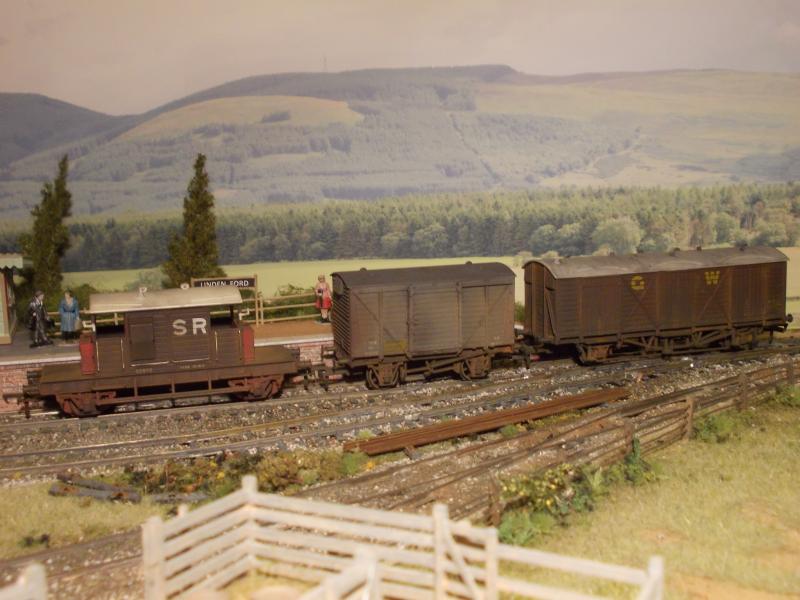
I have been spending some time weathering wagons recently. My general weathering usually compises of air brushing the under carriage (chassis/brakegear/axle boxes) and lower extremities of the wagon body with track grime (Floquil Railroad Tie Brown), followed by an application of powders. I have come to like using Carrs powders, but I have also tried Tamiya, the 3 colour 'make-up' style pad, which only have limited uses, such as high lighting. After the powders have been brushed on, a light spray of Testors Dull Coat fixes it all down.These wagons below have been treated to the method discribed above.

The wagons above were rubbed here and there with a fibre glass pen to remove some of the signage.
After visiting a local exhibition, I learnt of a new technique of weathering. This involves sealing the wagon with a Matt Finishing Sealer and the use of Isopropyl Alcohol.

After spraying the wagon/s with a covering of track grime (Floquil Railroad Tie Brown) the finishing sealer is applied and allowed to dry thoroughly. Powders can now be applied, one at a time. Between each covering/dusting of powders, isopropyl alcohol is then air brushed over the top. This has the effect of 'loosening' the matt sealer underneath enough to lock in the powders. The isopropyl also dries almost instantly, which allows another dusting of powders on top, followed by another spray of isopropyl. Slowly layers can be built up to the required finish.
The only disadvantage is that the powders are 'locked in', which means if you bugger it up, there's no going back….
For touching up areas like the leaf springs and brake shoes, spray a small amount of isopropyl into a container, dab your brush into the powder, then the isopropyl and paint the colour onto the designated section. Simple and it seals in when it dries. Using a variety of colours, some good effects can be obtained.
These wagons below were weathered using the Isopropyl technique.

The streaking above was done by applying the powder then streaking, very lightly, with a dry brush containing the isopropyl alcohol.
I was intending to load up another pic, but I keep being told it isn't the correct format… :hmm Took all the pics at the same time with the same camera..! Anyway, I'll try again later.
Cheers, Gary.

Posted

Full Member
Floquil's a brand you don't see very often these days, although I do have a bottle of their brush on grey primer (the last of it's kind sadly).
I prefer acrylics for weathering. I do like PollyS (same people as Floquil I think but now owned by Testors) and, of course also discontinued.
If you go to an art shop you can get good sized jars of paint pigment (Fragonard) for commonly used colours like umber (earth) and black for a reasonable price.
John
 Last edit: by Brossard
John
Posted

Inactive Member
It makes sense when you think about it.
Max
Port Elderley
Port Elderley
Posted

Full Member
I have an almost unused airbrush bought for exactly this job but, until I can muster the time to do an assembly line production, it seems I'll spend all my time cleaning the brush ………:hmm
When you weather the running gear with an airbrush, do you remove the wheels and mask the bearing cups? If not, do you clean off the tyres afterwards - with what - and how do you stop bunging the bearings up with paint ?
'Petermac
Posted
Banned
Peter, I tend to spin the wheels on the axle when spraying the chassis. I apply a few light coats as I go allowing the paint to dry in between layers. I use a automotive thinner with my paints, knowing that it dries almost immediately. I haven't had the wheels or bearings bung up on me yet…! Touch wood… ;-) For cleaning the tyres, I use a cotton tip dampened with thinners and just wipe the surface clean.
Below, the pic that wouldn't upload last night…. Now it will :hmm…
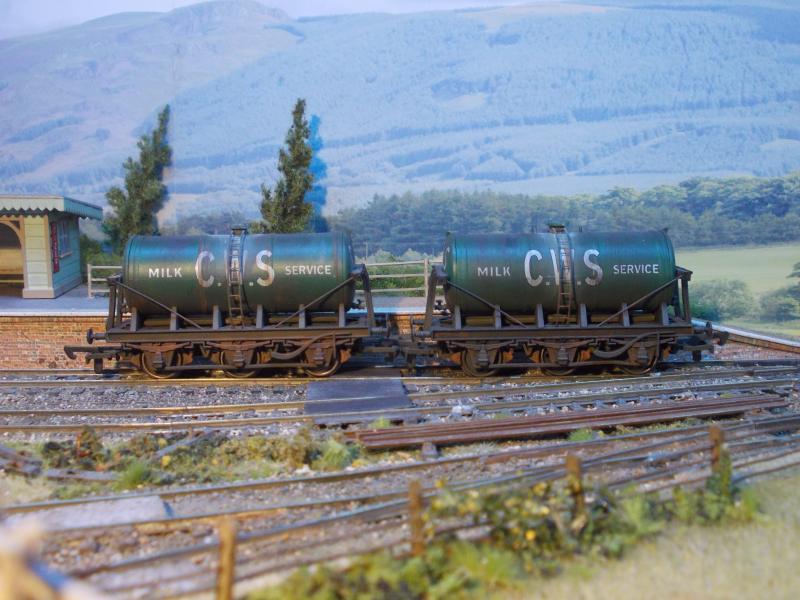
This is the process I go through for the desired results on the tankers above..
^ Spray the chassis and bottom of tank with track grime from below. A covering will be needed from above to dirty up the top of the chassis, as well as across the top of the tanker, but just lightly.
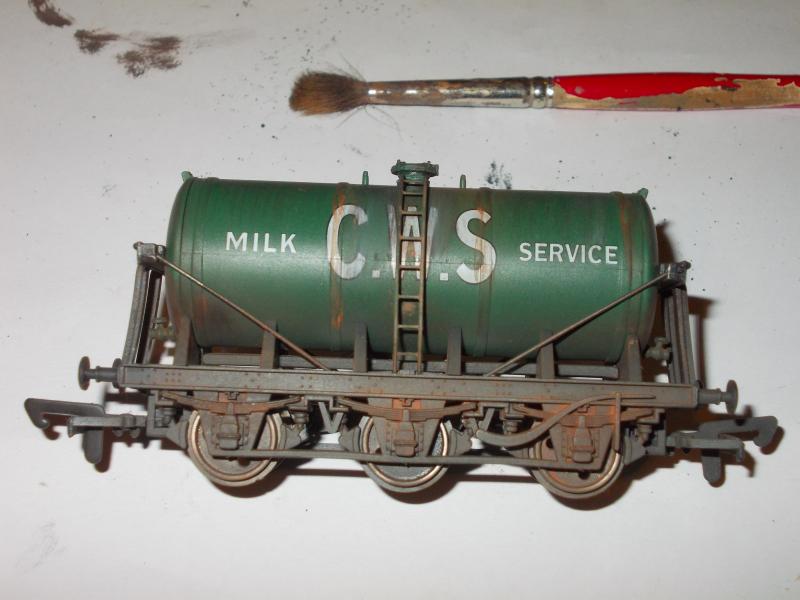
^ Dusting on 'rust' over the chassis, concentrating around the springs, axle boxes, rivets on the chassis and bottom of the tank. Once happy, spray with IPA to set it in. The top of top of the tanker has been lightly dry brushed with some IPA over the top then brushing the powders across (left to right) to form the streaks. Need to work quick on this, as the IPA will dry fairly rapidly. The rust streaks around the tank rings was done by wetting a finer brush with IPA then dabbing in powder. Quickly trail the brush down the rings. The same method is used on the steel (wire) restrainers, ladder and brake shoes. although painted on rather than trailing the brush.

^ Last of all is the application of white, or milk staining. This was applied directly over the tank body by brush then lightly air brushing on the IPA.
Looking at the pics now, I think I'll revisit them and apply some Tamiya 'Gun Metal' over the axle boxes to represent a greasey/oily look.
Cheers, Gary.
Posted
Full Member
I have a thing about wheels so I paint them separately with a grunge colour. I make sure the tyres are kept clean. At the airbrush stage I give them a once over with a light coat of earth followed by black. This puts a light coating of paint on the tyres. When the wagon runs on the track, this light coat wears quickly leaving a shiny line.
I find that weathering doesn't bung up bearings but painting the chassis can do that. I find the H0 Truck Tuner ( http://www.micromark.com/HO-Truck-Tuner,8241.html ) works well to clear the bearings.
Your wagons look effective.
John
John
Posted
Banned
I just had a look at some pics I have and you are correct. :thumbs I'll give the handles a touch up of white when I revisit the axle boxes. Thanks again for the additional info.
Cheers, Gary.
Posted

Full Member
Posted
Full Member
Posted
Banned
Thankyou ! As for sealing, with the IPA method I used, there is no need to seal the models as the powders are locked in. If you require the model to be sealed, I would first recommend Testors 'Dullcote'. This is available in an aerosol from here : http://www.modeldisplayproducts.co.uk/index.php?route=product/product&path=75&product_id=159
If you can not get hold of Dullcote, you could try any of these :
Humbrol No.135 Enamel Matt Varnish or No. 49, Revell Matt Clear Acryllic, Tamiya X22 Clear Acryllic. These would be need to be airbrushed on for best results. The paints above are available from ; http://www.hobbycraft.co.uk/peterborough
I have previously used the 'Boyle Matt Spray Finishing Sealer' (as shown in the 1st post), but it does darken the powders considerably. I would aim for Dullcote.
Cheers, Gary.
Posted
Full Member
Hi Jimmy,
Thankyou ! As for sealing, with the IPA method I used, there is no need to seal the models as the powders are locked in. If you require the model to be sealed, I would first recommend Testors 'Dullcote'. This is available in an aerosol from here : http://www.modeldisplayproducts.co.uk/index.php?route=product/product&path=75&product_id=159
If you can not get hold of Dullcote, you could try any of these :
Humbrol No.135 Enamel Matt Varnish or No. 49,  Revell Matt Clear Acryllic,  Tamiya X22 Clear Acryllic. These would be need to be airbrushed on for best results. The paints above are available from ; http://www.hobbycraft.co.uk/peterborough
I have previously used the 'Boyle Matt Spray Finishing Sealer' (as shown in the 1st post), but it does darken the powders considerably. I would aim for Dullcote.
Cheers, Gary.
Thank you it's my motor torpedo boat that requires sealing so spraying is the only option. I will see what I can buy from the internet.
Posted
Full Member
John
John
Posted
Full Member
From what I've heard, one of the ingredients is suspect under UK regulations so the product was withdrawn. The fact that it was actually a very good product that worked has no bearing on it's withdrawal …………………………..:roll::roll::roll:
It seems to me that, before we've finished, everything that works will have been withdrawn just leaving us with things that don't work - things like governments and banks…………………….:cheers:cheers:cheers
'Petermac
Posted
Banned
Here is another wagon I 'dirtied up' last night. An old Triang ICI bogie tanker. I have even replaced the wheels, although they are coach wheels they look ok and roll a lot better. ;-) Now I just need to do something with those HUGE tension lock couplers…

Cheers, Gary.
Last edit: by Gary
Posted
Full Member
As for couplings, you probably know that I've been using Kadee for donkey's years, deciding very early on that the T/L type simply will not do.
John
Last edit: by Brossard
John
Posted
Banned
Just been reading your thread on the Stove R, interesting. I'm a long way off making those excellent brass kits !
Anyway, as far as couplers go, I have several packets of Kadee No.5's, 17's, 18's and 19's sitting around just waiting to go on to wagons and locos…! That'll be a job for a later date. The wheels I have are from Hornby, but I do need the 12.5mm diameter sets. I may just have to place an order with AJM…
Cheers, Gary.
Posted
Full Member
Well if your wagons have NEM pockets, fitting the #17 thru #20 couplers is a matter of a few seconds. If you don't, #5s fit directly under the buffer beam. You'll need to check for length to minimise the gap between buffers. Temporarily fixing the coupler with a blob of blu tak will assist you in that. Rule of thumb is that the knuckle hinge should be aligned with the buffer heads.
John
Last edit: by Brossard
John
Posted

Full Member
Nice weathering techniques, especially the section on the use of IPA. What strength did you use? 70% or 99%?
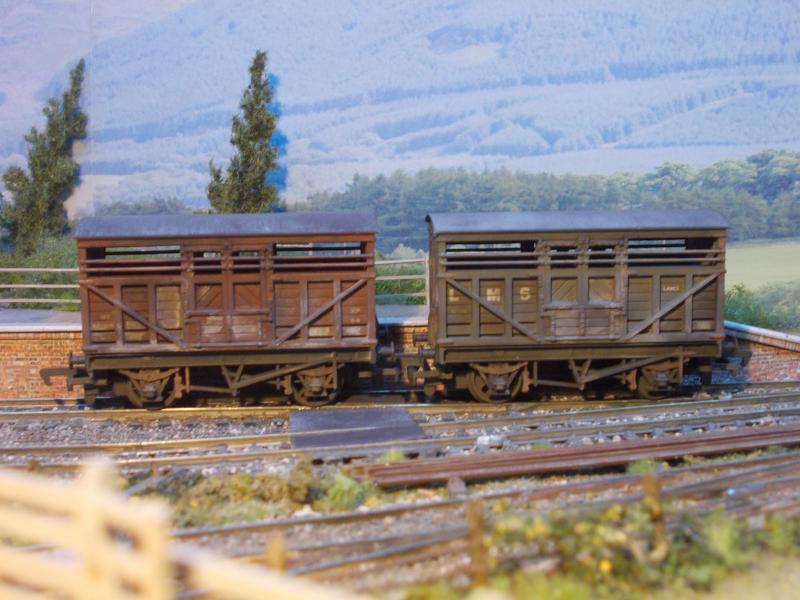
I especially liked the lime wash on the cattle wagons, but….what time frame are you modeling? Lime powder was not used after around 1930, being replaced by a liquid disinfectant.
I've just been checking my" Private Owner Wagons" collections - most PO wagons up to the end of the 1930's were kept sufficiently clean such that the company name and logo was readable (even if weathered and fading), even on coal wagons, as they were mobile advertisements. Coal wagons especially got serviced and painted at fairly short intervals. Illegible lettering and bare plank repairs occurred after pooling in the late 1930's and even more so in the run-up to nationalization and after, especially the period when BR just slapped "Pxxxxx" in a black panel on the lower left hand side. Something to keep in mind when weathering them, as very few of us specifically model the period 1939-1955.
John (Brossard) is correct in his comments about RTR wagons from Bachmann, Dapol, Hornby (and before that Airfix, Mainline, Lima) - rarely did they get it right (or for that matter rarely do they get it right), and not just the dimensions.
Nigel
©Nigel C. Phillips
Posted
Banned
Thankyou for your kind words regarding the models and technique. The IPA I use is 100%, well, so it reads on the bottle ! As for the lime wash on the wagons, I was trying to get a weathered dry look to the timber, not so much a lime wash ! As for the PO coal wagon, it was an impulse buy, something to match the 'advertisement' on the goods shed wall, on Linden Ford. These few wagons are to be used during the exhibition, just to show what can be done with older models, on a layout that was built using 2nd hand bits and pieces, track included !
Cheers, Gary.
Posted
Full Member
The white wash really makes the wagons look like they have been "limed".
IPA - the % is important, at this concentration (99-100%) it's a solvent. The 70% concentration may not work as well due to the water content.
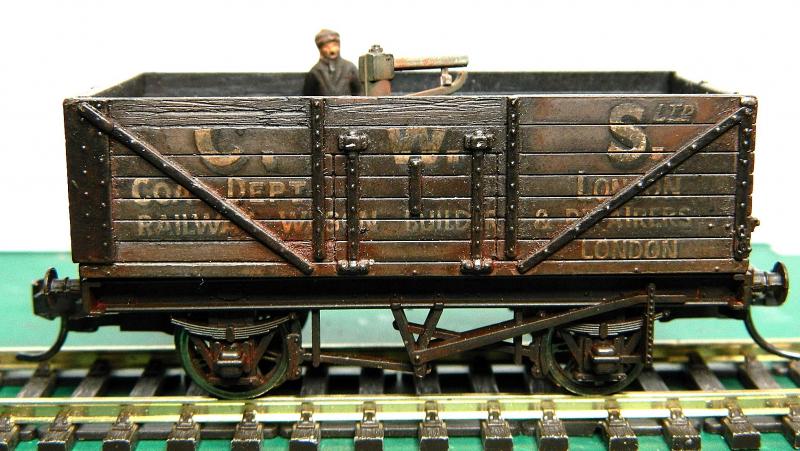
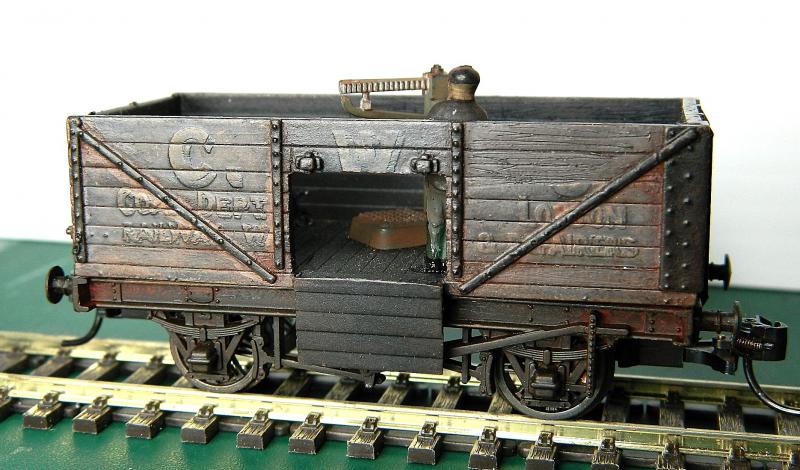
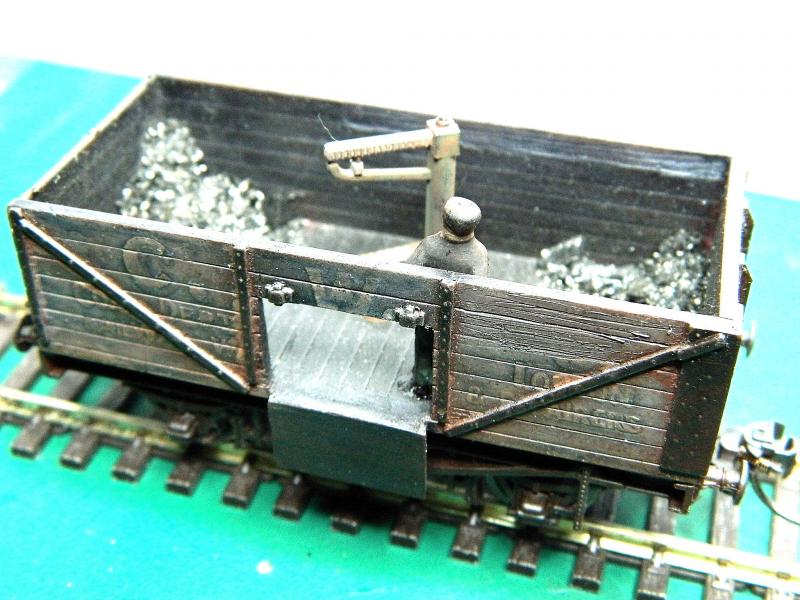
In my (limited) experience it's hard to get a realistic light weathering that would have been typical of the interwar period. From memory Colman's Mustard coal wagons in the 1920's and 1930's were kept a lot cleaner than the weathering on what looks like a Mainline model (I'm not that old, but there are photographs around). A light coating of coal dust on the wagon and underframe (which apparently was red) would have been all that was tolerated, most of which would have been around the tipping end (or the top of the side door if unloaded by hand). There is a picture of one in vol. 1 of PO Wagons (one of the volumes I don't have). Coke wagons were apparently always dirtier due to the rails at the top letting w
From the time of pooling prior to WW2 to the early BR era most PO wagons were never repainted (except of repaired), and rarely washed except by the weather. Most photo's from this period (especially in the late 1940's and early 1950's) show faded lettering, often peeling (doable) and repair planks were often left unpainted. I did some experimenting on some old Mainline PO wagons (CWS Coal) that were my test bed for Kadee NEM couplings and which form a stationary coaling montage. The body was treated with paint/decal remover (Testor) until most of it had been removed, and the CWS had taken on a ghostly appearance (much like the CWS today, although ghastly would probably be closer to the mark judging from the store I was in last week). A few of the top planks had all their paint removed and were scribed to represent the effects of being left exposed for a few years.
Weathering powders fixed with matt varnish were used, although I'm going to go back and try and the IPA method you described (I have some 99% IPA) as i think they will benefit from the technique. This is meant to be in the 1950's, so I need a Pxxxxx number on a black panel (which I will do when I find where I filed my decal paper). See below for the results.
Nigel
©Nigel C. Phillips
1 guest and 0 members have just viewed this.