Johns 7mm Coach Workbench
Posted

Full Member
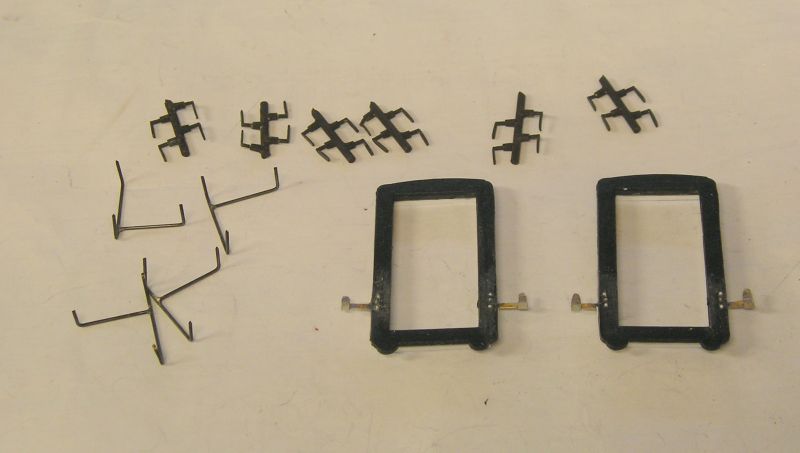
Cast brass door handles blackened. Tee shaped grab handles for the central guards door. These are 0.032" brass wire (scales to just less than 1.5" in 7mm scale). I used the coach as a jig and soldered the joint. These have been blackened as well.
Gangway ends with cobbled up lamp brackets. This coach will form part of my parcels train with non corridor CCTs. The gangways will be retracted so I won't use the concertinas.
John
 Last edit: by Brossard
John

Posted

Site staff
Ron
NCE DCC ; 00 scale UK outline.
NCE DCC ; 00 scale UK outline.
Posted
Full Member
John
John
Posted
Full Member
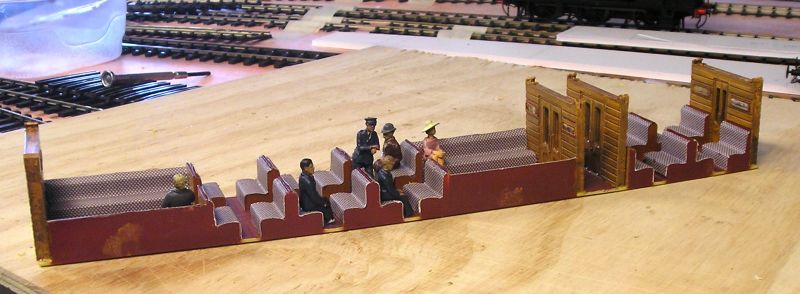
The main job was to cover the seats and I used Nicks method of self adhesive address labels. I found a pack with full page sized labels. I took the moquette from:
Latest News
I reduced the size to suit the seats, printed onto a label sheet and stuck them on.
Next I turned my attention to the partitions. These I wrenched out, breaking some locating pips in the process. I drilled and glued in 0.032" wire to replace them.
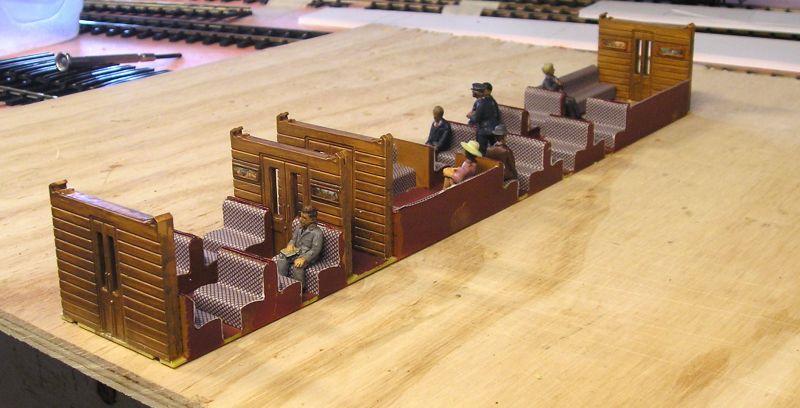
First, I printed some pictures on to a label sheet and cut these out.
I painted the partitions with Humbrol Matte Sand (#32 IIRC), a colour Mike Trice recommends to simulate varnished teak. This required two coats. I used a Letraset marker to mark the frames and stuck the pictures in.
To try to stop the thinner attacking the paint I sprayed the partitions with matte varnish to make a barrier.
I wanted to get a sort of varnished teak look on the partitions. My method was to use Tamiya Panel Lining Wash to darken the partitions. It dried too dark, so, following Tamiyas instruction, I brushed on enamel thinner to light the effect. This took several tries until was happy, letting things dry between attempts. I sparayed on 2 coats of gloss varnish (Testors Glosscote) and the effect is quite pleasing I think.
Passengers are from Omen Miniatures. Guard is from Heroes of the Footplate.
I can reassemble the coach next.
John
John
Posted

Inactive Member
Max
Port Elderley
Port Elderley
Posted
Full Member
I put the interior in:

Note the driver in his compartment.
I'm painting the glazing Humbrol sand, like the partitions and I'll varnish this tomorrow. I'll rub off the old glue marks before fitting the glazing.
It's not obvious, in fact, you can't even see it, but I sanded the seat edges and ran a marker along them to give them a more finished look.
John
John
Posted

Site staff
Regards
Alan
Born beside the mighty GWR.
Alan
Born beside the mighty GWR.
Posted
Full Member


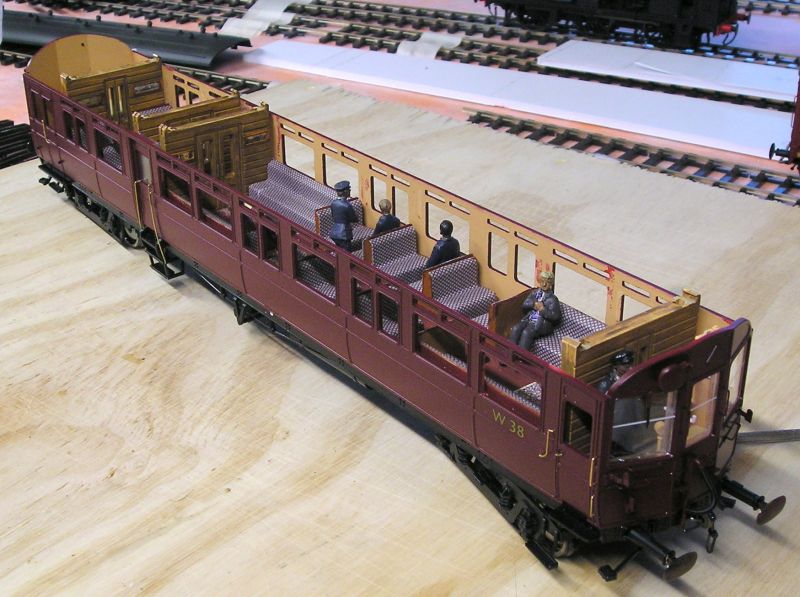
Clip top buffers are a bit of an issue, since they tend to go ahoo. I tried to add an anti rotation feature involving a piece of L shaped wire glued into the floor and soldered to the retaining nut.
I left the vestibules varnished teak, I nice touch I think.
The place is a building site so I don't have any good places to take pictures.
John
Edit, I set up a better photo location and replaced the previous pictures with better ones. I have tested the coach and it runs round my 4'6" curve without problems.
Last edit: by Brossard
John
Posted

Full Member
Regards Rob
Posted
Full Member
I had to redo my steam pipes because of a foul on the bogies. Should be OK now.
John
John
Posted

Full Member
Posted
Full Member
John
John
Posted
Full Member
I built two some time ago and they are finally, after all this time, coming to completion. I built and painted the basic coaches and my friend, their owner, has been working the detailing and interiors.
The most recent picture I have of these is this:
Taken at the Exporail show last year.
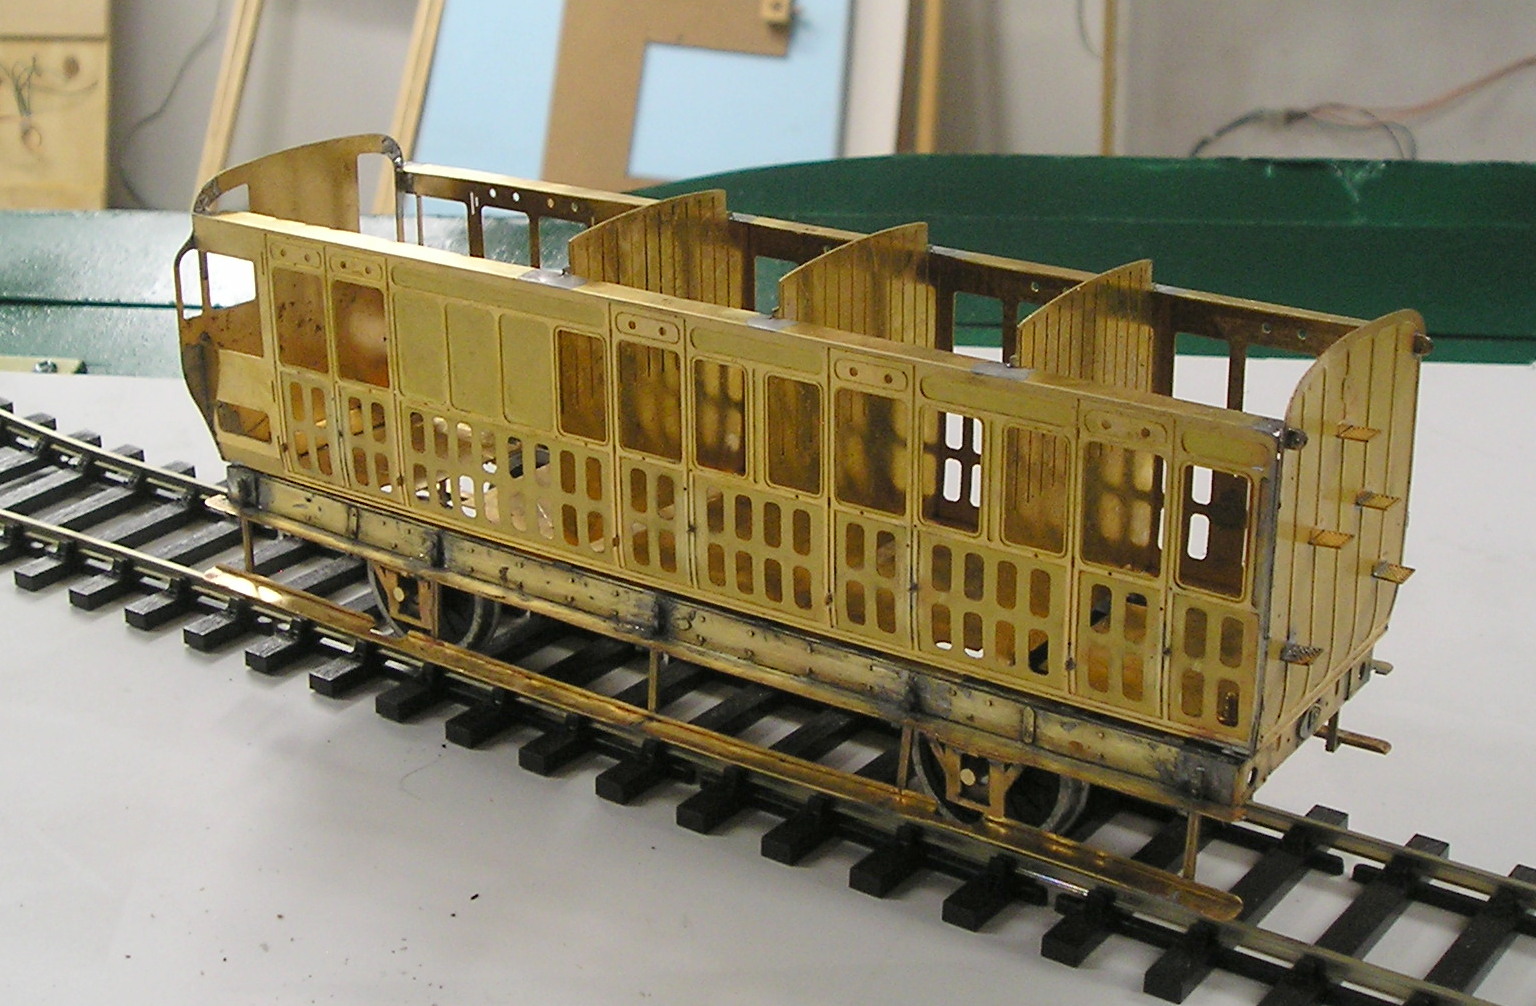
I was given a second 4 wheeled brake kit to build a shockingly long time ago and haven't done a thing with it, being focused on the layout. I find myself with some time so I decided make a start on the kit.
I've been at it for a few days and today I completed phase 1, the underframe:
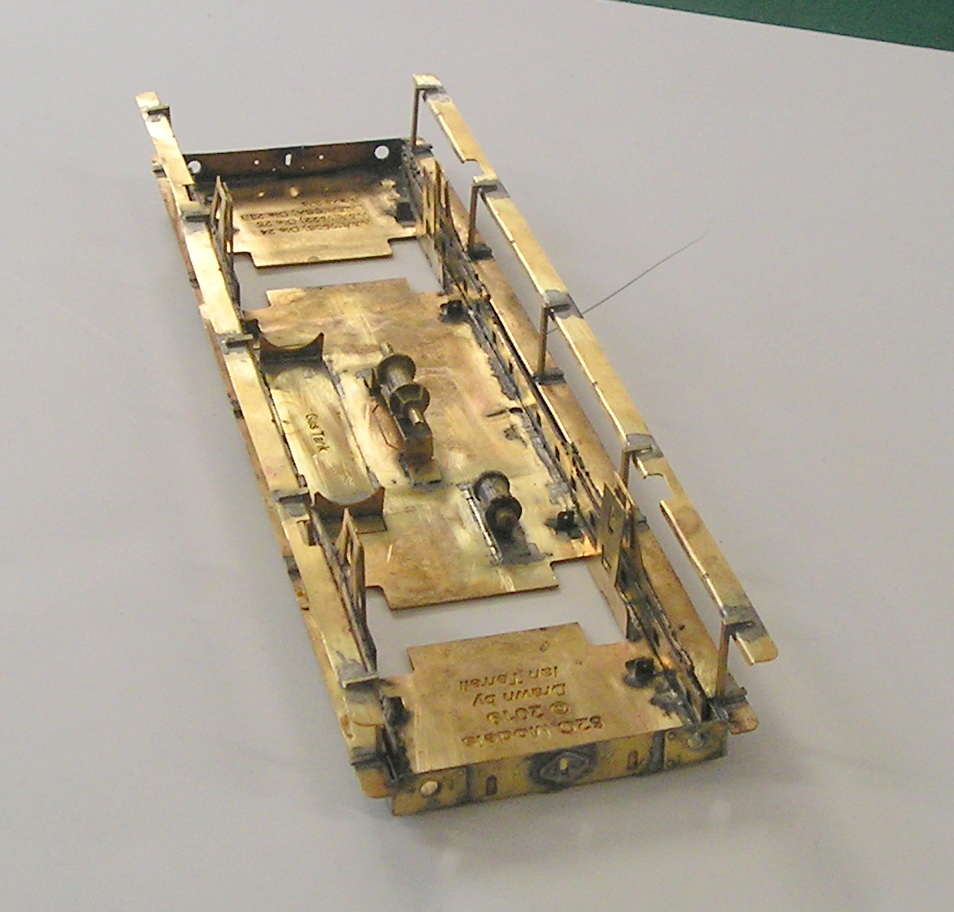
My only issue is that I have trouble getting enough heat onto the work. I have a Weller 50W soldering station and can crank that up to a tip temp. of over 400C which helps.
Onto phase 2, the wheelsets.
John
John
Posted
Full Member
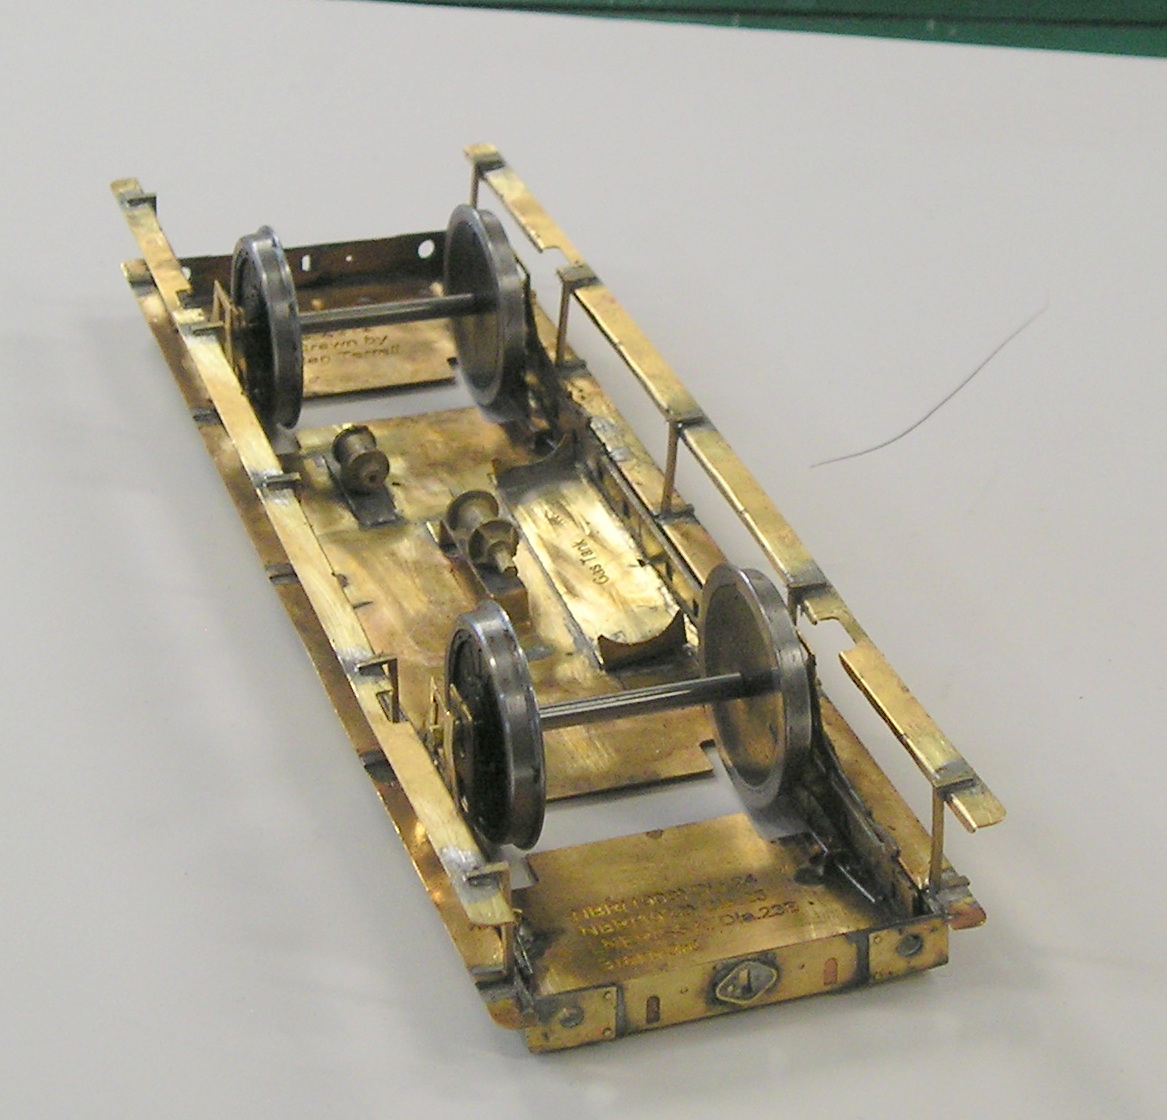
There are bearing holders suspended by steel wire to provide springing.
I gave it a spin on some track and all seems well.
Wheels will need to come out for painting and while I detail the underframe.
John
John
Posted
Full Member
Terry
Posted
Full Member

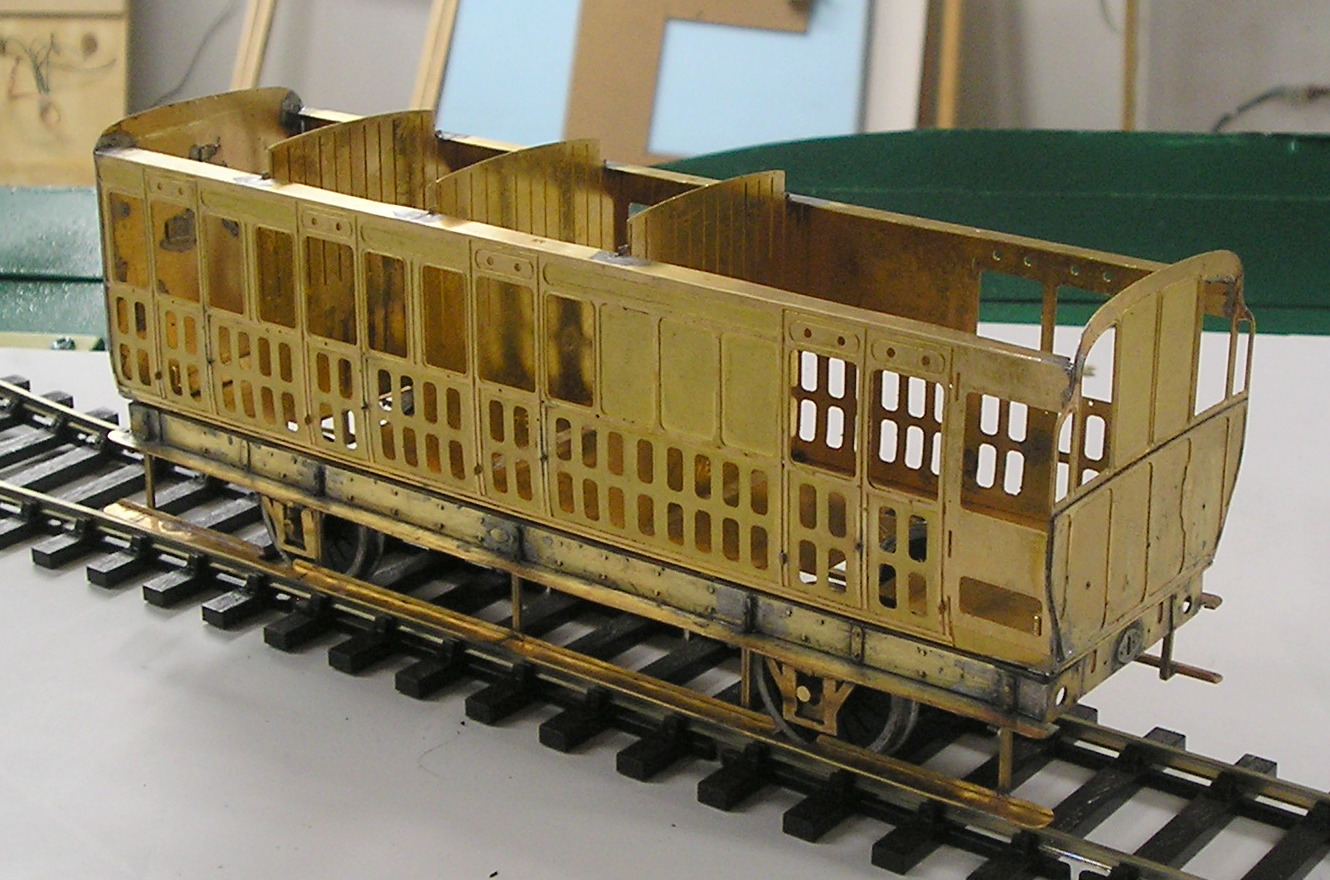
All in preparation for building the body.
Sides and ends have a very subtle tumblehome. Done using a length of dowel.
Sides got door stops from 0.5mm wire soldered to the back. Also lower hinges added.
Flanges top and bottom were done by clamping the side to a large file with the flange protruding. I then bent this back as required. The sides are half etched so attempting to do this with pliers could ruin them.
Brake end (with windows) got a laminated lower section. Looking at the pic, I may need to revisit that.
The end flanges were done with square ended pliers.
Other end got some small brackets at the top.
John
John
Posted
Full Member
The instructions said to fit the body to the chassis, bolt it on and solder on the nuts. Sod that! I thought. So, off came the ends and I got the nuts soldered (after I had to cut two off because they were soldered solid, masking tape under the screw head and oil on the threads seems to work). Even so, much easier to solder the nuts on when everything is flat. I don't recall this issue with the first kit.
When it came to fitting the body to the chassis, the holes were nowhere close so I spent time and effort elongating the chassis holes and things seem good now.
John
John
Posted

Full Member
Posted

Full Member
I have a couple of Wizard Models Gresley coach bogies to make up - my first venture into brass rolling stock so your thread should help although 4mm stuff is tiny compared with what you've got ……………
'Petermac
Posted
Full Member
Good luck with the build. I made a rake of 5 Roxey LSWR coaches for a friend once. It took eons but I finally cracked it:


The brass coach is on hold for a while until after the show in a couple of weeks. After that I hope to be able to do something else. I've been a slave to the layout for a long time.
John
Last edit: by Brossard
John
1 guest and 0 members have just viewed this.