Brake vans
Posted
#211366
(In Topic #11548)

Full Member
I have 1 Bachmann offering and an old Hornby version bought at a show. Whilst recovering after checking out the current Bachmann prices, I happened upon the old Airfix version, now in Dapol guise:

The Bachmann model is over £20 whilst the beastie above is a mere £5 odd ………………..
In spite of the mouldings being nearly as old as I am, I thought I'd try one out.
They are indeed in need of new tooling but, at the price, make up into quite a reasonable vehicle (using the 3ft rule)……….;-)
I've already made 2 and am about to start on another pair which will probably be enough for the time being. That will total 4 brake vans for the price of 1 by Bachmann. Naturally, they're not in the same league but I think they'll do. See what you think as I build the next one. :thumbs
'Petermac

Posted

Full Member
My own recommendation would be to find original Airfix ones if you can, as the mouldings are a little sharper (the tools weren't as worn out then), and the grade of plastic was a little more rigid and easier to work with.
Another advantage of starting with a kit is that it is much easier to modify to produce variants.
 Last edit: by SRman
Jeff Lynn,
Amateur layabout, Professional Lurker, Thread hijacker extraordinaire
Amateur layabout, Professional Lurker, Thread hijacker extraordinaire
Posted

Full Member
The old Airfix tools are completely worn out now yet Dapol still re-use them and sell kits made from low-grade recycled plastic covered in flash and moulding glitches.
That said they do produce decent models but beware the quality of the material. I have no objection to recycled plastic (in fact I'd choose to use it given the option) but these kits are often made of the poorest stuff so must cost Dapol next to nothing to produce.
Posted

Full Member
I have 4 of these brake vans that I built from Dapol kits and they have been running on the layout for about 7 years now.
As Jeff has commented they definitely need decent wheels and they do run better with some added weight which can be hidden in the cabin.
I have fitted two of mine with working lights.
Posted
Full Member
I hadn't considered doing any mods to them Jeff - I just wanted some cheap brake vans - but might do some "smartening up" on future builds. Not possible this time around because the cost of getting materials here would probably take the overall price up closer to the Bachmann prices, in which case, I'd simply buy Bachmann …………………:roll::roll::roll:
I do add some reasonably sized fishing weights in the corners of the cabin during the build because plastic kits are usually pitifully light - often so light that even couplings stuggle to couple properly ………….

'Petermac
Posted

Legacy Member
:thumbs;-):cool:
Owen
web-cam 2.2.74.174:8081
if the lights are off no cam
if the lights are off no cam
Posted
Full Member
Posted
Full Member
Don't forget the 3ft rule Peter.
Now, now Derek - as you are well aware, in France, it's the "metre" rule ………..that's an extra 3 inches :cheers
'Petermac
Posted
Full Member
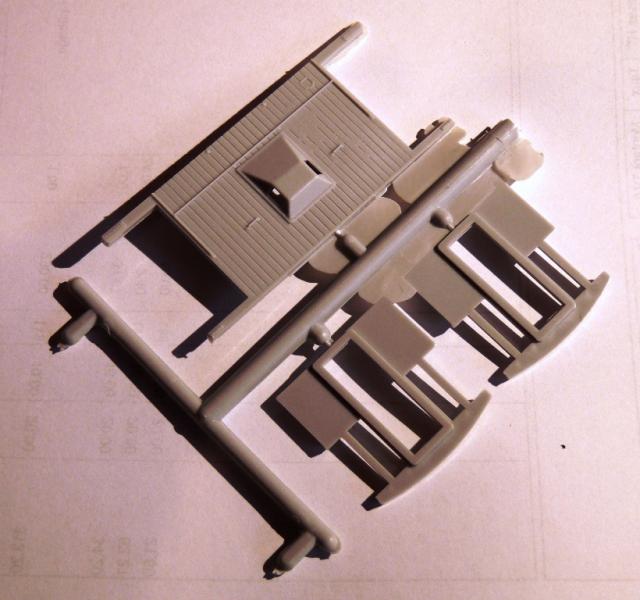
This shot of a sole bar shows quite clearly the warping in the fairly soft plastic. Also, half the locating holes for the running boards, being not clearly defined, had to be drilled out and, on the reverse side, there should be little pips to locate the brake blocks - most of these were missing so positioning of the brakes had to be done by guesswork. I didn't bother getting rid of the circular marks made by the mould ejection mechanism (particularly noticable on the right hand brake blocks) - they can't be seen once it's painted matt black.

But please remember, these kits can be bought for around 20% of the cost of the Bachmann model. Once made up, although they won't stand close scrutiny by rivet counters, they're not at all bad. ;-)
'Petermac
Posted
Full Member
Posted

Inactive Member
Max
Port Elderley
Port Elderley
Posted

Full Member
cheers
Marty
Posted

Inactive Member
Posted
Full Member
I decided it wasn't worth setting up my airbrush to spray this 1 van so hand painted it (very badly) with acrylics. I may well give it a spray over with the airbrush before a final coat of varnish because all the handling has rubbed much of the paint off. Perhaps I should also have used a primer first but didn't have any on hand ……………:oops:
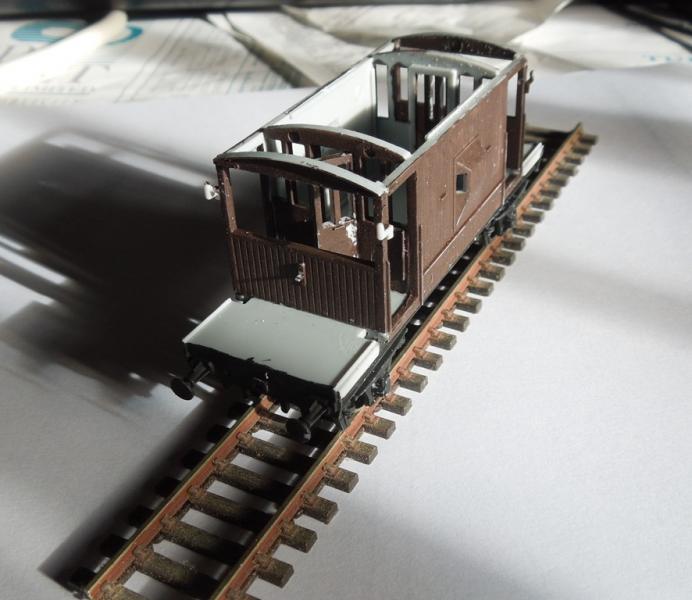
Here's the half-way stage. The weights (lead fishing weights) have to be added to each corner inside the cabin and the fiddly running boards attached (which never seem to fit properly). Has anyone got any idea why there are those cut-outs on the deck immediately behind the end wall ? :
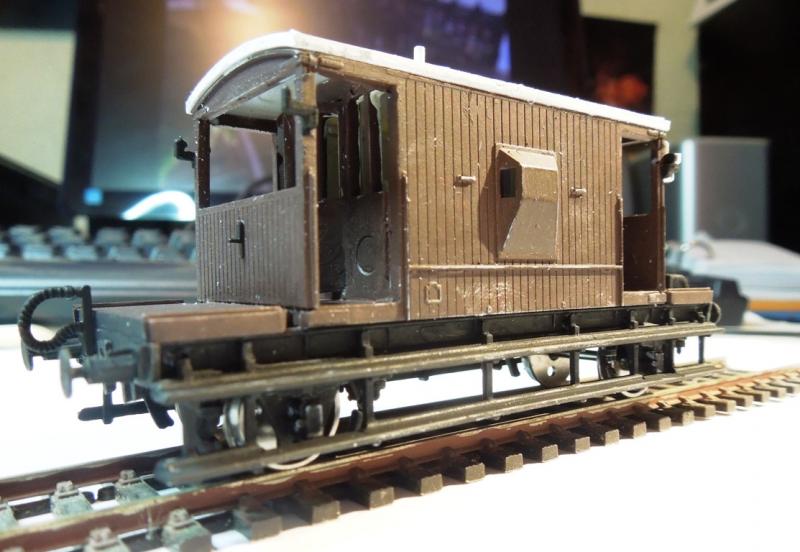
And here she is finished (for now). You can see how the paint has not only rubbed off with handling, but picked up every bit of dust. You can also see once again, those odd recesses behind the end walls. The brakes have a huge amount of travel to make up before they engage with the wheels ……….:shock::shock: but, at a 3ft viewing distance ………………………………:
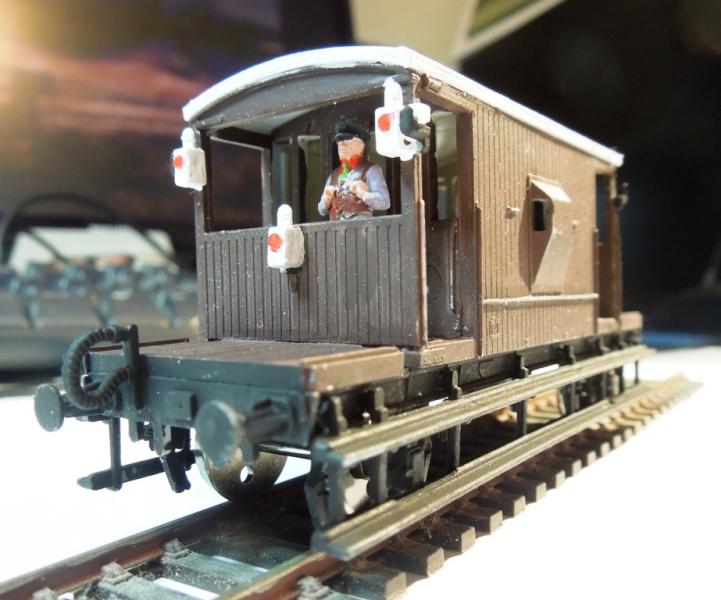
With the guard installed but awaiting fitting of the Kadee couplings. I may, or may not give her a blast with the airbrush :roll: :
'Petermac
Posted
Inactive Member
Max
Port Elderley
Port Elderley
Posted
Full Member
'Petermac
Posted
Full Member
I'm unfamiliar with that particular lamp configuration and the guard's uniform but I never claimed to know everything!
Posted
Full Member
The uniform is station porter of the above parish but he just happened to be handy …………….:cheers
'Petermac
Posted
Full Member
Posted
Full Member
Re the raised edges along the end platforms. These are a rather crude representation of the handrails which BR adopted but were not present on the original LNER design. I actually filed these off and replaced them with wire handrails. They should rise vertically from just beyond the end of the platform (where there should be a slight lip protruding beyond the platform end on the prototype vehicle), perform a ninety degree turn and run a few inches above the platform to be fixed into the end sheeting of the veranda. I can post a picture if anyone is interested.
If you want a bit of variation, you could remove the handrails completely and shorten the stepboards to a point just past the axleboxes (about a third of the way along the end platforms). This will give you a good representation of the original LNER design, some of which were actually built by British Railways.
Terry
1 guest and 0 members have just viewed this.