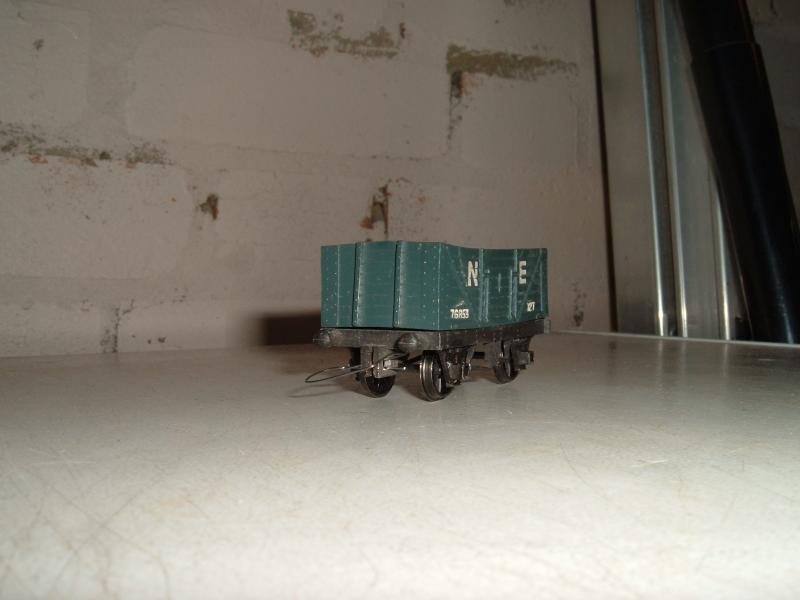
Old Triang Wagons
Posted
Full Member
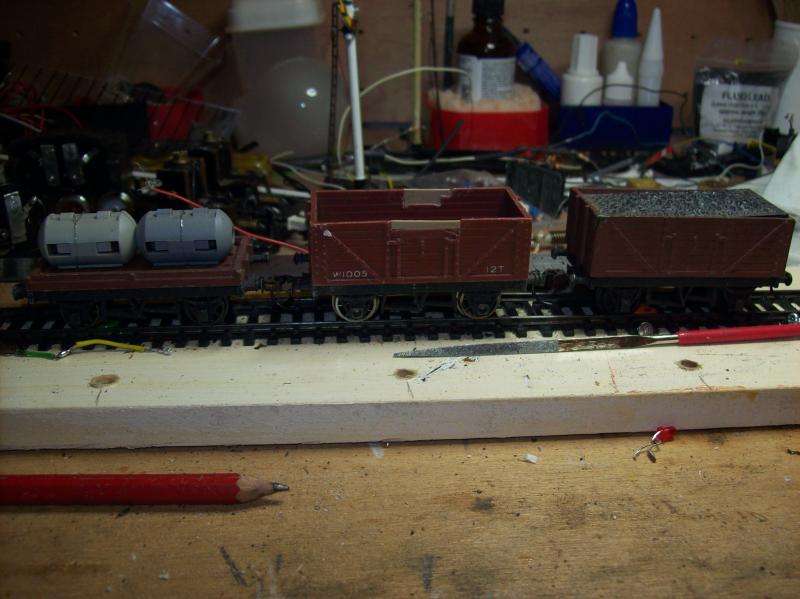
Recycling for the sake of it?
I find that UHU clear glue will usually do most plastic to metal joints, failing that of course, it's superglue.Keith.

Posted

Site staff
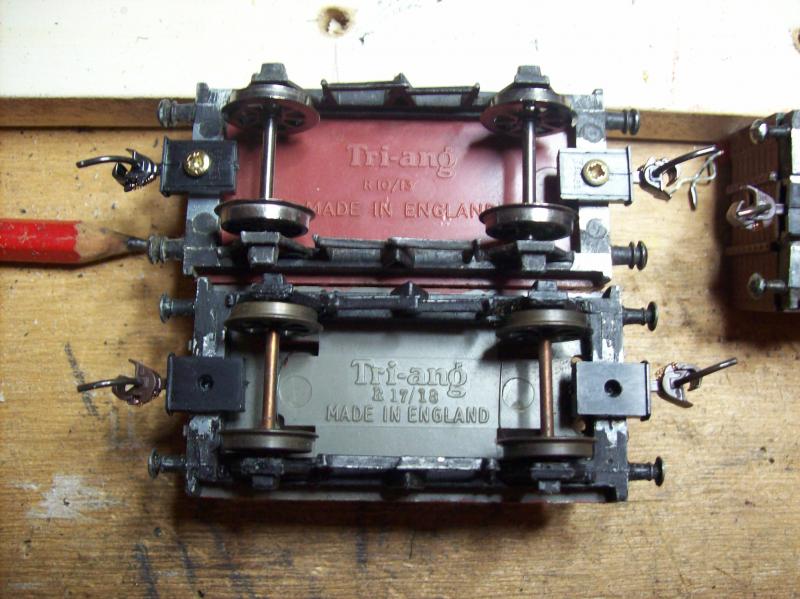
Dunno where weight got into the conversation really, as I agree the diecast chassis is heavy enoughWill superglue stick to Mazak ? If so, then if the solebars are too high, just glue some appropriate thickness bits of plasticard to the underside of the chassis to act as shims and either glue or drill and tap the draft gearboxes to the plasticard…………:roll::roll:
For weight, I've sometimes used lead weights used for fishing lines (or even 12 or 16 bore shotgun shot) pushed into BlueTack or plasticine worked into the gaps in the chassis frames - depends how much extra weight you need ……….I'd have thought with a diecast chassis, you won't need that much. :hmm

Got to agree about superglue (cyano) Peter, I've put off adding 'running boards' on the pug conversion I'm doing as I'm not sure the glue would hold the styrene to the mazac, and that's just cosmetic whereas a coupling would have to hold the weight of a train.
Sounds like screwing Kadees works ok, but has anyone replaced with a newer type of T/L or something else?
Ed
Posted

Inactive Member
I reckon cut off the bit hanging down where the rivet went. Get it back to a flat surface underneath the wagon. Then use either a contact adhesive or epoxy resin or whatever you can find that will hold the Queen Mary against a dock, and stick a block of plastic underneath. The block can be drilled to take a small self tapper and you can fit the coupling of your choice. Obviously the thickness of the block has to be just right. The block could even be made by laminating thin squares of suitable plastic together with Superglue. Paint the block Matt Black and it will look like it was always there. !
Just an idea????
:cheers Gormo
"Anyone who claims to have never made a mistake, never made anything!!"
https://sites.google.com/site/greatchesterfordmodelrailway/home
https://sites.google.com/site/greatchesterfordmodelrailway/home
Posted
Site staff
Just wondering what anyone else may have done.
Can't believe no one else has done this, but looking around on other forums I can't find any references.
Perhaps most people do just throw them in the bin !
Ed
Posted

Banned
Cheers, Gary.
Posted
Site staff
(Option 2?)
Ed
Posted
Inactive Member
Ed you could at least run them that way until you sort out a method for adding a coupling or on the other hand just leave them as little rakes of three…………too easy!!!
:cheers Gormo
"Anyone who claims to have never made a mistake, never made anything!!"
https://sites.google.com/site/greatchesterfordmodelrailway/home
https://sites.google.com/site/greatchesterfordmodelrailway/home
Posted

Legacy Member
web-cam 2.2.74.174:8081
if the lights are off no cam
if the lights are off no cam
Posted
Legacy Member
web-cam 2.2.74.174:8081
if the lights are off no cam
if the lights are off no cam
Posted
Legacy Member
web-cam 2.2.74.174:8081
if the lights are off no cam
if the lights are off no cam
Posted
Legacy Member
:thumbs;-):cool:
Owen
web-cam 2.2.74.174:8081
if the lights are off no cam
if the lights are off no cam
Posted
Site staff
That might work if I put a spacer in between the chassis and the tension lock, to get the height right :thumbs
Meanwhile, I did try drilling holes in the end of the chassis with a 0.7mm drill to try and insert a wire loop, without much success.
They're not quite level, but the drill is too small to make much impression anyway.
So I've just put a wire loop through the rivet hole and I'll slap some Milliput in the hole today to try and get it to stay rigid.
If it doesn't work, I'll have a go at Owen's suggestion and drill the underside of the chassis with a bigger drill bit.
Ed
Posted
Site staff

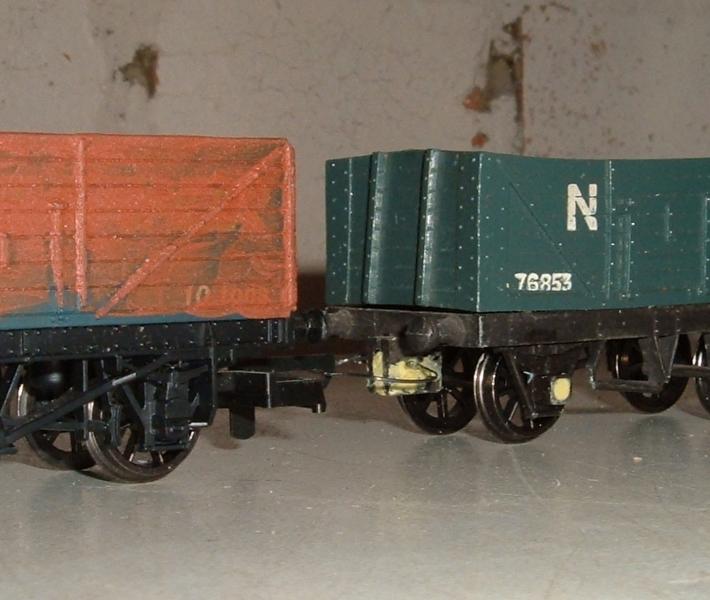
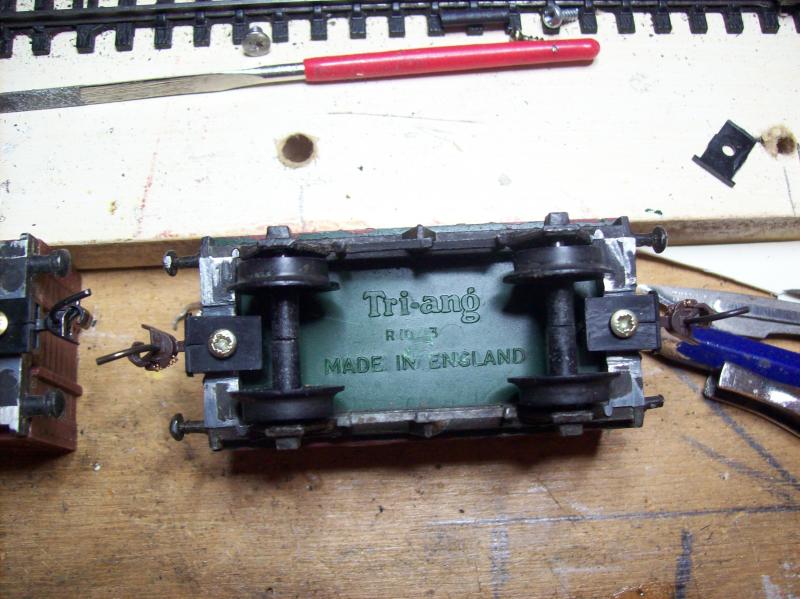
The problem is when you push the wagons the wire loop doesn't always meet the bar part of the adjacent tension lock………..
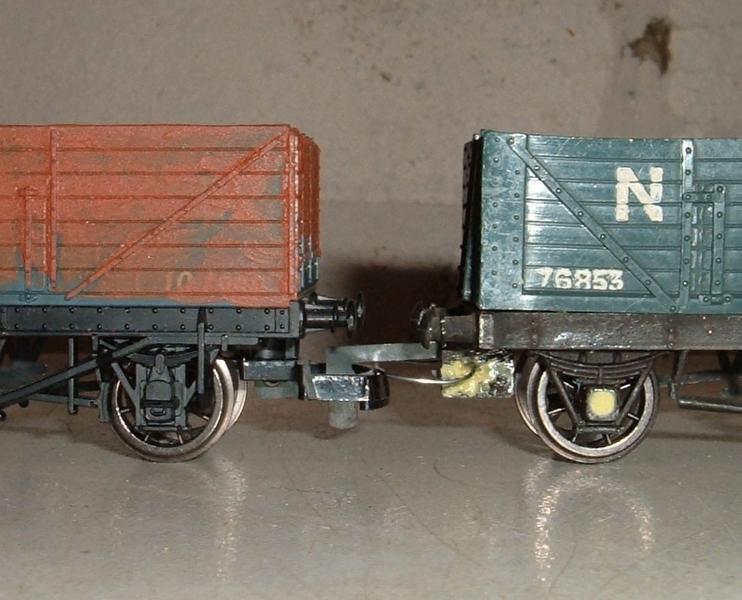
…and rides up and over.
I think the answer is to screw a Bachmann coupling to the underside of the frame in the same way Owen has screwed his Kadees in his post (#30).
I really need a rotary cutter now to remove the old tension lock mounting from the chassis and Father Christmas has been duly notified.
Ed
 Last edit: by Ed
Posted
Legacy Member
:thumbs;-):cool:
Owen
web-cam 2.2.74.174:8081
if the lights are off no cam
if the lights are off no cam
Posted
Full Member
Keith.
Posted
Site staff
Ah, but, it has new wheels already and I don't want to damage 'em.Have to agree with that Owen, with the wheels out of the way, both ends can be cut at the same time. Mazak being fairly soft, it's a quick job, then a clean-up with a fine file, job done!
Keith.
Ed
Posted

Full Member
Won't the wheels just pop out Ed ?[user=1707]Keith M[/user] wrote:Ah, but, it has new wheels already and I don't want to damage 'em.Have to agree with that Owen, with the wheels out of the way, both ends can be cut at the same time. Mazak being fairly soft, it's a quick job, then a clean-up with a fine file, job done!
Keith.
Ed
I'd go with the hacksaw then glue some NEM pocket couplers onto the chassis. They can be chocked up with plasticard shims as mentioned earlier if necessary.
'Petermac
Posted
Site staff
Not now they're held in with the glued 'Romford' bearings Peter.Won't the wheels just pop out Ed ?.
I'd go with the hacksaw then glue some NEM pocket couplers onto the chassis. They can be chocked up with plasticard shims as mentioned earlier if necessary.
Might try sawing very carefully with a hacksaw, but there's no rush and until we get a milder day (temperature above 150C), I'm not staying out in the garage for too long.
Ed
Posted
Legacy Member
:thumbs;-):cool:
Owen
web-cam 2.2.74.174:8081
if the lights are off no cam
if the lights are off no cam
Posted
Banned
Cheers, Gary.
1 guest and 0 members have just viewed this.