Making a Tree from Plastic Imitation Flower Parts
Posted
#142865
(In Topic #7763)

Banned
Step by step instructions for making a simple pine tree.
G'day all,This is a continuation of my other post, 'Cheap Tree Armatures'. Here I show how I made a decent looking Pine Tree, step by step.
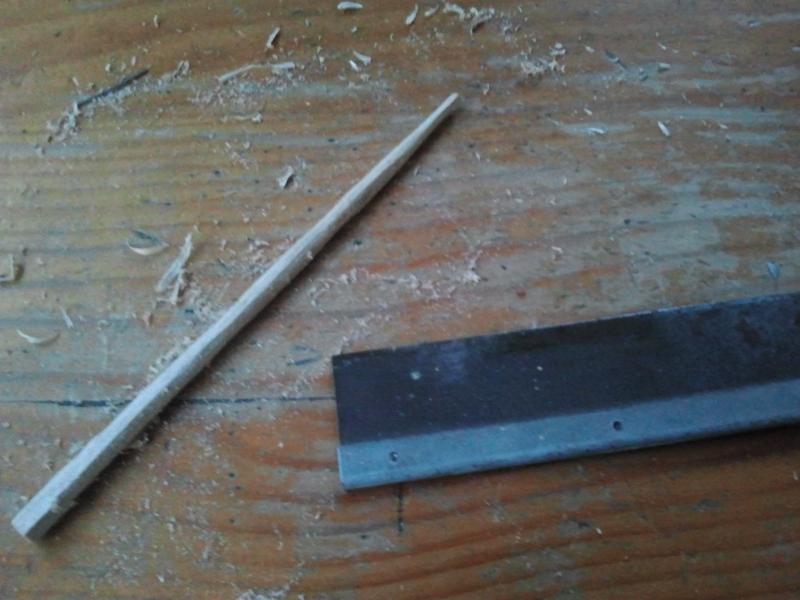
First of all, I selected the material that I require to make a tree. The below pic shows some plastic 'fern fronds' from the imitation flowers, desribed in an earlier post. These will be used as the branches. Most Bargain Variety Stores have these at a reasonable price. Also in the pic is 5mm square Balsa wood, which will be used as the trunk.

2. Using a hobby saw, chamfer/shave down a 150mm (6") piece of balsa. Tapper this down at one end to represent the slendering of the trunk. Don't be too critical of shape as all tree do vary in size along the length of the trunk. Main objective is to remove all the corners. At this stage, gouge out a few splits in the base end of the trunk.
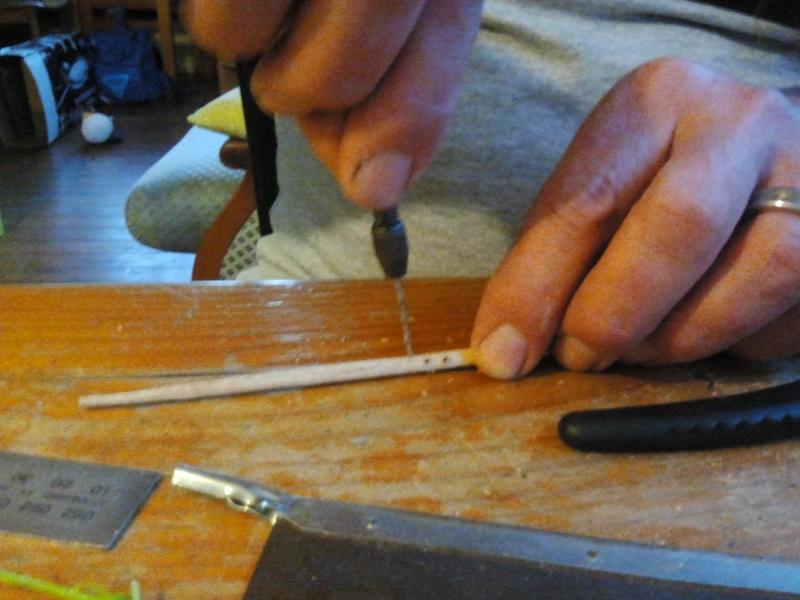
3. Using a pine vice with a 1mm drill bit, drill a few holes right through the balsa. Vary the distance and angle of these holes along/around the trunk. This is where the branches will be glued into place.
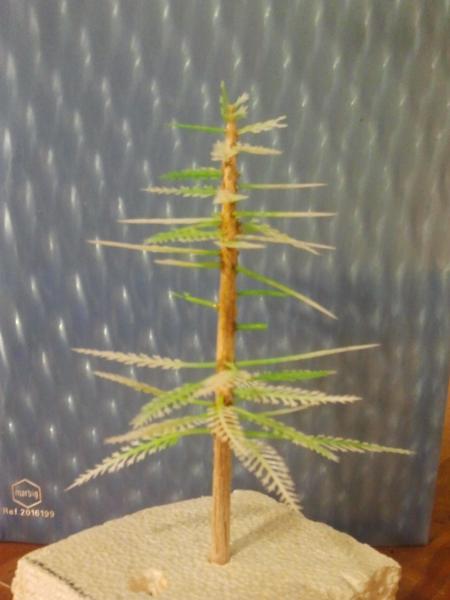
4. Take the 'fern fronds' and cut into individual branchlettes from the main branch/group. Some of these will require shortening, which includes removing some of the leaflettes from the stem. Do not remove all the stem as you may wish to adjust the length. always test fit first, then shorten where required. The longer branches will be used at the base and the shorter at the top. Save some of the off-cuts to use at the very top of the tree. I used araldite to glue into place, by dipping the ends, then inserting into holes along the trunk. I included some 'stumpy' branches along the trunk, which can be seen half way up. The gouging in the trunk can also be seen in this pic.
5. After allowing the glue to dry (I allowed overnight), spray the tree with an acrylic primer. I used some old auto primer for this purpose. Acrylic primer dries fairly quickly and once dry, I gave the branches a coat of mid to dark green paint, thinned down. I used Humbrol acrylic RC410. Be careful not to paint the trunk as this will be painted after the green dries. Do not panic if the base primer shows through as it will be covered later. Also, don't forget to paint underneath the branches. I painted the trunk with thinned down Burnt Umber acrylic poster paint. Again, don't panic if it dries patchy as trunks are not one sole colour.

6. Once all the paint is dry, an application of fine foliage material can be glued to the branches. I used an aerosol glue for this purpose, starting from the lower branches, working upward. Sprinkle the foliage material on the branches as you work up the tree. Apply glue to the next row of branches, as the overspray will only land on the lower 'foliaged branches', insuring a good bond. I'm sure PVA could be used, but you won't have that same double bonding as you would with aerosol. The foliage material I chose was some old, dried up dark green lichen I purchased many years ago. After sifting, it was cut up fine using scissors (many times to make the foliage 'fine'). You may wish to use something different.
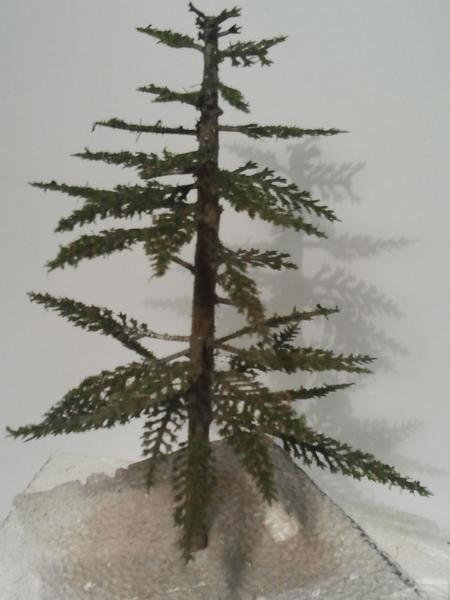
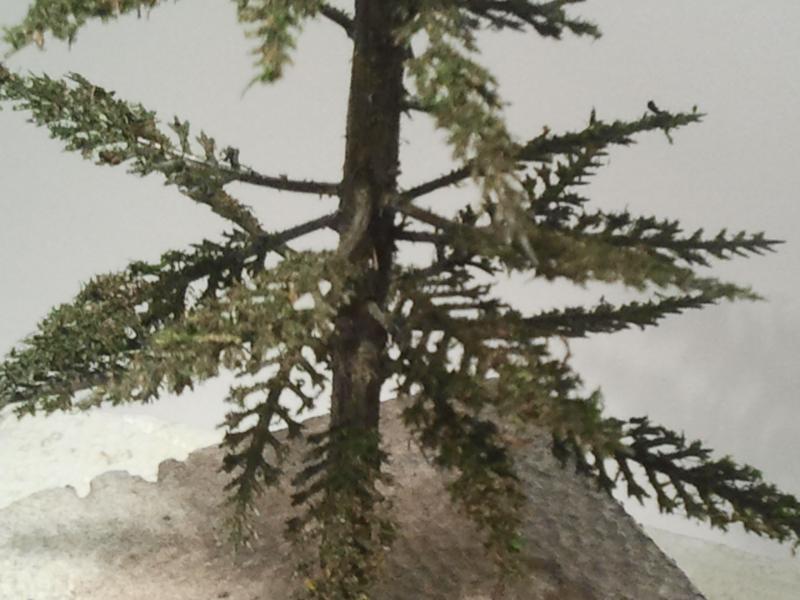
7. A close up of the foliage applied.
In reality, it would have taken about 1 hour (in total) to produce this one tree. I'm sure a batch could be turned out within a few evenings, providing you have all materials at hand.
Well, there you go, now it just needs planting on the layout !
Cheers,
Gary.

Posted

Legacy Member
1 guest and 0 members have just viewed this.