Pointless Dogbone Tramway
Posted
#247082
(In Topic #13644)
Full Member
A simple model tram layout.
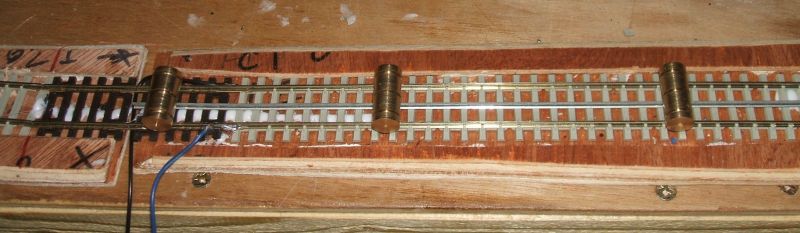
I have managed to progress my dogbone tramway. Track is stuck to 3mm plywood, in this case 8 lengths each taking one length of Peco track. Idea is that track is not part of the baseboard so the baseboard can be used for other projects. I am more into model trains and trams than model towns and villages.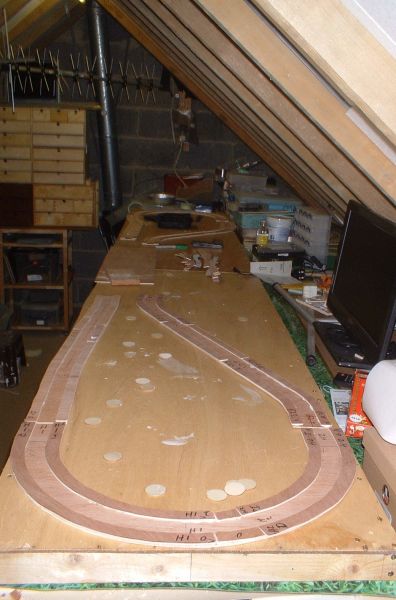
This is the track bed made up as a groove for the track to be laid in. The edging ensure the extra tight radii of 260mm is easy to lay.
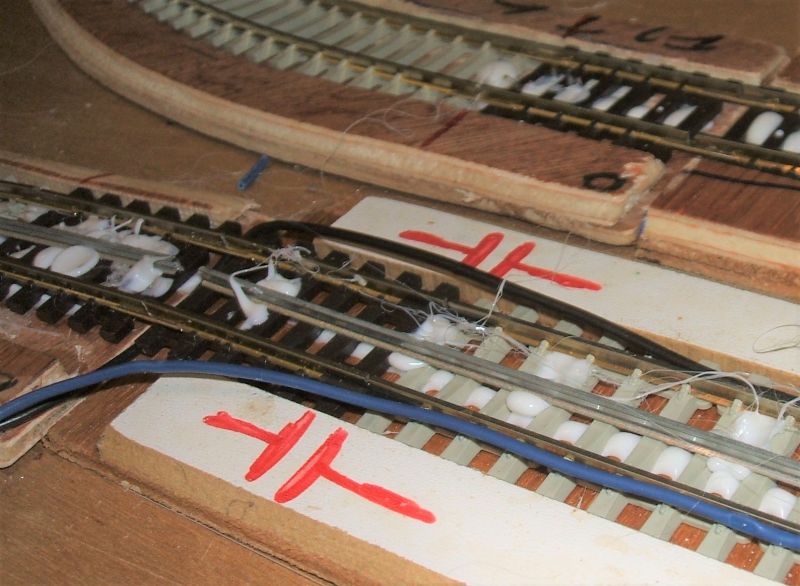
This shows the track laid. It is the concrete sleeper version but at the ends so the sections can be more easily connected and disconnected I have used short lengths of Setrak. The longer piece of setrak is a gap i had to fill due to some measurement errors. Track is glued down using heat gun glue, really 3mm board is too thin for nails. As the track will eventually be filled in to represent roadway the colour varieties and the glue will be covered over. As will the wooden edges.
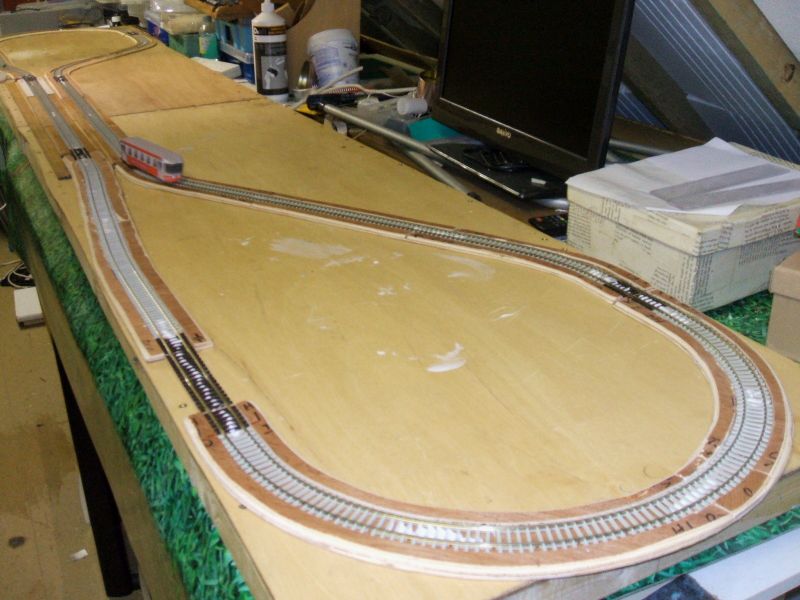
This picture shows the short ends of setrak connecting sections. Isolating joiners are used as part of the three rail automation system I hope to implement allowing up to four trains to follow each other around the circuit.
This is a short video of the track in action.
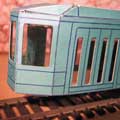
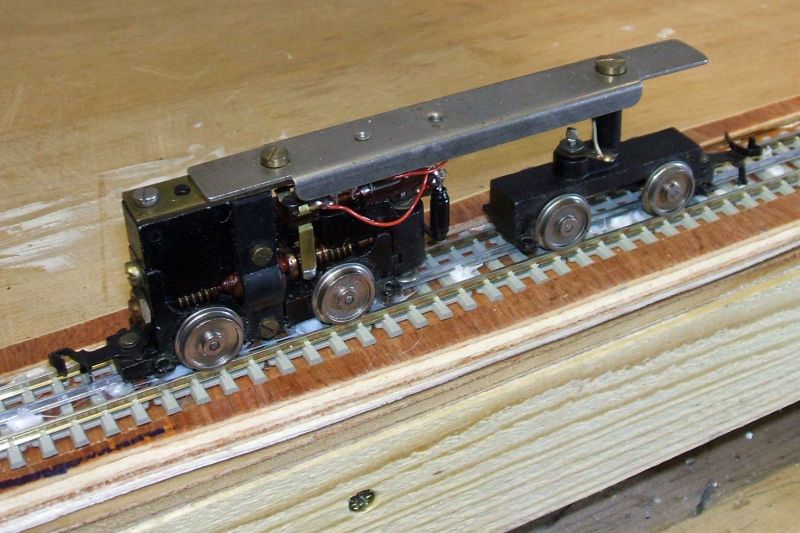
I have also tried some model locos on it and was surprised to find that 0-6-0 tank chassis worked fine. I just expected the simple 0-4-0 chassis to work.
Work in progress. Next stage is a centre rail, it is going to be a modern version of the stud system. APS is the Althom system, using solid state switching to ensure that the track is live only under the tram. I have a number of chassis on which I intend to produce a range of free-lance bodies in various styles.
At least the track worked first time. Now that is a first, usually there is a break somewhere. As an aside I cleaned a bit of the track with some wire wool. This left a few 'hairs' of woll on the track. This lead to some interesting sparking displays as the vehicle first went around. No shorting but it looked good!!
freelance model railways and tramways
index02
index02

Posted

Full Member
Cheers,
Claus
www.flickr.com/photos/ellef/
Claus
www.flickr.com/photos/ellef/
Posted
Full Member
Posted

Full Member
Nigel
©Nigel C. Phillips
Posted
Full Member
Used three gauging rollers and was able to bend and glue centre rail as I went.
Couple of pictures of track.
freelance model railways and tramways
index02
index02
Posted
Full Member
Oh well back to the asylum
Posted
Full Member

The system works by splitting the oval into two sections and while one set of openings are opposite other the other apir of openings are staggered. One of the staggered cuts is usually fairly near the opposite cuts. I hope the diagram expalins it, it was drawn some time ago.
 Last edit: by wahiba
freelance model railways and tramways
index02
index02
Posted
Full Member
Simon.
Oh well back to the asylum
Posted
Full Member
Some people fron on it as the vehcles have a sudden start, but a the low speeds trams travel at I do not think it is much to worry about.
This is a link to a site with more information and details:
Automatic Tram Stops
David
freelance model railways and tramways
index02
index02
Posted
Full Member
This is a short video of the current situation.[yt]dog bone 2[/yt]
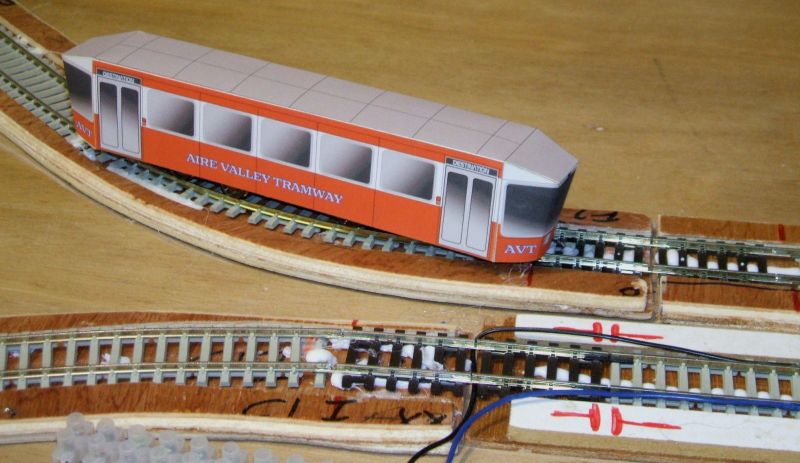
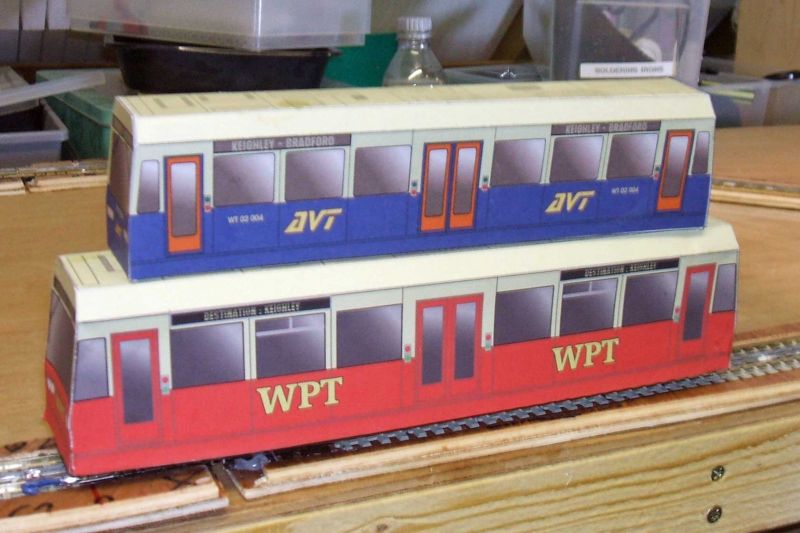
The HD3 Chassis
1/76 scale body
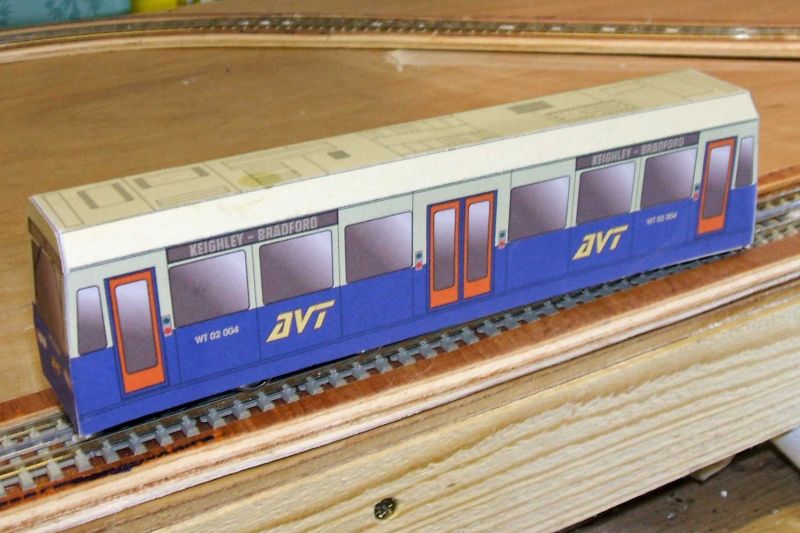
AVT - Aire Valley Tramway WPT - Wireles Pointless Tramway!
Weather is predicted to be awful next week so time in the windowless loft preparing the track more and/or creating 3 rail chassis.
Last edit: by wahiba
freelance model railways and tramways
index02
index02
Posted

Site staff
Ron
NCE DCC ; 00 scale UK outline.
NCE DCC ; 00 scale UK outline.
1 guest and 0 members have just viewed this.