Glebe Street
Posted
Full Member
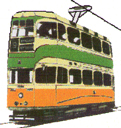
00 Gauge Street tramway based on Glasgow 1950s - 1960s
Mojo, you asked for more layout pictures so here is the current state of play at the canal basin. It's on the outside of the dock wall and originally was the main transfer point to the docks from Glasgow. The arrival of the railway (South Clydeside and Drumlins Railway) has reduced it's standing somewhat but WW II kept it going through till the 1960s and it is now starting to quietly fade away.
This is the Canal Bridge and Locks from Scalescenes. The side next to the harbour wall will be filled in with a transfer yard and a warehouse. I have two Ratio N gauge cranes for unloading the canal barges and a 00 Gauge one for the breakwater for transfer and ship unloading. The crane on the breakwater is a wills kit still to be painted and detailed.
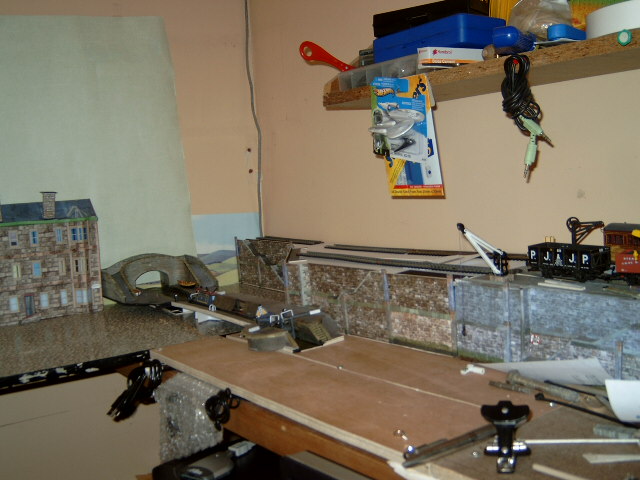
The funny blue/green paper behind the tenement is actually a remaindered roll of wallpaper but I remember skies that colour and when I learn to paint clouds on it it will look reasonably authentic and reach all the way round the layout without joins.

Well Mojo that's your update.
Regards
Jim
Because, except in some unfortunate circumstances, trains did not run on town centre streets

Posted
Full Member
'
Posted
Full Member
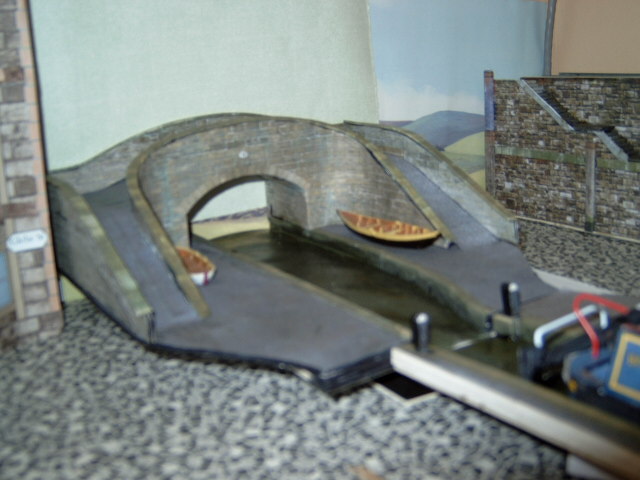
Looks like a Birmingham/Stafford narrow lock.
Totally wrong for my home area as the Forth and Clyde is a wide canal but he stuff on the south bank, Monklands, Paisley and Jonstone and the Cart Junction canals were all narrow canals. A slight bit of licence as the Cart junction was only a feeder to the Forth and Clyde and under a mile long.
The reason the bridge looks to be flying is that as the lock is descending I need to elevate the bridge to allow the lock to have an upper and lower section.

You could incorporate a canal as the site of Wheregate as you originally describe it is on Canal Road and literally alongside where the Bradford branch of the Leeds & Liverpool canal actually ran. It's called Canal Road as it was built over the filled in canal.
Have A think Pat.
Regards
Jim
Because, except in some unfortunate circumstances, trains did not run on town centre streets
Posted
Full Member
Just to convince myself that I am still working on the layout I have uploaded this,
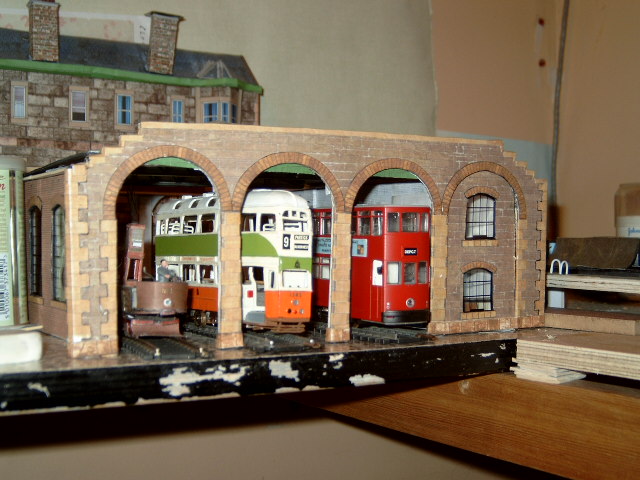
as my latest addition to the buildings.
It was originally a Scalescenes freebie of a bus garage which I lengthened, raised and added a custom front to.
The REAL front was a giveaway in the November 2015 Hornby magazine but I missed that, so as I needed to raise and stretch the building I simply built a new front and rear.
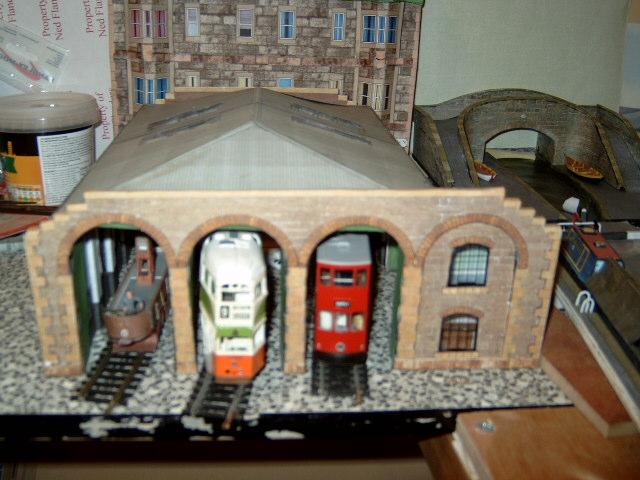
Same thing from above.
Regards
Jim
Because, except in some unfortunate circumstances, trains did not run on town centre streets
Posted

Full Member
Looks much like the some of the kingsway kits you can get
Posted
Full Member
Now I need to look up Kingsway Kits
Regards
Jim
Because, except in some unfortunate circumstances, trains did not run on town centre streets
Posted
Full Member
historical; some of the LT trolley bus, and bus depots/sheds were the old Tram ones, but modified/changed with the times, and I think some of the kits come with the option of being built as there original tram use.
Posted

Site staff
Ed
Posted
Full Member
Had a quick look last night and will investigate properly today. Two minor snags, I only need one tram shed and the ashlar is one I invented to suit the Glasgow size and colouring. The sandstone is geologically closer to New York than the UK stuff. Suppose I should have a look at some US kits but they tend to be HO gauge.
Regards
Jim
Because, except in some unfortunate circumstances, trains did not run on town centre streets
Posted
Full Member
'
Posted
Full Member
Not a lot happened and nothing to say so I didn't say it:shock::shock::shock:
Jim
Because, except in some unfortunate circumstances, trains did not run on town centre streets
Posted
Full Member

'
Posted
Full Member
This is on the "Hints and Tips" thread but as it's tram related I recon I aught to post ithere as well.
Some more on the etching side.
A little while back I described how had done some etching using sticky labels as the resistant medium. Well I said I would let you know what happened when I moved on to “proper†resist stencils so this is the latest experiment in the search for custom parts for tram trucks and overheads.
I finally got around to ordering some vinyl for my Silhouette cutter and did some practice runs on glass jars. I may sound like a bit of a contradiction but S.W.M.B.O. has now got a set of custom made matching spice jars and is starting to come round to the idea that the Silhouette is a good idea.
So I drew up a set of stencils for a bow collector and a trolley standard to fit a Glasgow sett and sand maintenance car.
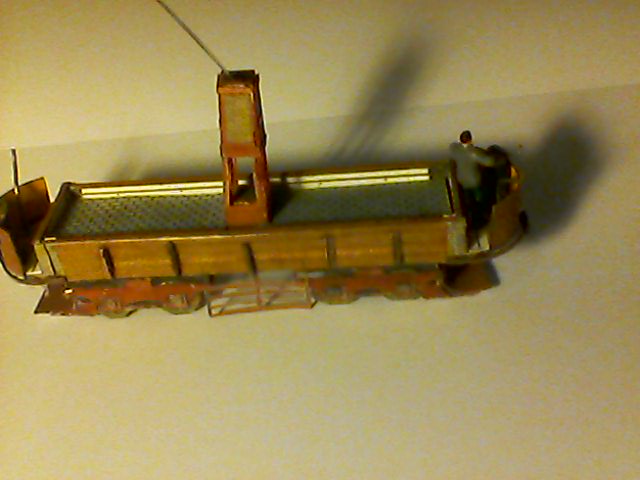
Luckily I wont be able to use this one but it allows me to see what the possibilities and problems are.
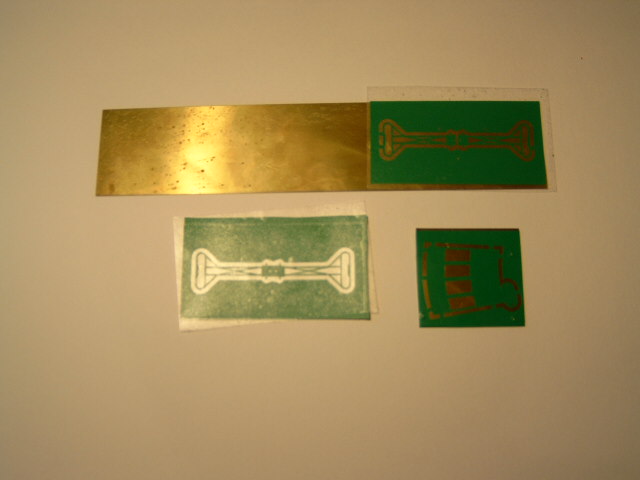
So I printed out and cut the stencils and learned several things in the process.
First, at 4mm sizes you need to figure out how narrow you can make things with this process. It's not as delicate as the photographic process and at my present level of skill a millimetre is about as thin as I can get clean strips. A bit more thought in the stencil design and I can certainly manage less than that.
Next you have to allow for the transfer of the vinyl to the brass sheet. This can be tricky as the vinyl is sticky backed. Below you can see a cut bow collector stencil ready to be transferred to the brass for etching. The white sheet behind it is the vinyl backing and the one on the brass has already been transferred. This is where the alignment holes come into play as you can set the first piece slightly out and still line up the stencils. The vinyl on the front, the lower sheet, is stuck to the transfer sheet ready to transfer to the other side of the brass plate which is why you can see the white backing sheet at an angle. The smaller sheet is the tower already transferred on both sides of the brass with the transfer sheet removed.
The next lesson is make certain that the metal is absolutely clean. I used industrial alcohol and crocus paper. The template IS adhesive but it will only stick properly ONCE.
Now you need to flatten the whole thing and carefully peel of the transfer sheet so keep a pointed implement handy to stop the wrong bits lifting up as you transfer to the metal.
You should have already “weeded†the transfer, that is removed all the bits you want to be removed from the etching, so that you are left with the actual component in vinyl with a gap all around on the front and only the tags holding the component in the fret left on the back or underside. The underside of the bow collector is the one already on the brass sheet.
I find the weeding the most difficult simply because it is confusing trying to work out which bits remain and which bit get removed and you need to get it right as you can't stick them back on.
Finally get the thickness and type of metal right for the job. These components were from old imperial stock of “Half Hard†brass and were 0.003 inch making them wrong on both counts. You need soft, unworked or undrawn, brass at 0.015 inch for best results.
However I did get my components just not as good as I want.
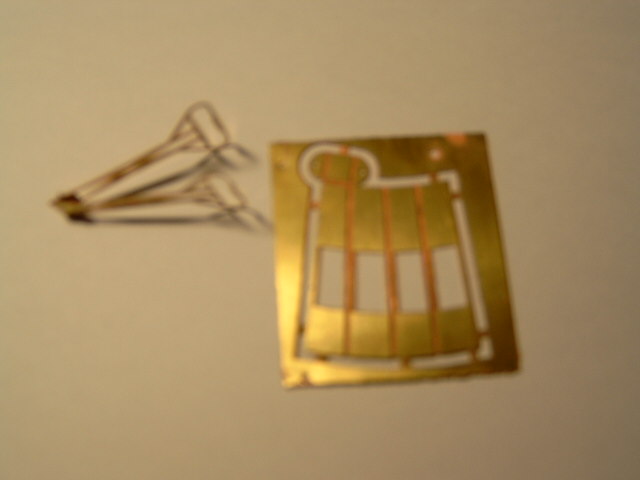
So it looks like I'll need to have another go.
Just in case your wondering the copper colour is the result of the etchant bringing out the copper used in making the brass.
Regards
Jim
Because, except in some unfortunate circumstances, trains did not run on town centre streets
1 guest and 0 members have just viewed this.