Puddles
Posted
#233401
(In Topic #12793)
Full Member
Making puddles
Puddles do not appear to be modelled very often on model railways. I thought I would have a go at 'making a puddle' (not very difficult when you reach a certain age and the bladder is not what it used to be!) The method described is not mine, I merely delved into the superb book 'Modelling Grassland and Landscape Detailing' (Wild Swan Publications Ltd.) by Gordon Gravett, to whom any credit must be given. On my home layout I am making a small farmyard where my windmill will be situated (previously described here):
This farmyard is raised above the surrounding ground level, being built upon a platform of greyboard. I had previously painted it an earth colour but decided that it looked too flat and needed some muddy tracks and a puddle or two. Eventually, a tractor might be situated amongst the mud. Using ready mixed plaster (I obtained mine from Wickes) I made a rough track entering the yard from where a gate will eventually be situated. I then painted it with the earth colour.
Now for the puddle. The surface of the puddle is made from a glass microscope slide cover. You could use clear plastic but the beauty of glass is that it will not be scratched and reflects in a way which plastic does not. I bought this box of slide covers quite cheaply online…


As you can see this particular type are only 18mm x 18mm and there are 200 of the beauties for under £5. They are very thin being about 20 thou thick. Start by selecting a slide cover and paint one side to suit the surrounding terrain. Enamel or acrylic paints will cover the glass best. When dry, this painted side will represent the underside, the unpainted side being the reflective surface of the puddle.
Next, draw a square on the ground surface just large enough to take the glass slide. Remove the ground surface inside the square just deep enough to allow the glass slide to sit level with the surrounding area. Now glue the glass slide, painted side down, into the recess which you have created. Using the ready mixed plaster, build up the land surface around and onto the glass slide, making sure you conceal the edges. When dry paint the plaster with your earth colour, taking care not to get any paint onto the glass surface of the puddle. Once everything is dry, paint the whole area, excluding the puddle surface) with gloss varnish to give the impression of wet mud. I used acrylic gloss varnish as it dries quickly.
A general view of the area. Some of the varnish is still wet which gives the white appearance. This will disappear when the varnish is dry…
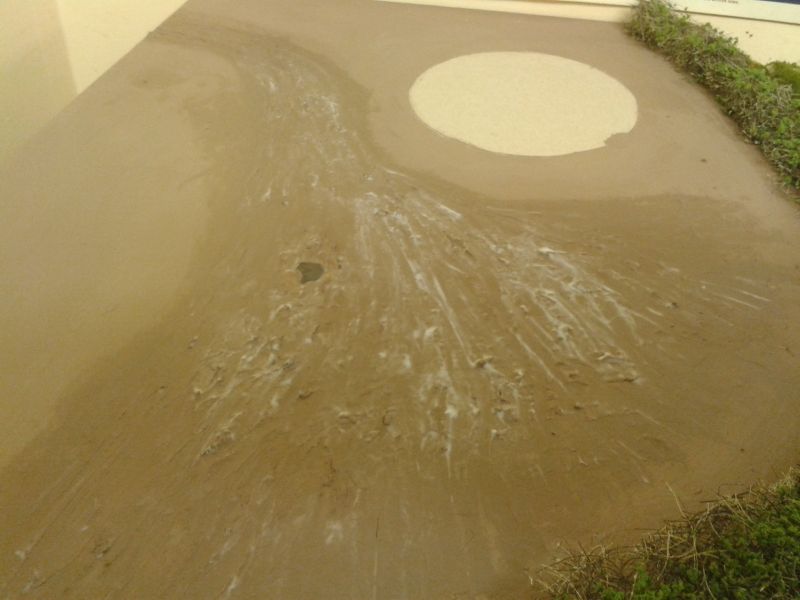
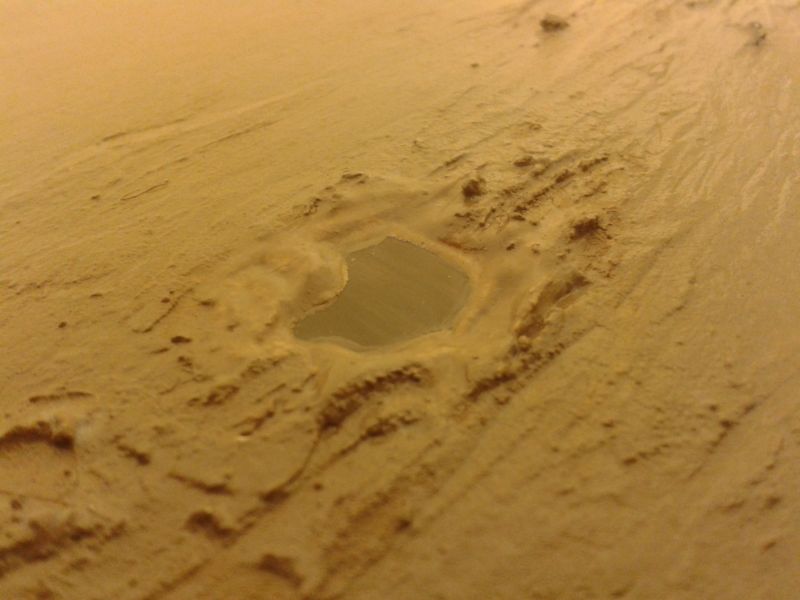
The windmill will eventually be sighted on the unpainted circle. Here is a close-up of the finished puddle…
For a fuller account of the methods used and for lots of other interesting ideas, I can offer no better advice than to recommend that you buy Gordon Gravett's book as detailed above.
Terry

Posted

Inactive Member
Thanks. :thumbs
Max
Port Elderley
Port Elderley
Posted
Full Member
You are welcome Max, but as I said Gordon Gravett deserves the praise.
Terry
Posted

Site staff
Regards
Alan
Born beside the mighty GWR.
Alan
Born beside the mighty GWR.
Posted

Full Member
Nice reminder that traditional materials work well. There are bigger ones.
How do the cover slips compare to a couple of coats of gloss acrylic (that's what I normally use).
Nigel
©Nigel C. Phillips
Posted
Full Member
Thanks Alan.
Nigel, it is not apparent in the photos but the real glass gives you a reflective surface which varnish simply cannot achieve. The surface is also dead flat.
Terry
 Last edit: by col.stephens
Posted

Full Member
I like the idea very much.
Remembering that people in Britain moan about there being only a couple of weeks of summer every year means that most of the time there should be puddles on the ground – and these should be in peoples layouts.
And for your leftover glass – I'm thinking GREENHOUSE!
Gordon :-)
Posted

Full Member
Good idea to use the glass slide covers. The method you have used is the same as that we teach at the Pendon Scenic workshops and I can vouch as one of the instructors that it works. Gordon used to run these workshops until a couple of years ago before he had to cut down on his external modelling activities. We generally use the clear plastic from CD cases making sure it isn't scratched before cutting it down to size. They are usually quite tough and reflective and don't tend to shatter if you drop something on them, which glass of course has the potential to do.
I note that you suggest to paint the underside of the plastic (or glass) with the same earth colour beforehand which we also do, but we also mix the plaster using the paint as a wetting agent rather than mix with water and paint afterwards, any subsequent chips in the plaster do not then show. We also mix a little pva glue into the plaster mix to help avoid shrinkage cracks when drying which can be a problem if the plaster is thickly applied. We tend to use household emulsions for colouring the plaster rather than modelling acrylics or enamels, primarily because they are much cheaper if you have a fairly large area to cover and they do the job just as well.
I endorse your recommendation to buy Gordon's book, it is excellent. I urge everyone to have a go at what Terry has described, it can be very satisfying and is a lot easier than you might think. But, if you need some help and guidance to gain the confidence to have a go at these kind of techniques then have a look at the adult workshops available on the Pendon website
Well done Terry.
Posted
Full Member
Thank you Gordon and Nick. Nice tip about adding paint to the plaster mix. The earth colour in the photos is actually from a large tub of household emulsion but this does not cover the glass very well, thus the tip about using enamel or acrylic paint on the underside of the glass. I use ready mixed plaster from a small tub bought at Wickes (other brands are available) and have had no cracks appearing at all.
Terry
Posted
Full Member
Cheap cover slips then (there are many types, good ones are optimised for light transmission and immersion oil use, minimized for reflection).
Nigel
©Nigel C. Phillips
1 guest and 0 members have just viewed this.