First Attempt
Posted
#48194
(In Topic #2775)
Guest user


The following is a brief description of what I have done …..
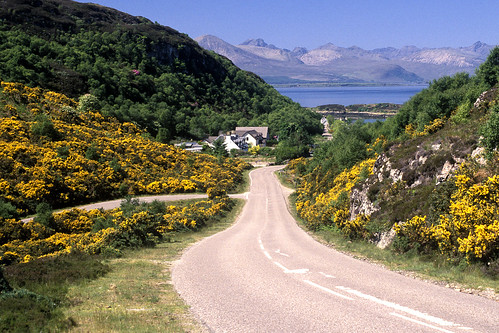
Taking Jeff's advice I mixed some brown colour with the tile cement that I was going to use (Jeff had suggested emulsion but I used poster paint as an alternative — both water based) and went for it slapping it on with gay abandon doing it in two sections the upper and lower. This was the first mistake as I know that one must build it up in layers to allow it to dry but unfortunately the exuberance of youth took over. Needless to say it took about a week for each "slap" to go off.
While slapping on the lower level I pressed some bits of rock into the cement, the rock being some hardcore left over form when the patio was laid last year.
Once it had all gone off I covered it in PVA and scattered Woodland Scenics grass over the whole area. I wanted to break up the area somewhat so I have tried to make some gorse bushes using Woodland Scenics clump, dipped it in yellow acrylic and attached to the hill
I also broke up some more of the hardcore (you can do a lot of damage with a lump hammer) and spread it around at the bottom … as yet not fixed permamently
The following is the result ……
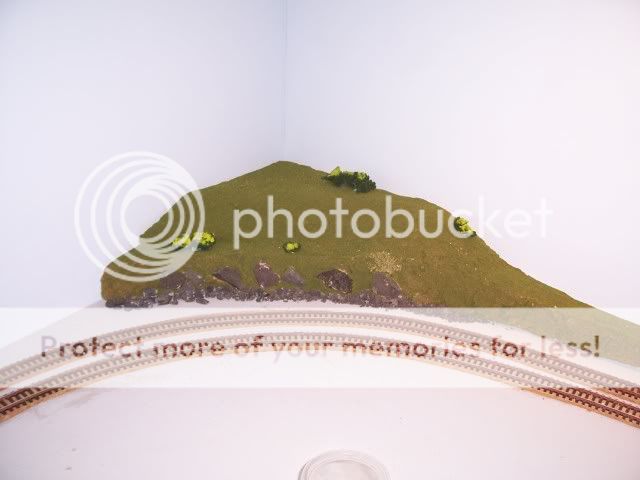
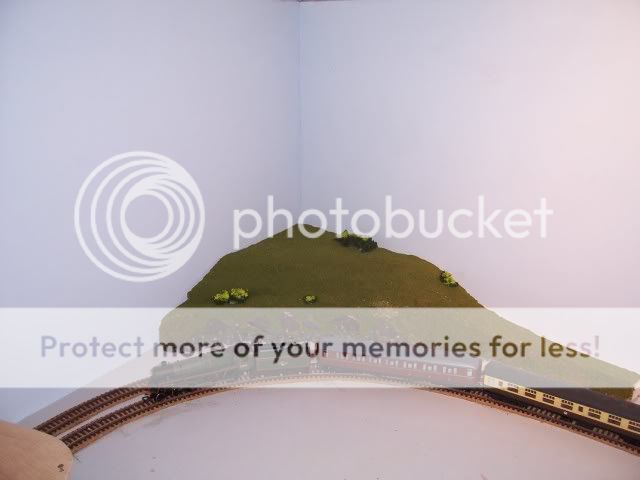

As a first attempt I am reasonably happy with it but really would appreciate critique from the those on the forum who are masters at the scenery.
All comments will be received in the manner they are given and if thought that I should go away and try again so be it … I have no qualms about starting again
I look forward to reading your responses
Happy Modelling
Matt
Posted

Full Member
 thumbs
Sorry I'm not what you asked for - I'm no "master scenery builder" but that certainly doesn't look like a first attempt and I'm sure those more qualified than me will tell you the same thing. Well done. :cheers
I'd add the odd bit of "clump" foliage to make a bush here or there to break up the grass, a tree at some stage and you're away.
'Petermac

Posted
Guest user
Perhaps some longer grasses and stuff around some of the boulders? I like the colour of the rocks though.
Posted

Full Member
I would say that looks pretty good Matt, a couple more clumps of grass and some sheep and you will be set :thumbs Nice touch with the stones
 Last edit: by Kevr
'Kev
Posted

Legacy Member
Posted
Legacy Member
reg
Posted

Inactive Member
Max
Port Elderley
Port Elderley
Posted

Full Member
Bang on for a first effort IMHO!:thumbs
Cheers,John.B.:pathead
Posted
Guest user
:doublethumb
 :cool:
Posted
Guest user
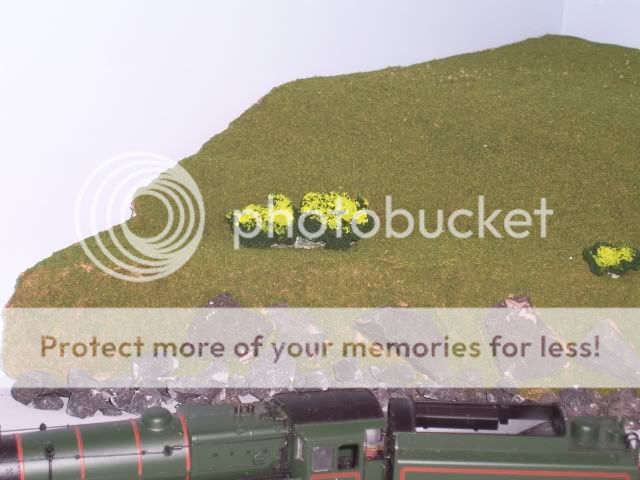
I really like the idea of having gorse - I wish I had some - but I agree with Bob about the yellow. Not that I've seen any for ages, but I've seen loads of photos and from them I'm gauging that it ought to be a bit darker than that, and with just a hint of orange in the mix - I'm not saying it should be orange! Also I think for modelling purposes the intensity of that colour needs to be subdued a bit.
Gorse
You may well have to start with a different yellow. It wouldn't be easy to alter the one you've used.
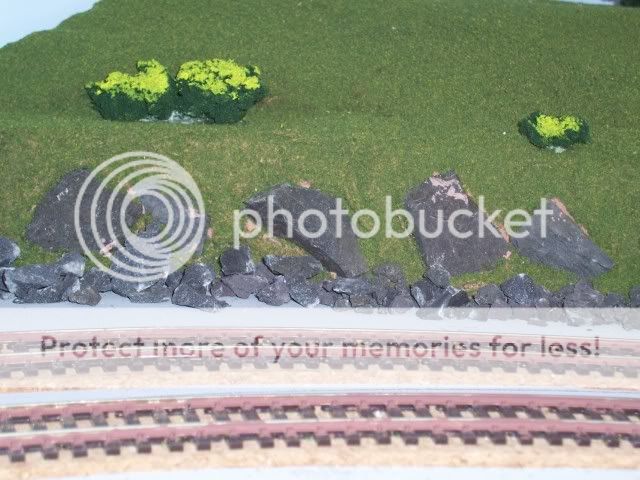
I reckon if you add some finer grade crumbled rock more like coarse sand and some very fine dusty stuff and scatter it in and around the others, as well as adopting the other suggestions you've received it will look very good.
Maybe some small pathways made by people or animals too, to break up the big area. I made some in my little cow paddock by repeatedly ramming a paintbrush handle [I think] through and along the ground. When I got through to the base it was the wrong colour so I had to paint it to suit.
Mike
Posted
Guest user
I think you have made an excellent first attempt and already your scenery looks a hell of a lot better than some I've seen :exclam
I like Mike's idea of adding some finer stuff to the small rocks ( / talus) at the bottom of your slope, you could also add some different scatter such as Woodland Scenics "Fine Turf - Earth", to give the lower slope the effect of a rough, almost bare scree. It needs to be "fused together" by one or two of these non-green materials that have been mentioned.
The other important addition to make is some differing height grasses and patches on your hillside. At the moment you could imagine that hillside having been cut twice a week all summer, so now you need some tufts, some long grass patches, some bare earth patches (as per my Woodland Scenics suggested earth above) make sure these additions are of slightly different shades of green to your initial scatter and the variation of tone and grass length will make a huge improvement for little effort.
Good work, now to add that little bit of extra "lift".
thumbs:thumbs
Posted

Inactive Member
One thing I found was that adding colour to the tile cement seemed to significantly lengthen its drying time and weaken its adhesion. I found it better to use the cement sparingly to stick the polystyrene former together and let that set. I then used ordinary finishing plaster which you can get in small bags from DIY stores adding in the required colour and a blob of PVA to keep it flexible. This mix dries quickly and is easy to work during the drying out period. It eventually dries hard and robust but can still be sanded, scraped and carved to introduce more detail as required.
For colouring my preference has been to use artists acrylics. A small amount of the intense colour goes a long way and of course there is a superb range of colours available. Also, the acrylic seem to give a plasticising effect to the plaster making it a creamy smooth consistency and again easier to work with.
Look forward to seeing further developments in your scenery.
Cheers
Mike
Happy Modelling,
Mike
Mike
Posted

Full Member
John
Life is just a bowl of cherries!
Posted
Guest user
I will look at redoing the gorse and take on the comments that it looks too much like a lawn and will apply some different coloured scatter and get myself some longer grass (going to Glenrothes MRC show on Sunday) for fiddling around the rocks etc.
I also propose to build a cairn (translation for non Celts available) and possibly some sort of ruin at the back corner, some sheep and maybe a path running across
Again thanks for your supportive comments
Happy Modelling
Matt
Posted
Legacy Member
Posted
Guest user
A really great start, I like the real stones at the base of the hill, that makes it look far more like the real thing, I agree that different heights of grass will help, for me you need to add height but this can be done by making bushes and or trees, all of which you would find by the lineside, and on a hill.
If this is something that you might like to try, I can show you some that I have done on Walnut End, but we all do these things different, and you will find a way thta suits you.
Posted

Full Member
Squueze about half an inch of orange out onto a saucer on one side and the yellow the other. Wet the 'sausages' with a drop of water on a brush until it turns to runny cream consistency, cleaning the sponge in between each colour. Don't worry if it runs down into the middle and makes a mixture, that's useful!
With a piece of damp torn sponge, take some orange cream and dab on, Allow to dry a little, then repeat over it with a dab of yellow cream.
You'll get there sooner than you think!
If you do it in the bottom of a small margarine tub or similar, you can put a bit of wet, screwed up kitchen roll in the tub, replace the lid and it will keep usable for days…..
The orange, mixed with Viridian will give exactly the colour of newly grown oak-tree leaves too, and with a cobalt blue a deep shade colour grey.
The yellow, mixed with the blue in various proportions will give a huge range of greens, so that you never need have a 'field' all the same colour all over!
Last edit: by Chubber
'You may share the labours of the great, but you will not share the spoil…' Aesop's Fables
"Beer is proof that God loves us and wants us to be happy" - Benjamin Franklin
In the land of the slap-dash and implausible, mediocrity is king
"Beer is proof that God loves us and wants us to be happy" - Benjamin Franklin
In the land of the slap-dash and implausible, mediocrity is king
Posted
Guest user
Mike
p.s. great suggestions though :doublethumb
1 guest and 0 members have just viewed this.