A tale of Three Rivers
Posted

Full Member
Experiments with 3 methods of modelling water
A bit of both Peter.The upper reaches of the rivers can be crystal clear, especially after the winter rain but, like any urban area I suppose, there are other areas that range from muddy green/brown estuaries to dried up littered creeks.
The Swan River, which runs through Perth, is reasonably healthy. There are still plenty of fish and water plants. In the tidal areas, the dolphins hunt for baby mullett in the shallows in season.
As someone said in another thread, the water colour is often influenced by the reflection of the sky or trees above it.
I think that the PVA has a place within our modelling tool box.
I suspect that when I mix it with water I'm contributing to the opaque quality of it when it dries, certainly, when I leave a blob of neat PVA on my paint pallet to dry it is much more transparent.
Although, nothing as good as the resin.
I too like the highland stream look but will continue exprimenting with tints of colour just to see what happens.
More results soon.
cheers

Posted
Guest user
The best thing that could happen to that particular hair style! Hunted to extinctionthe dolphins hunt for baby mullett

Over this side of the country the urban water courses are mostly in concrete troughs these days and sometimes barely a trickle. The larger creeks (rivers in UK English) are mostly quite healthy but not crystal clear while the Yarra which flows through the centre of Melbourne has always been known as a brown and muddy river.
In country areas the water courses are mostly very clear though too often are also devoid of any water
 .
.
Posted

Full Member
Jeff Lynn,
Amateur layabout, Professional Lurker, Thread hijacker extraordinaire
Amateur layabout, Professional Lurker, Thread hijacker extraordinaire
Posted
Full Member
Are we talking even colder temps Jeff? If so I pass on doing the testing!!! Cold I'm not keen on.
The thickness effects it, too thick a layer and it takes ages to dry.
However, from the experimentation I've done there is no point in making the layer thick.
Especially if you mix it with water, the water evapourates and the PVA flops, a lot like my sisters cakes used to do.
PVA, from my experimentation, is suited to either a thin layer over a painted and scenic riverbed or tinted, and again spread thinly to provide the surface of a river/lake/pond that is not meant to be crystal clear.
It's also good if you want to show ripples or fast moving white water.
Happy to have others experiences included here if they differ.
cheers
 Last edit: by Marty
Posted
Guest user
On the last picture, i like the top one, but im confused to what that is. I was thinking it was pva, but then reading the text, it may be the varnish. Im not sure.
Posted
Full Member
The top one is a two pack resin.
You can buy it in Bunnings or Spotlight. It doesn't smell but make sure you have good ventilation if you use it.
The pack of two 250mm bottles costs about $13 dollars and is sold as a Furniture sealer.
Mix equal parts of part A and part B together, mix in some acrylic paint to tint if you want and pour into your river/lake etc.
Have a toothpick handy to spread the resin evenly where it meets the bank or bits in the river.
cheers
Posted
Full Member
Good clear weather this weekend so I should be able to finish this off.
PVA - the final tests
The blue tint came out like this…
Which was a bit too blue so a green tint was next.
This one was mixed with a fair amount of water, maybe 80 water/ 20 glue.
It poured in beautifully and came right up under the banks, etc. I thought, if it dries there it's going to great.
No such luck. The high tide can be clearly seen on the rear plastic dam wall… and the colour!!!

So… since there was still plenty of depth in the river to play with an attempt was made to cover over the god awful green with some river bed mud and sandy river banks. The green "slime" is still visible on the brick wall and the pole and I quite like that.
I think I'm going to use resin to finish it off.
Posted
Guest user
Ill just have to save up some money for the high quality secnic stuff, instead of that static grass i have been applying, in the non static way.
I was going to be removing the front tunnel entrance tommrow on my railway, first real bit of work, well really any work in months, and ill be seeing if i can fit a lake anywhere, or if i should wait first.
Guess using that stuff in a non ventalated area such a bedroom under my tall bed wouldent be to good would it. Would a fan and open windows work perhaps?
Posted
Guest user
would be great as a seaside scenario,makes a good sea colour.
 thumbs
 lol::cool:
Posted
Guest user
Mike
Posted
Full Member
I can't remember whether I have mentioned this before, but when I did my seaside diorama many years ago, I wanted the sea to be brown like it was stirring up the mud on the shingle beach (shades of Brighton) and also with a bit of algae and/or seaweed effect. I used oil-based Estapol with a little greenish water colour mixed in at the beach edges; of course, they didn't mix and this gave me precisely the effect I was looking for, with the sediment floating in clumps at or near the surface of the Estapol "water". It was an experiment, but it worked for me!

Jeff Lynn,
Amateur layabout, Professional Lurker, Thread hijacker extraordinaire
Amateur layabout, Professional Lurker, Thread hijacker extraordinaire
Posted
Full Member
Posted
Full Member
Nearly 4 years ago…. Where does the time go?
Anyway photos to close off this topic…
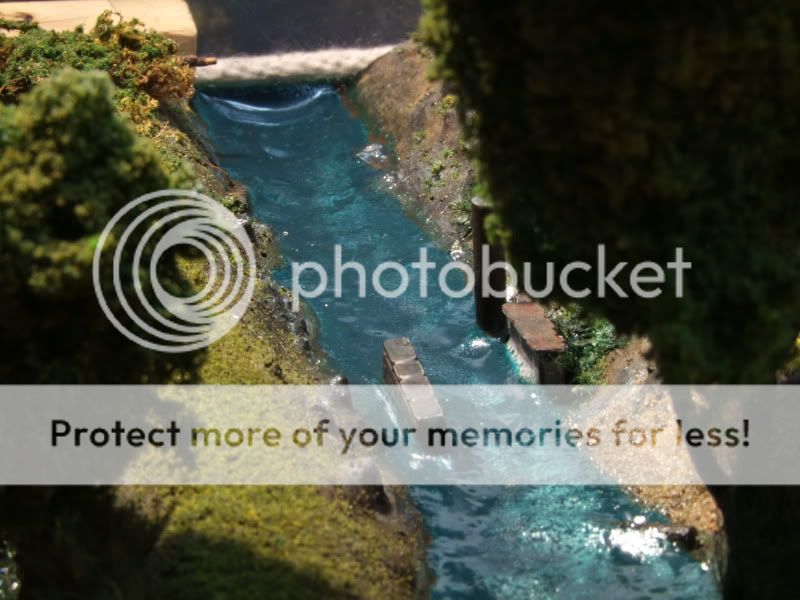
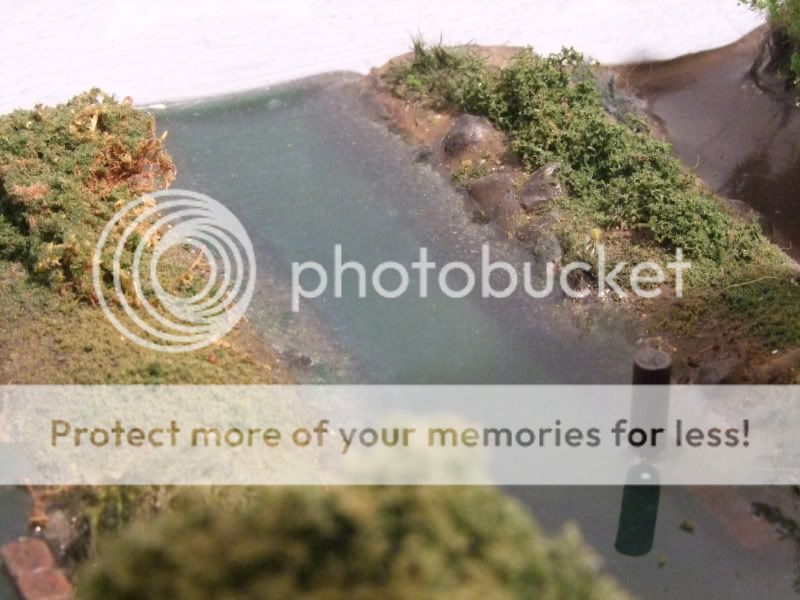
First up, the final state of the resin only river. Set hard as a nail, flat as a polished mirror and after 4 years all I had to do was blow the dust off.
You can see, by the cross section at the end, that the top two layers were tinted with acrylics, the lower blue and the upper green.
From above the depth and colour worked really well, the submerged log is visible but you can no longer see the bottom except in the shallows near the riverbank. Very little meniscus, a pointy cocktail stick was used all around the banks and submerged objects to blend the resin in. There is a little around the brick bridge abutment.

Great reflections too…
More to follow…
Posted
Full Member
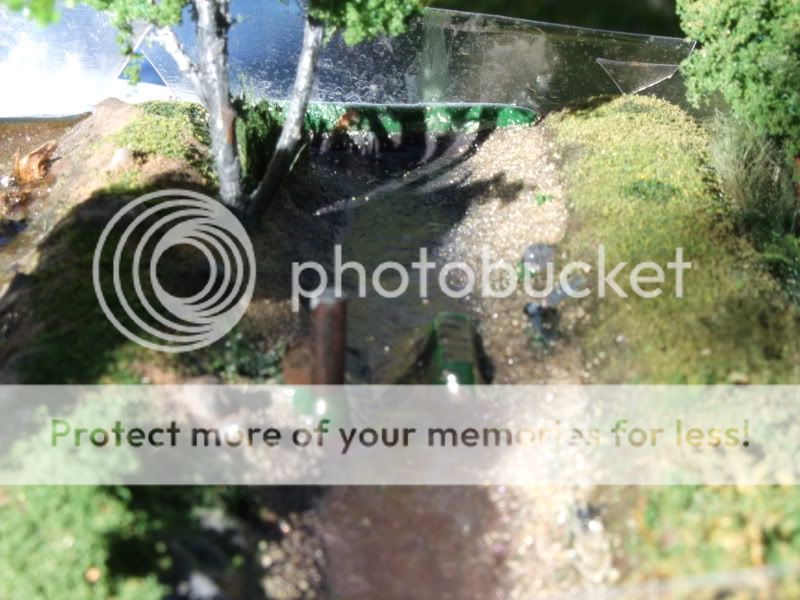
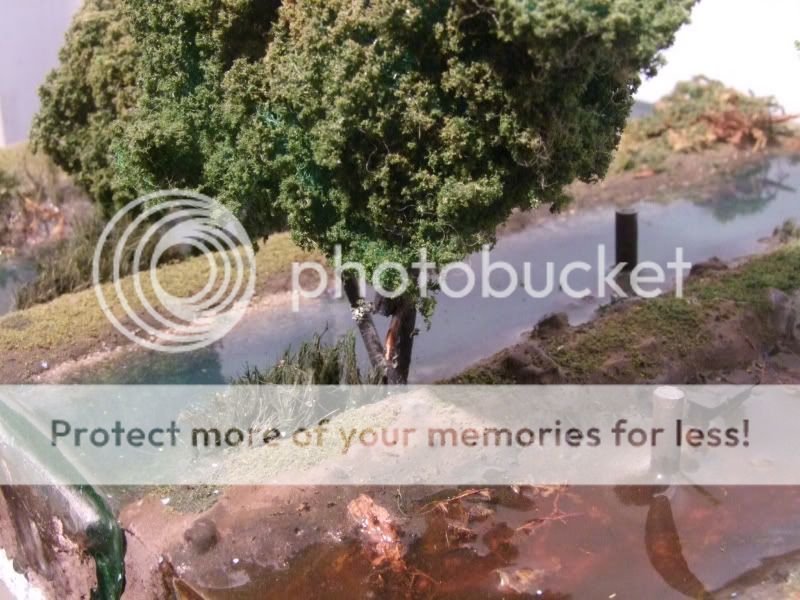
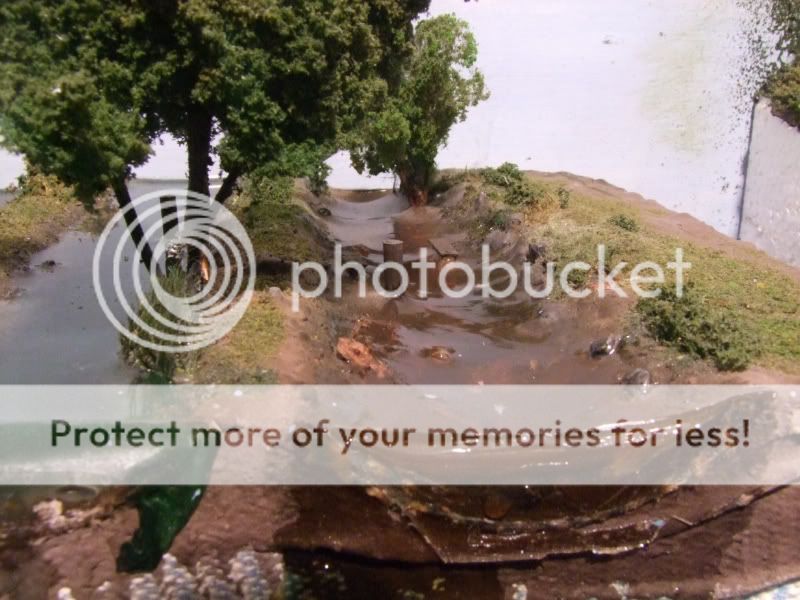
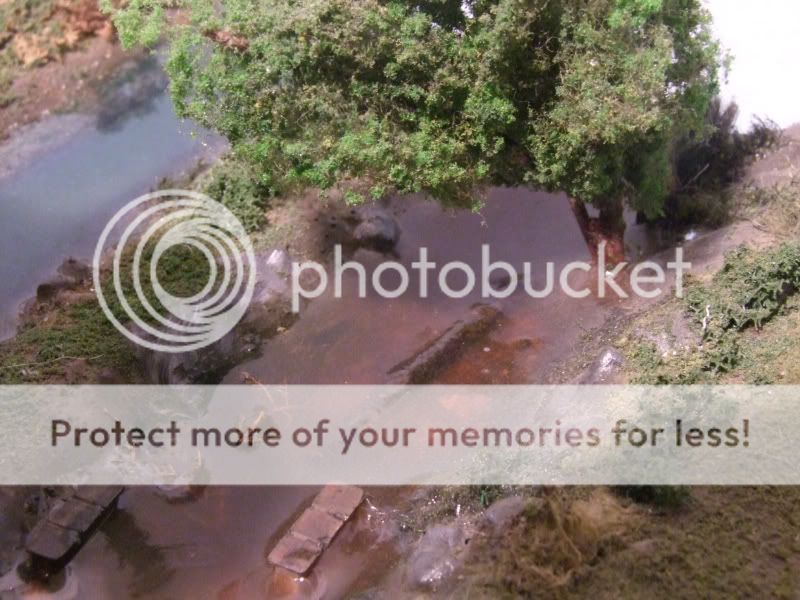
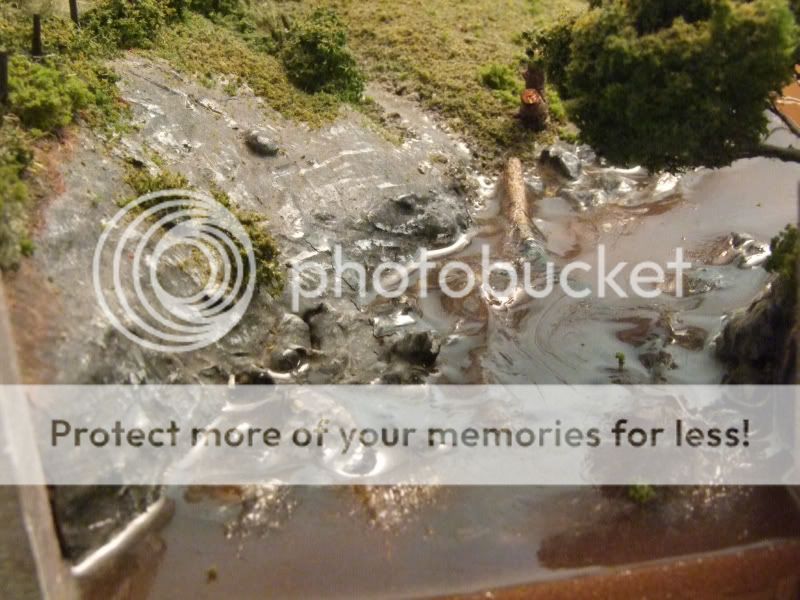
As discussed, trying to fill the creek with PVA was a disaster so the river was reborn with a new mud bed and sand banks over the PVA. Then a lightly green tinted resin was poured.
This is the final result, the sand along the edges showing up particularly well but the same mill pond, still early morning finish.

Once again the cross section at the end shows it's history. This one also has a wicked curve up where the dam had been. I'm not sure how to overcome that.
You might be able to see the sandy bottom in this one below? The final version wasn't that deep.

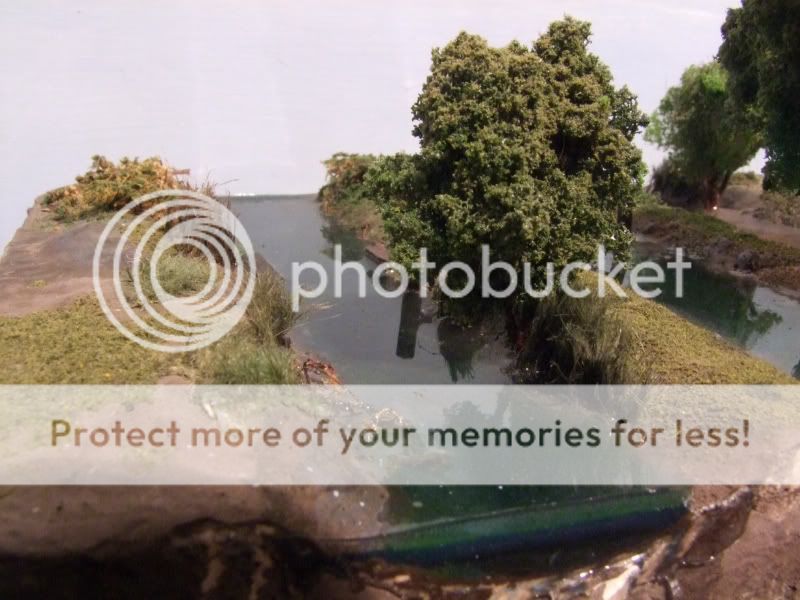
And, leading onto the varnish river, a photo showing comparisons.
More to follow…
Last edit: by Marty
Posted
Full Member
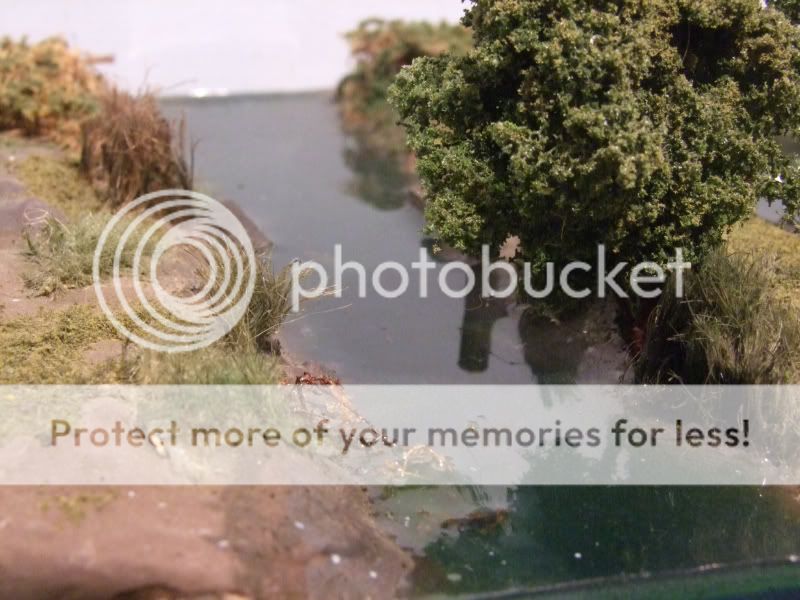
Early light and shallow layers weren't bad.
Deep water it didn't do that well.
Although the overhead view isn't too bad.
And whatever you do don't let it get into contact with the polystyrene! It just eats it away… How do I know this?
Posted
Full Member
For me the two pack resin won for Pentrecourt Halt although with a bit too much brown tint the river is obviously in flood and full of mud.
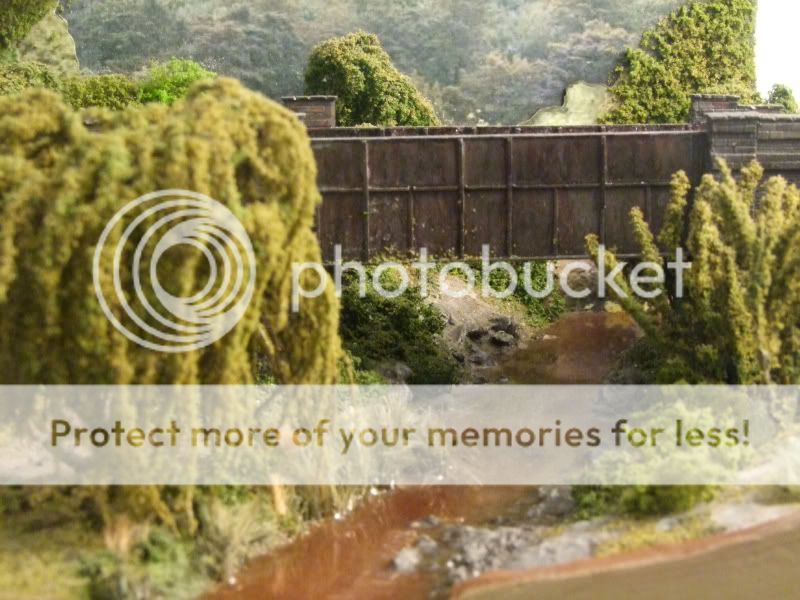
Not quite what I'd envisaged but for a first go it came out OK I thought.

By poking the drying resin a few ripples and eddies were created too.
This is what it looks like before dusting! But the cross section does show the tint well.
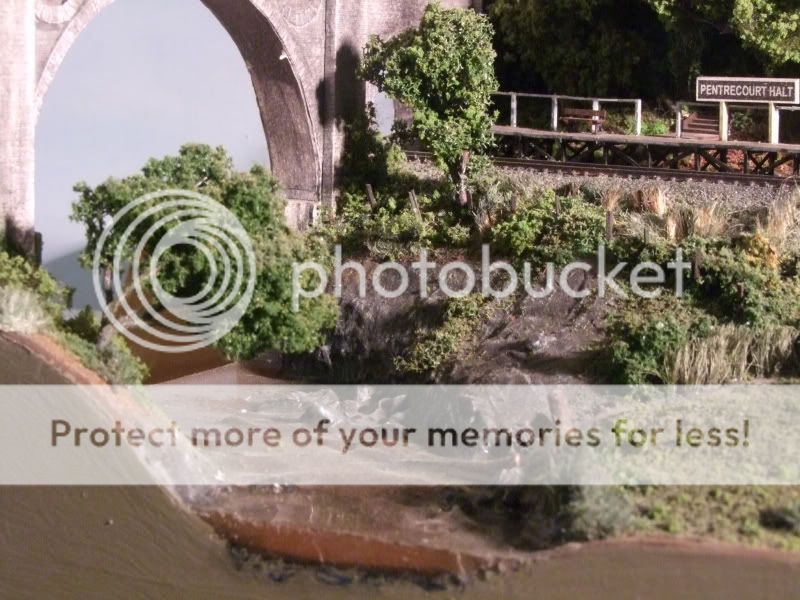
And a couple of gratuitous loco shots 'cause we can… 1472 light engine approaching Pentrecourt Halt on the downhill run to Newcastle Emlyn.


That'll do… Give it a go, it's great fun.
Marty
Last edit: by Marty
Posted

Banned
Cheers, Gary.
Posted

Inactive Member
A great "how-to", thanks Marty.
Ken
'It don't mean a thing if it ain't got that Swing'
Posted

Inactive Member
Max
Port Elderley
Port Elderley
Posted

Full Member
Argh…….
Tempus ruddy fugit, wot!
Doug
'You may share the labours of the great, but you will not share the spoil…' Aesop's Fables
"Beer is proof that God loves us and wants us to be happy" - Benjamin Franklin
In the land of the slap-dash and implausible, mediocrity is king
"Beer is proof that God loves us and wants us to be happy" - Benjamin Franklin
In the land of the slap-dash and implausible, mediocrity is king
1 guest and 0 members have just viewed this.