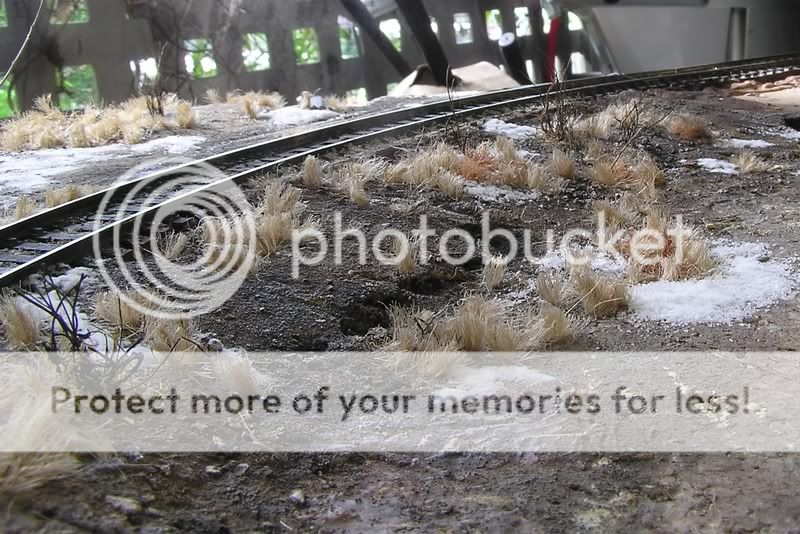
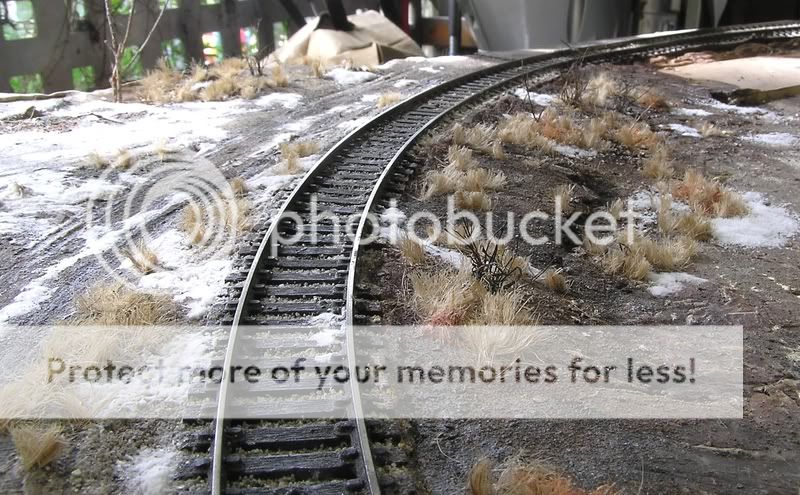
Making a low embankment
Posted
Guest user
Posted
Guest user
Hang on Max, let him finish this thread off first and then do one for Petermac and I on detailing a river estuary :exclam:exclamA likely story! Off with his head!
Posted

Full Member
[user=269]MaxSouthOz[/user] wrote:Hang on Max, let him finish this thread off first and then do one for Petermac and I on detailing a river estuary :exclam:exclamA likely story! Off with his head!

'Petermac

Posted
Guest user
Mike
Posted
Full Member

Posted
Guest user
Mike
Posted

Full Member
Do you find it easier to paint (and model) this season of the year, than say a summer scene? You are sure good at it.
That one photo you had of all the colors slightly mixed on your pallet, I would have thought that you hadn't finished mixing it yet, I never would have thought to stop at that point and start painting.
Wayne
Posted
Guest user
As for colour mixing, it's a very good idea to keep your mixes "loose" when doing the ground. Its colours and shades [lights and darks] can vary so much. It's one way to make everyday scenery that we take for granted interesting.
Sometimes a colour that's just too strong gets painted on but with acrylics it's the easiest thing in the world to plonk some other colour on top to kill it a bit, and it all adds to the richness.
That's not to say it adds to the bulk, because it's vital to keep the paint thin and diluted. Keeping it thin makes it mostly transparent [to varying degrees depending on the pigments used] and being transparent it is influenced by colours beneath.You want to be looking at soil and rocks that are coloured in a certain way - and NOT to be looking at paint. These washes are more like stains. This gets us into tricky areas such as whether acrylics are truly transparent in the first place! *sigh* I think for our modelling purposes it's sufficient to think of them as transparent when they're diluted enough.
Be aware too that things will darken with each subsequent transparent wash. On occasions when things get too dark and heavy it becomes necessary to add semi opaque to opaque paint to salvage things.
Opaque lights, [i.e. those with white added, or merely thicker paint] both dry-brushed and "spotted" onto individual rocks, are kept to a minimum and even they are painted as thinly as possible so that they show up without looking caked-on.
To assist in keeping the paint thin, thus avoiding the caked-on look, it's necessary to keep wetting the target area with clean water, and you also must be prepared to wash more water over it if, after applying the paint, it's too thick or if it is too light or too dark. It pays to have some paper towel very close at hand too to mop things back a bit before they dry.
I seem to have wandered off a bit here, but I hope some of this is helpful.
Mike
Posted

Legacy Member
Posted

Full Member
Comparing that first picture with the putty with the last one with the grasses…………………genius!
I see you do it,and I read HOW you do it…..and still I dunno how you do it?!!!
Top job,sir!
Cheers,John.B.
Posted
Full Member
Wayne
Posted

Inactive Member
The photos look great. Good job
Craig
Craig SR
1 guest and 0 members have just viewed this.