The art of compromise.
Posted
Full Member
Finally gettiing out of my system.
Anyway, enough of this nonsense. To the photos…
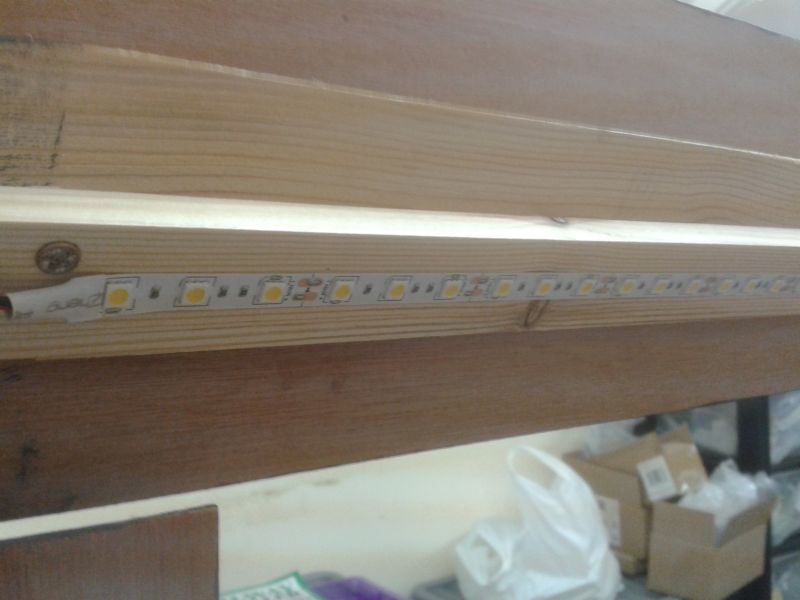
As you can see in the photo above, I cut the LED strip at the layout centre point as the pelmet divides in two for transporting. The LED strip was easily re-connected with soldered wires, these being joined together with chocolate block connectors (so useful for all kinds of wiring jobs on the layout).

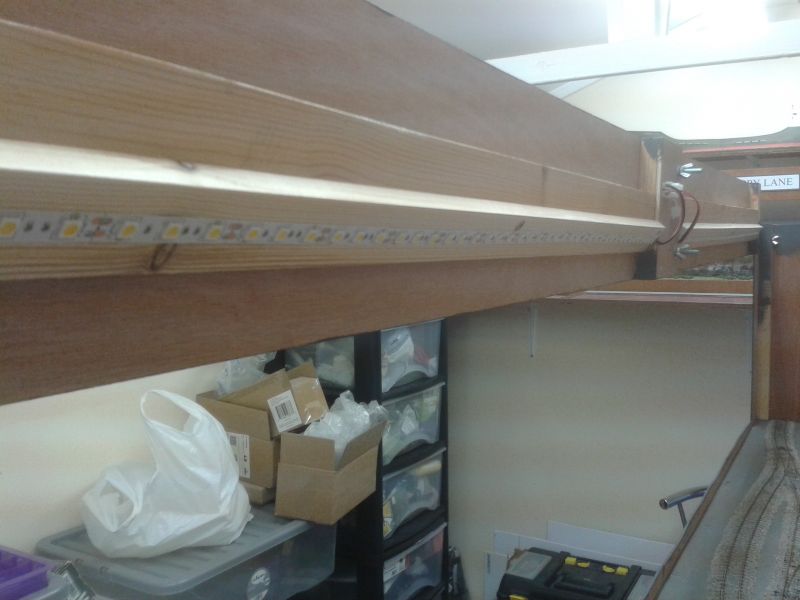
And finally, the photo above shows the layout lit with the LED lighting, the shed lights being turned off. (Taken about 1pm today. The shed windows are behind the layout).
More soon.
Terry

Posted
Full Member
Best wishes,
Terry
 Last edit: by col.stephens
Posted
Full Member
Well, the Southern station building is now finished. If you remember, back in post 7, I posted a photo of the Scalescenes' small station building in London Midland red and then decided to model the Southern Railway instead following the release of Hornby's Terrier. Herewith a couple of photos of the finished building. Additions to the basic kit are plastic downpipes, white-metal chimney and card valance. The posters and signs come with this excellent Scalescenes' kit.


More soon.
Terry
Last edit: by col.stephens
Posted
Full Member
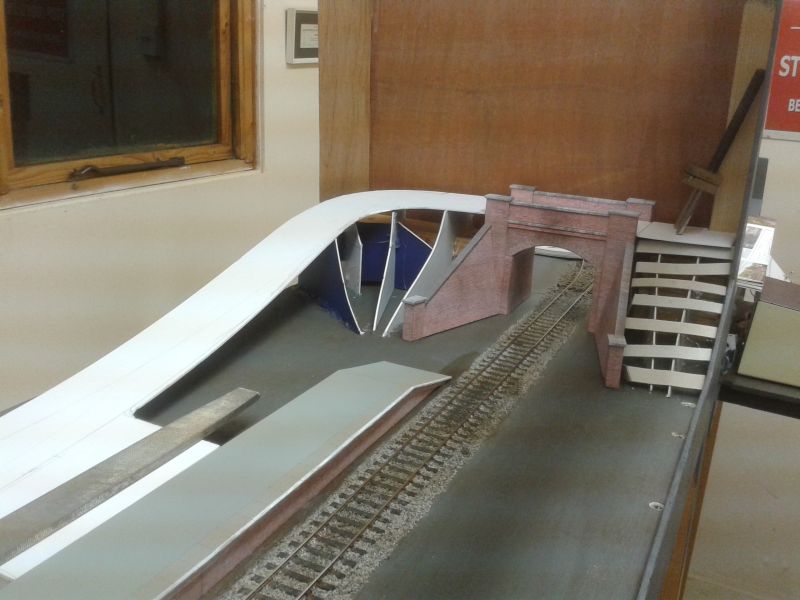
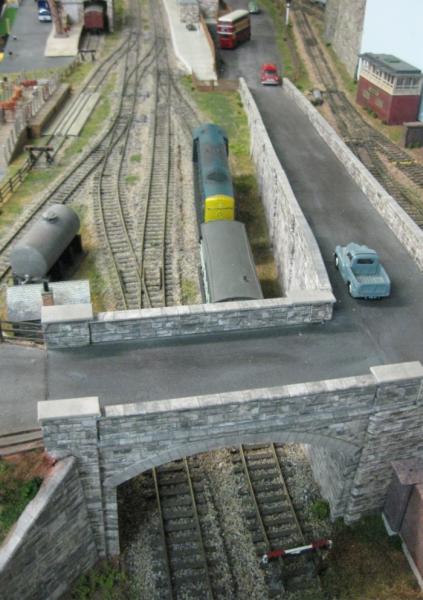
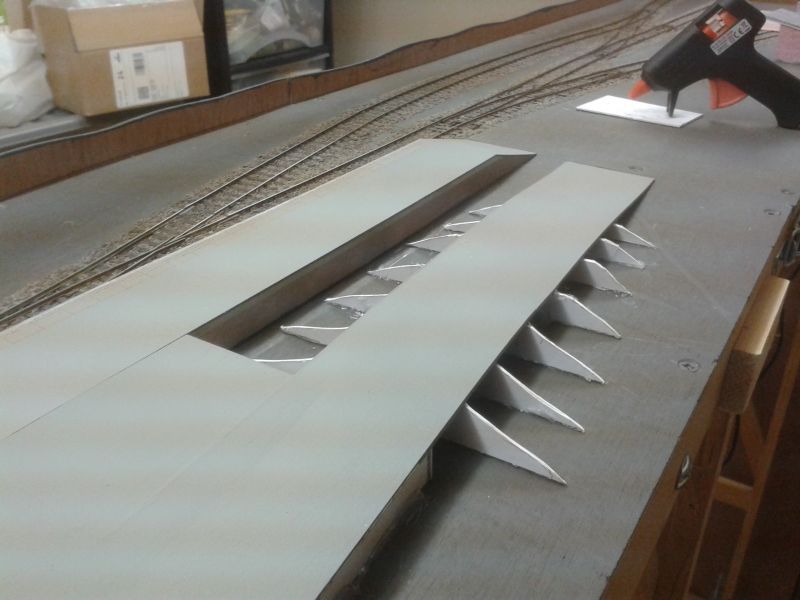
The time has come to make a start on the scenery. The road, previously cut from mounting board, dictates the shape of the land on the right-hand end of the layout. It passes over the bridge, this being the entrance to the fiddle yard, and makes an sharp turn to the left and descends steeply to the station building and then into the goods yard. Of necessity there will be a steep embankment down towards the trackbed. The photo shows the first of the supports for the road. Neither the bridge or the road are fixed down yet. I am using a hot glue gun, which is certainly speeding up construction.
Re the white line on the platform edge. Firstly, the ramps were not usually painted, unlike mine. Secondly, as I have decided to set the layout further back in time to the Southern Railway circa 1936, not BR circa late 1950's, as originally envisaged, the white line may no longer be appropriate. There seems to be a belief amongst modellers that the white line first appeared during the Second World War to help passengers during the blackout. This is not strictly true. Certainly during the war the practice appears to have become commonplace. However, there is photographic evidence available of some platform edges being painted long before. Coincidentally, whilst reading the April 2019 copy of Backtrack yesterday, on page 200 there is a photo of the strangely named Trench Crossing Halt on the branch from Wellington to Newport and Stafford, dated 1927. This photo clearly shows a white line on the platform edge. Clear evidence that the practice existed before the war. The platform ramp is not painted.
I need to do some research to ascertain what was the approach of the Southern Railway to painting platform edges circa 1936.
More soon,
Terry
Last edit: by col.stephens
Posted

Full Member
Sarsden Halt had white lines on the platform in what looks like 1910-1920 from the uniforms and age of the staff.
Nigel
©Nigel C. Phillips
Posted

Full Member
Barry
Shed dweller, Softie Southerner and Meglomaniac
Posted
Full Member
Best Wishes,
Terry
Posted

Full Member
Last edit: by Passed Driver
Staying on the thread Kevin.
Posted
Full Member
Thanks Kevin.
Measure twice, cut once, goes the saying. Unfortunately, when cutting out the station forecourt area from card, I didn't measure at all! The result was that there was insufficient card abutting the platform on which to stand the station building. I then wasted time having to add an extra piece of card, so…

I did what I should have done in the first instance and either measured the station building or took it down to the shed and offer it up against the card before cutting out. Anyway, here's proof that the station actually fits the allotted space. The observant amongst you will notice that this is not the actual building which is going to be used for this layout. It is a spare.

Jobs completed this evening: 1) the white area of card painted with an undercoat prior to spraying with Humbrol Grey No.64; 2) glue applied to the underside of the bridge and same placed in position with weights thereon.
More soon.
Terry
Last edit: by col.stephens
Posted
Full Member
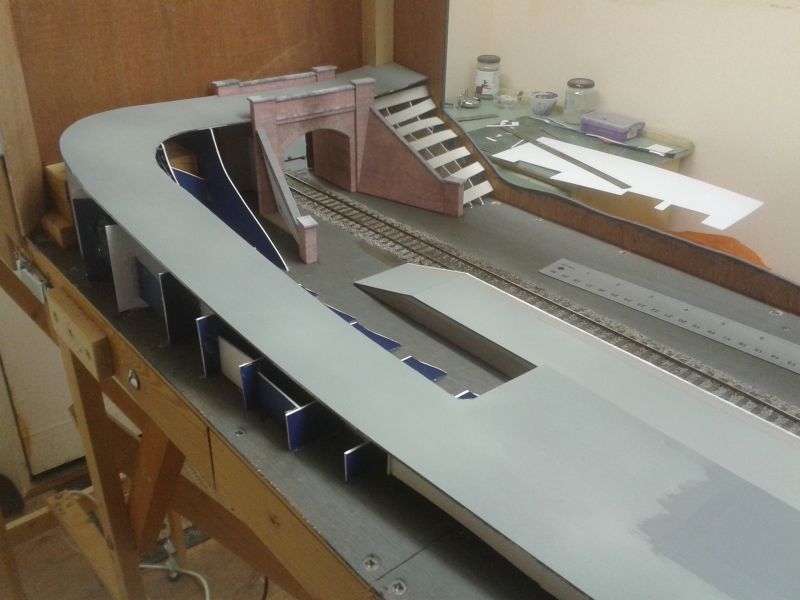
Today I am singing the praises of the humble glue gun. I have always been of the 'stick it with PVA and leave it overnight' school of thought. However, I recently obtained a £5 mini-glue gun from Hobbycraft and what a difference it makes to construction time. I spent a short period this afternoon gluing in place the remaining supports for the station approach road. I may have to make some minor changes to accommodate the grass embankment, but the framework is in place…

This picture shows the road laid in place, not glued down yet, to give an idea as to how it will look…
More soon.
Terry
Posted

Site staff
Ron
NCE DCC ; 00 scale UK outline.
NCE DCC ; 00 scale UK outline.
Posted
Full Member
Regards,
Terry
Last edit: by col.stephens
Posted
Full Member
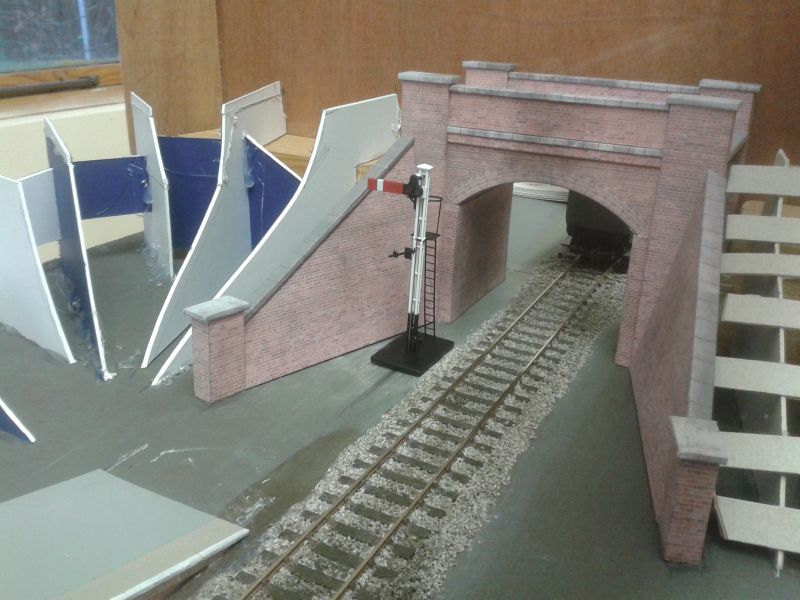
The last job achieved last night was to apply PVA to the underside of the platform and fix it in place under suitable weights. It dawned on me that, before too much scenery was added, provision needed to be made for the eventual installation of the starter signal. This will be one of Dapol's superb working signals which will be wired up to the switch previously installed on the control panel. It was a simple job to drill a 14mm hole through the baseboard at the appropriate place just before the bridge…
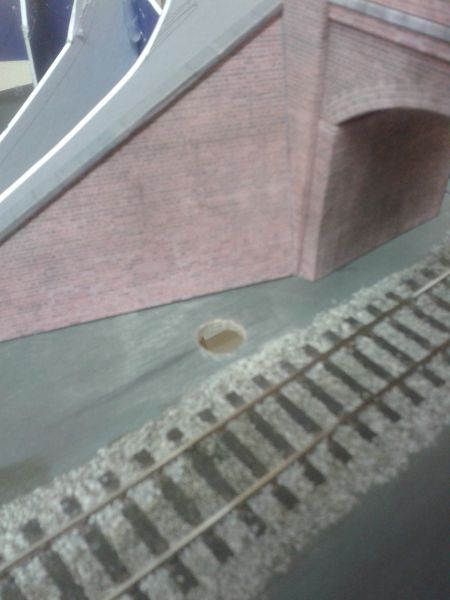
Here's a flavour as to how the signal will look when in place…
Last job this evening was to glue the card supports in place under the road as it meets the entrance to the goods yard…
More soon.
Terry
Last edit: by col.stephens
Posted
Full Member

Terry
Posted

Full Member
I have had a hot glue gun for years - bought for work - and also thought I'd try it on the railway. Maybe it's to do with the type of glue used but I found that, whilst it stuck sufficiently to hold bits in place, it didn't really "bond" so joints cracked very easily. When you think about how glues work, PVA "soaks" into the material then sets - rather like a weld whereas hot glue is not only too thick but sets too quickly to soak in. The result, in my experience, a weak joint, "wedged" by the glue blobs rather than truly glued. As I said, it could depend on the type of glue used.
Regarding the white platform edges, I'd certainly go with them. I think you're right in that the practice became commonplace during WW2 for obvious reasons. To answer Kevin's comment about carrot-eating bomber pilots, the rails themselves were the guiding light Kevin. Look at any moon-lit aerial photo of railways and the rails shine like strip lights. The platform edges, although white, didn't shine. That's why a clear full moon was called a "bombers moon";
'Petermac
Posted
Full Member
Nigel
©Nigel C. Phillips
Posted
Full Member
'Petermac
Posted
Full Member
Hello Nigel. Interesting comment re the hot glue not being suitable for use on foamboard. Thanks for that.
Regards to all.
Terry
Posted
Full Member
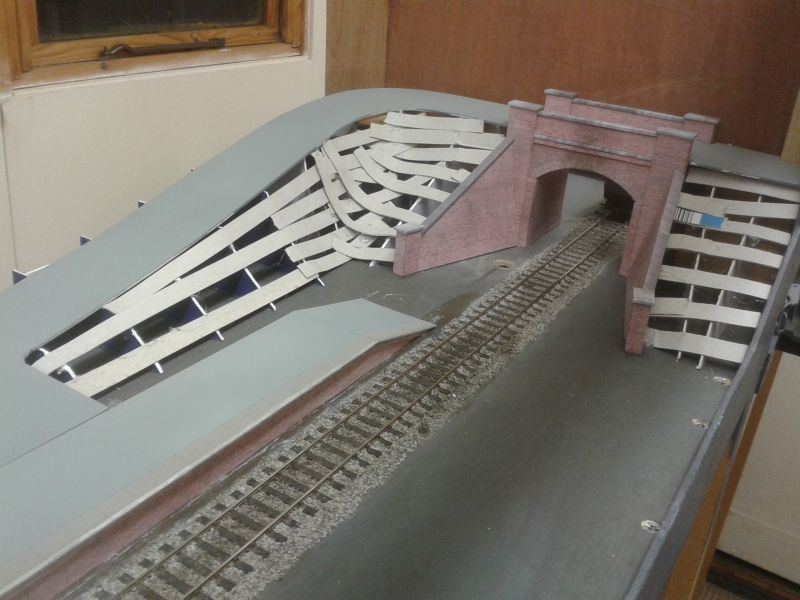
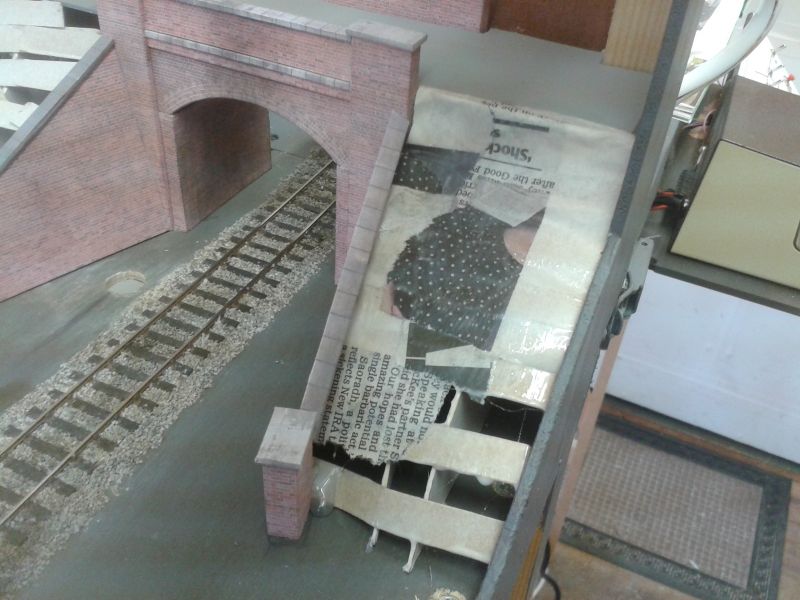
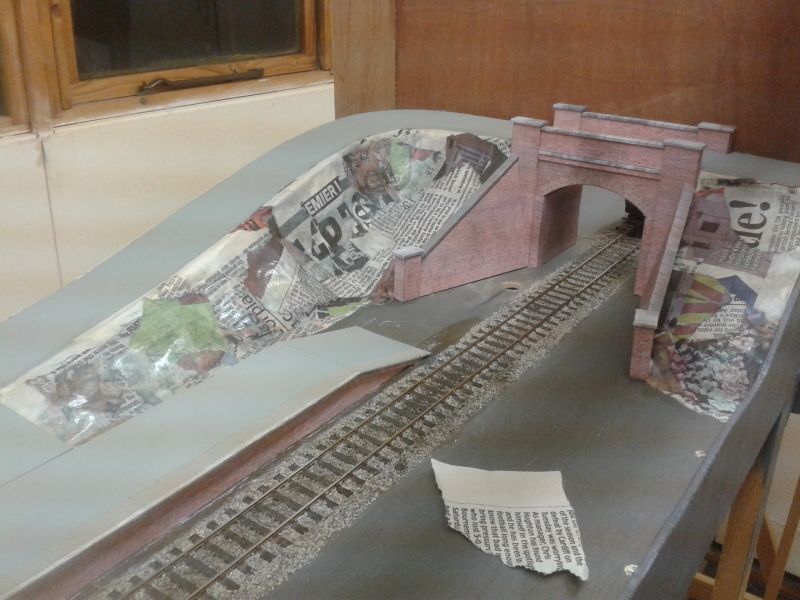
For newcomers to the hobby, here is a brief description of my favoured technique to fabricate the land surface. Other methods are available but this works for me. Apologies if I am 'teaching anyone to suck eggs'.
So, to the 'Glueshell' which gives us our land surface. Cheap - use old newspapers, pound shop PVA, a cheap brush and a yoghurt pot (or similar) in which to decanter the PVA. The technique is very simple and requires liberal application of the adhesive. Tear the newspaper into small pieces beforehand. Liberally coat the cereal packet lattice work with adhesive and push a newspaper piece thereon. Coat the newspaper with more adhesive as soon as it is applied. Add the next piece of newspaper alongside the first, but overlapping. Carry on until the whole lattice work is covered. Now add a second and even a third layer of newspaper, applying lots of adhesive as you proceed. Leave to dry and you will have a light, firm shell onto which the ground cover, grass, foliage, etc., may be applied.
A couple of photos to show the technique in action…

Right…back to the shed to carry on.
Terry
Last edit: by col.stephens
Posted
Full Member
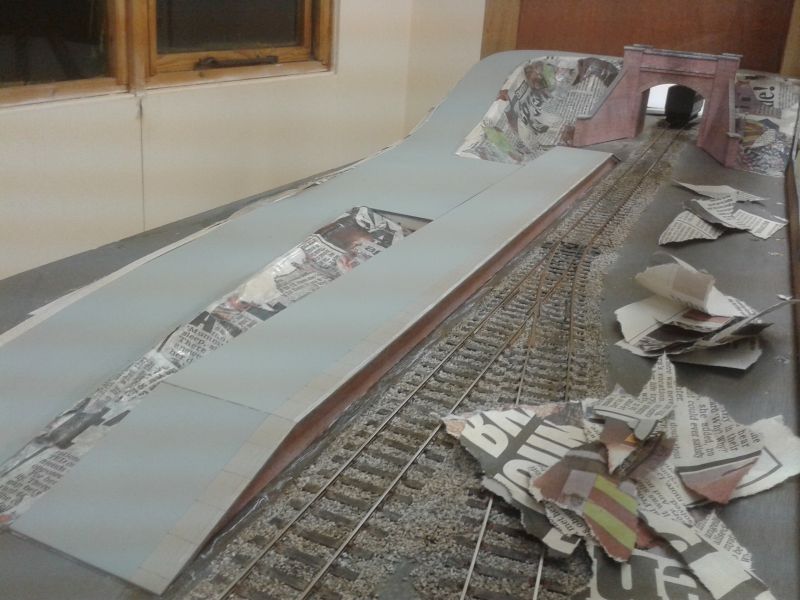
The terrain is definitely taking shape. This is a quick way of making the landscape and I hope to finish off later this evening.
More soon.
Terry
1 guest and 0 members have just viewed this.