Tescbury's Storage & Distribution

5-3-3 Inglenook
Over recent months, I've collected a few mostly Airfix/GMR wagons, including Persil, Lyons and Typhoo Teas, Tizer, Express Dairy and others. All with the aim of building my first layout, a 5-3-3 inglenook based on a supermarket storage and distribution centre, hence Tescbury's.I'm using a 100x24x4cm floating shelf for the base, with an 18cm extension, all overed in 2mm cork.
Peco Streamline code 100 track with electrofrog points was laid and ballasted yesterday. It seems to have gone rather well considering the total mess it looked after I'd swamped it with dilute pva. Points are switched by unbent paperclips, for which I gouged a channel in the cork and then covered with card and tape. The ends of the paperclips will be disguised, probably by some disgarded barrels or crates. Another paperclip will uncouple the tension-lock couplings.
Although I've not designed anything yet, I hope to scratchbuild most of the structures, but will probably make use of prefabricated items such as doors, windows etc. I'm not yet sure how I'll disguise the fact that the line goes nowhere, but would prefer to avoid the classic tunnel or bus on a bridge scene.


 Last edit: by Shunter_J


As for the line going somewhere, you will want a fiddle yard of some sort. Mine's a 3 road sector plate that swivels.
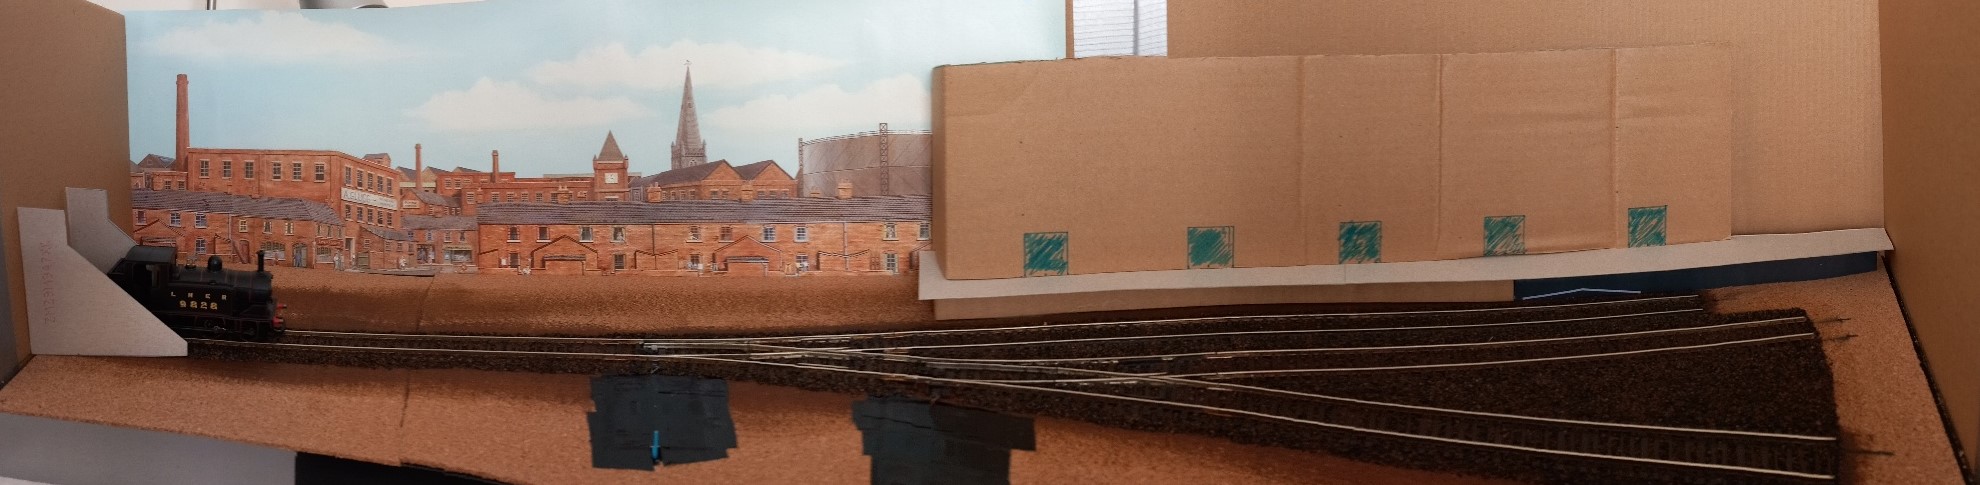
My structures are kit built, I used a combination Scalescenes and Lcut with scratchbuilding as well. You can see these in the shot below.
BTW after the layout was running it was left unballasted for about 2 years.
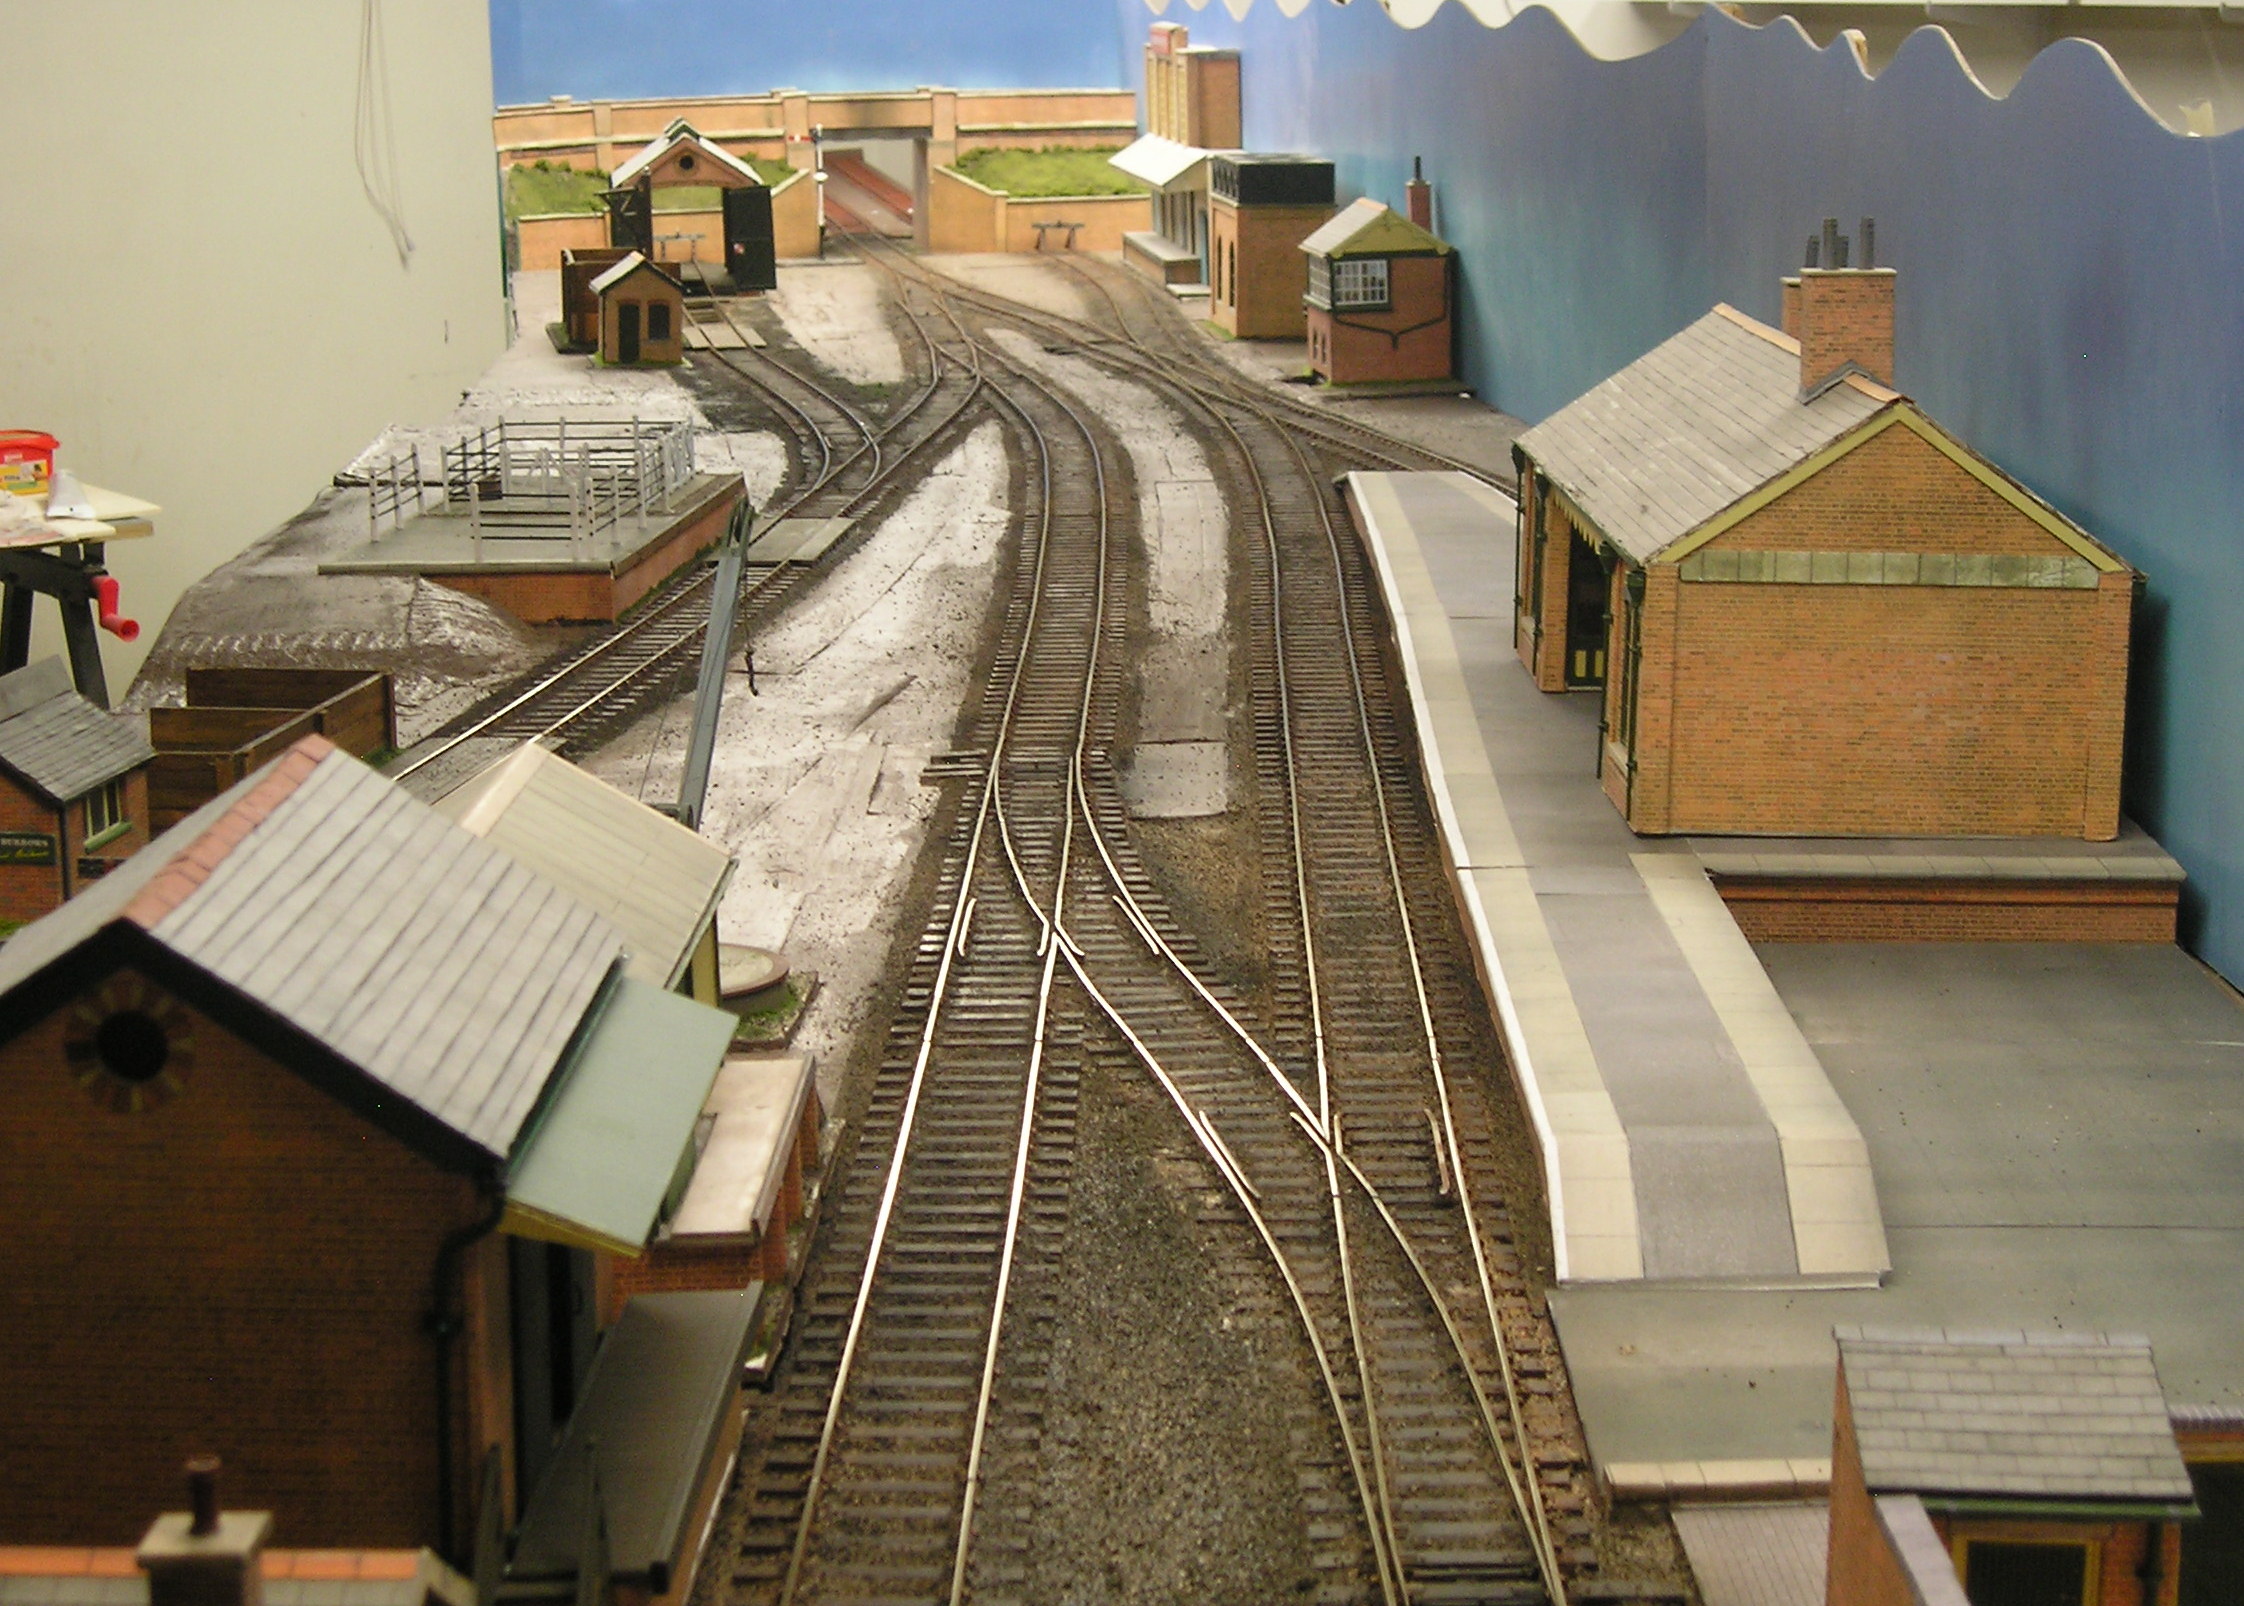
Here's a shot down the layout with the scenic break in the distance. You can just make out the sector plate:
My friend gave me a Bedford OB bus this past weekend so I can put it on the bridge. :

John
Brossard
.Oh yes, the track was fully tested before ballasting. In fact, all sections have soldered wire connections, although I rather lazily didn't bond the point switchblades, which may come to be something I'll regret at some time in the future.
The 5-3-3 track plan is already well proven and it seems, quite popular. I was very careful to ensure the correct lengths of sidings (2 x 3 wagons + 1 x 5 wagons) and headshunt (loco + 3 wagons) to enable the puzzle to work. Some, although not many inglenook layouts bother with a fiddleyard.
Happy to know you tested the layout. Ballast looks neat.
I have found in the past that the point blade hinge can be a weak spot electrically, so a good idea to solder a piece of wire across it.
You haven't said whether control is DC or DCC. DCC is so much better than DC, even for small layouts, but there may be budget constraints.
For changing turnouts I can recommend a few options:
Caboose industries turnout throw:
Caboose Industries ground throw installation - Recherche Google
Probably the least expensive option and quite good.
Blue point:
Blue Point Manual Turnout Controller

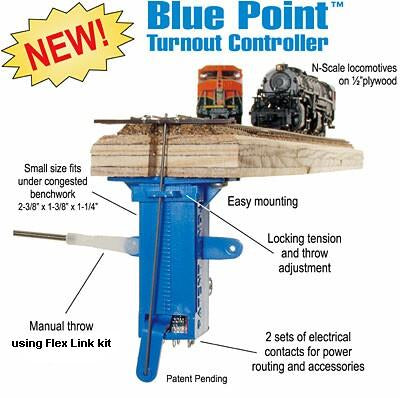 If you want to make the operation of your layout a lot more enjoyable, slow things down and have more hands-on control, the Blue Point™ is what you need!
Ideal for yards, sidings and anywhere else you don't need a motor- driven turnout controller. These are small and very easy to install. Attach them to the benchwork under the turnout, then use our FLEX LINK™ system to connect the Blue Point™ to the fascia knob. The Blue Point™ includes two sets of electrical contacts-rated at 5 amps.
We've also had a number of questions about using the Blue Points™ under 2" thick foam. The simple answer is yes, they work great. The tension and throw adjustment slider provides more than enough range to handle long runs of spring wire. We include .032" diameter spring steel wire with the product, which is quite rigid.
Installation
Installation is very simple. Use our Flex Link™ system for hooking up Blue Points™ to your fascia. These kits include everything you need.
Specs
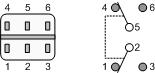
We've designed the Blue Point™ Turnout Control to operate turnouts in scales from N through O. The electrical contacts are double pole, double throw (DPDT) rated at 5 amps, so they have plenty of capacity to power a frog or just about anything else you'll want to drive.
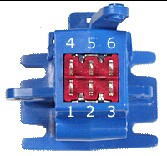
DPDT Switch Diagram
The picture on the right has two diagrams. The left diagram shows the numbering of the contacts (viewed from below), while the right diagram shows how these contacts are arranged electrically. When the switch is in one position, contact 5 is connected to contact 4, and contact 2 is connected to contact 1. Move the switch to the other position and now 5 is connected to 6 and 2 is connected to 3.
Typical DCC-Friendly Turnout Wiring
And finally, here is a typical wiring diagram for a powered frog found on DCC-friendly turnouts:
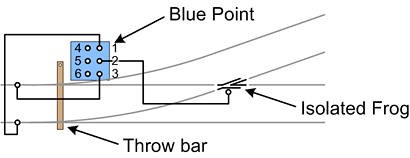
Note: This is a view from above, which is why the numbers are in a different order from the diagrams above (they are views of the bottom).
There are a number of different designs for turnouts, with the wiring being a little different for some of the turnouts. You can find a lot more information about the different turnouts at this link: Wiring Turnouts.
![]()
- Blue Point Manual Turnout Controller
- Blue Point Flex Link Starter Kit & Parts
- Blue Point Installation Instructions - Part 1 (Turnout not attached to layout yet)
- Blue Point Installation Instructions - Part 2 (Turnout installed on layout)
- Blue Point Installation Instructions - Part 3 (Turnout operated from both sides of layout)
- Universal Throttle Pockets
- Folding Drink Cup & Tool Holders
My friend's layout has these. I operated his layout at a show a few years ago and quite liked them.
Tortoise:
Tortoise
All these are American but I am pretty sure you can get them in the UK. My layout has Tortoise.
Solenoid point motors from Peco or SEEP? I have used these and find them to be quite terrible.
John


Brossard said
…snipped…
My friend gave me a Bedford OB bus this past weekend so I can put it on the bridge. :
John
From “Post #288,509”, 22nd August 2023, 1:27 PM
My memories of Bedford OBs (and SBs) was seeing them on narrow country lanes with a lo-o-ong tailback of cars behind them.
Amateur layabout, Professional Lurker, Thread hijacker extraordinaire
Brossard
but I think point motors would be a slight overkill on this tiny layout! I might consider them should I ever get round to building something larger, on which manual control might not work too well, but for now, will stick with my unbent paperclips.This'll run the traditional analogue way that I recall from my childhood, using a Gaugemaster Combi controller.
D_Will said
James, I'm looking forward to seeing how your layout progresses! It looks like we're doing similar layouts and currently at a similar stage. Yours is just 2 inches longer than mine… Two inches that would have made a big difference to me haha
From “Post #288,513”, 22nd August 2023, 7:03 PM
Thanks Darius
It's surprising what a difference a couple of inches can make! I was fortunate to have read the wymann inglenook website prior to making a start, and am also not restricted space-wise in the way that you are.
You've made some good progress with your layout, and I particularly like what you've done with your Caley Pug.

I think I've solved the issue of hiding the fact the line doesn't go anywhere by placing a brick-built footbridge on the far left side
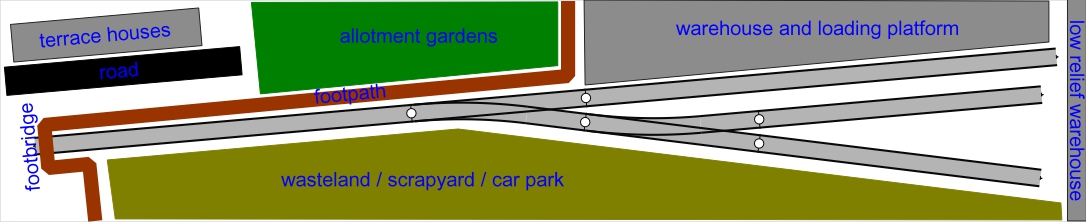
Here's a plan of what I hope to do when I have full use of all my fingers again

Cheers,
Claus
Claus
www.flickr.com/photos/ellef/


I wanted to avoid the classic road bridge or tunnel, so was quite pleased when the footbridge idea popped into my noodle.
It's just occurred to me that for any non UK readers, 'Tescbury's' is a (possibly rather corny) mashing of Tesco and Sainsbury's, two major supermarkets here.
And thanks for the context, I get Tesco because I bought a bunch of chocolate there when I was in London a few months ago,
but I haven't heard of Sainsbury's. `


I love these Inglenook type layouts - so much fun to operate, quick to build and won't break the bank on stock purchases !!
D_Will
, I always buy chocs there. You see, I worry that if I don't, then they might stop making them. So I do it as a sort of public service really :-)One of the reasons I chose the inglenook
Petermac
, in addition to the hopefully quick(ish) and cheap(ish) build, is the brain-taxing enjoyment it'll give once complete, just right for the coming winter evenings. Of course, depending on my ability to solve the puzzles, it could very well end-up as frustration 
https://scalescenes.com/
Terry
James, that’s a good service you do haha
Last edit: by D_Will
col.stephens said
Hello james. I don't know if you have any particular buildings in mind, but I think that the products from Scalescenes would fit nicely and are reasonably cheap also. You can peruse the range here:
https://scalescenes.com/
Terry
From “Post #288,620”, 30th August 2023, 6:57 PM
Thanks for the pointer Terry, very interesting and quite tempting.
Before resorting to kits/downloads though, I'm going to give scratch-building a try. No idea how that might turn-out, but I quite like the idea of making the layout as unique as possible.
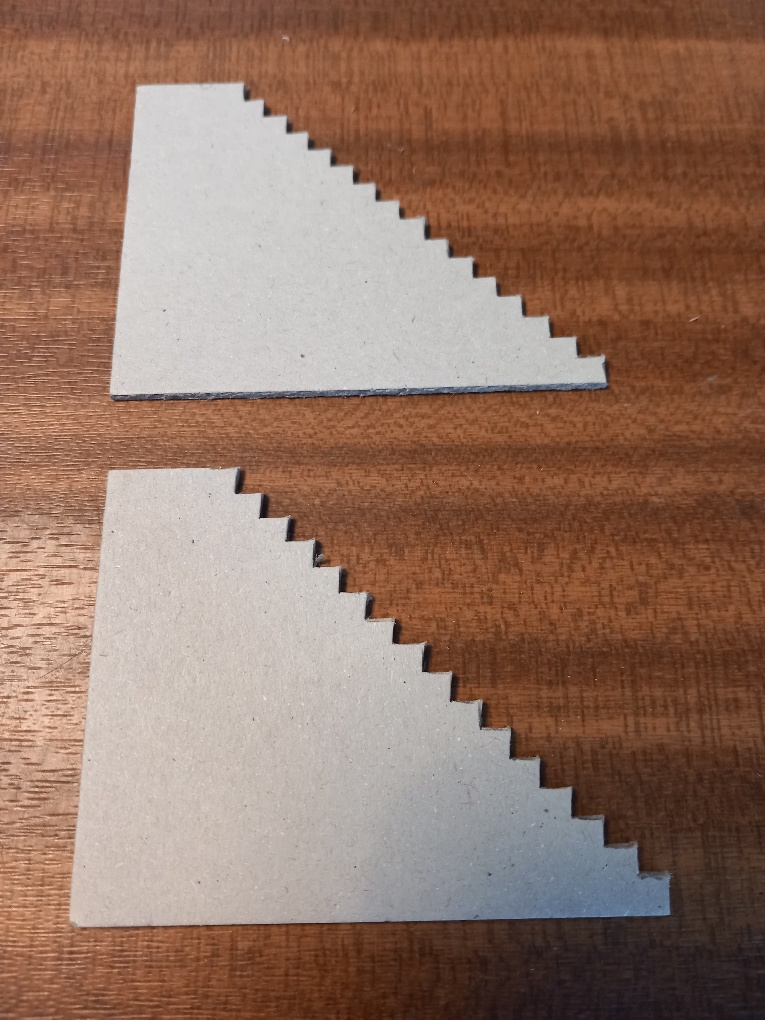
That said, my first attempt at the footbridge hasn't go too well. Prior to starting, I had no idea just how tedious and difficult cutting 60+ small squares of 2mm card could be. VERY as it turns out! Result as shown below:

That has now been put in the "Might be useful one day" box.
My 2nd attempt, although a little rough in places, seems quite promising so far:
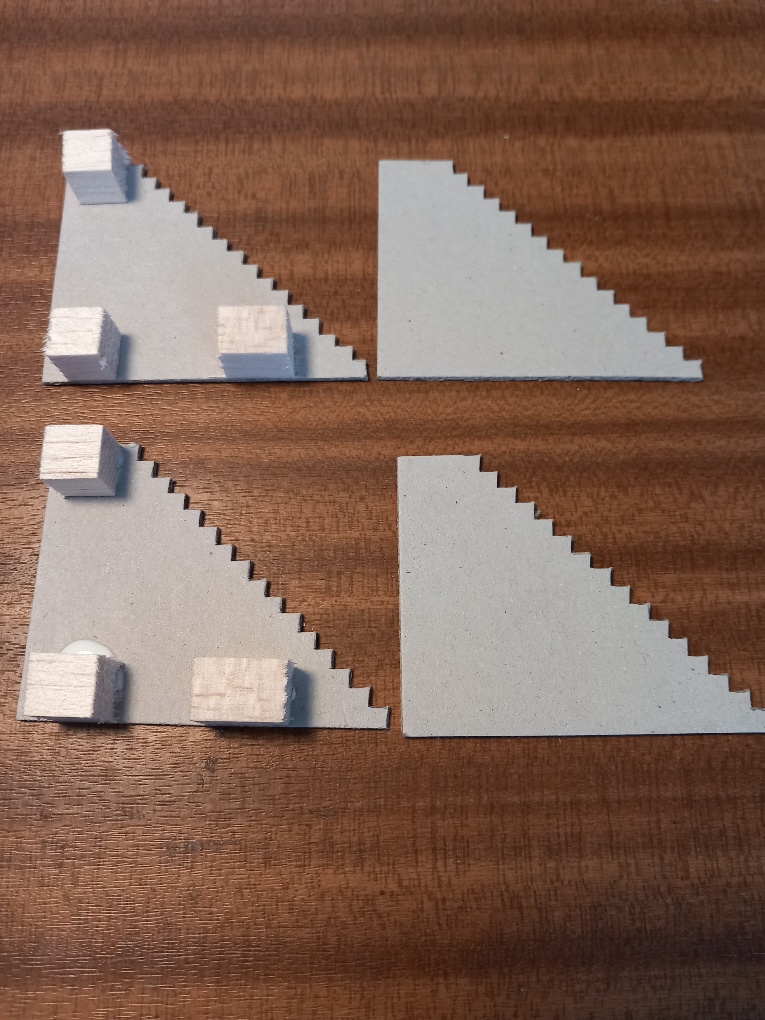

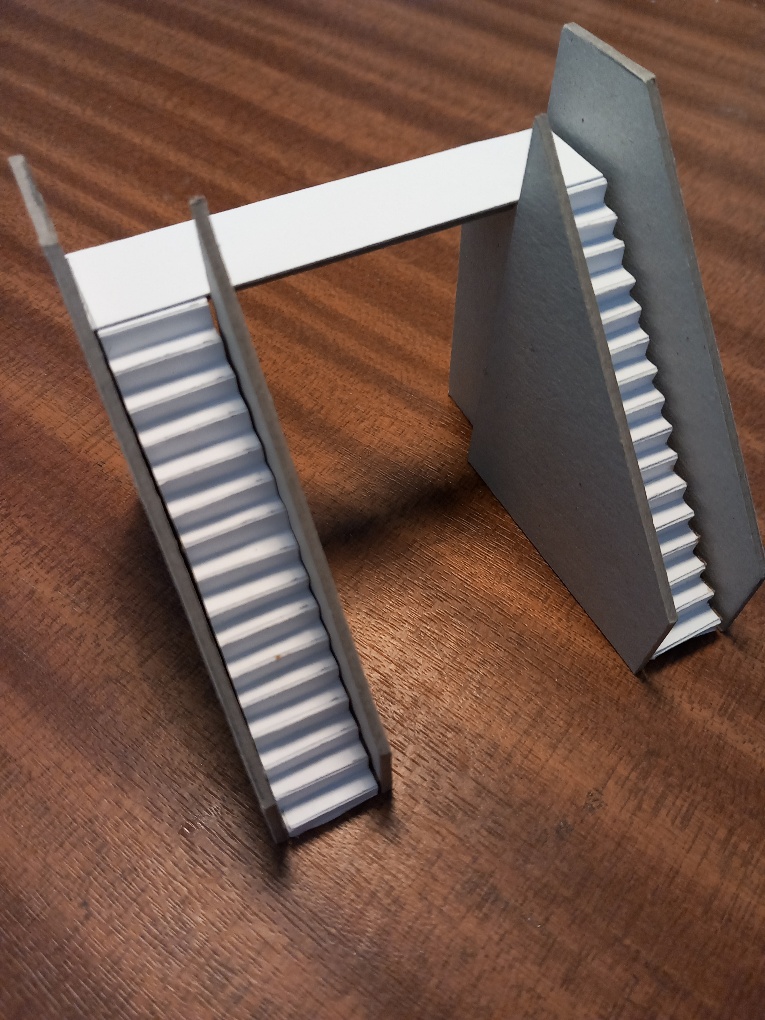
The side walls will be covered with Superquick brick-paper, but I'm not sure if the actual bridge part will be brick, steel or maybe concrete.
https://scalescenes.com/scratchbuilders-yard/
Lots of surface finishes and other useful bits and bobs.
John
Brossard said
If you're not ready for kits and want to scratch build you should look at Scalescenes scratchbuilders yard:
https://scalescenes.com/scratchbuilders-yard/
Lots of surface finishes and other useful bits and bobs.
John
From “Post #288,630”, 3rd September 2023, 7:09 PM
Yes, I had a look at it earlier and thought some bits might be handy.