Porthgarrow
Posted
#266251
(In Topic #14504)

Full Member
A mixed-scale single-board exhibition layout
May I introduce Porthgarrow.This will be a single-board layout mixing OO and OO-9 for the exhibition circuit. It must be small enough to travel in the back of my Vauxhall Corsa, be capable of movement, erection, operation and removal by one person. That also has implications for weight. Size and weight are also limited by the need to build and store Porthgarrow alongside (and beneath) Waddlemarsh in one room and to lift it to shoulder height, get it around corners and through doors.
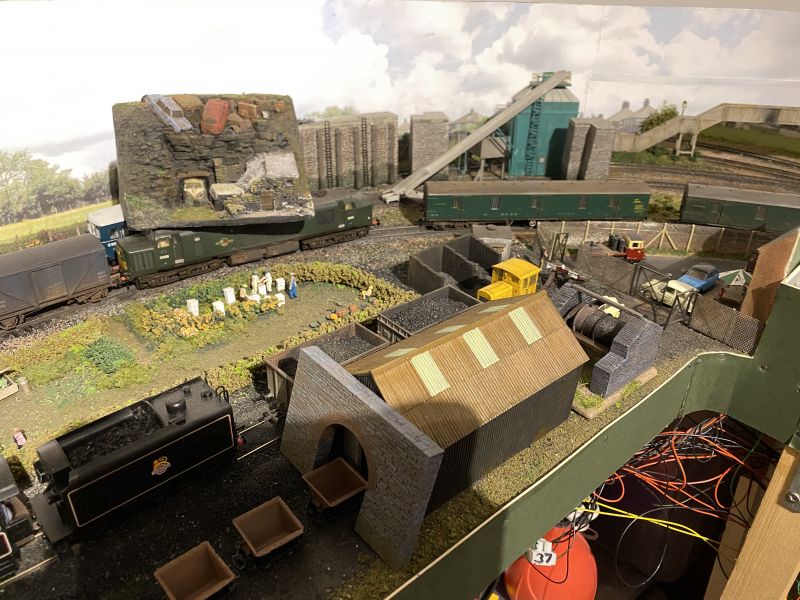
The scene will present a small location in North Cornwall where a narrow gauge industrial line brings quarried stone to the quay for shipment. There will also be a small passenger branch line which will be little more than a length of single track for a train to arrive and depart on.
The name is derived from the Cornish “porth garow†meaning rough beach. There will be a rough beach - boulders, weed and bits of sand. And all of course with a trademark water scene - all my layouts have featured water.

Posted
Full Member
The baseboard has been built and fitted with folding legs. This allows for easy storage and presents the layout at around 1.2m height for viewing. A basic lighting bar will follow
Posted
Full Member
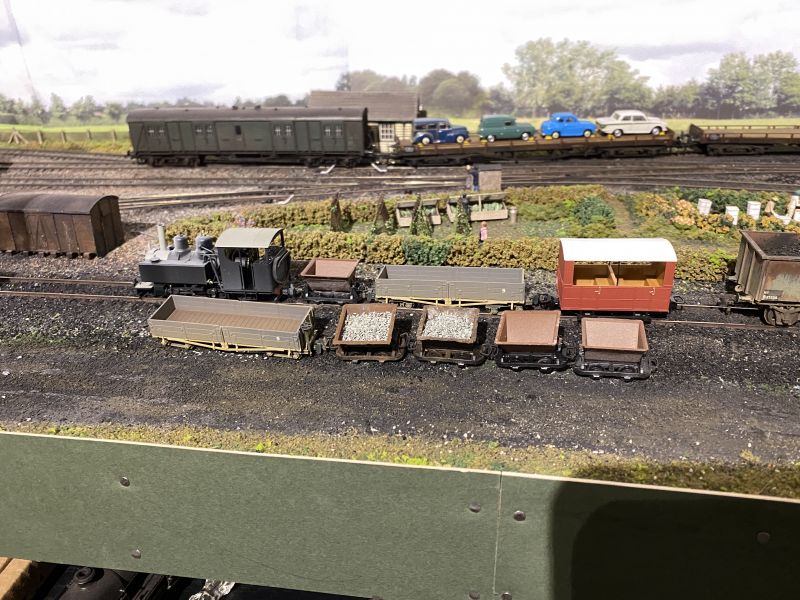
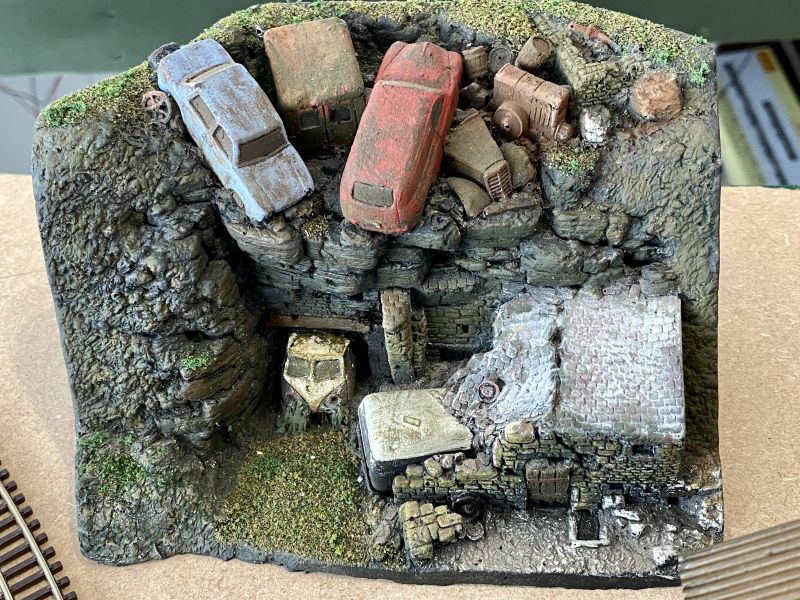
Some of the OO-9 stock placed in the yard at Waddlemarsh
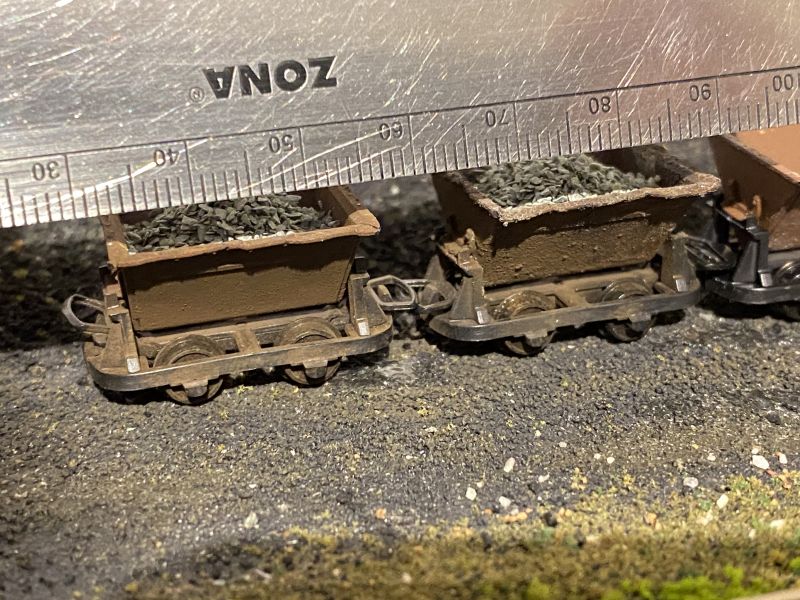
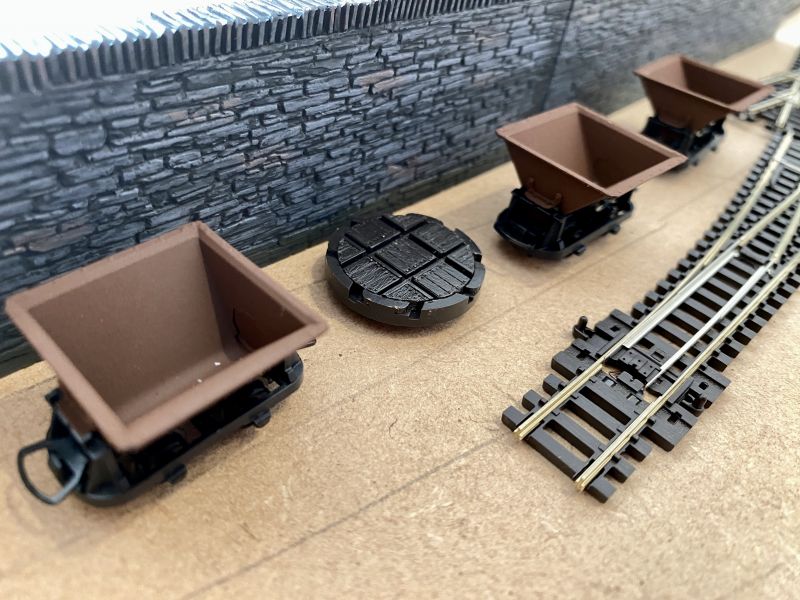
Tiny skips some of which have already been loaded, weathered and nibbled with the Xuron cutters to represent damage in use
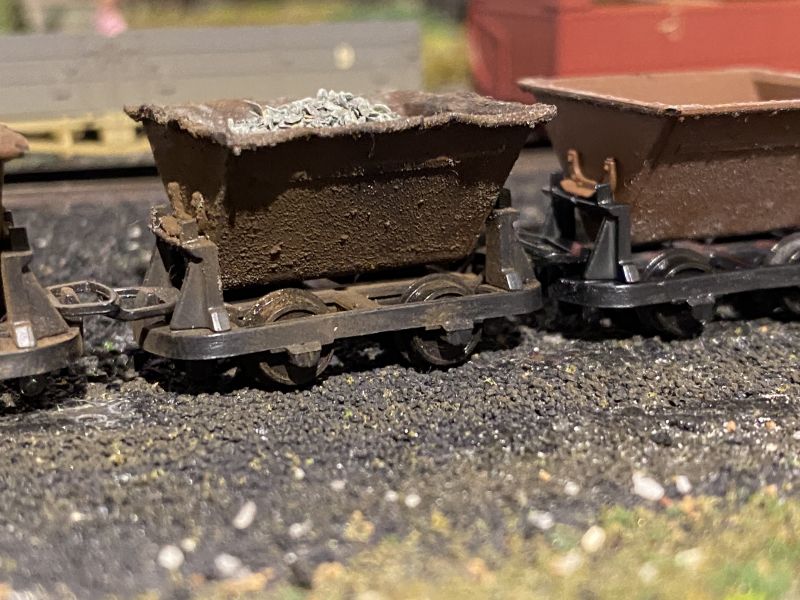
Close-up of a ready-to-go skip

The baseboard legs have adjustable feet to ensure level operation
All built up in a tiny patch of bedroom floor because there is nowhere else to work. Never let it be said a lack of space hindered modelling progress!

Seen through the phone’s wide-angle lens the four fold-away legs are seen (inverted) in their upright position
More bits and pieces ready to be built into the project
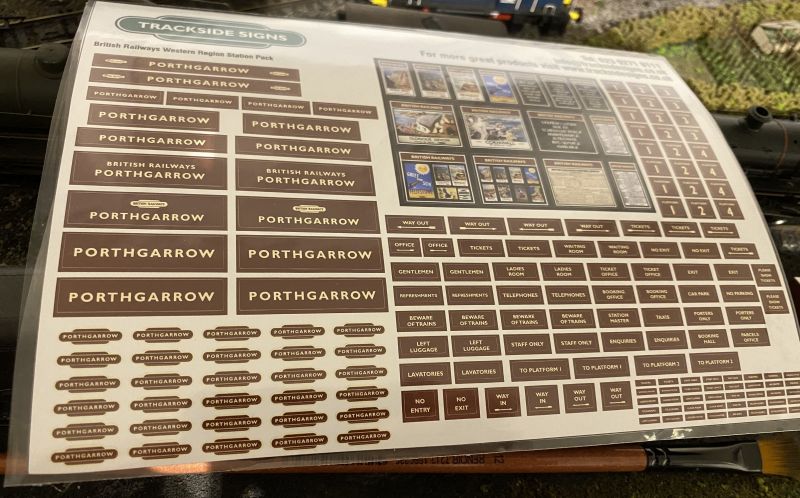
Even the Tracksidesigns are ready to go.
Time to get building!!!
 Last edit: by Gwiwer
Posted

Full Member
What a great idea! Look forward to the next installment!
Last edit: by Claus Ellef
Cheers,
Claus
www.flickr.com/photos/ellef/
Claus
www.flickr.com/photos/ellef/
Posted

Site staff
Looking forward to seeing more progress :thumbs
Ed
Last edit: by Ed
Posted
Full Member
Thank you.Interesting little project Rick.
Looking forward to seeing more progress :thumbs
Ed
In terms of "seeing progress" the layout already has its first two exhibitions in the diary. Twickenham MRC Open Day in July and (provisionally, subject to confirmation during the summer) Hayle MRC's November event. It will sit alongside my normal weathering demonstration at Twickenham but there isn't space in the car to take both to Cornwall for a weekend along with the Good Lady Co-driver.
Posted
Full Member
Terry
Posted
Full Member
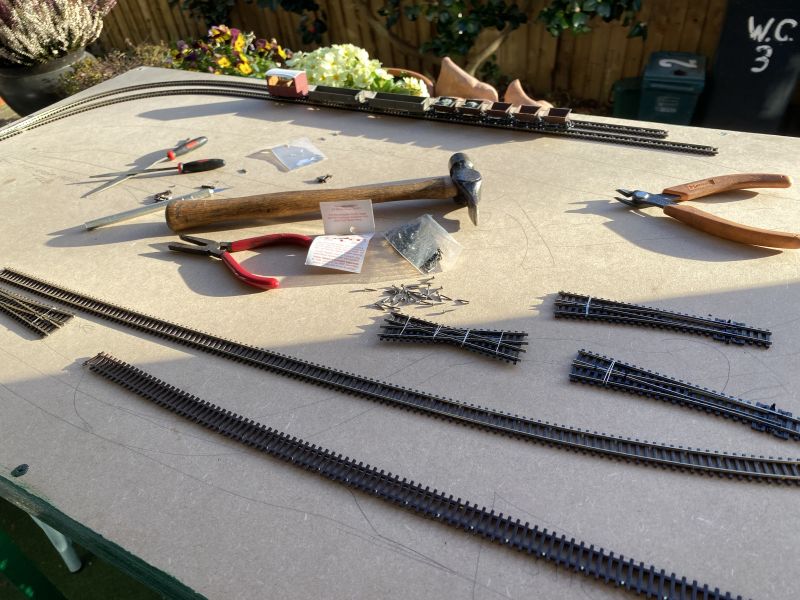
The track has been ordered; I have a few bits on hand but the order covers the full requirement for this layout allowing me to retain those spare bits as exactly that - spares. I have opted for N-gauge code 55 rail for the narrow gauge line rather than OO9 code 80 rail. This is because diamond crossings are not produced in code 80 but the track plan requires two.
As it will be an industrial line and therefore running on "lighter" rails than perhaps a narrow-gauge passenger line would the difference between the two won't make an appreciable difference. The sleepers are wrongly-spaced on the code 55 as they are set for N-gauge but they will be covered with dirt and dust anyway so again it doesn't matter.
The "main line" will be laid in Peco's recently-produced bullhead rail with correctly-spaced wood-effect sleepers. The track plan here is a remarkably simple single-track running line to the buffer stop with a run-round loop. Nothing more. There is neither space nor need for it.
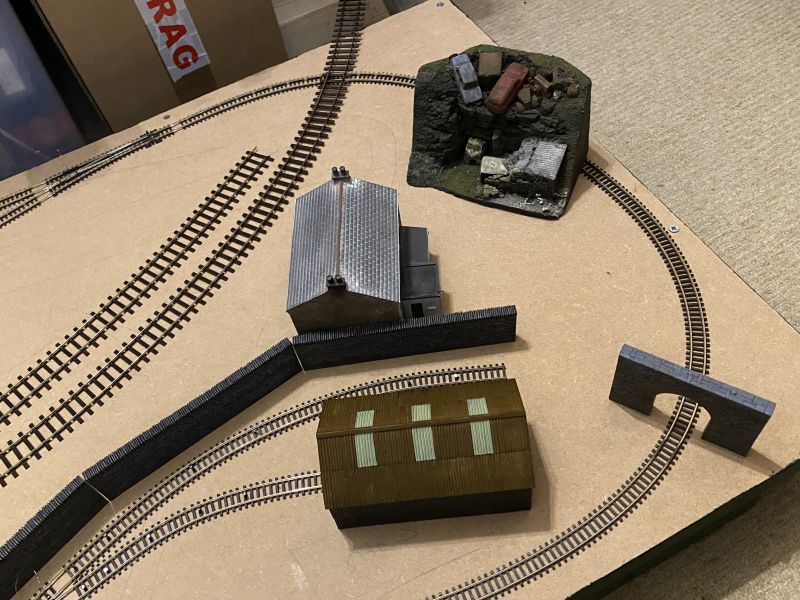
More ready-to-use parts have arrived namely resin sea walls. These are rather too tall for my purposes but I have successfully cut down resin pieces before with careful use of a saw. And so it shall be again. The offcuts may also find a use - my first thought is to break them up further and use them as "ruined" bits of wall washed away by the sea.
Posted
Full Member
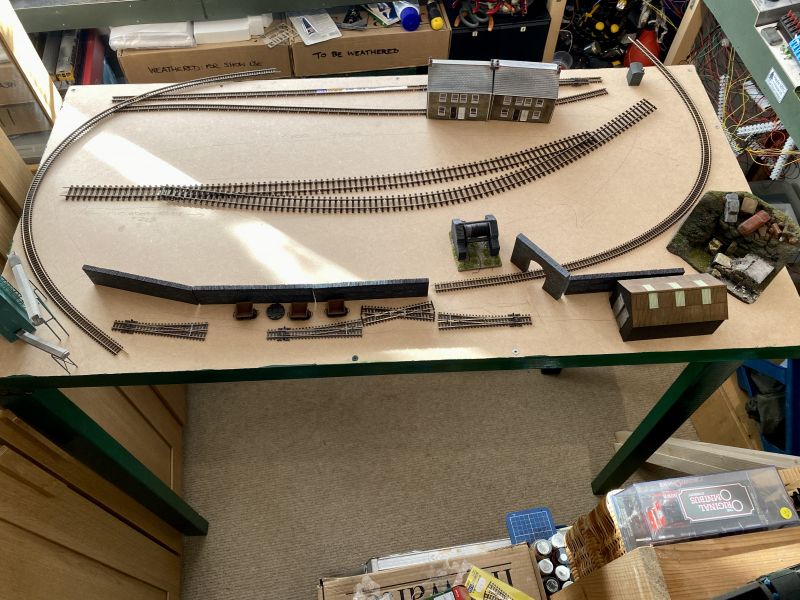
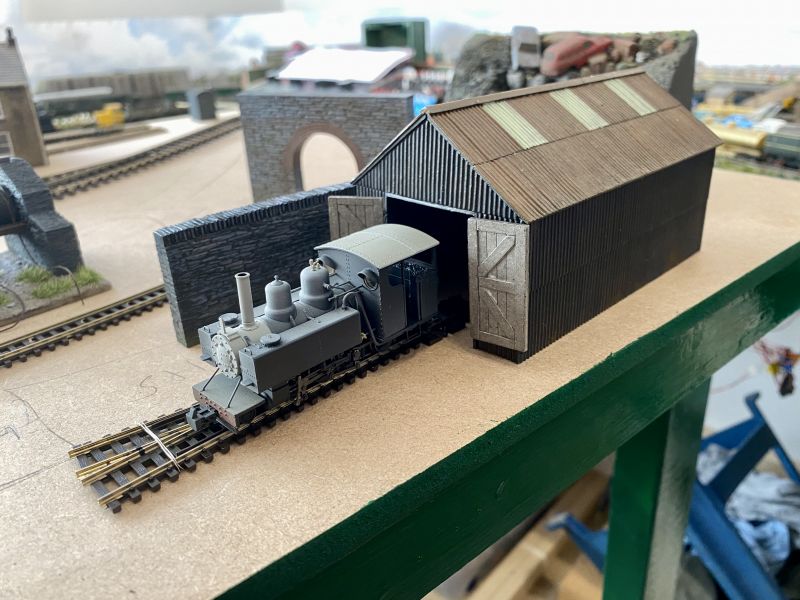
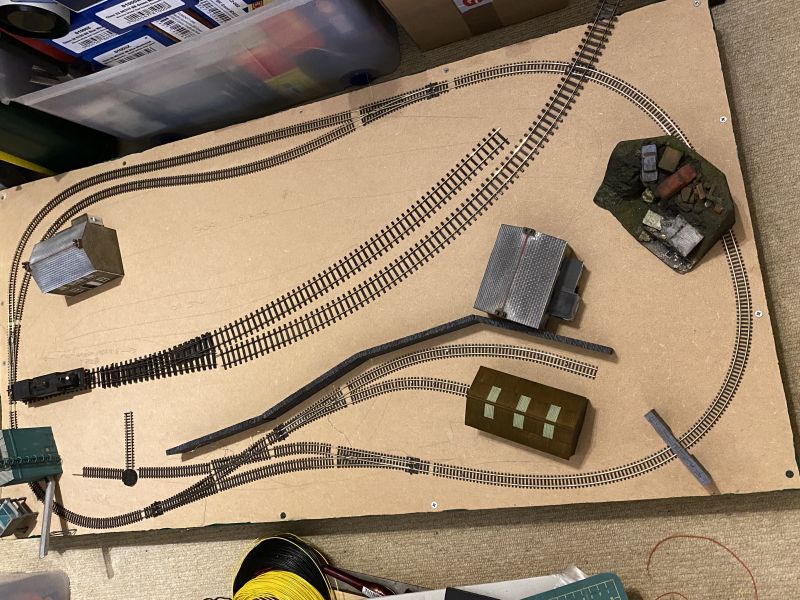
The board was erected and a proof-of-concept track arrangement set out. Some of the structures add a bit of context. A wagon turntable adds a bit of interest.
Several thoughts occur. The board is probably a tad too high for exhibitions. There isn’t a standard height but what do the knowing among us suggest? Currently 1200mm but I think take it down to the even metre.
The car graveyard, cottages and OO track will be uphill from the narrow gauge line and partially above its concealed off-scene loop.
All of the sea wall, harbour walls and beach area will be mounted on a bolt-on outrigger board. This will allow for the significant difference in levels required without introducing a lot of weight on the main board. Not only in terms of geography (plastercloth can become quite heavy even if laid over foam block) but the weight of the resin components would make one-person movement of the board nearly impossible.
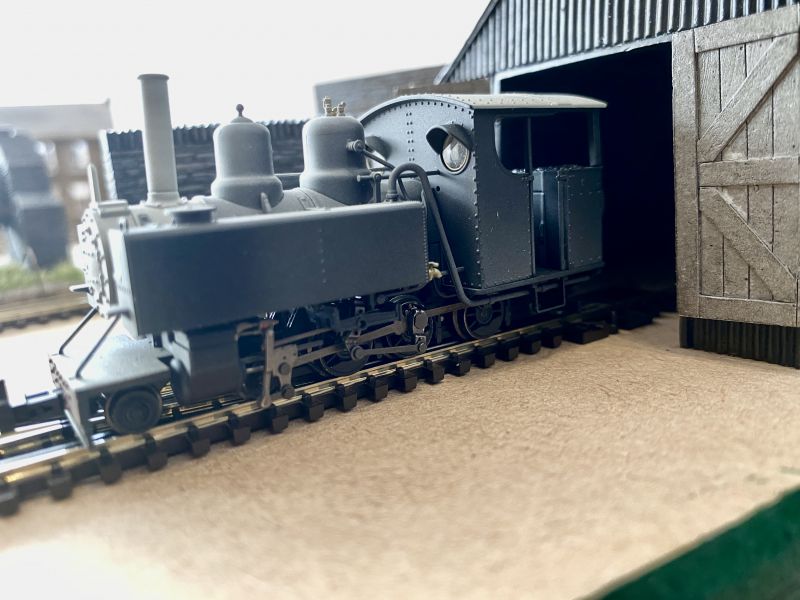
Loco and stock have been tested and will cope with the narrow gauge radii.
Posted
Full Member
Generally, if layouts are displayed too low, it gives you the helicopter view, which isn't the best way of viewing model railways which then take on a toy-like quality. The higher the layout the more realistic view is to be had. Ideally, eye-level would give the most realistic view. Have you noticed that when a layout is too low, modellers automatically tend to crouch to get an eye-level view?
Personally I favour a height of about 54 to 56 inches. I am tall so this height is comfortable for me and gives me the best view. If you intend to operate your layout at home as well as exhibit occasionally, then it makes sense to set it at a height which is comfortable for you for the odd 355 days that you are not exhibiting.
To sum up. I would set the layout at a height which is comfortable for you to view and operate. My experience of exhibiting is that most adults will only stop to view for probably no longer than a couple of minutes. Children will be gone in four seconds!
My personal view.
Terry
.
Last edit: by col.stephens
Posted
Full Member
I don't have a specific "target audience" but would expect that far more adults than children to be interested. I don't propose to lower the height to anything below 1m for that reason.
Operation will be from the back and I will have a seat but expect to be standing for much of the time. In answer to the question I am exactly 6' 0" these days having shrunk slightly from the 6' 0¾" of my prime; I never quite made 6' 1'. I stand all day at work, often without moving around very much, so am used to lengthy periods on my feet.
The front bolt-on unit with the jetty and beach will take the viewing area to a lower level and the scene will slope upwards to the rear meaning the front-to-back height differential will be quite noticeable. Somewhere in there is a compromise and a"best height" for the main board.
I do intend to fit a lighting bar at some stage though probably not for the first outing as that is in July. That would probably be too much work too soon. The intention is that this would be another bolt-on in order to fit everything into the back of a fairly small car. I shall probably need bracing struts between the legs as well; having it free-standing for the first time I wasn't happy with the amount of "give" despite the legs being fitted with locking hinges. In fairness some of the slack might have been because it was erected on a fairly thick carpet.
The adjustable feet can come off easily enough, the legs cut down by a small amount and the feet re-fitted. That seems an easy solution. On balance I think taking 5cm not 10cm off the height may be the compromise I need.
It will be possible to operate the layout at home but it is not designed with this in mind. It has folding legs for ease of transport but also because this will allow it to be stored beneath the Waddlemarsh layout nicely out of the way but in a quite modest room. Any home operation would likely be when SWMBO is away; I could then erect the board in the lounge (cat permitting!!!) and have a few friends round. They would get to see Waddlemarsh as well, of course, which is also an aim for this year. Having built much of it during the pandemic and when we were not officially allowed into each other's homes very few people have yet seen that layout in the flesh. So far only three have seen it in its current condition and two of those live here. My sister is the other.
Posted
Full Member
Layout lighting is a must for exhibition layouts. I have seen too many unlit layouts lurking in the gloom of some odd corner of a small hall. The larger type of sports halls are often no better in as much that they often favour a type of yellow sodium(?) lighting which does the layout no favours.
Bracing struts are a good idea. The last thing you need is the layout collapsing during an exhibition.
Good luck with the project.
Terry
Posted
Full Member
The track is here. The narrow gauge will go straight onto the baseboard. The "standard gauge" will be a later job once the higher land has been added. I have some large poly-blocks on hand to help with that. The intention is to use them beneath plastercloth which will give a robust structure for minimal weight.
The backscene also needs to go in fairly early on and will be curved into a half-oval. Almost flat along the back but curving around to the front corners. That will go onto steamed card. Steaming allows flexibility and forming after which the photographic sheet will be glued on. Nothing grand for this one - just sky. A reinforced strip around the top edge and some slim wooden uprights should help it keep the shape.
I plan to crack on with this work in the coming week. I have other jobs which compete for time currently as one book is in progress, another has just been commissioned and two more are planned and not all on railway subjects. I also have to arrange any messy jobs around times when I can work outside (so in dry weather) and at times when neighbours will not be disturbed if I have to use power tools or blue language!!! Ah the joys of living in a small flat.
Posted
Full Member

The legs have been cut down by 5cm because I felt the board was too high. It still feels high to me but bearing in mind it would be viewed from a metre or so away and that both upper and lower levels will add scale and depth I am hoping this will be enough.
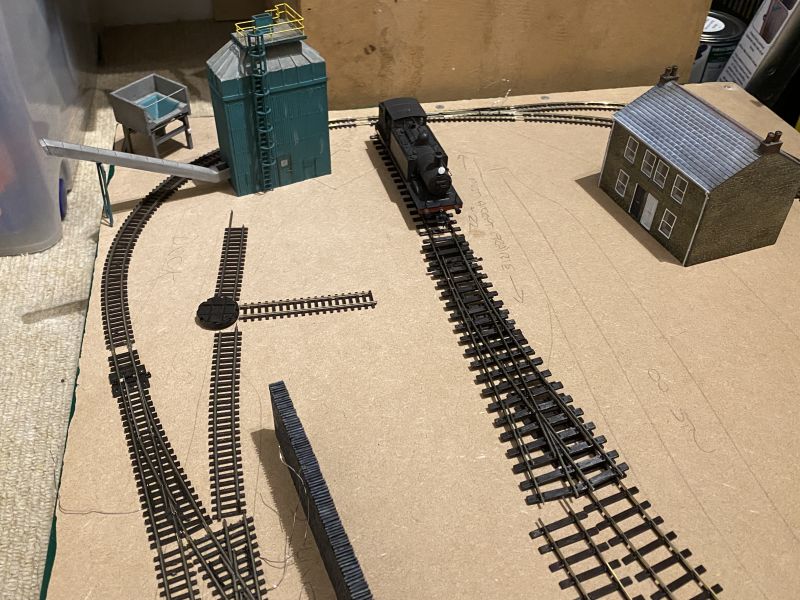
It was with some sense of excitement that I began laying the OO-9 track today. The radii are fierce but workable.
And with senses of both excitement and trepidation, at 15.45 as the afternoon light started to fade, the very first train moved under its 1fp (finger-power) traction unit. Porthgarrow comes alive!!!
https://m.youtube.com/watch?v=Ub1pW7mGH5U&feature=youtu.be
Posted
Full Member
The shed road will be bottom left and will have a second open-air road alongside. The line leading off the diamond top left will be the "dead road" and feature a wagon turntable with road (dirt track) access as that might not be practicable at the shed end.
https://www.youtube.com/watch?v=XliGC7Jm49E
Posted
Full Member
My train plan is to run a 2-coach push-pull set (either Maunsell or the gate stock), auto-train or a one or two-car DMU. So the loop won’t be needed all that often.
All points will be hand operated on this layout due to its size and the complexity of fitting suitable motors to OO-9 track. I considered brass push-rods and haven’t entirely dismissed that option but any system needs to be robust enough to withstand manhandling the board and car transport to events.
Posted
Full Member
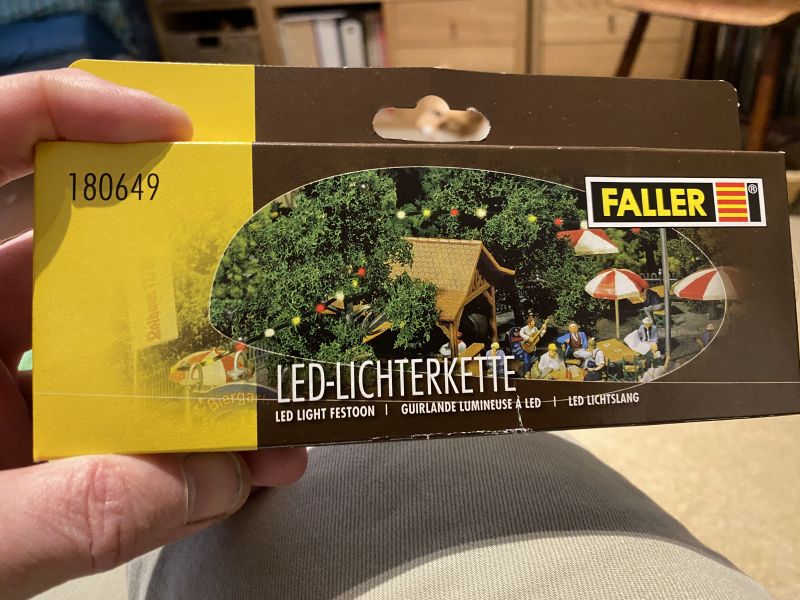
Some of us will remember I made good use of these in the Penhayle days. Well - they’re back! Several steps ahead of where I am currently in the build but the little beach scene will have festoon lighting once again.
Posted
Full Member
All points are unifrog and manually operated on this tiny layout. The diamond is electrofrog because unifrog versions are not made in code 55. I had thought it would pass current to all routes unless switched. But no. The loco stalls and the tester shows no current at all.
It appears I need to insulate the joins and fit frog switches despite only running a single loco on DC.
I am looking for an alternative. There is no insulfrog diamond in code 55 either but there is in code 80. I could use a code 80 insulfrog and adjust the heights to avoid the small step between rail codes.
The other issue is the loco which slows or stalls on the points which - as fitted - behave as insulfrogs. I had hoped that unifrog points might pass current throughout but there is just enough of a dead spot on the frog to stall the loco at the required slow speed. When the 4-wheel diesel arrives that will have an even shorter wheelbase so the issues must be resolved before I do much more.
Any thoughts?
Posted
Full Member
Gaugemaster DCC80 Autofrog units will be fitted to the narrow-gauge points to control polarity. This also means I have to fit N-scale power joiners at the toes of the points as a more practical alternative to soldering feeds onto tiny rails.
The standard gauge points will have Seep motors fitted (Gaugemaster part GMC-PM1) which will control polarity and flick the points as well. The narrow gauge points will remain hand-worked.
The diamond has reverted to the electrofrog model and will be controlled via a DPDT switch. It has been re-installed with the required insulated joiners fitted.
Hopefully that lot should resolve the electrical issues and allow me to crack on with building the scenery.
Posted

Site staff
Ron
NCE DCC ; 00 scale UK outline.
NCE DCC ; 00 scale UK outline.
1 guest and 0 members have just viewed this.