Painting Slaters plasticard
Posted
#236172
(In Topic #13034)
Inactive Member
Need advice on technique
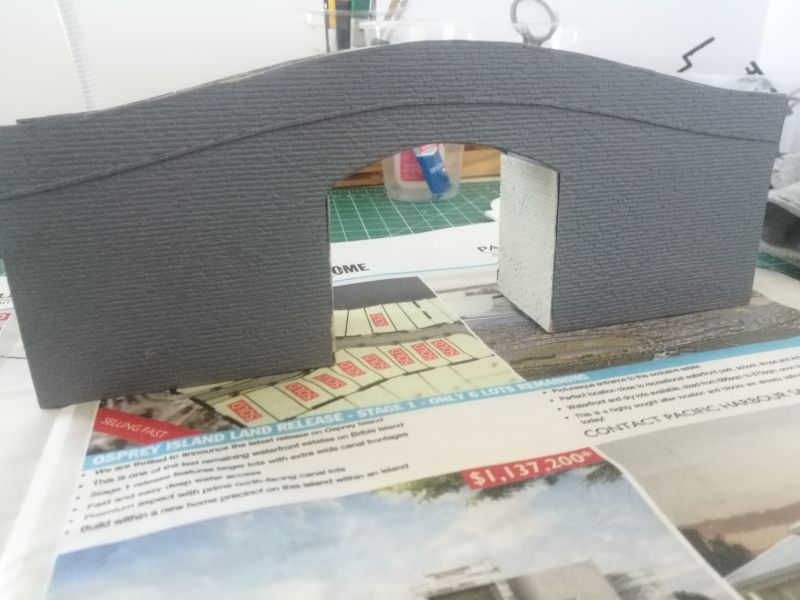
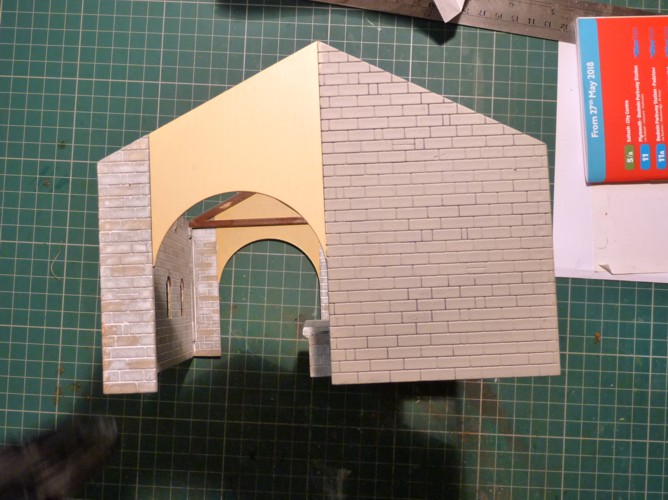
HiMy latest project is a small humpback bridge with a card shell and platicard stone sheets on the outside/
I am happy with the construction - by my standards. I particularly found the plasticard is very easy to work with. Even cutting a single course was done without too much trouble. Here is a photo of progress to date. The grey colour comes from the primer/undercoat I sprayed over the sheets.
But I have run into a problem with painting.
I am using a Humbrol Enamel as the base coat. I am finding the paint often fills the grout courses with the result that the stonework looses its definition. If I brush out the paint the coverage is very thin. And becomes transparent.
The enamel paint seems to be quite thick. So I was thinking I could try their acrylic paints.
I would appreciate any tips you might like to share.
Cheers
Evan

Posted

Full Member
What color is the intended stone? It helps to get as close as possible with the primer - grey for granite, light grey for dark limestone, white for light limestone, red oxide for sand/iron stone.
Nigel
©Nigel C. Phillips
Posted

Full Member
This is a classic example of finding what works best for you personally, but after a base coat, I usually brush on an overall diluted grout colour and wipe off the excess with kitchen tissue. Then a varied colour mix of stone sparingly is applied with an almost dry sponge and brush, slowly building up the colour until satisfactory.
You can vary the colour mix as desired and redo parts as desired.
Have fun and let us know how you get on.
Bon courage,
Bill
 Last edit: by Longchap
At 6'4'', Bill is a tall chap, then again, when horizontal he is rather long and people often used to trip over him! . . . and so a nickname was born :)
Posted

Full Member
Cheers MIKE
I'm like my avatar - a local ruin!
I'm like my avatar - a local ruin!
Posted

Full Member
For such a project I would use a rattle can as a primer, either a Halfords grey, red or white depending on the top coat or a rattle can primer from such as Tamiya or even Railmatch.
Over the top of that you can then apply washes for the mortar, paint on and wipe off the top with a damp wide brush after it has dried, and further weathering effects for grime and limescale etc. from washes and pigments.
If you have a bit of the plasticard left over I would do some experimenting with that before having a go on the model.
Posted
Inactive Member
Nigel, the stone will be a sandstone colour.
Evan
Posted
Inactive Member
But, of course, it is not that easy.
Buy an airbrush, need a water trap (I have a compressor). Also need adaptors to connect threaded ends to click connectors. And threaded connections need threadlocker. And then I saw disposable eye droppers - have to have those.
A perfect case of more dollars than sense, as my father would say.
Evan
Posted
Full Member
I decided this was the perfect opportunity to learn how to use an airbrush. So I now have an airbrush.
But, of course, it is not that easy.
Buy an airbrush, need a water trap (I have a compressor). Also need adaptors to connect threaded ends to click connectors. And threaded connections need threadlocker. And then I saw disposable eye droppers - have to have those.
A perfect case of more dollars than sense, as my father would say.
Evan
You are probably better doing a bit of reading first to try to determine which is the best airbrush for your purposes then what accessories are necessary as opposed to those which may be a "Nice to have". For instance to start with do you know whether you have a double acting or a single acting airbrush and which one you would prefer?
The first thing you should put money into is the airbrush itself. A cheap one will lead very quickly to frustration and dissolusionment so you should be looking at spending somewhere in the region of £100.00 (or Austalian dollar equivilent) if you want something reliable and capable of doing what you want it to.
I don't know if you can get hold of any copies of Tim Shackleton's weathering books over there but, if you can, I would strongly recomend that you get one and read through it.
You are right the plastic droppers are extremely useful, along with some glass dishes for the thinners, but one of the main starting points is where you are going to use the brush and whether you are going to set up a booth with a filter unit or whether you are going to wear a mask. I purchased a portable fan and filter unit with a multistage filter so I do not need to vent to outside but this cost three times the price of the airbrush!
Posted

Full Member
IMHO, you either need to be spraying something big or have an assembly line of smaller bits requiring spraying to make the exercise practical.
I haven't used mine much at all because of that but, in the right hands, and with some practice, they do make a superb job.
Regarding this bridge, as others have said, paint the mortar lines first with an overall colour, wipe it off the block faces then "pick out" the blocks themselves with dry brushing or individually to vary the colours a bit.
'Petermac
Posted
Inactive Member
One thing I have noticed is that the war gaming fraternity seem to be a very good source. They seem to be a lot more into it than us.
Yes, Petermac, I know I am going to have to get into the cleaning habit. And that will be a challenge. A drawer full of stiff paint brushes attest to my rather slack approach.
Thanks also for the painting tip.
Cheers
Evan
Posted

Inactive Member
Here are the promised piccies
Wall with just Halfords Plastic Primer and start of brick lintel paint
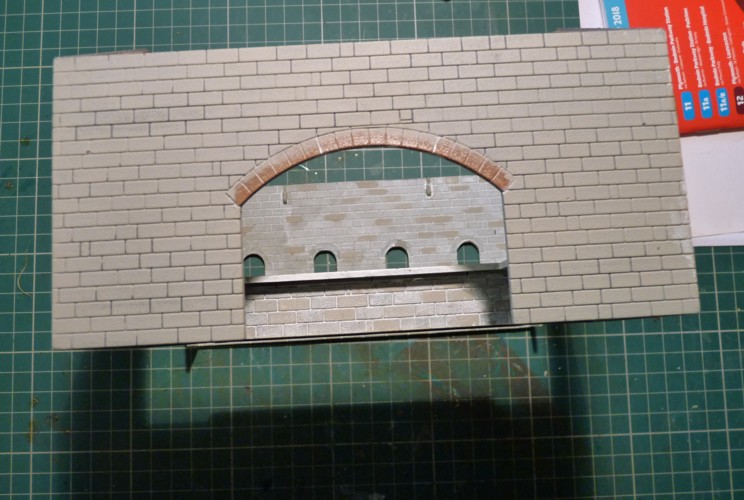
Other wall with all treatments done
Gable end with just the primer and a start on the other treatments
Other end almost finished
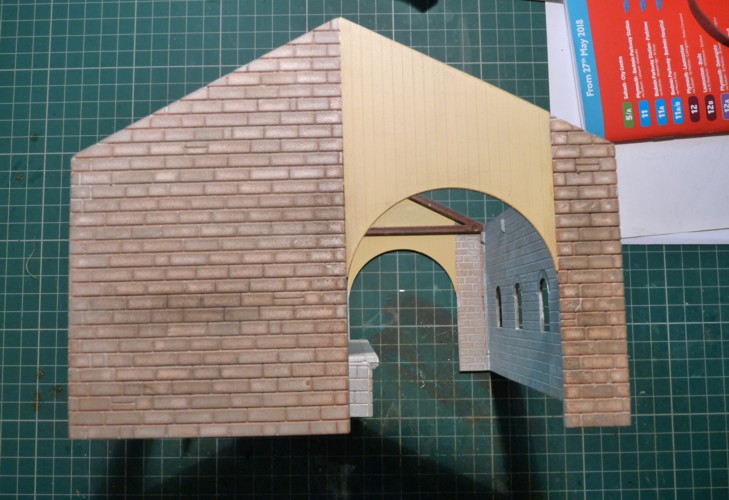
Hope this helps.
Last edit: by 60019Bittern
Posted
Full Member
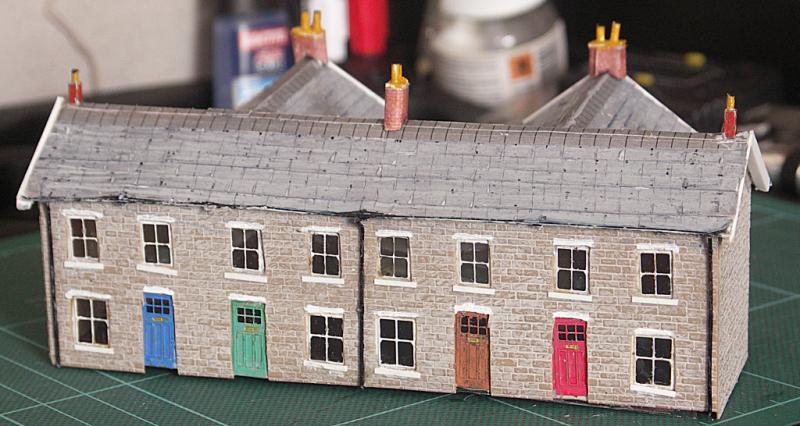
granddad here I also put on the brick or stone colour first, let it dry hard then use diluted white or grey paint all over then whilst stil wet wipe over the bricks/stones leaving paint in the grooves between.Here is a pic of one of my scratch built buildings.
grandad.

Posted
Inactive Member
I have also had a couple of attempts with an airbrush and and am really pleased with the coverage it gives. The only problem I have is that with our climate the paint in the airbrush dries very quickly.
Cheers
Evan
Posted

Full Member
This is something I have done a lot of experimenting with, and still haven't found a fool proof system. I only use acrylics - if it all goes wrong it can be washed off and start again - I know this from experience!
I've used cheap paints, but got fed up with lack of pigment. I now use paints designed for war gamers. The names of them are a bit odd, but I've got over that now. They have great coverage because of high pigment levels, which means they can also be thinned and still be quite strong.
I tried, ,the "paint the whole model to give the mortar lines, then dry brush the raised bricks or stones" approach. This works well if you are both patient and careful. It works best if you build up the colours, rather than trying to do it all in one go. But invariably I have parts where the brick colour gets into the mortar lines, creating a bit of a splodge. Very frustrating. I have found powdered pastels can be used when it is all dry to fill the mortar lines - haven't worked out a good way of keeping it in position yet.
I also pick out individual bricks and stones in different colours, then give it all a wash of an appropriate colour to pull it all together - but that means doing something with the mortar lines to finish (the pastel powder works well there). But I have also found that brushing can give a good range of colour, even when using just one colour - that's where paints with high pigments do so well.
I have found keeping colours light, then using a wash is more effective, but I can't be sure of what the final look will be.
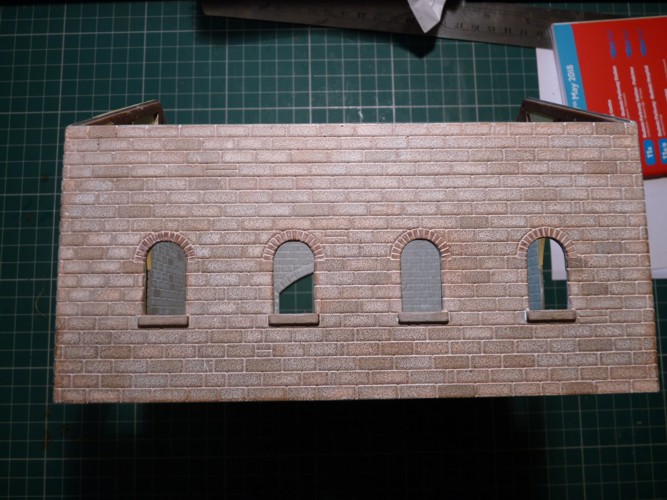
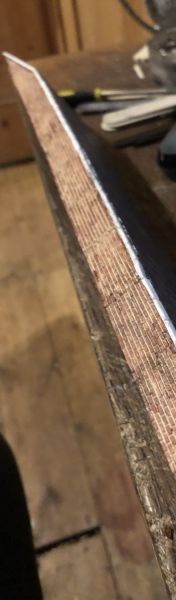
This is a platform I have made - you can see the process I've used
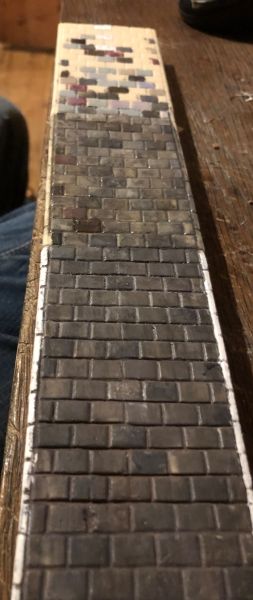
This is my platform walling. Despite appearances, I used just one paint pot - the different shades are simply a result of different amounts of paint used.
I'm no expert, just sharing different approaches I've tried so far (I've left out my disasters!!)
Regards
Michael
1 guest and 0 members have just viewed this.