Building 4mm Coaches in Plastikard.
Posted
#243378
(In Topic #13433)
Full Member
LBSCR bogie coaches.
Requiring a couple of ex-LBSCR bogie coaches for my current layout project (see 'the art of compromise', I decided to have a go at making them from styrene. The first job was to search through my collection of saved magazine articles. Of the five or so articles revealed, the one which interested me most because of the simplicity of construction, was by Bernard Holland in the January, 1974 Model Railway Constructor. Mr. Holland advocates building the coach sides rather as they were in real life (as you will see shortly). I will use Mr. Holland's method with one or two tweaks of my own, and I hereby pay tribute to Mr. Holland who is the originator of this method.
The coaches will be built separately and in order not to bore you rigid, I will only feature the build of the first coach, this being a 48ft Brake Third.
This coach is being built in 'real time', i.e. as I complete each part, you are reading about it. Therefore, there may be some delay between posts as I need to do further research and require some bought-in parts, such as buffers, wheels, etc.
 Last edit: by col.stephens

Posted
Full Member
Before you start it is necessary to source a good drawing of the desired coach. Of course, books devoted to a particular railway company's carriage stock are ideal. Old magazines are another useful source and a search on the internet might reveal that drawings of a particular coach were previously published. Old magazines are available on ebay and from other internet sources.
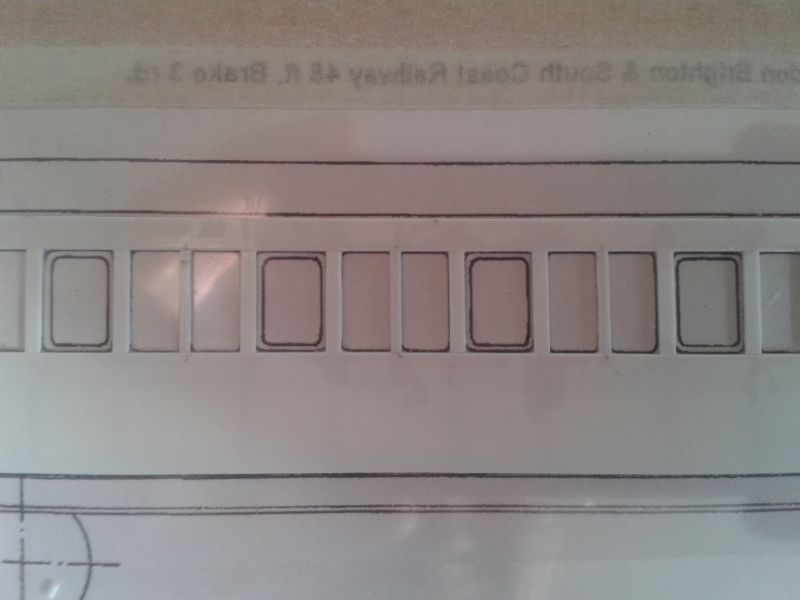
I was fortunate in finding drawings online, which I was able to instantly download after payment. The drawings are to 7mm scale but I was able to re-scale them to 4mm scale during the printing process. It took a bit of trial and error, but I eventually found that if I reduced the scale on the printer to 56.75% of the original, it was spot on for 4mm scale. As stated earlier, I am building a 48ft Brake Third. Obviously, because of the brake portion, the coach sides will need to be built as mirror images, so the drawing will need to be reversed for one of the sides. I found that I was able to do this on the printer also.
To start, the drawings of the two sides were placed on a piece of mdf board and covered with the thinnest clear styrene sheet which I could find. All was secured to the board with masking tape.
Posted
Full Member
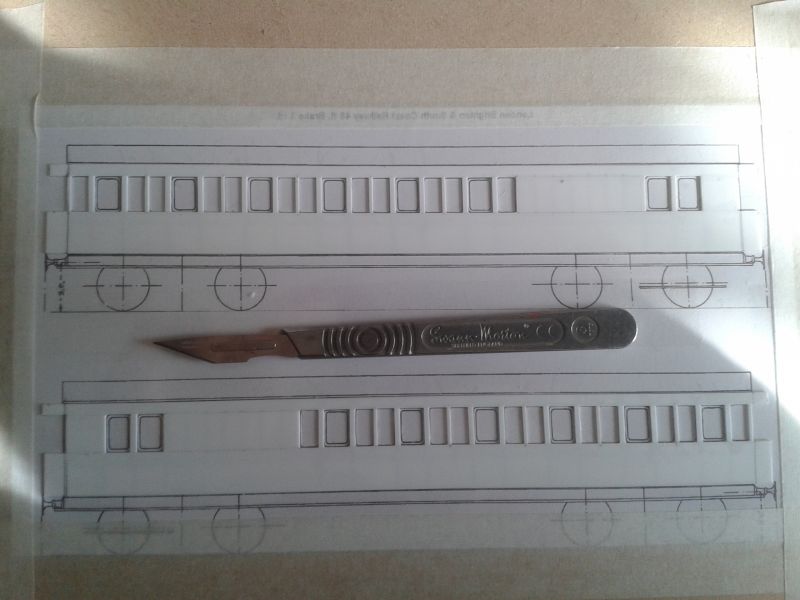
I am modelling the coach sides in 20thou white Plastikard. Firstly, I cut a strip to cover the drawing from the bottom of the coach side to the bottom of the window apertures. Solvent was applied around the edges to weld the white styrene to the clear styrene.
Next, a thinner strip of white styrene was stuck in place to cover the drawing from the top of the window apertures to the top of the coach side.
Posted
Full Member
Now it is a matter of fitting all of the pieces which go between the window apertures. I started with the false wall behind the guard's lookout. I may need to trim this back later in the process as research today has revealed that it may be visible through the windows at the end of the coach. This was followed by the area of coach side which will be a number of panels. The edges of the double doors were also inserted between the windows.
Last edit: by col.stephens
Posted
Full Member
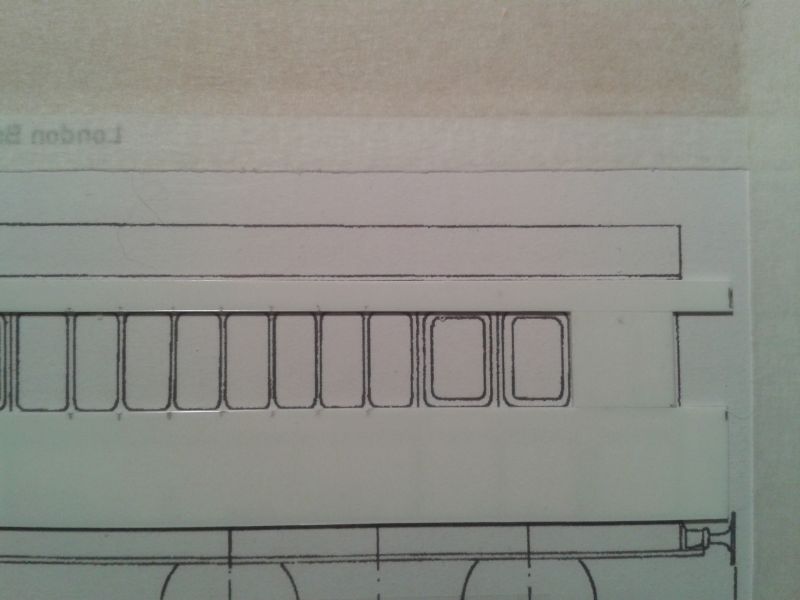
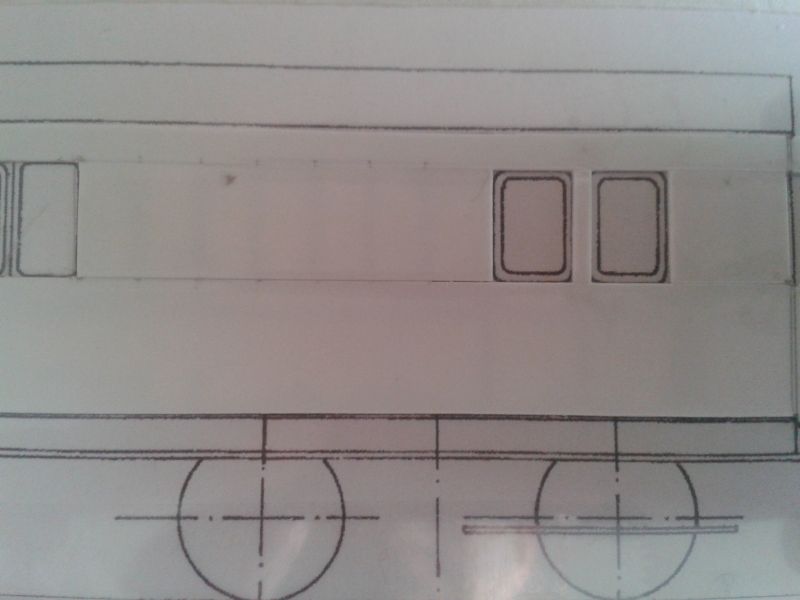
All of the other uprights were fixed in place using strips of 1mm and 1.5mm styrene. Both coach sides were worked on simultaneously.
This guillotine was very useful for cutting all of the thin uprights to the same length:

The sides were removed from the mdf board and the clear styrene was trimmed back to the coach sides. The ends were also trimmed. This is where we are at present:

More soon.
Terry
Last edit: by col.stephens
Posted

Full Member
Barry
Shed dweller, Softie Southerner and Meglomaniac
Posted

Full Member

Posted

Full Member
Cheers
Andy
Andy
Posted
Full Member
Brendan, I'll post the website details later when I get home,
Regards to all,
Terry
Posted
Full Member
Here is the website from which I downloaded the drawings (and very good they are too):
Enjoy!
Terry
Posted

Full Member
Doug
'You may share the labours of the great, but you will not share the spoil…' Aesop's Fables
"Beer is proof that God loves us and wants us to be happy" - Benjamin Franklin
In the land of the slap-dash and implausible, mediocrity is king
"Beer is proof that God loves us and wants us to be happy" - Benjamin Franklin
In the land of the slap-dash and implausible, mediocrity is king
Posted

Full Member
Do you think painting is going to be tricky with the glazing in place?
Posted
Full Member
Nick, no it won't be a problem. All to be revealed soon.
Doug, curved corners coming up soon.
Terry
Posted
Full Member
[the swine is keeping us in suspenders…]
D
Last edit: by Chubber
'You may share the labours of the great, but you will not share the spoil…' Aesop's Fables
"Beer is proof that God loves us and wants us to be happy" - Benjamin Franklin
In the land of the slap-dash and implausible, mediocrity is king
"Beer is proof that God loves us and wants us to be happy" - Benjamin Franklin
In the land of the slap-dash and implausible, mediocrity is king
Posted
Full Member
Before we proceed further I would like to make one or two observations on the work so far. I have been experiencing a problem in keeping the clear styrene backing attached to the white styrene. In spite of flooding the edges with Mek-Pak, they appear to come apart with ease. I have now resorted to squeezing superglue around the edges. I suspect that the problem with bonding the two plastics together is that they are of different chemical composition and whilst the white styrene is quite amenable to being bonded with Mek-Pak, the clear styrene doesn't want to know. I could resort to using a stronger solvent if I don't mind ruining my lungs and brain. I would advise that when purchasing your styrene you ensure they are from the same source. For instance, I have never had this problem in the past when bonding white Slaters' Plastikard to Slaters' Plastiglaze. All of the styrene sheet being used for this project was bought from the same trade stand at a recent exhibition, but they are clearly not compatible. You have been warned!
The other mystery to me is why the section of white styrene in the centre of the coach side, between the guard's doors and the first compartment window, is standing proud of the styrene strips above and below. They were all cut from the same sheet! It will be sanded to reduce its thickness. One of life's mysteries, such as why is it that my wife puts my socks into the washing machine in pairs, and they always come out as singles? I have countless single socks in my drawer waiting for their partners to join them sometime in the future!
Terry
Posted
Full Member
Time to reveal all regarding the curved corners of the windows and to answer Nick's previous question regarding painting the coach without getting paint on the glazing.
If the coach is of a type, built by some railway companies, with square corners to the windows and panelling, then the next part, regarding the curved windows, can be ignored. And, I might add, you will have an easier life!
For us lesser mortals who are destined to suffer, this is how you deal with curved corners…
But first, let me keep you in suspense by answering Nick's question about painting the coach without getting paint on the glazing. The answer is… the clear styrene sheet, to which we have stuck the white styrene sides, IS NOT THE GLAZING! Its purpose is simply to hold the coach side together. Hands up all of you who thought the clear styrene was the glazing!
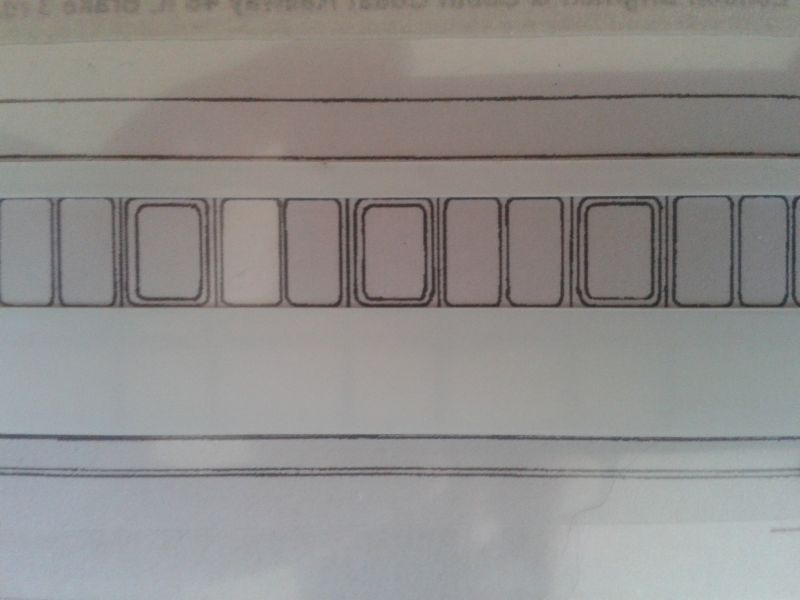
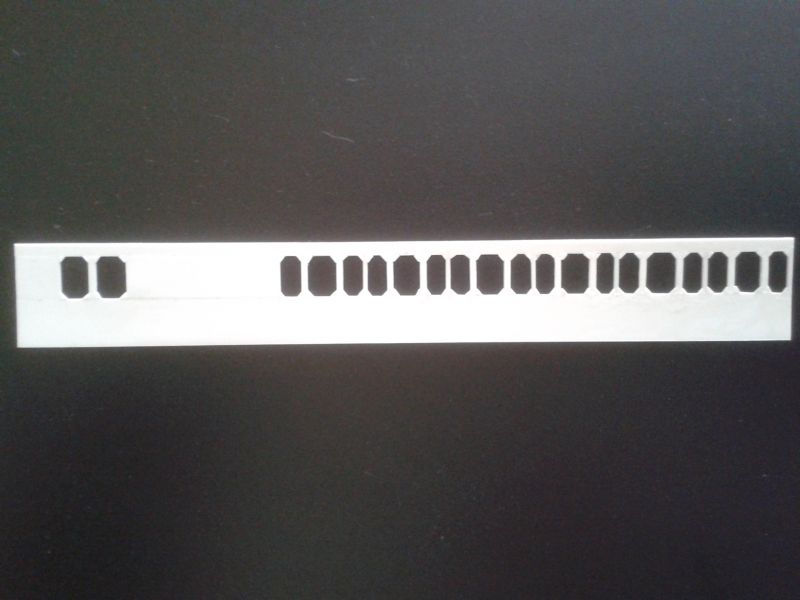
In fact, the next step is to carefully cut out all of the clear styrene from the windows. This didn't actually take me very long. All edges were quickly cleaned up with a swiss file. In the original article by Mr. Holland, he advises cutting out all of the clear styrene, EXCEPT from those windows with droplights, usually those windows in the doors. The droplight frames are actually fashioned in the clear styrene by carefully cutting out a rectangle in the clear styrene to leave the frame. Some droplights can be made to look partially open by cutting the top of the droplight frame further down the window, and removing the clear styrene from above it. Using the clear styrene to make the droplights will work for windows with square corners but can't be done for those with curved corners as will become apparent shortly.
Terry
Last edit: by col.stephens
Posted
Full Member
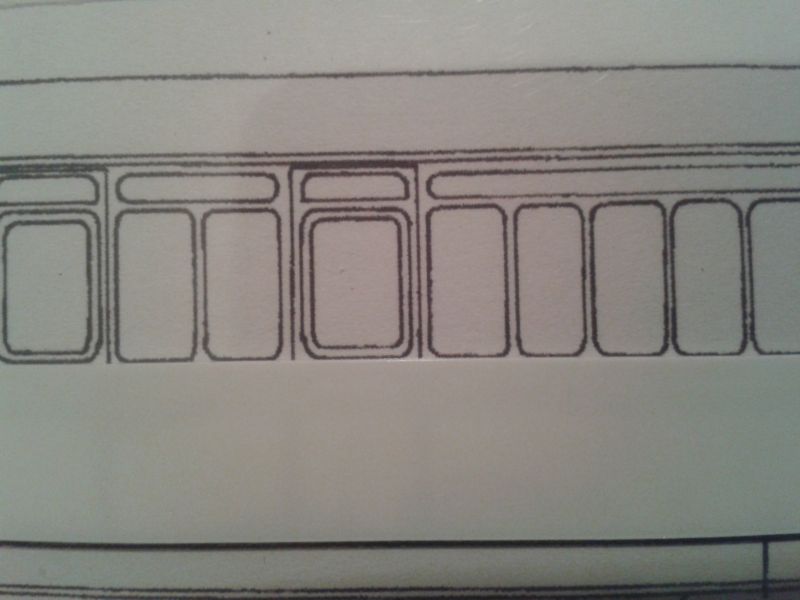
Now for the curved corners. From a narrow strip of styrene cut a number of small squares. Now cut these diagonally to produce triangles. Stick one triangle into each corner on every window and you end up with something like this…
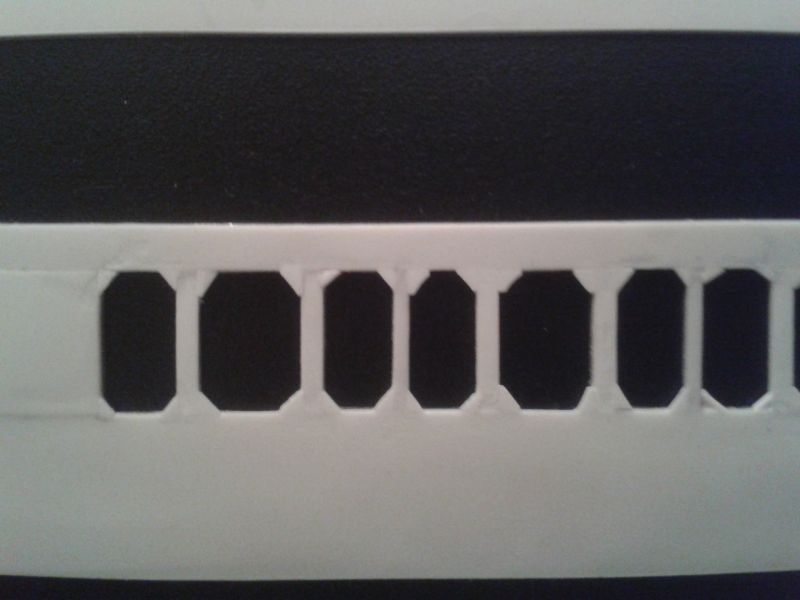
ALLOW TO DRY THOROUGHLY before using a round swiss file to carefully file each corner to create a curve. In the next photo, I completed the window on the left in a couple of minutes this morning just to show the end result.

It may not be perfect but I think it will look reasonable from the normal viewing distance.
As mentioned in the last post, it is impossible to leave the clear styrene in place for curved corners, as you would not be able to pass the swiss file through the window to shape the corner. No problem, we will add the droplights later at the glazing stage.
Right, I now have lots of triangles to cut out for the other coach side and lots of filing to do, so I'll post again when this has been done.
Regards to all,
Terry
Last edit: by col.stephens
Posted

Site staff

Ed
Posted
Full Member
Ed, given the choice I would opt for coaches with right angled cornered windows too. That would certainly speed up construction.
Terry
Posted
Full Member
To badly misquote "Apollo 13" - "You sir are a steely-eyed round corner window maker!"
I'll get my coat…..
Barry
Shed dweller, Softie Southerner and Meglomaniac
1 guest and 0 members have just viewed this.