A two road engine shed from card
Posted
#250647
(In Topic #13780)

Full Member

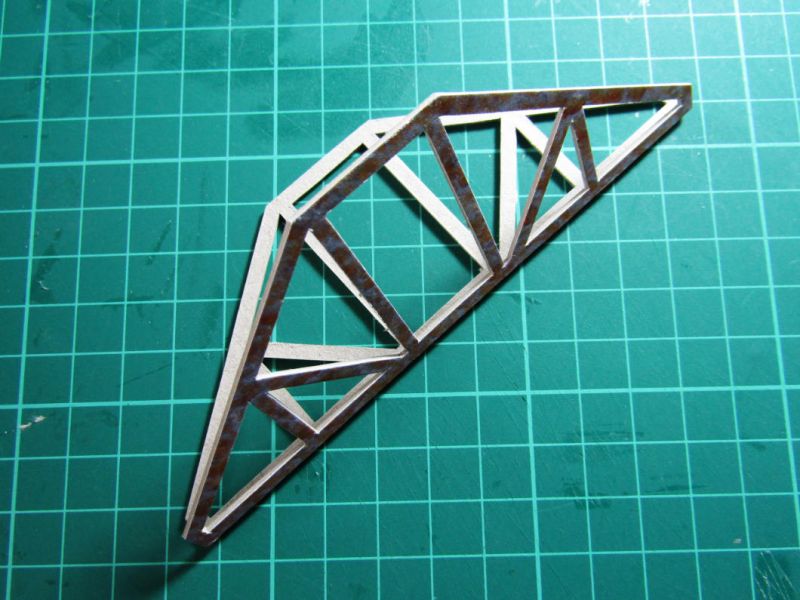
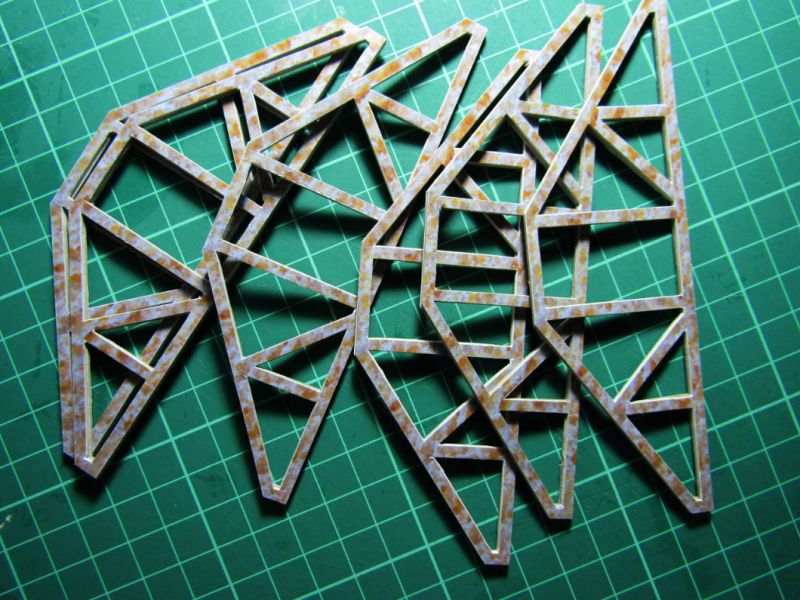
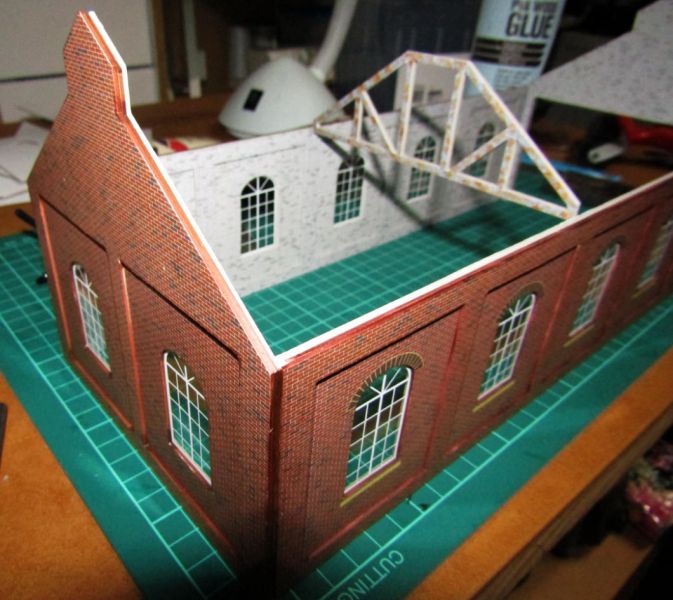
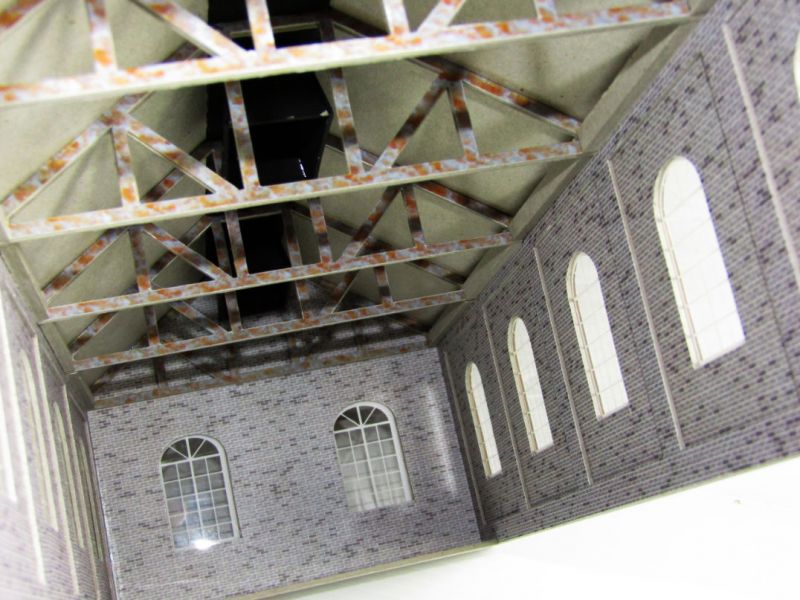
These are the roof trusses which I tackled first as they took a while to cut. Once all the white areas are removed a part cut along the centre line allowed them to be folded and glued.
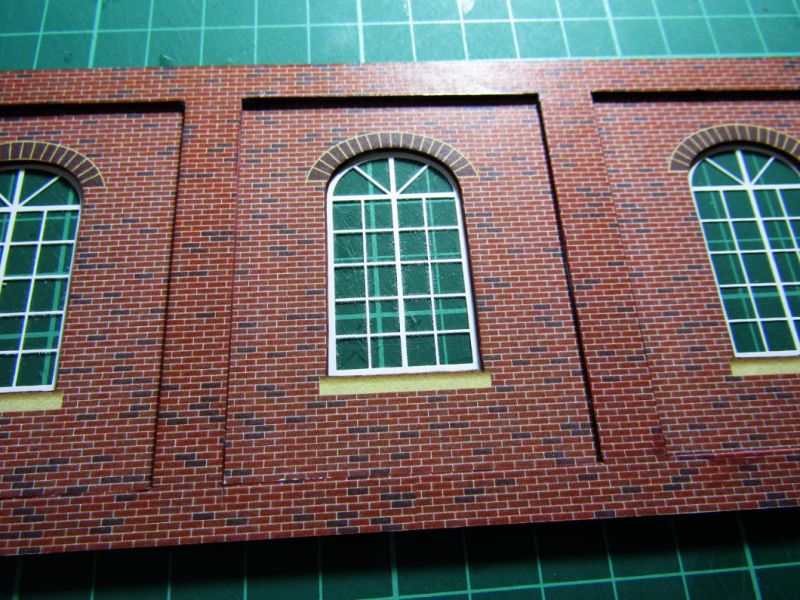
The walls are made by layering a number of sections that create depth to the model and provide additional strength, a total of three layers of material was used in the walls.
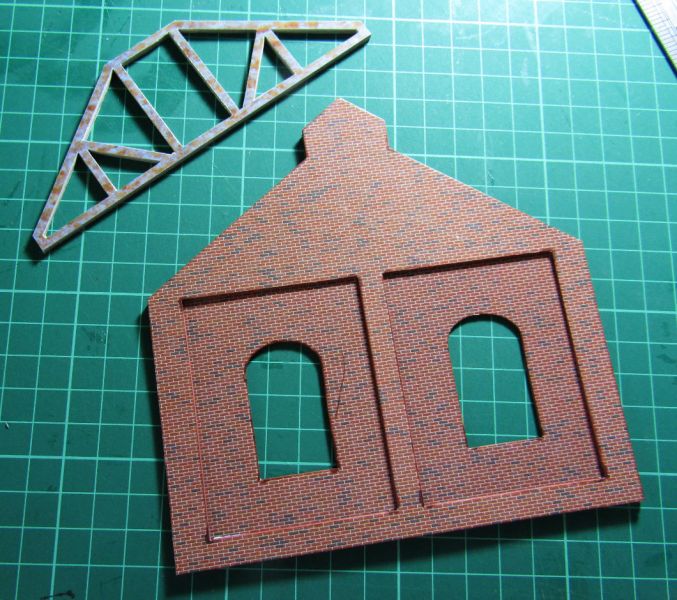
The photo shown below is the parts for the internal side walls.

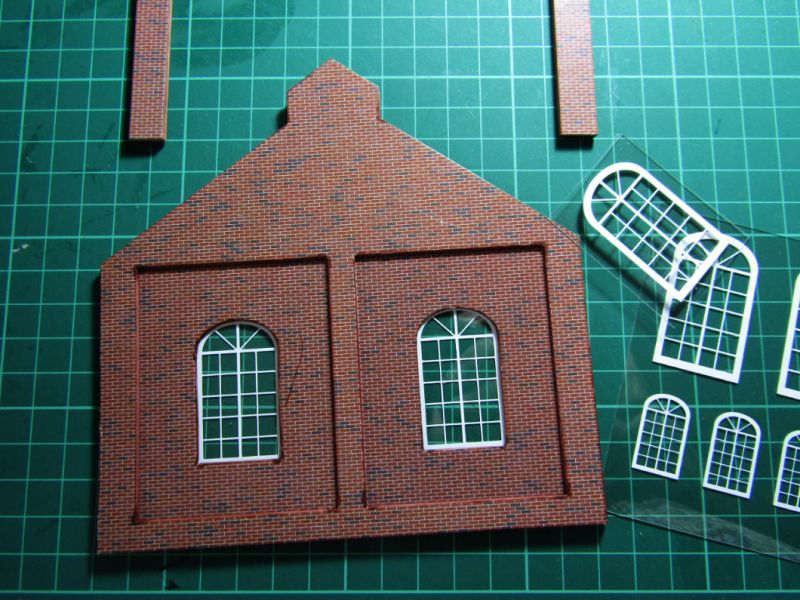
The fitting of my screen printed windows.
When everything was cut out and the individual walls constructed it was a simple job to glue them together to create the basic shell and of course a little test of how the trusses look when in place.

Posted

Full Member
D
'You may share the labours of the great, but you will not share the spoil…' Aesop's Fables
"Beer is proof that God loves us and wants us to be happy" - Benjamin Franklin
In the land of the slap-dash and implausible, mediocrity is king
"Beer is proof that God loves us and wants us to be happy" - Benjamin Franklin
In the land of the slap-dash and implausible, mediocrity is king
Posted
Full Member
Terry
Posted
Full Member
Posted

Full Member
Cheers,
Claus
www.flickr.com/photos/ellef/
Claus
www.flickr.com/photos/ellef/
Posted

Full Member
Looking forward to the update and to seeing the finished model. :thumbs
'Petermac
Posted
Full Member
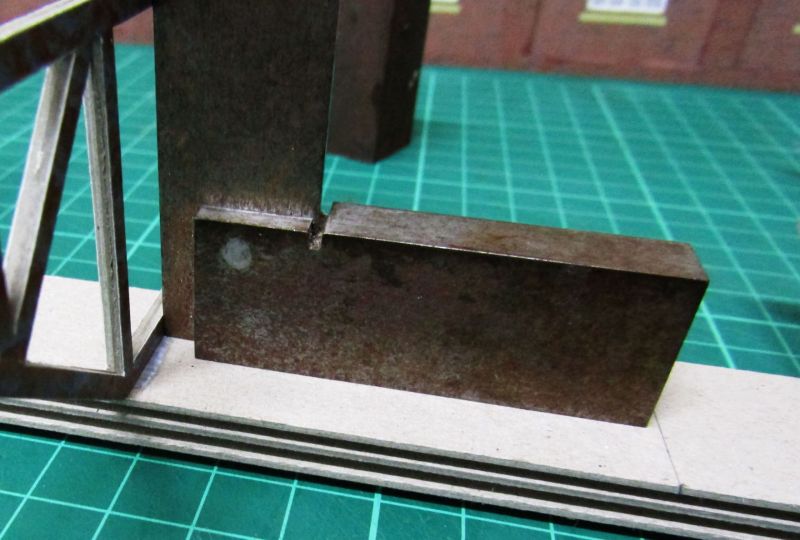
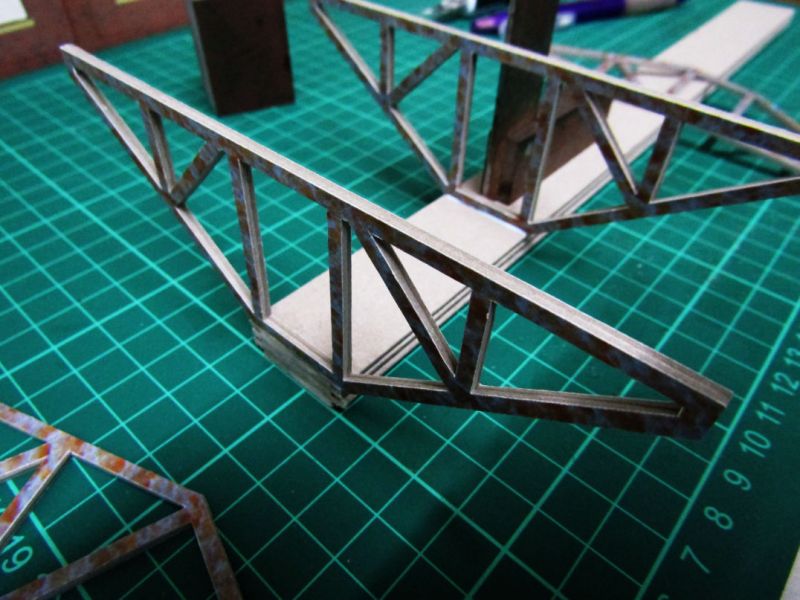
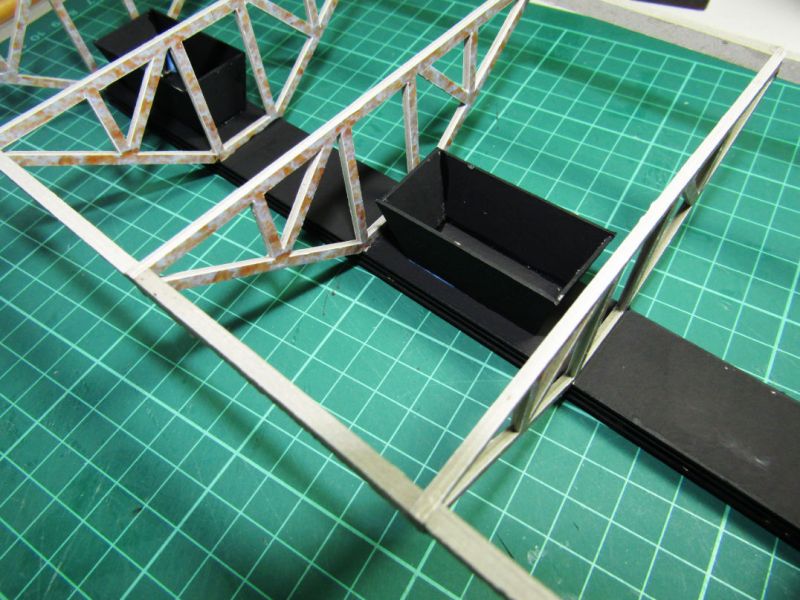
The photo below shows the fitting of the cross members between the roof trusses.
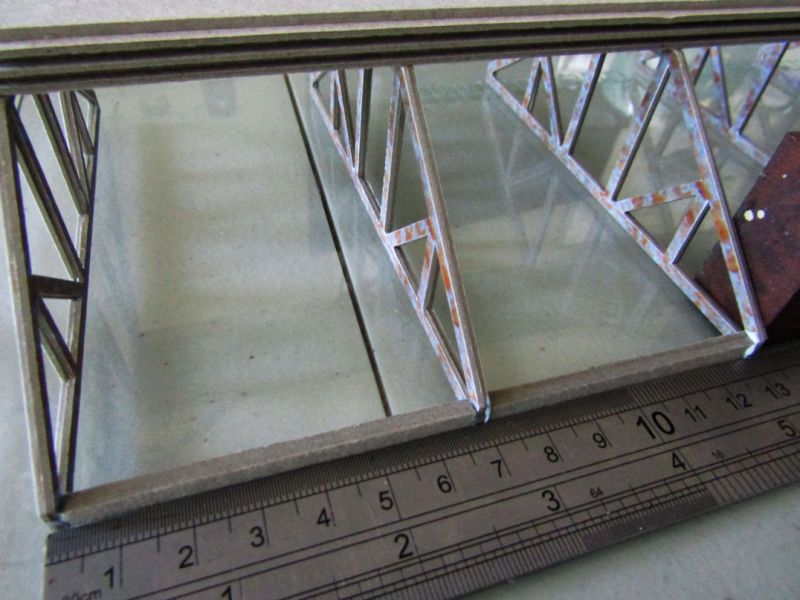
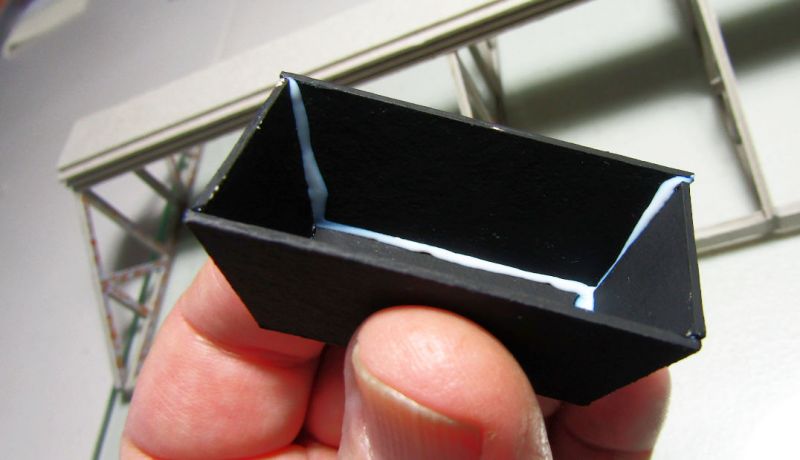
Making the extraction fan hoods and fitting them in the roof cavity.
Testing the roof assembly fit on the model.

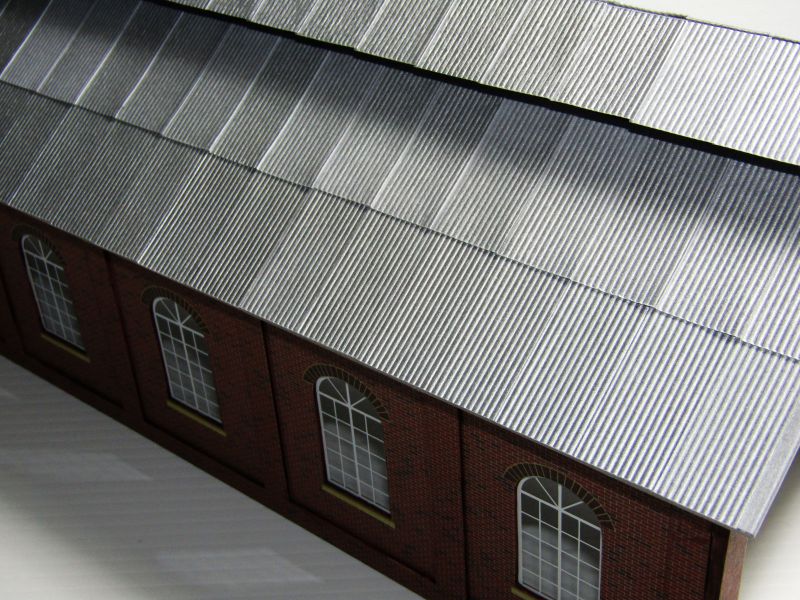
Fitting the roof panels to the trusses. I think that is enough for today, I will do more tomorrow, I think a cuppa is in order.

Posted
Full Member
I think a large congratulatory glass of S.L.W. would be more appropriate…..I think that is enough for today, I will do more tomorrow, I think a cuppa is in order.
D
'You may share the labours of the great, but you will not share the spoil…' Aesop's Fables
"Beer is proof that God loves us and wants us to be happy" - Benjamin Franklin
In the land of the slap-dash and implausible, mediocrity is king
"Beer is proof that God loves us and wants us to be happy" - Benjamin Franklin
In the land of the slap-dash and implausible, mediocrity is king
Posted
Full Member
Clever idea using the layered card to represent the slotted vents - it works very well. :thumbs
'Petermac
Posted
Full Member
Posted
Full Member
Sorry to hear about your car accident - just as long as you're OK - cars are inanimate and can easily be replaced …………..humans aren't so easily done. :roll:
'Petermac
Posted
Full Member
Nice sheeting. :thumbs
Sorry to hear about your car accident - just as long as you're OK - cars are inanimate and can easily be replaced …………..humans aren't so easily done. :roll:
Thank you.
Posted
Full Member
Cheers,
Claus
www.flickr.com/photos/ellef/
Claus
www.flickr.com/photos/ellef/
Posted
Full Member
A bit of a process to get a system that worked, after a few failures I finally milled a couple of plates that actually worked.Still impressed with your modelling. How do you make the corrugated metal/roof?
Posted

Full Member
Very impressed. I like all the finer detail that you are putting in. Are you thinking about installing lighting?
Gary
__________________________________________________
I am no expert but I do what I can, when I can, with what I can.
__________________________________________________
I am no expert but I do what I can, when I can, with what I can.
Posted
Full Member
Thank you for your kind words, in answer to your question I will be weathering the model and will fit lighting inside as well. I purchased the LED's and resistors the other day so I am keen to get it done but I must concentrate on one step at a time.Regards,Excellent work.
Very impressed. I like all the finer detail that you are putting in. Are you thinking about installing lighting?
Robyn
Posted
Full Member
Ian
Ian Lancaster
Please visit my OO Gauge 1930's LMS layout "Jencaster"
http://yourmodelrailway.net/view_topic.php?id=14622&forum_id=21&page=1
Please visit my OO Gauge 1930's LMS layout "Jencaster"
http://yourmodelrailway.net/view_topic.php?id=14622&forum_id=21&page=1
Posted

Full Member
Do you intend to add any interior detail? It can be a divisive issue…. frankly most of it is never seen… but then those closeup photos reveal the full detail. It's a lovely model so far and I hope we will see it in situ
Michael
Posted
Full Member
Thank You IanThat really does look good! Very nice modelling.
Ian
Posted
Full Member
That is super corrugated sheeting. I made a former for mine, but yours is beautifully uniform.
Do you intend to add any interior detail? It can be a divisive issue…. frankly most of it is never seen… but then those closeup photos reveal the full detail. It's a lovely model so far and I hope we will see it in situ
Michael
Thank you Michael, the plates took a bit of experimenting before I finally got a set that worked but it was worth the effort. Interior Detail…well I am looking at doing some work in this regard but I think it will be limited so my friend can add to it as well, I am confident that this will look good on his new layout.
Robyn
1 guest and 0 members have just viewed this.