A Simple Goods Depot after John Ahern.
Posted
#234375
(In Topic #12868)
Full Member
Goods Shed in card.
Here we go again! I need a goods shed to fit a rather slim site on my home layout. Look no further than the card modeller's bible, Miniature Building Construction by John Ahern. Please turn to page 82 of your copy and there you will find a very nice drawing of 'a simple goods depot'. There is a photo on the opposite page.
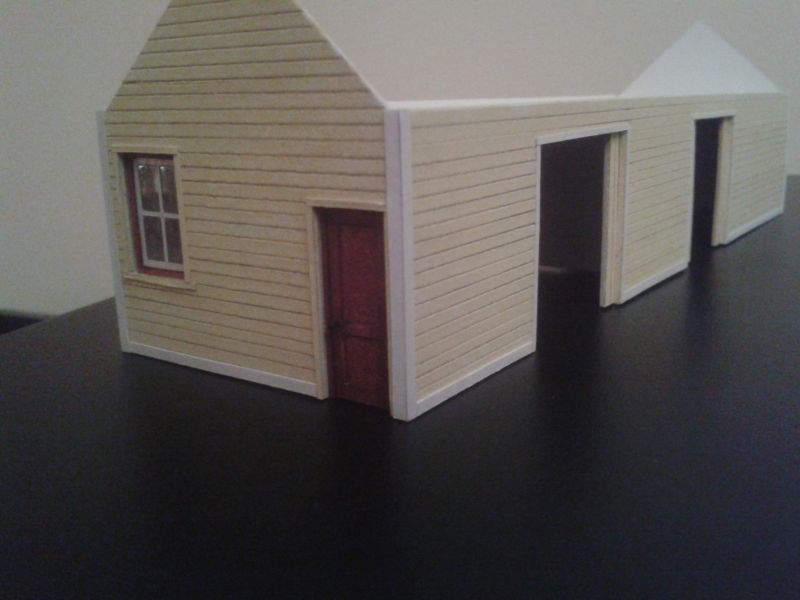
Basically the building is a wooden structure sat on a brick base. A narrow platform on one side allows incoming or outgoing goods to be dealt with trackside. The other side of the building allows road vehicles to draw up hard against the building for transference of goods.
Once again I will be using mount board for the building of 1.5mm thickness. However, for strength, the base will be constructed of 2mm grey board. I use Cosmic Shimmer acrylic glue to hold everything together.
So, to start with the rectangular brick base. Scalescenes red brick paper was treated to a spray of Testors Dullcote matt varnish to protect the inkjet surface, before being glued to the platform walls with a glue stick. I laid them on top of my computer tower and piled a number of books thereon and left them to dry. Once dry, the walls were assembled using try squares to ensure all corners were square…
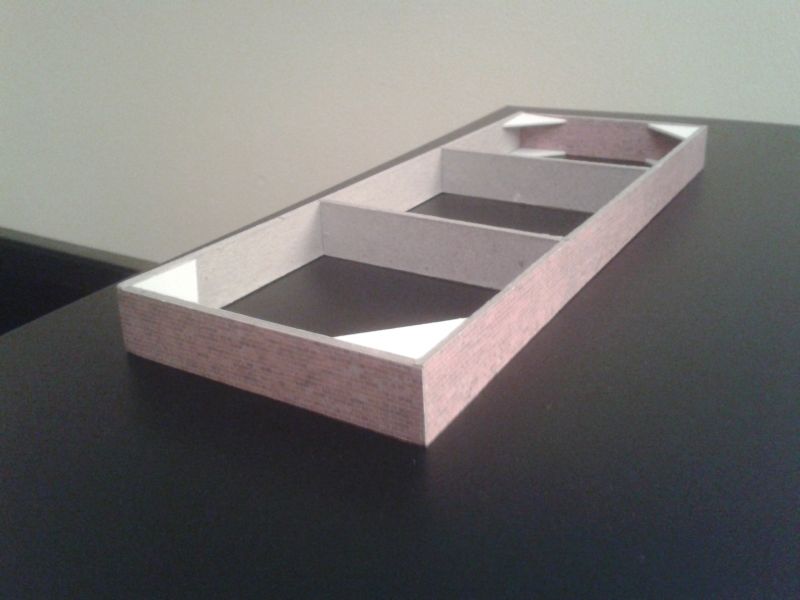
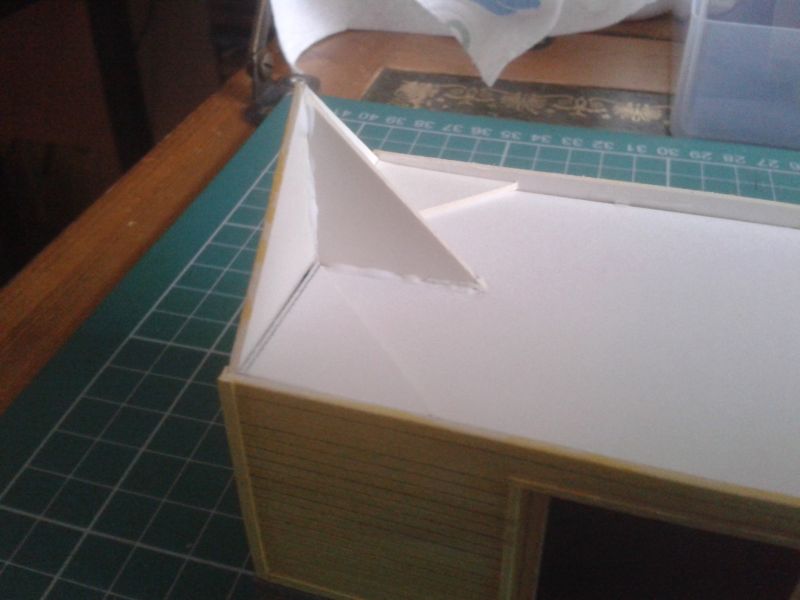
As you can see from the photo above I added two interior walls and small card triangles to lend support to the corners. Re the brick covered interior of the end walls. I forgot to leave narrow tabs of brick paper protruding from each end to cover the edges of the adjoining side walls. Hence I had to flip them over and apply the brick paper to the other sides, this time remembering to leave an overhang at each end. To be honest, I usually make a number of mistakes when constructing buildings. The trouble is, I never seen to learn from my mistakes! Oh well, as they say, 'he who never made a mistake never made anything'.
The platform surface was cut from mount board leaving a small overhang for the track side. This was painted with grey acrylic paint to match the platform of the nearby station on the layout. When dry, it was glued in place…

Terry
 Last edit: by col.stephens

Posted
Full Member
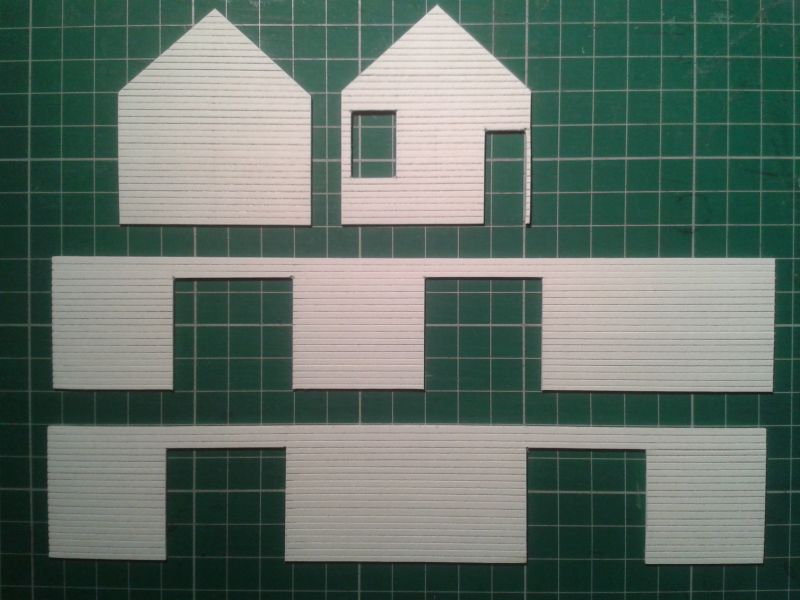
And now to the main building. The sides and ends were drawn onto the mount board and the planks drawn thereon. Here are the ends…

The sides were drawn in a similar fashion and all planks on sides and ends were scribed. All parts were cut out and this is where we are at present…
More soon.
Terry
Posted

Site staff
Cheers
Matt
If your enjoying Terry's John Ahern build you can see more work by Terry and Doug in their John Ahern thread
just follow the link Here or the photo box link on the RIGHT of the homepage or recent posts page
Cheers B
Wasnie me, a big boy did it and ran away
"Why did you volunteer ? I didn't Sir, the other three stepped backwards"
"Why did you volunteer ? I didn't Sir, the other three stepped backwards"
Posted
Full Member
Matt, thanks for the link to the John Ahern thread.
I was a bit miffed yesterday to find that my perfectly flat platform had warped overnight to resemble a rocking chair. Probably due to our central heating. It has been sitting under some weights for twenty-four hours and appears to be flat again. I shall see if I have some wood to glue underneath to keep everything level.
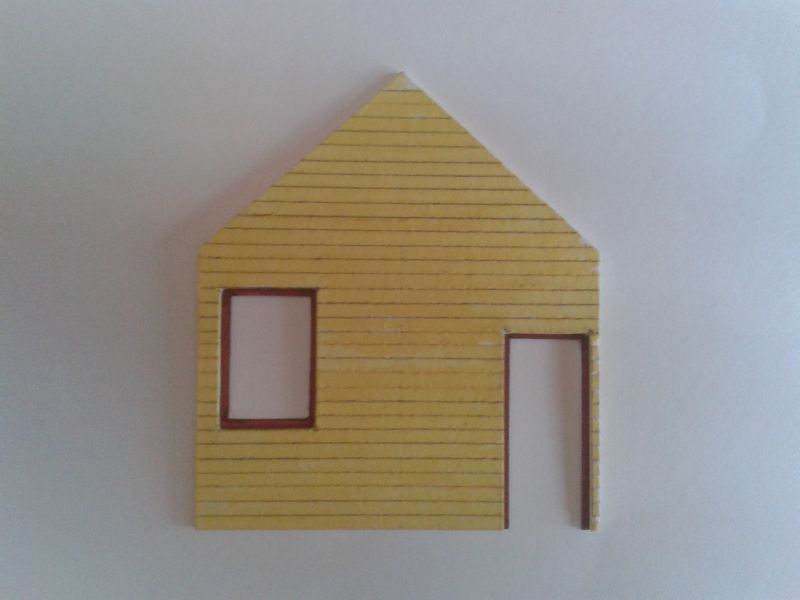
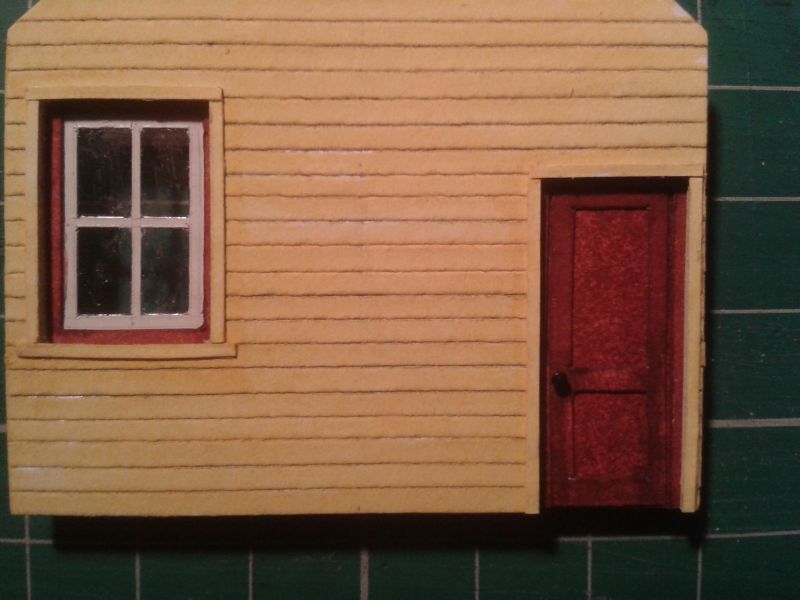
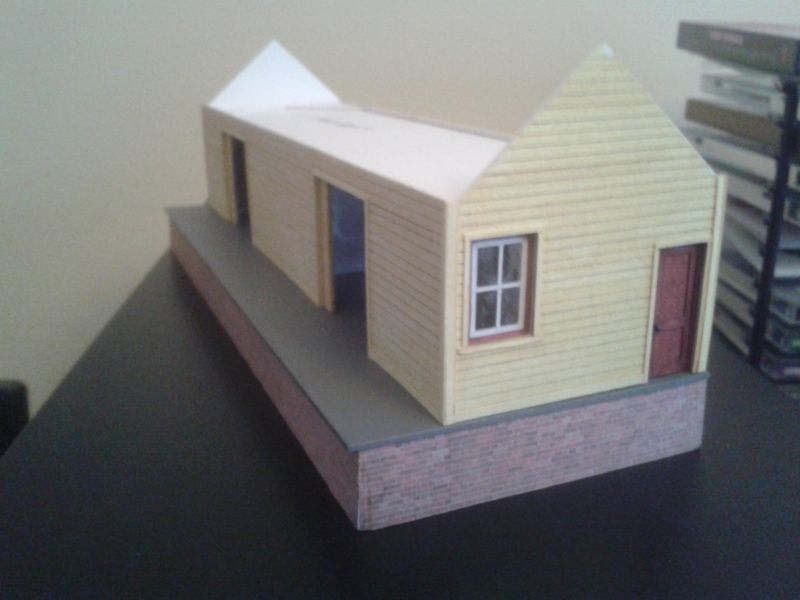
The building walls were given a wash of watercolour paint, a mixture of lemon yellow and naples yellow. I like to add doors and windows to my buildings before the walls are joined as I find it much easier to work with the walls lying flat. The office door and window frames were formed in the same way as described in previous threads. The window (or door) opening is placed on a piece of thin card and a pencil line is drawn around the aperture. Cut just inside the pencil line and remove the piece of card. I gave the card a wipe over with a red felt tipped pen and glued in place behind the window aperture, as shown here…
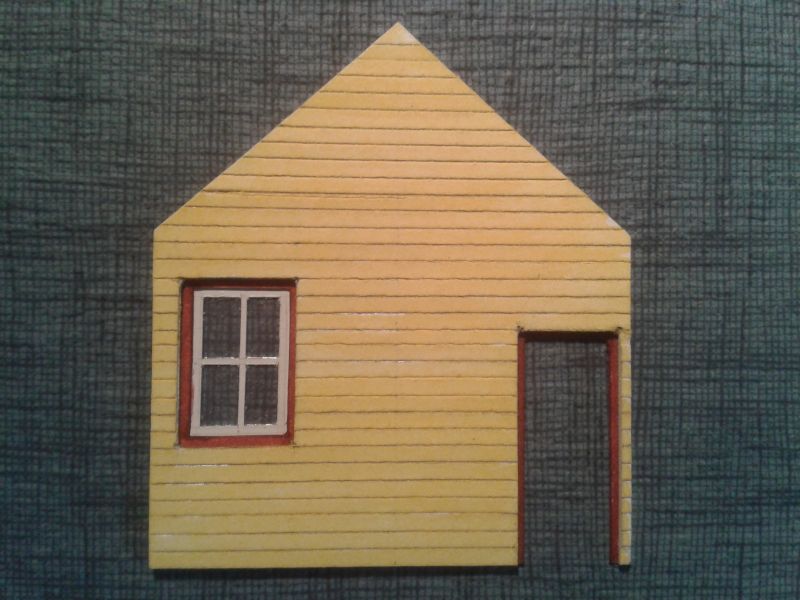
The window was made using the sticky label method as previously described by Doug (Chubber) on this website. Stick the label to a piece of clear plastic. (In this case a piece of discarded packaging from some product or other). With a pencil, draw on the glazing bars. Cut out all of the window panes and remove. I use a wooden tooth pick to raise the corner of the pane without scratching the 'glass' underneath. The window was glued in place…
More soon.
Terry
Posted
Full Member
The office door was made from two layers of card. The top layer was made from thin card, two rectangles were cut out to leave a frame which was coloured with felt-tipped pen. This was glued to mount board which had been coloured also. A Peco track pin represents the door knob…
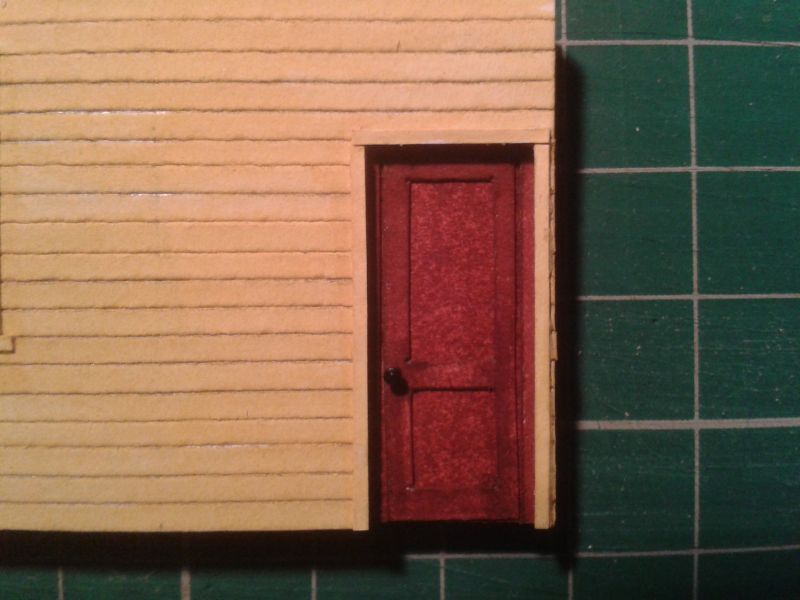
A thin card frame was fixed around both window and door and painted…
More soon.
Terry
Posted
Full Member
Looking back to the fourth photo in this thread, you will see that there are square holes in the sides where I had cut out the apertures for the main doors. The removed pieces were used to represent the doors. As they were already scribed with the planks, they were turned 90 degrees, cut in half, painted and glued in place at either side of the apertures. Narrow strips of thin card were glued in place around the apertures to represent the door frames. Tip: always make sure that the top horizontal frame is supported on the tops of the side frames, never between them. The frames will be painted to match the walls. The building was then erected with the ends glued between the sides.
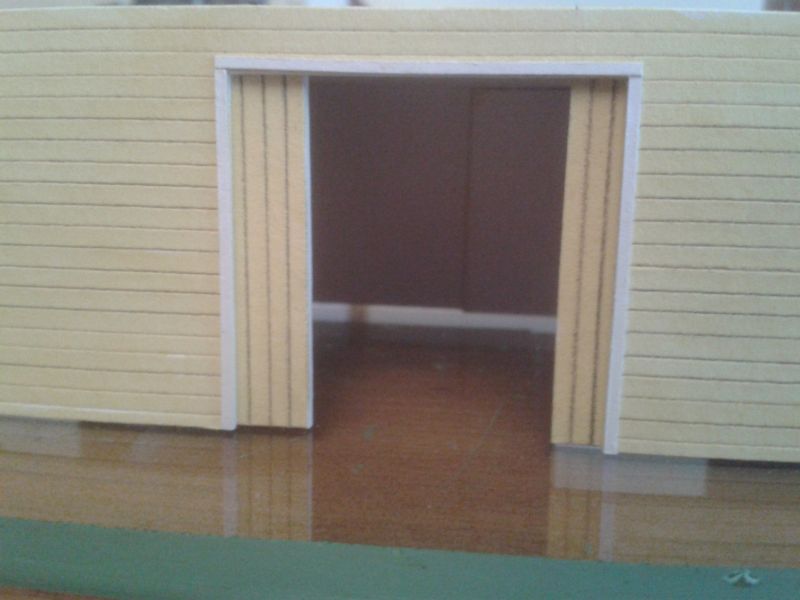
As this building is rather long and in order to give more support, I fitted a false roof which rests on the tops of the doors.
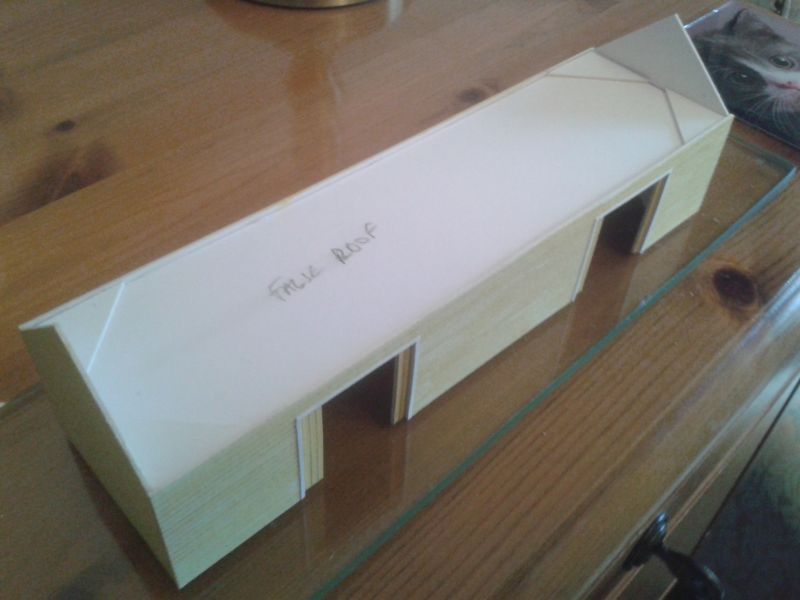
To give extra support to the centre of the building, I also fitted a false wall about halfway along its length. In this photo you can also see the small triangles fitted to the bottom of the walls to ensure right-angled corners.

More soon.
Terry
Posted
Site staff
Cheers
Matt
Wasnie me, a big boy did it and ran away
"Why did you volunteer ? I didn't Sir, the other three stepped backwards"
"Why did you volunteer ? I didn't Sir, the other three stepped backwards"
Posted
Full Member
Thin card was added to the corners of the building and to the lowest plank, followed by a lick of paint.
The inside of the building was given a wash of dark watercolour paint. Time to bring the building and the platform together with a thin bead of glue.
Owing to the scribing of the card, the tops of the ends had a distinct bend inwards. To counter this I added small triangles of card to straighten them up.
More soon
Terry
Posted

Inactive Member
Coming on really well Terry, in fact it makes me wish I was modelling in 00 instead of N as it must be easier on the eyes - and the fingers! 
Ken.
'It don't mean a thing if it ain't got that Swing'
Posted

Full Member

Posted

Full Member
Staying on the thread Kevin.
Posted
Full Member
Thank you both. I have put this project onto the 'back burner' for the present as I am constructing a new micro-layout. I have a deadline of January next when, hopefully. it will be exhibited for the first time. I hope to return to finish the goods depot at some later date.
Kevin. I have sent you a PM regarding cutting windows in styrene sheet.
Regards to all.
Terry
Posted
Legacy Member
Hi PD.Hi Terry. Excellent . How does everyone make it so simple? I thought that it would be a “ Piece of Cake “ to cut windows into to styrene , or any plastic, how wrong I was! My three storey warehouse , has become, a two storey warehouse . I would agree that 2mm Card is hard enough, but, I chose a thin styrene , and I have been making shallow “ Attempts “ , not even cuts, without doing one window this afternoon . Best wishes. Kevin
You'll find that cutting window/door apertures out of 1mm styrene/ card much easier if you use a Stanley knife as opposed to a flimsy scapel where a couple of good passes is all that it usually needs.
Posted
Full Member
Staying on the thread Kevin.
Posted
Full Member
Staying on the thread Kevin.
Posted

Site staff
Hi Terry. Something that I missed before, was the use of “ Testors Dullcote “ . I found a weathering project that used Testors products, but, when I tried to purchase them they were not available , needless to say that project went out of the window. Best wishes. Kevin
Kevin, Humbrol make a range of varnishes like Dullcote
https://www.humbrol.com/us-en/shop/coatings-thinners/varnishes.html
Humbrol AB0135 No 135 Satin Varnish - Satin -12ml Acrylic
Ron
NCE DCC ; 00 scale UK outline.
NCE DCC ; 00 scale UK outline.
Posted
Inactive Member
I have seen Dullcote mentioned on a number of forums. Every now and then I go searching Australian sites for Testors Dullcote and give up when I see the price a local hobby shop charge - $13 for a spray can. It is good to know there is an alternative.
Cheers
Evan
Posted
Full Member
Staying on the thread Kevin.
Posted

Full Member
I usually put a strip of card full length and height between the ends which prvides an additional surface for gluing and supporting for the roof as well as holding the ends vertical.Owing to the scribing of the card, the tops of the ends had a distinct bend inwards. To counter this I added small triangles of card to straighten them up.More soonTerry
Cheers MIKE
I'm like my avatar - a local ruin!
I'm like my avatar - a local ruin!
1 guest and 0 members have just viewed this.