Scalescene Farmhouse and barn
Posted
#132932
(In Topic #7053)

Full Member
first impressions
I thought I would have a crack at Johns new offering - this is a very quick build of the farmhouse.A trial run, as it were, to see how things went together.
I did the build in 5 hours total, without taking too much care - results are shown below, with my observations afterwards.

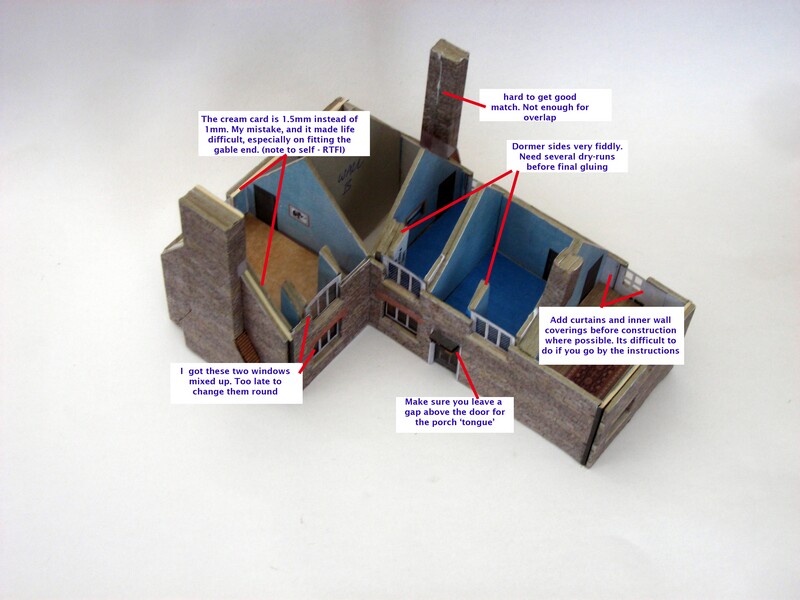
Ignore the chimney pots - they were just quick paper rolls stuck on for appearances!
Problems I encountered:
1. Roof over the front door. Very tight fit. I should have done a dry run first
2. Dormer window sides and flashing. Very fiddly, and tolerances are tight.
3. Fitting the floors. Not easy to fit as per instruction steps. I would fit them sooner.
4. Roof valley. Glaringly bad on my example. I ended up sticking a strip of flashing there.
5. Wrap around brickwork paper on one of the chimneys doesn't look good - could be me…
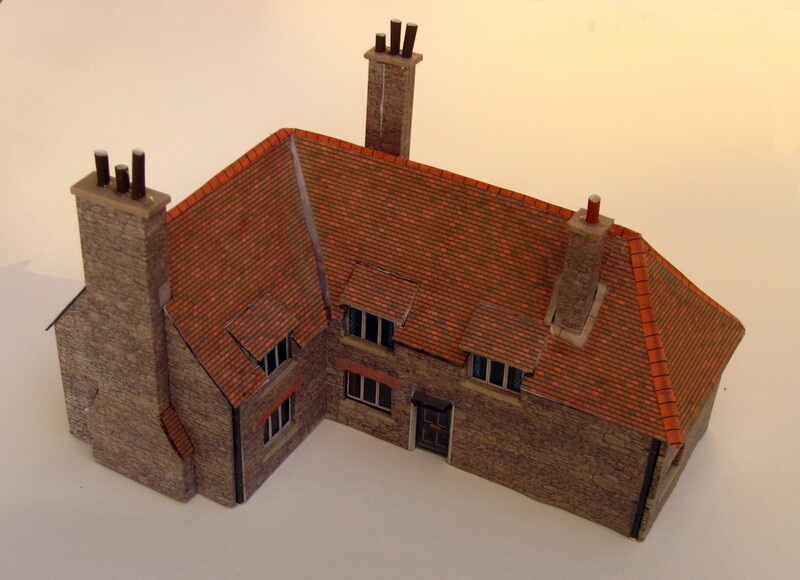
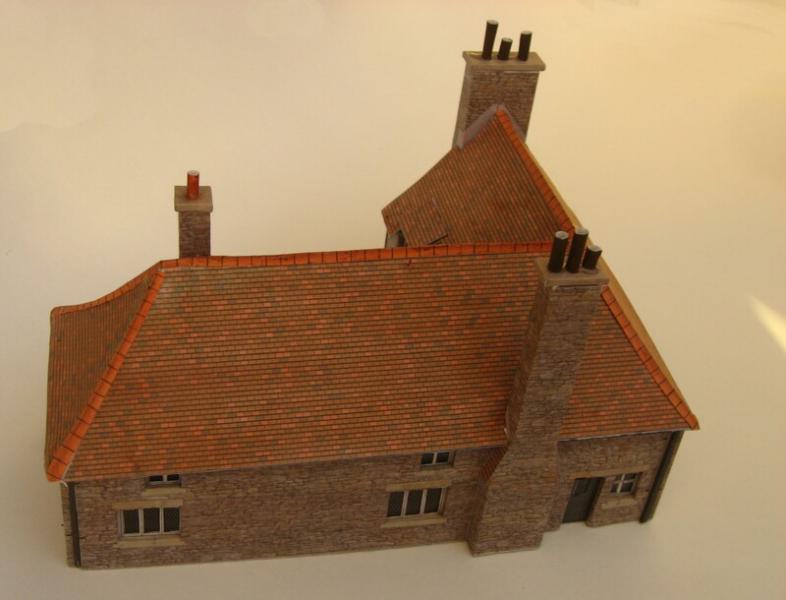
6. The roofing was pure hell to fit. John says to use medium card for the roof base and 200gsm for the tiling.
I ended up using 260gsm for the roof base and 90 for the tiling. Even then it was not a perfect fit.
7. The dormer roofs - the effect was better using the tiles on paper rather than card (in my quick and dirty above, the left and centre are per instructions and the right-hand one is just 90gsm paper)
8. Ridge tiling - I ended up using some spare from my scratch folder - the stuff supplied was not really adequate.
All in all it was a good exercise. Not the easiest Scalescene kit, but enjoyable. I made some glaring mistakes that were my own fault.
Memo to self:
RTFI !!
Some hints:
Do use 2mm and 1mm card. This kit isn't as forgiving as much as previous ones!
Paint the window overlays - they look so much better in colour.
Where possible fit the windows and internal overlays sooner rather than later. Same goes for the curtains. They are virtually impossible to fit later on.
Dry-run with everything, don't assume, like I did (oh, I've made his kits before, I know what I'm doing… Big mistake!)
There are a couple of void spaces inside, which would be a great help if you wanted to fit lighting.
I'm now halfway through building it again, this time taking my time. Results to follow…
Hope this has been some help. Happy to answer any queries.
Shaun.

Posted

Inactive Member
It came out pretty well. :thumbs
Max
Port Elderley
Port Elderley
Posted

Full Member
The roof looks wonderful - is it just 2D or embossed ?
'Petermac
Posted
Full Member
The roofing is 2D, 'straight out of the box' - looks quite effective, doesn't it.
Posted
Inactive Member
And possible pit falls builders may encounter.
Turned out a good looking model.
Regards,
Derek
Posted

Legacy Member
1 guest and 0 members have just viewed this.