High Street Backs / Fronts
Posted
#216265
(In Topic #11810)

Full Member
Joining Together
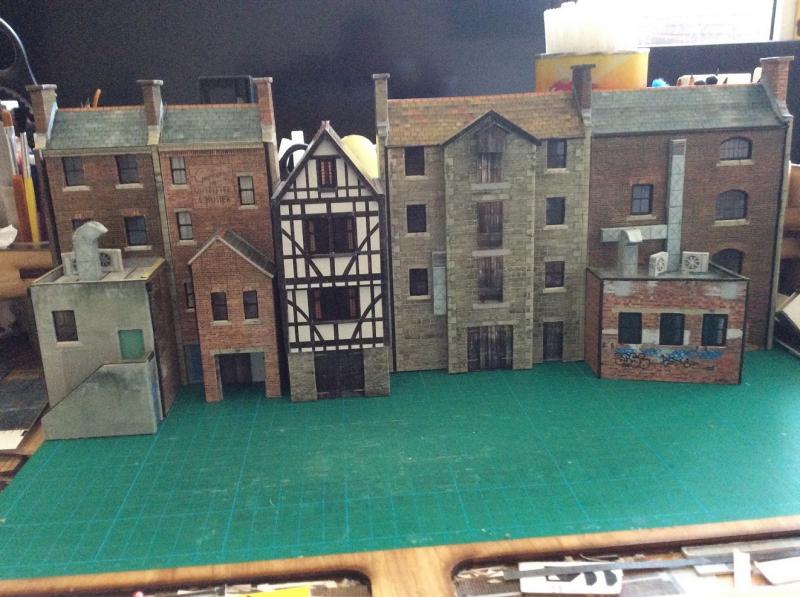
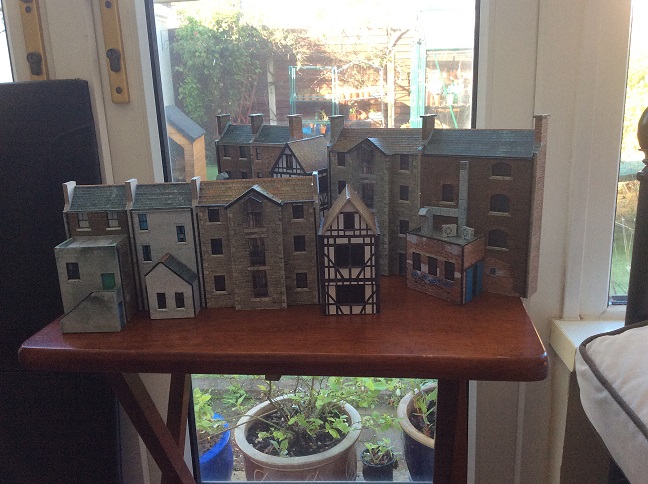
I have just about completed the Scalescenes high street backs and have now purchased the high street fronts. It says on the Scalescenes website that these can be joined together to create one unit.
Was wondering if anyone on here had actually attempted it. My main concern would be the location of the chimneys as on the models they are designed to sit at the front of the build so I presume some sort of kit bashing is required.
I originally intended to kit bash the high street fronts and make them into backs and so giving me a more diverse look on the original backs but now am thinking they would look pretty good as a full high street back and front.
Any comments welcomed..
Shaun

Posted

Full Member
I logged progress here, but doubt there is much that will help you…
http://yourmodelrailway.net/view_topic.php?id=11682&forum_id=101&page=1
Mike
Pig Hill Yard - a small Inglenook shunting layout for my boys, in 00.
Pig Hill Yard - a small Inglenook shunting layout for my boys, in 00.
Posted

Full Member
 ) on Granby…….so I am afraid I cant help very much.
Looking at the two sets of instructions it did seem to me that a fair bit of kit bashing will be required in terms of both structural integrity and adding a sensible amount of depth……plus the roofing:roll:
Do let us know how you get on…..I will be watching with interest
Kind Regards
 Last edit: by John Dew
Posted
Full Member
I know I am not allowed to post an attachment but don't how else to do it
Posted

Inactive Member
Post number 10
Firefox is the browser which works best with this forum.
Max
Port Elderley
Port Elderley
Posted
Full Member
Posted
Full Member
Posted
Full Member
Mike
Pig Hill Yard - a small Inglenook shunting layout for my boys, in 00.
Pig Hill Yard - a small Inglenook shunting layout for my boys, in 00.
Posted

Inactive Member
The mortar bed for the pots can be cut through at the half way point if you are only building the fronts or backs.
Posted

Full Member
You may find that some low relief kits are less than a front or back "half" in which case you will need to make new ends and roofs, end walls between buildings joined in a terrace/row can be plain card, only the visible ends of a block need to be brick or stone. Roofs I prefer to cut new ones from embossed plasticard, tops of buildings are the most visible part of scenic buildings so can benefit from the extra detail.
Try to add some variety by adding cast bay windows and/or dormers and other extras.
Cheers MIKE
I'm like my avatar - a local ruin!
I'm like my avatar - a local ruin!
Posted
Full Member
When I say chimneys I should have been clearer, I meant the stacks. The stacks and the side walls are all one piece in the kits and need to stay that way as they form not only the end walls but the down pipe layers which are all integral to making the model fit. I am going to splice into the stacks whilst maintaining the roof line which will make the stacks less wide and more realistic.
I like the idea of the dormers etc, will give that some thought.
Hopefully make a start tonight. I will try and keep updating my progress.
Posted
Full Member
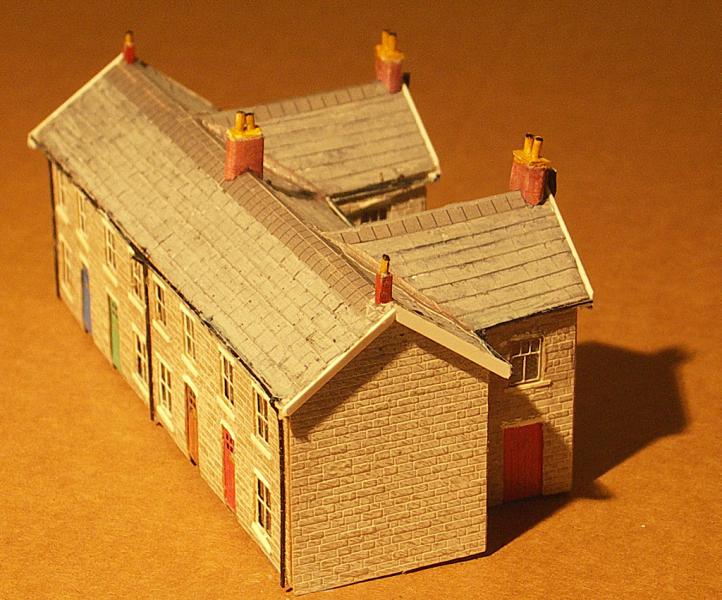
I rarely build Scalescenes or Metcalfe kits exactly as bought, I fit etched brass windows and doors, use cast chimneys, add bay windows and/or dormers.
I've now got to the stage where I usually build completely from scratch but try and make things that will fit in and blend with the few kits I have; examples done in stone embossed plasticard, with etched brass doors and windows and cast white metal dormers and bay windows, window cills and lintels white styrene strip
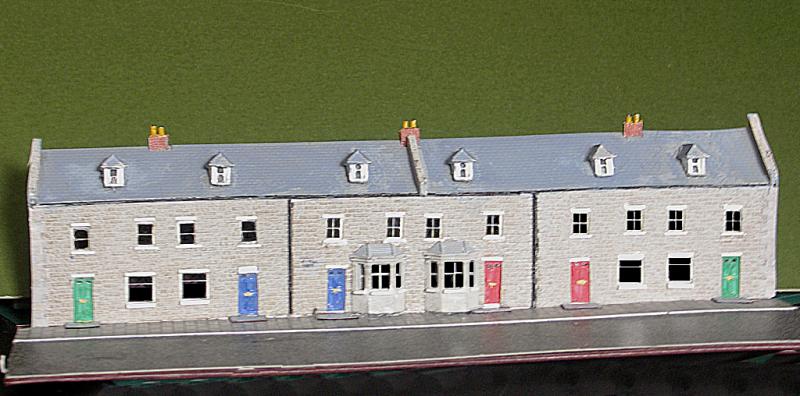
On the one below you can see the effect of the stone embossed plasticard, for the roof I tried paper strips overlapped, need more practice at that! Chimneys rectangular plastic tube covered with brick paper, pots from round tube. To colour the stone I used a 4" paint roller to apply emulsion from match pots (I think I mixed Dove grey with Pebble); the roof of the one in the above pic I sprayed the tile embossed plasticard with grey primer
Last edit: by Dorsetmike
Cheers MIKE
I'm like my avatar - a local ruin!
I'm like my avatar - a local ruin!
Posted
Full Member
Posted

Full Member
Have a stroll down your local high street and look up, I think the scalescenes kit is designed to have double width stacks to mimic this.
Cheers
Andy
Andy
Posted
Full Member
I also had to cut back on the depth on the outbuildings which was quite tricky to get everything to fit. Not 100% happy with the extension on building two but did demonstrate to me how versatile this kit is…
The kit at the back is the original size.

Last edit: by shaunabeer
1 guest and 0 members have just viewed this.