004.4 Advanced Occupancy Detection
Posted
#125300
(In Topic #6558)

Full Member
Using a Flagman to activate a stop marker
This post still requires some editing to tie in with the tutorial so its another WIP……..thank you Max for doing all the groundwork!As previously discussed Stop and Brake Markers can only be activated by the indicator with which they are associated.
Typically a block has one occupancy indicator……a train enters the block…..activates the indicator which in turn activates the stop marker (s) subject to any conditions or schedules
However if we need to run a loco into a block where the occupancy indicator is already activated we have a problem because TC cannot recognise the second train entering and cannot activate the stop marker…………..in 004.3 Virtual Contacts we explained how a loco passing an indicator in the preceding block could activate a virtual contact (and therefore its associated stop marker) in the occupied block (note I havent written 4.3 yet:oops:).
Unfortunately, this will not work if you have a two block schedule ie one that starts in one block and finishes in the next adjacent block……a common occurrence in scheduling routines. In this situation virtual contacts will not work……the second loco has to pass through an intermediae block to start the measurement………….no intermediate block…………….no virtual contact
The solution is to use a flagman. We set one up in the occupied destination block in the same way that we set up a virtual contact……attaching stop and brake markers markers with appropriate conditions
The virtual contact was triggered by a train entering the preceding block…….the flagman is triggered by a switch being turned on when the schedule starts
Here is a step by step from Max
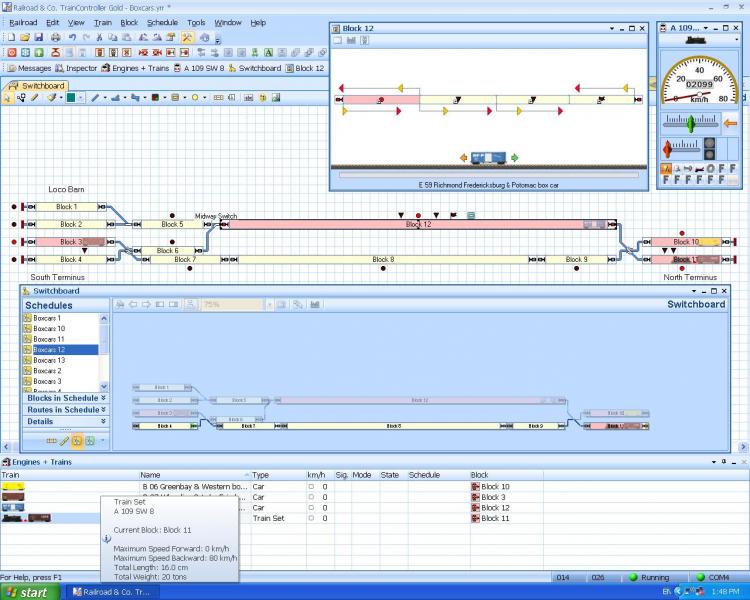
This is where we start. The loco is in Block 11 and is sharing Block 11 with a boxcar. It needs to Separate from the boxcar, both digitally and physically. I Separated it at the end of Schedule 12. You can see the red triangle between them.

It's run around the boxcar after dropping it off in Block 12. Here's where we want to go.
You need to pull down a Switch from the top - see the Switch icon to the left of the yellow circle on the bottom toolbar? I parked it above Block 12 on the Track Plan.

In General, all you have to do is - just give it a name. Easy as . . .
Now everyone knows how to make a Schedule, so when it's done, open the Rules tab.
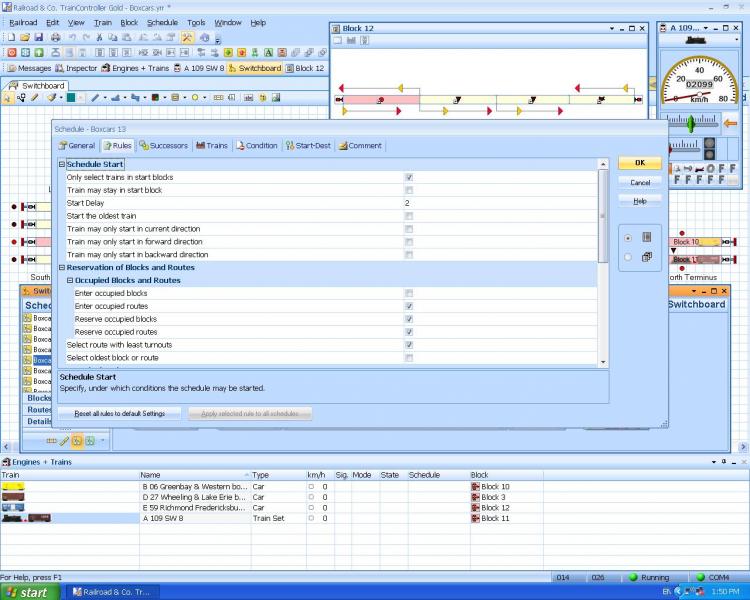
Here are the Rules you need to check:-
Only Select Trains in Start Blocks
Start delay 5
Enter Occupied Routes
Reserve Occupied Blocks
Reserve Occupied Routes
Select Route with the least turnouts.
Time of Release
At Stop Marker
No enforced release of Blocks or Routes upon termination
Train Sets
Enter reserved destination block for joining
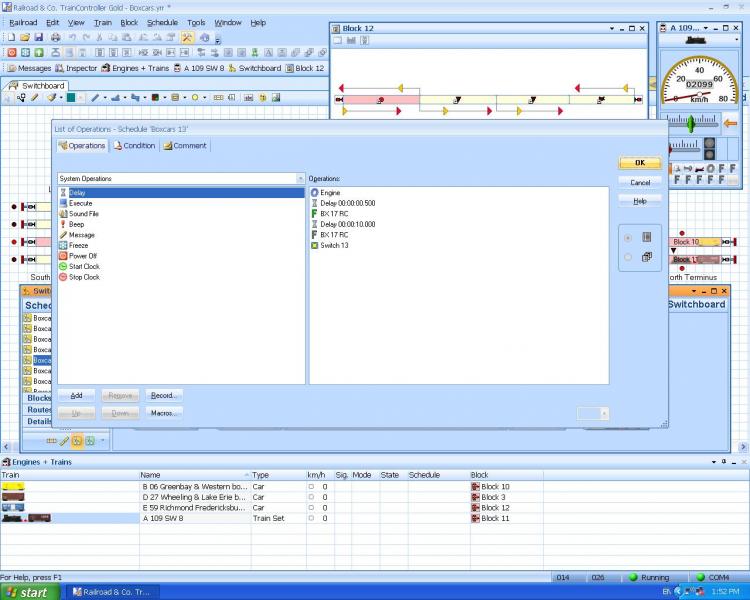
I always put an engine start at the Begining of each Schedule in case of an accidental disconnect in previous Schedules. Then I have to open the coupler on the boxcar and close it again after 10 seconds. Then the Switch is entered, in the ON position. To change from OFF to ON, click on the Switch and a choice box will open.

The End List looks like this for my layout. The loco joins the boxcar. (It usually happend automatically, but belt and braces, you know), and then the Coupler sound plays - and then the Switch goes next. This time it's turned OFF.
We grabbed a Flagman from the toolbar, next to where the Switches are kept.
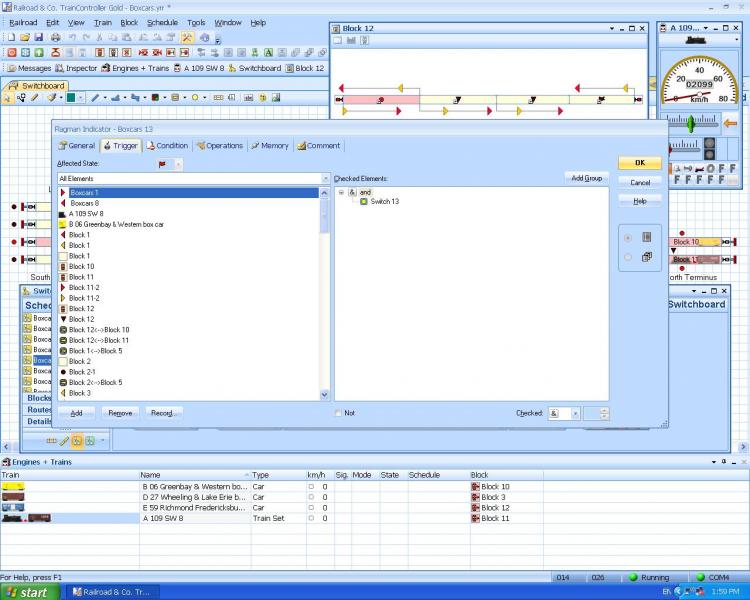
Double left click on the Flagman. Add Switch 13 to the Trigger.

. . . and the Schedule to the Condition tab.
. . . and put 30 seconds in the Timer beginning when turned on.
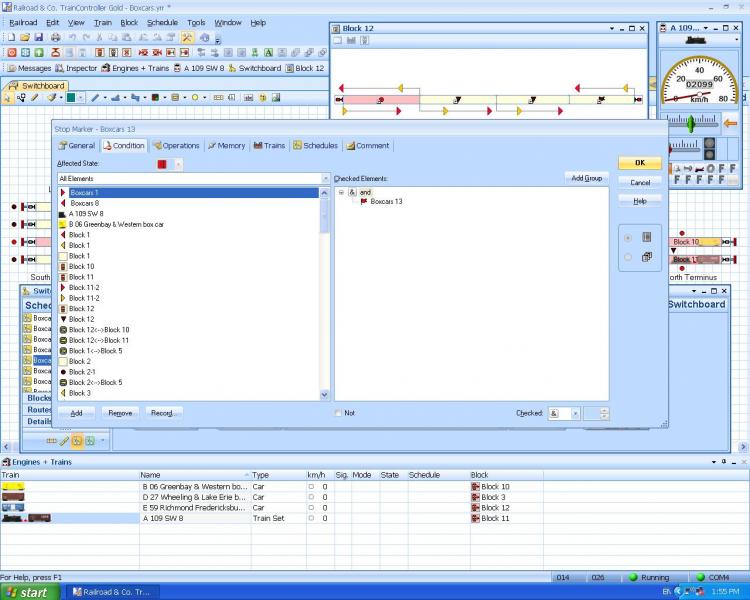
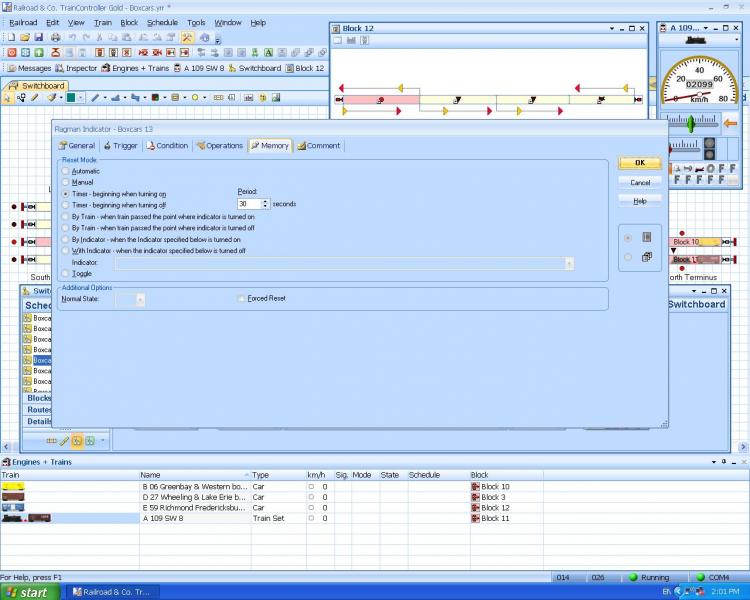
Treat the Brake and Stop Markers the same. Put the Flagman in the Condition tab and turn it ON. Once again, click on the Flagman and an options box will appear.
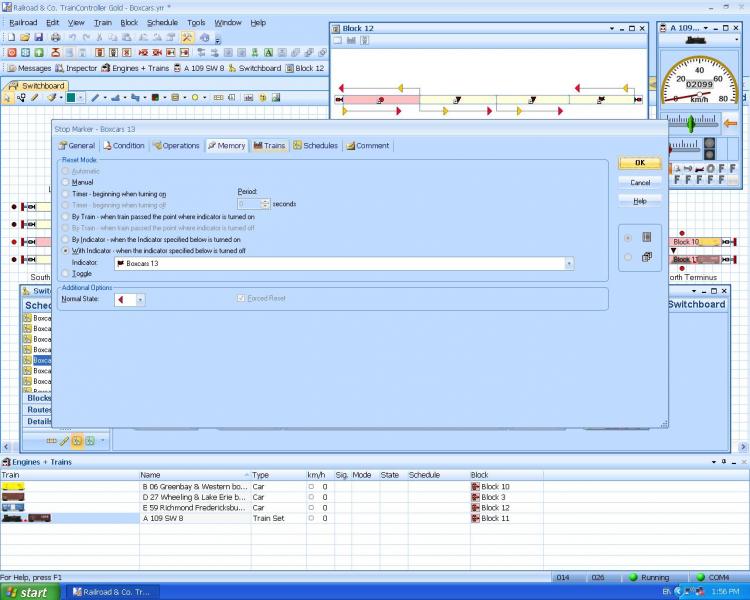
Move to the Memory tab and put the Flagman in the Indicator OFF.
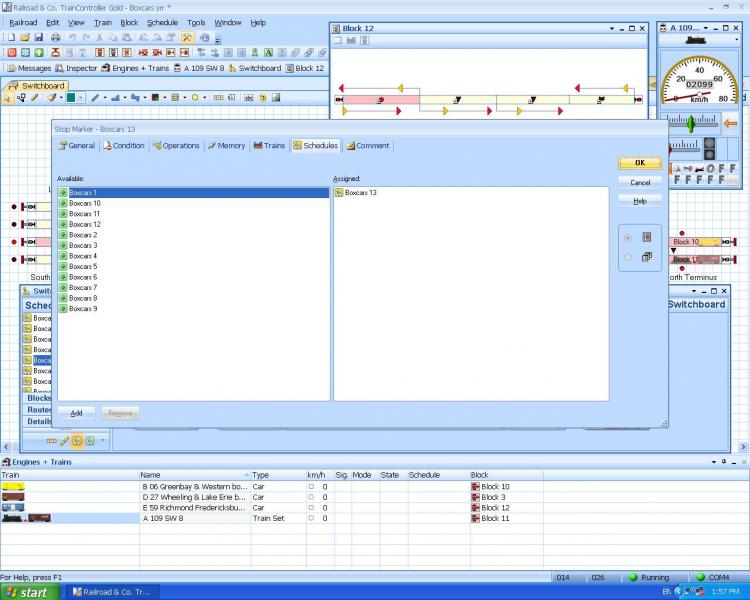
. . . and finally put the Schedule into the Schedules tab. As I said, the commands for the Brake and Stop Markers are the same.

1 guest and 0 members have just viewed this.