Stopping in Occupied Blocks
Posted
#126086
(In Topic #6599)

Inactive Member
Using a Virtual Contact
Normally if we try to stop a loco or train in an occupied Block, it will refuse to go in - even if we set the Schedule Rules up to allow it.A Virtual Contact will allow you to activate the Brake and Stop Markers by referencing them to when the loco/train enters the penultimate Block. NB a VC will only work when the loco/train is running in a Schedule with at least three Blocks. As the loco/train enters the last Block before the End Block, TC starts to calculate the distance to where it has to stop. The Stop Marker will also be at that point. The Brake Markers always total the distance of the Brake Marker.
When using a VC to stop a loco/train, only the General and Rules tabs need attention.
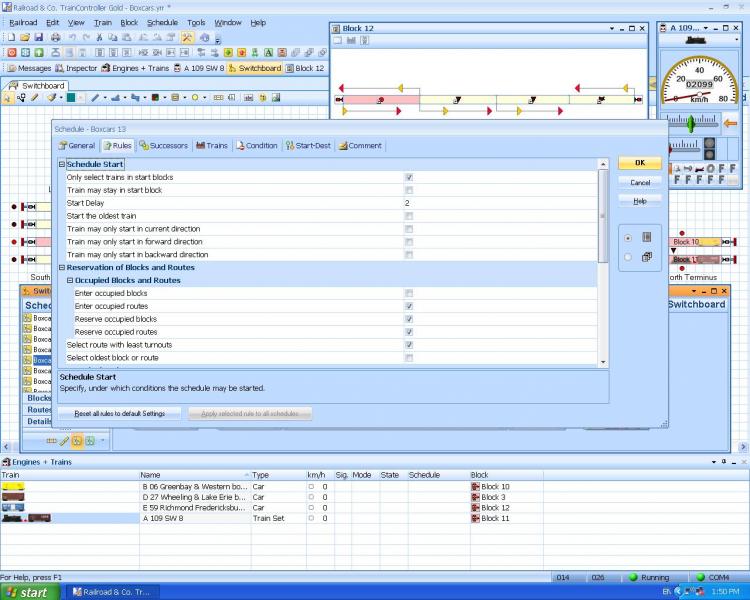
Here are the Rules we must have checked.
Only Select Trains in Start Blocks.
Start Delay 2
Enter Occupied Routes
Reserve Occupied Blocks
Reserve Occupied Routes
Select Route with the least turnouts
No enforced release of Blocks or Routes upon termination
Train Sets
Enter reserved destination Block for Joining.
Now we click on a Virtual Contact in the toolbar and click it into a square above the Block where we want the train to stop.
Then we set up the following Tabs:-
VC General tab
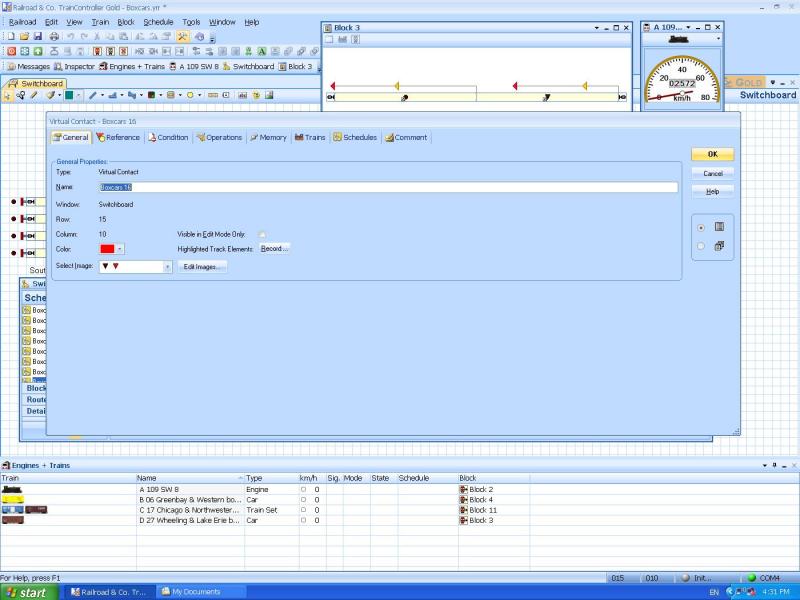
Name the VC for the Schedule it applies to; that way when you put the cursor over the VC it will be easily identified.
VC Reference tab
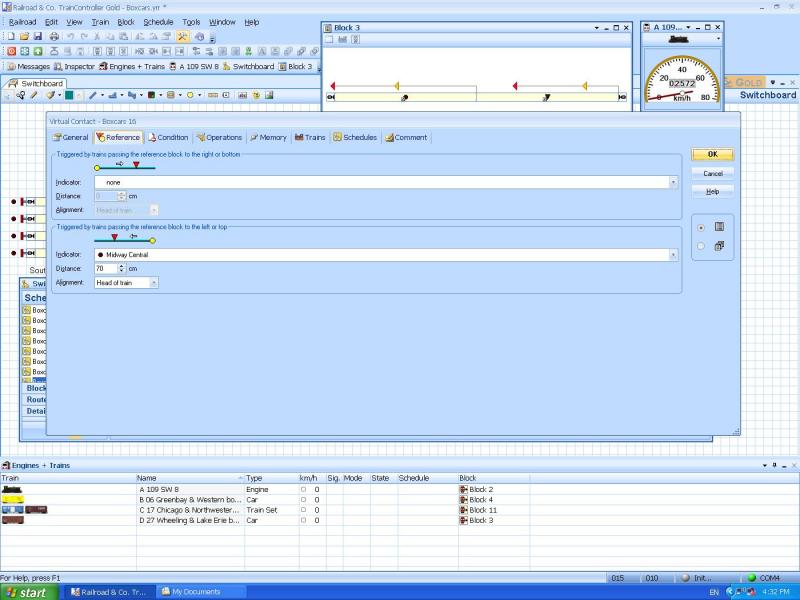
Measure from the start of the Block before the End Block to where you want the loco/train to stop and enter it in this tab. Also enter the name of the penultimate Block as before.
VC Condition tab

Here we select the applicable Schedule from the All Elements box.
VC Memory tab

In the Memory tab, select Timer begining when ON. 20 to 30 seconds should be plenty.
Double right click on the End Block and insert the VC. That will create a sub-block into which go a Brake Marker and a Stop Marker.
The settings for these are both the same.
SM General tab
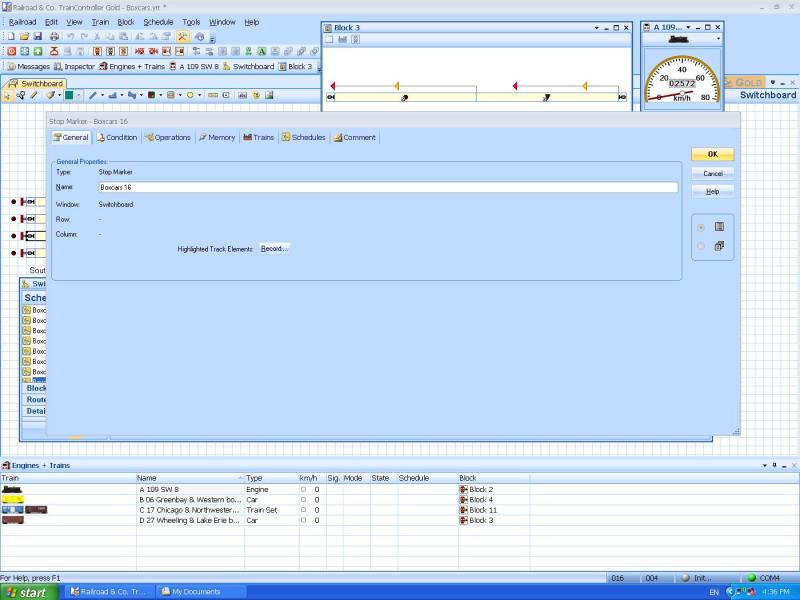
Once again, this will help you to identify it later.
SM Memory tab

In the "With Indicator turned OFF" slot, put the applicable VC.
SM Schedules tab
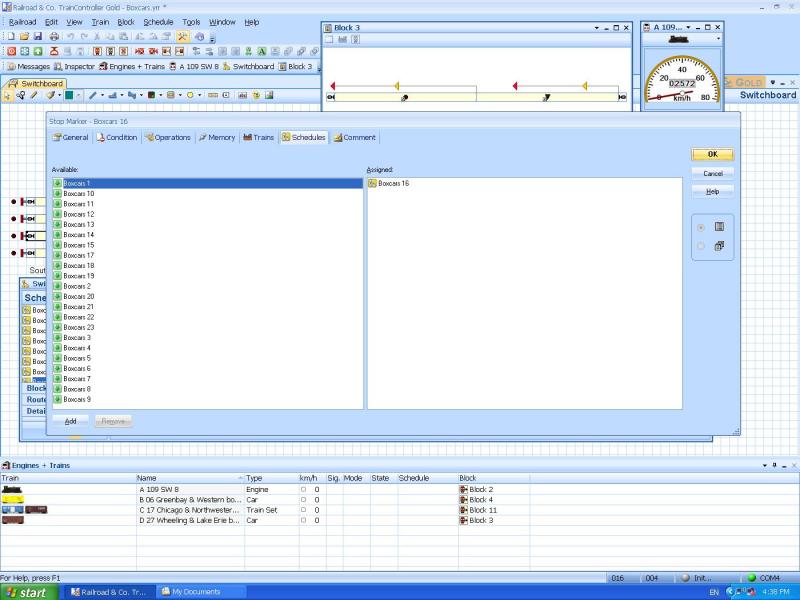
Add the applicable Schedule and click OK.
Then it's just a matter of adjusting the distances in the VC Reference tab and the Brake and Stop Markers.
I've prepared a Check Sheet with all of these commands on it, on one page. I found that it allows me to quickly double check that everything is in place before I run the Schedule live.

If anyone reads this draft and can see any corrections or additions required, please do not hesitate . . . . . . .
Max
Port Elderley
Port Elderley

Posted

Full Member
I have had quick with some success it needs tidying up and tuning when I get a chance.
Thanks for posting.
Regards
Pete.
ECOS2 with RR&Co Traincontroller and a load of other electronics so i can sit back and watch the trains go by.
Pete.
ECOS2 with RR&Co Traincontroller and a load of other electronics so i can sit back and watch the trains go by.
Posted
Inactive Member

Max
Port Elderley
Port Elderley
Posted

Full Member
You posted this when I was away…….is it ok if I post in the tutorial and add a few bits and pieces?
Posted
Inactive Member
There's another one for Flagman/Timer, somewhere as well I think.
Max
Port Elderley
Port Elderley
1 guest and 0 members have just viewed this.