Jeff's (SRman) work bench and projects
Posted

Full Member
On a completely different slant, I recently won two Lima European locomotives from an auction. The one item I really wanted (also a Lima item, a DSB MR DMU) went for more than I was prepared to pay, but these two cost me the princely sum of $AUS129, including their fees. The Swedish T43 had the old style pancake motor but I was the only bidder and got it for $40 plus fees, so can't complain. The BR 127 Eurosprinter has a central can motor with large flywheels and all eight wheels are driven, but it wasn't DCC ready. Both had lights, with the T43 having a primitive set up of two white incandescant bulbs and a pair of diodes, plus a mess of wiring. The 127 had head and tail lights, although one red bulb was broken. Both locos ran perfectly straight from their boxes on DC analogue.
The T43 was first to be converted to DCC through a straight hard-wiring job using a Zimo MX600 with the 8-pin plug cut off. This model has a slightly more modern implementation of the Lima's motor bogie setup, with extra pickups on the non-driven bogie. I determined that there was plenty of room for a decoder at the non-motored end under the long bonnet. The track pickups to brush wiring were easily disposed of and the relevant decoder wires soldered to the necessary points. The blue positive accessory wire had to be extended to reach the light return contacts at both ends, with the white wire to the back of the front-end bulb (long bonnet), and yellow to the trailing end. I cut the clip retaining the front bogie so the bulb holder was entirely separate to keep the circuits apart, and for the present mounted that on a blob of Blu-tack, with another blob holding the decoder to the side of the bonnet. A quick test showed that it all worked perfectly. The paint finish on this loco is very good. I will eventually improve the lighting a bit, bit for now it is adequate.
P_20200929_112500_vHDR_On by Jeffrey Lynn, on Flickr
The Eurosprinter represents a Siemens/Krauss-Maffei prototype that lead to several variations, including the Austrian Taurus locomotives. The PCB is a fairly simple one-layered affair, allowing me to cut and use the tracks to connect a decoder straight in. The pantographs had the facility to make them live instead of the rail pickup on one side, but for DCC use this is undesirable. I soldered the pivoted link to make it semi-permanently connected to track only. I found that I could just squeeze in a full-size ESU LokPilot v5 decoder, sitting diagonally under the PCB at one end, on top of the bogie tower and directly behind the cab bulkhead. The usual brush and track connections were made, keeping an eye on which end was intended to be the No. 1 end (easily swapped if necessary either by swapping the brush wires or by changing the value in CV29 - neither of which was necessary for me). For the lighting, I wanted to separate the tail lights out to their own functions, so being able to use a 4-function decoder was useful. The white headlights were wired to the white and yellow wires, while the red tail lights were wired to the green and purple wires. The broken red bulb was replaced with a red LED and resistor.
On test, the decoder read properly on the programming track, and the lights worked correctly first go, with the locomotive travelling in the intended directions for forwards and reverse. The body has not quite clipped back properly, hence the light bleed apparent in one of the photos, so I will be tidying the wiring up a little to get any stray bits out of the way. F0 works the directional white headlights, F1 works the tail lights at #1 end, F2 works the tail lights at #2 end. All in all, a successful bit of work.

P_20201001_191729_vHDR_On by Jeffrey Lynn, on Flickr
P_20201001_192148_vHDR_On by Jeffrey Lynn, on Flickr

P_20201001_192328_vHDR_On by Jeffrey Lynn, on Flickr
 Last edit: by SRman
Jeff Lynn,
Amateur layabout, Professional Lurker, Thread hijacker extraordinaire
Amateur layabout, Professional Lurker, Thread hijacker extraordinaire

Posted

Full Member
I think I'm going to have to buy some cheap decoders to practice on ………. :hmm
'Petermac
Posted
Full Member
Jeff Lynn,
Amateur layabout, Professional Lurker, Thread hijacker extraordinaire
Amateur layabout, Professional Lurker, Thread hijacker extraordinaire
Posted
Full Member
Hard-wiring the track and motor connections is the easy bit………………………………………………
Only when you know how …………………….and only when you don't have size 25 hands………………….and only if you can hold them rock steady …………… :roll: :thumbs
'Petermac
Posted
Full Member
This was an EFE London Transport silver train, some 1959/62 tube stock. I had riginally installed the Black Beetle in a red 1938 car, but since Bachmann/EFE are producing a ready to run 1938 train, I swapped the chassis into a silver body. I repainted the seats to suit, but the EFE interiors use the same mouldings. The motor conversion was successful in itself, but the drag from those horrible EFE bogies needed something to be done: Metro Models to the rescue with some new bogie shells with pinpoint axles were added, using the EFE sideframes as overlays. These bogies come with some brass bar etchings that act as couplings, but they are still fiddly to connect, so I looked for an alternative and came up with using Kadee #5 coupling boxes in conjunction with Bachmann E-Z Mate whisker couplings with the dropper arms cut off. The boxes fit upside down over the coupling spigots on the bogies, and are secured with a spot of superglue.
Next was to modify the wiring of the Black Beetle to solder a harness with a 6-pin socket to the brushes and pickups, allowing me to experiment with different decoders. Initially I used a DCC Concepts decoder but wasn't happy with the running, so swapped that for a Zimo decoder. With advice from John at YouChoos, I added three tantalum 470uF capacitors to one of his LifeLink charging circuits, then soldered the wires from that to the pads on the Zimo MX617 decoder. I really didn't want to add any extra drag on the trailing bogies, which is why I have not fitted extra pickups on the one in the motorised car, and chose instead to use the keep-alive idea (the first time I have used this system).
I put together a very short video showing what I have done and the running unit in action.
[yt]eTVP_DVob-k[/yt]
Jeff Lynn,
Amateur layabout, Professional Lurker, Thread hijacker extraordinaire
Amateur layabout, Professional Lurker, Thread hijacker extraordinaire
Posted

Full Member
Staying on the thread Kevin.
Posted

Full Member
I'm glad your foray into keep-alive has been paying off for the purpose you did it for, and that your wiring in general has been working out.

Posted
Full Member
The photos show a few of the lighting permutations possible with this set up.
The running qualities of the model are very good, although I have had a problem that other modellers have reported, in that one of the rotating axlebox 'tubes' keeps dropping off its axle end. I have tried several different glues, and enlarged the hole in the bogie frame to give it more free play, but so far to no avail. After this most recent episode, I might try a spot of Araldite if it drops off again.

Last edit: by SRman
Jeff Lynn,
Amateur layabout, Professional Lurker, Thread hijacker extraordinaire
Amateur layabout, Professional Lurker, Thread hijacker extraordinaire
Posted
Full Member
Last edit: by Passed Driver
Staying on the thread Kevin.
Posted
Full Member
Posted
Full Member
Have you tried sanding the back end of the cap? Or using a little bit of paper as a gluing "bridge"?
I did file off any plastic pips/ridges and cleared out the old glue. I also cleared out the hole to make sure it as seating properly on the axle end. I did note that the centre axle (the one at fault) had enough up and down play to go out of alignment with the axle box hole in the sideframes, so elongated the hole upwards to allow full up and down float without putting any load on the rotating bit. Will have to await another run to see whether all that has worked.
The paper seems like a good idea to try too. I never thought of that. :)
Last edit: by SRman
Jeff Lynn,
Amateur layabout, Professional Lurker, Thread hijacker extraordinaire
Amateur layabout, Professional Lurker, Thread hijacker extraordinaire
Posted
Full Member
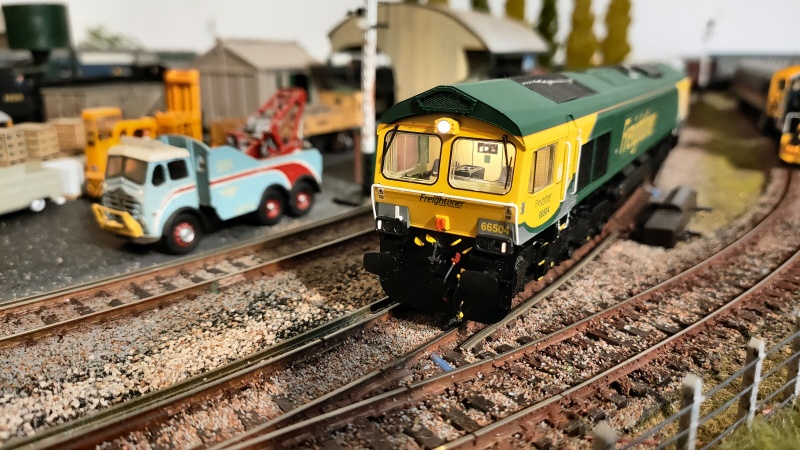
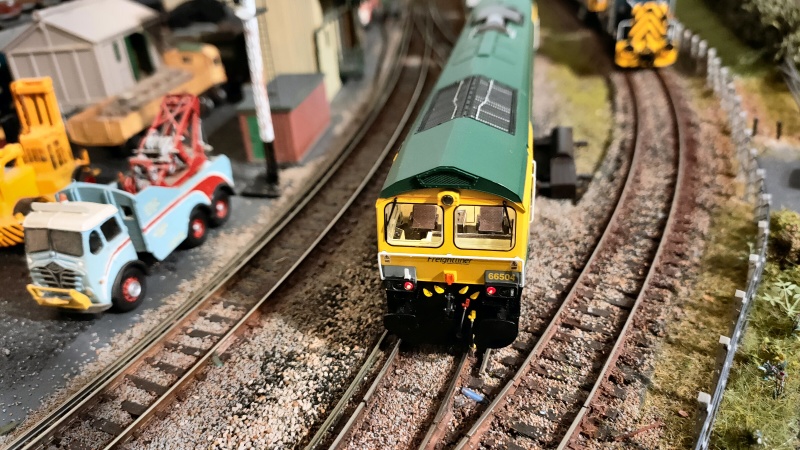
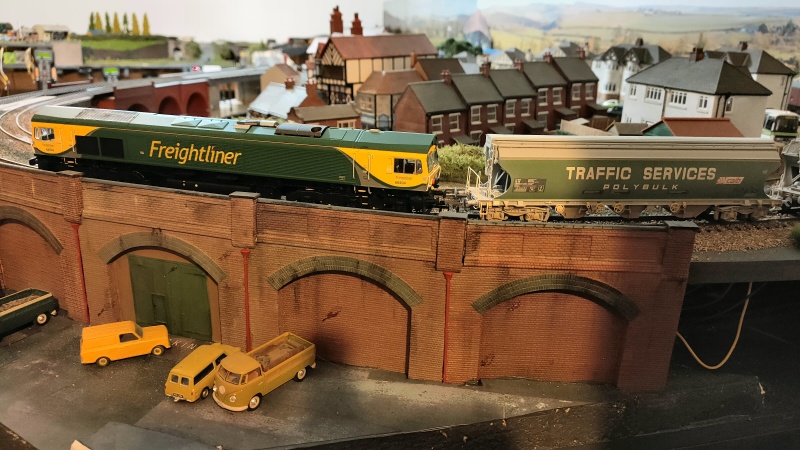
Also commonly referred to as 'sheds'. I have several of the Bachmann models, but the Hatton's one is astep up again from those, particularly in the lighting options and finer detail. Once the Hatton's price came down to equal or below that of the Bachmann models, I jumped in and bought one. Tempted to get another, but I really don't need more 66s.Hi Jeff. I like the look of the 66 class, as I often see them passing by on the nearby viaduct . I have heard the 66 referred to as “ the tent “ but really too big for my plank. Best wishes Kev

Jeff Lynn,
Amateur layabout, Professional Lurker, Thread hijacker extraordinaire
Amateur layabout, Professional Lurker, Thread hijacker extraordinaire
Posted
Full Member
It's something I worked out when cutting and shutting some Bachmann sideframes. The plastic pieces didn't want to reliably stay glued directly to each other. But I'd noticed that paper can be glued to just about anything, and so I gave it a shot as an intermediary material. And it worked.[user=1916]ZeldaTheSwordsman[/user] wrote:Have you tried sanding the back end of the cap? Or using a little bit of paper as a gluing "bridge"?
I did file off any plastic pips/ridges and cleared out the old glue. I also cleared out the hole to make sure it as seating properly on the axle end. I did note that the centre axle (the one at fault) had enough up and down play to go out of alignment with the axle box hole in the sideframes, so elongated the hole upwards to allow full up and down float without putting any load on the rotating bit. Will have to await anotehr run to see whther all that has worked.
The paper seems like a good idea to try too. I never thought of that. :)
Posted
Full Member
Jeff Lynn,
Amateur layabout, Professional Lurker, Thread hijacker extraordinaire
Amateur layabout, Professional Lurker, Thread hijacker extraordinaire
Posted
Full Member
Staying on the thread Kevin.
Posted
Full Member
I picked it up today, as Abbey's Auctions are just on the 5km radius limit imposed on us during the current lockdown. I really wasn't worried if it was a non-runner, because the body, paintwork, glazing, horns and pantographs were all in pristine condition (well a couple of slightly rusty spots on the pantos). A quick test on DC power showed tht there was life but something was sticking. The body slips off after easing four clips, and that revealed two separate can motors with large flywheels driving each bogie independently through short cardan shafts and gear towers. More testing showed that one end was turning freely but the other was binding. A few exploraory tests showed the binding was occurring in the gear tower somewhere.
I wasn't going to spend too much time on it, but later on decided I'll have a go - there was nothing to lose by trying. I dropepd the bogie (one screw retaining it), unclipped the base of the bogie and dropped out all the axles plus a couple of layshafts with gears, then dismantled the gear tower casing to get at the internal gears. The worm drive was nearly frozen solid with thick, gunky grease in its end bearings. I cleaned as muchas I could then oiled it and worked on it for a while to free it up. Once turning freely, I wiped it over again, then re-oiled it, and reassembled everything. There was more of the grease on the walls of the tower, but not too much on the gears, and they were all turning freely, so I didn't bother too much with that. Having reassembled the bogie, I hand-turned the worm shaft and it felt free-running, so then hooked the cardan shaft back in, and threaded the bogie back into its location.
A quick test on the track on DC again showed it hummed a little, but moved smoothly at slow speeds/voltages, and like a rocket on full power.
Success!
Now, do I consider converting it to DCC? It would be a hard-wiring job, and may not be really worthwhile if it is going to spend most of its life on a shelf.
Jeff Lynn,
Amateur layabout, Professional Lurker, Thread hijacker extraordinaire
Amateur layabout, Professional Lurker, Thread hijacker extraordinaire
Posted
Full Member
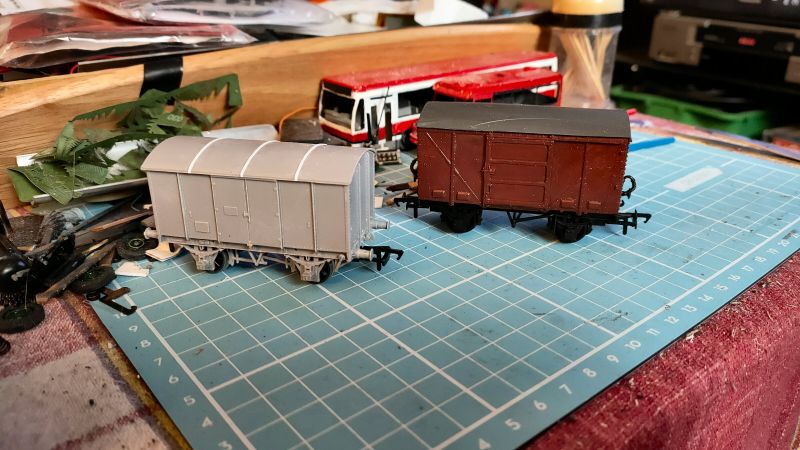
Those I built earlier were built in pairs at a time. The first two were an early kit for an LNER trestle wagon (which had plastic wheels and rather a lot of flash), and a GWR Mica B meat van (a later kit with metal wheels and brass bearings included). Both of these have been painted and are awaiting transfers and weathering. The Mica B may also need a few minor paint touch-ups. I substituted some metal wheels and added bearings to the trestle wagon during its construction.


The next pair which have also been painted now but are unpainted or part painted in the photo, were a BR 12T fruit van (based on an LMS design) and a GWR gunpowder van. These had metal wheels and bearings in the kits. I must take a couple of photos of the finished wagons.
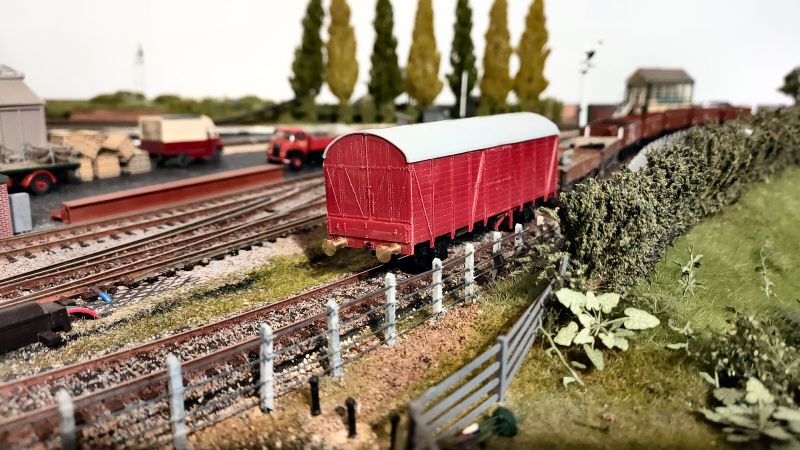
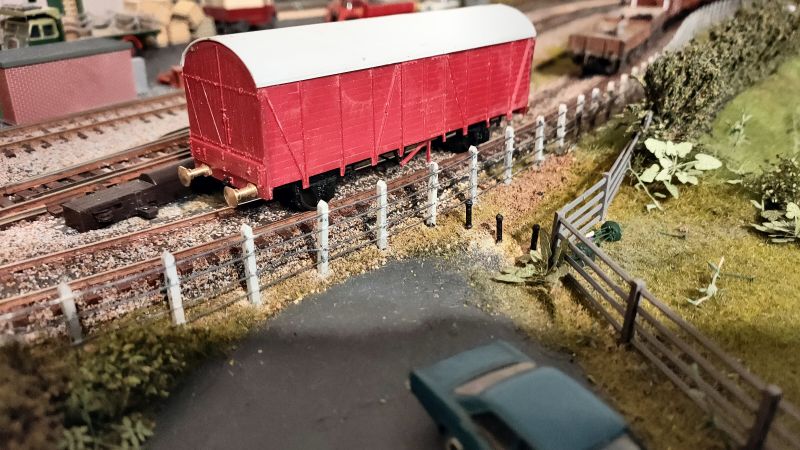
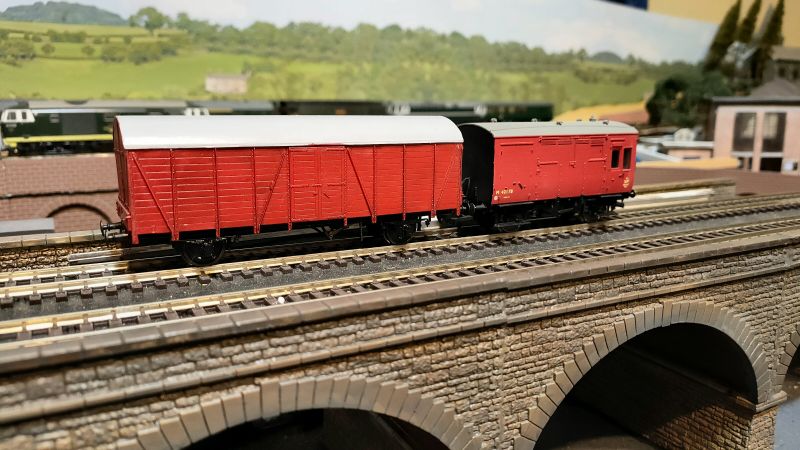
And now, just this evening, I constructed an LMS/BR CCT motor car carrier. I seem to have introduced a very slight twist to the body, but cannot see where it occurs (ignore the camera lens distortion in the photos). This is unpainted at this stage, and I have yet to fit the NEM couplings adapters and couplings. The photos show both sides and ends of the van.
Jeff Lynn,
Amateur layabout, Professional Lurker, Thread hijacker extraordinaire
Amateur layabout, Professional Lurker, Thread hijacker extraordinaire
Posted
Full Member
Jeff Lynn,
Amateur layabout, Professional Lurker, Thread hijacker extraordinaire
Amateur layabout, Professional Lurker, Thread hijacker extraordinaire
Posted

Full Member
Jeff, you just seem to have had a whole load of posts vanish in last hour or so. I was just looking back at how much you'd achieved and "poof", next alert of a new post and they'd gone. Bizarre.
All that hard effort vanished, nothing now between 21 Feb and 1st June and numbering has all changed. Matt ???
Colin
Last edit: by Colin W
Posted
Full Member
Roger OO DC Steam
1 guest and 0 members have just viewed this.