Jeff's (SRman) work bench and projects
Posted

Site staff
Wasnie me, a big boy did it and ran away
"Why did you volunteer ? I didn't Sir, the other three stepped backwards"
"Why did you volunteer ? I didn't Sir, the other three stepped backwards"

Posted

Full Member
I have had a small experimental try with imgbox, which also seems promising. Imgur will be my next port of call when I get home from work.
Jeff Lynn,
Amateur layabout, Professional Lurker, Thread hijacker extraordinaire
Amateur layabout, Professional Lurker, Thread hijacker extraordinaire
Posted
Full Member
Flush glazing followed all this, although if I was to redo that I would try to mount it slightly more inboard of the window recesses as the vacuum-formed curved edges do show a bit here. I also modified the couplings to bring the cars much closer together, and replaced the ridiculously tiny Lima buffers with decent turned brass ones, although the ones at this end in the photo need to be bigger still.
The latest improvement done today was to replace the Lima chassis in the DMBS with a much more modern DCC-ready one from the Hornby class 121, bought cheaply a while ago with this purpose in mind. This required a small modification to the shape of the end going int the brake van end as the 121 has a shaped ledge for the 2nd driving cab, whereas the 117 needs a flat end with a slight recess over the buffer beam, easily achieved in just a few minutes with a file and a cutting disc in the Dremel. I have not yet painted the new buffer beam red at the driving end, nor have I weathered and painted the underfloor detail on the new chassis, but these tasks will follow soon.
Better headcodes with the correct typeface will be fitted soon too.
I also have a lighting kit I can install to provide head and tail lights at each end, but that will also require some pickups and a decoder in the DMS car. Technically these units in green should not have tail lights as such, but should have an oil tail lamp hung on the rear of the cab.
Jeff Lynn,
Amateur layabout, Professional Lurker, Thread hijacker extraordinaire
Amateur layabout, Professional Lurker, Thread hijacker extraordinaire
Posted

Full Member
You obviously enjoy projects like this and I take my hat off to you - way above anything I could tackle - or, I could probably tackle it but I'd have to try to sell the odd bits off because I'd never pull it all together again ………………
Well done to you Sir !! :pathead
'Petermac
Posted
Full Member
I have now started painting it into a blue scheme to fit in with my other industrials. There's a bit more to do, but I think it looks quite attractive in this BR steam era express passenger blue. At this stage, I have retained the GWR numbering, both with the cabside plates and with the buffer beam numbers. I am undecided as to whether to keep it this way or to renumber in my industrial scheme. It's not that important!
Jeff Lynn,
Amateur layabout, Professional Lurker, Thread hijacker extraordinaire
Amateur layabout, Professional Lurker, Thread hijacker extraordinaire
Posted
Full Member
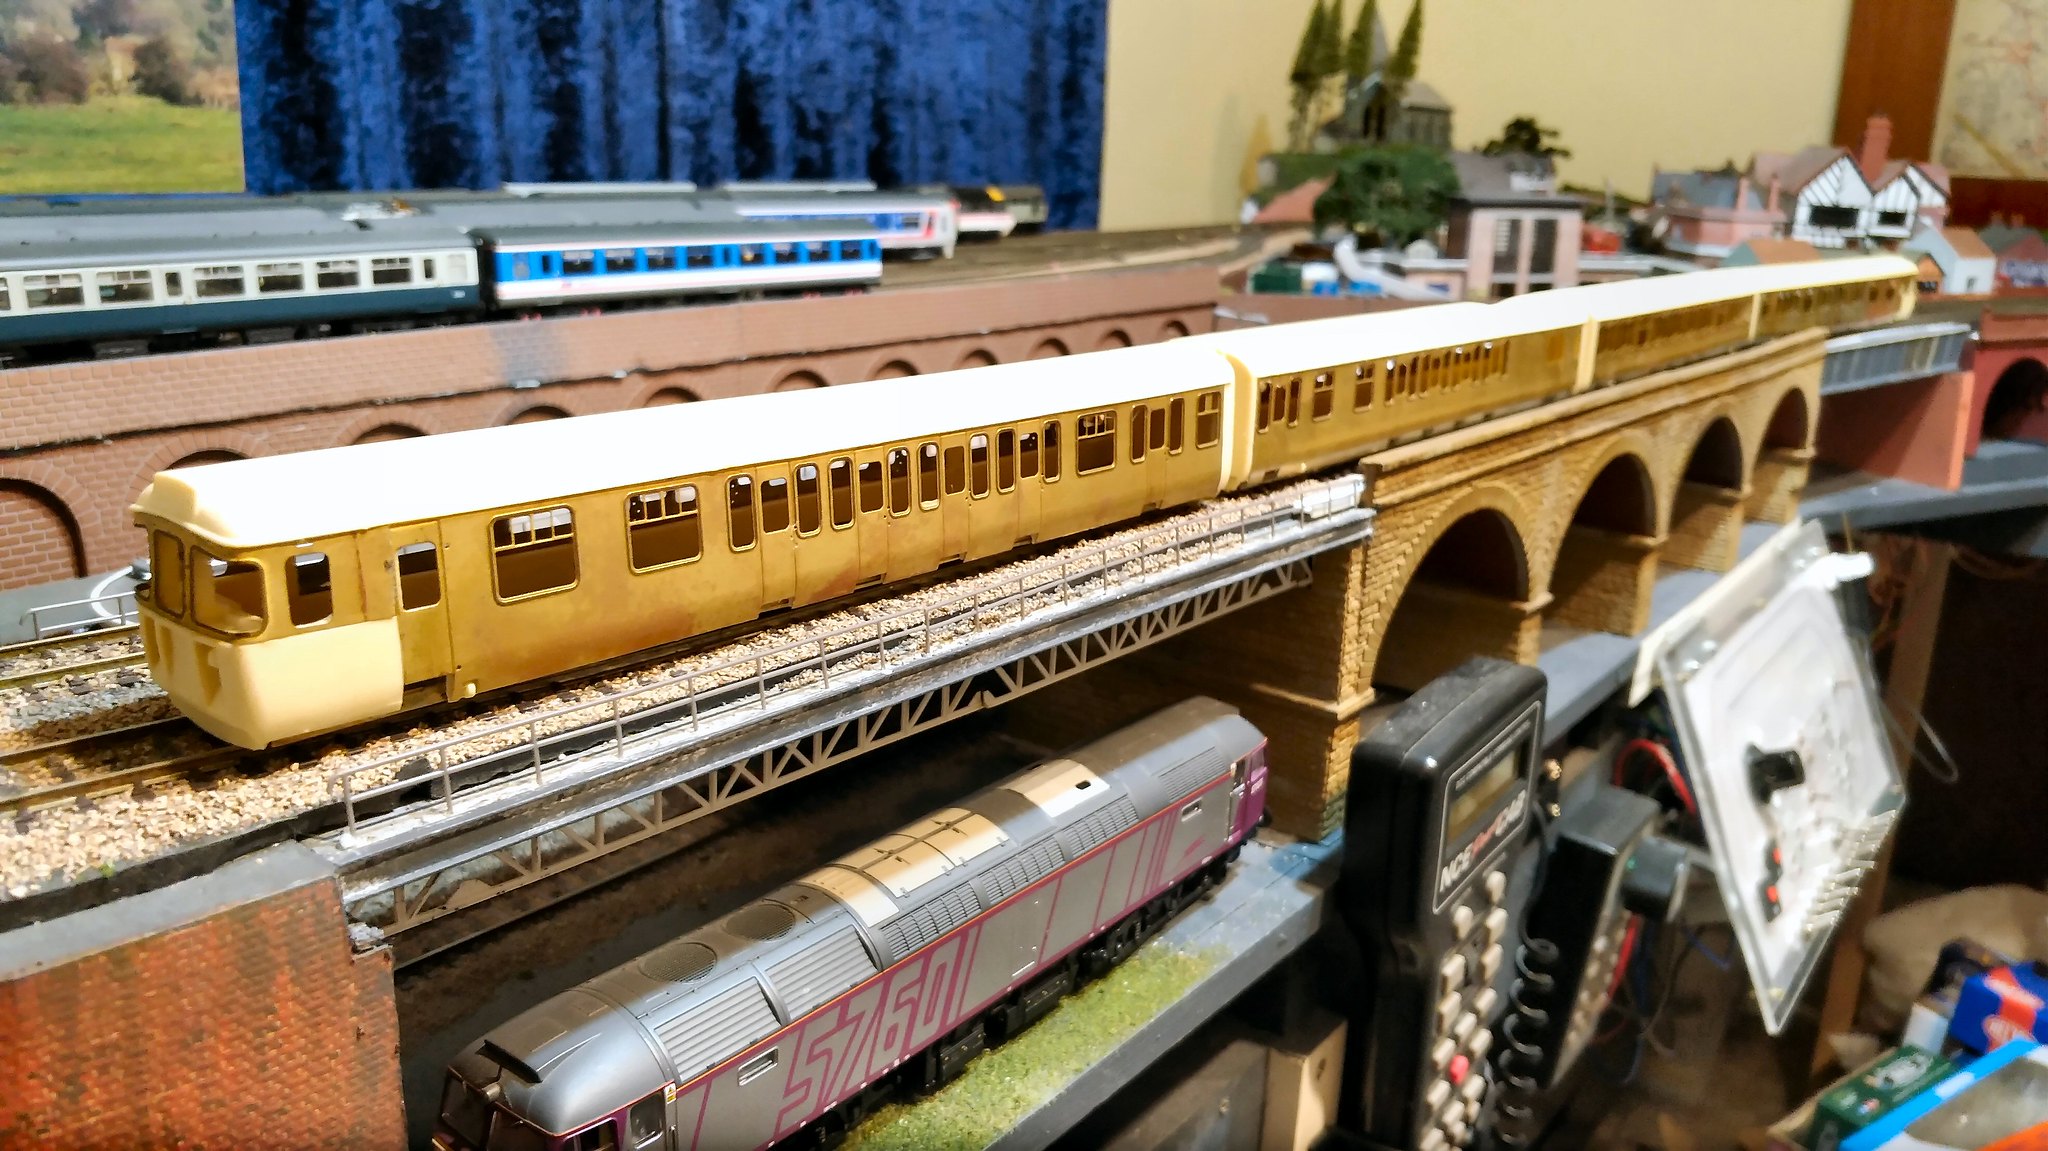
I recently purchased a Southern Pride class 310 EMU, and while I don't intend building this unit straight away, I decided it would be easier to store if I put the basic body shells together. This is a composite resin and etched brass kit, with a few white metal components as well.
 P_20200624_220529_vHDR_Auto by Jeffrey Lynn, on Flickr
A project that has been on my workbench for a very long time is this old Triang Railways L1 4-4-0, which I have been detailing up a bit. I replaced the correct sized driving wheels with smaller ones because the correct size meant the whole loco sat a good 2 to 3mm too high. I painted the wheels yesterday, but there are a couple of bits that need going over again. It still has the original Midland style tender, but another modeller with a far more advanced model of the same thing has successfully replaced his with a Bachmann N class tender.

P_20200630_165124_vHDR_Auto by Jeffrey Lynn, on Flickr
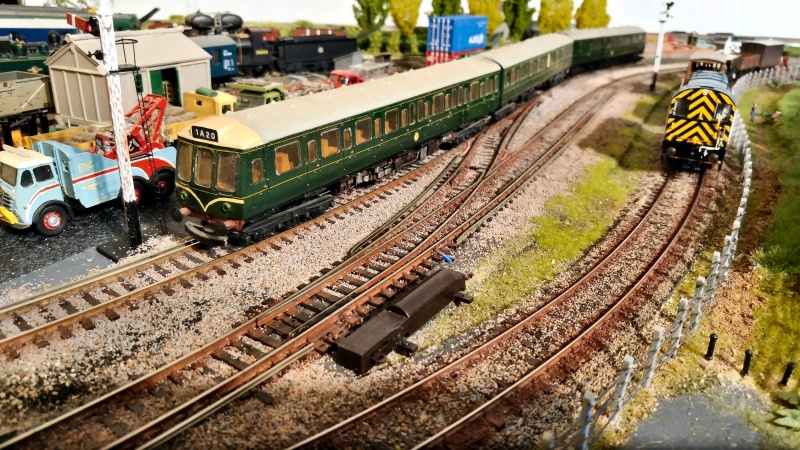
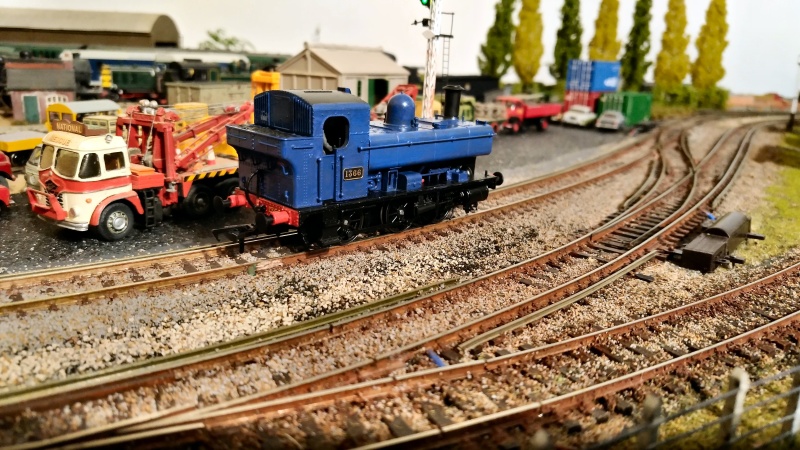
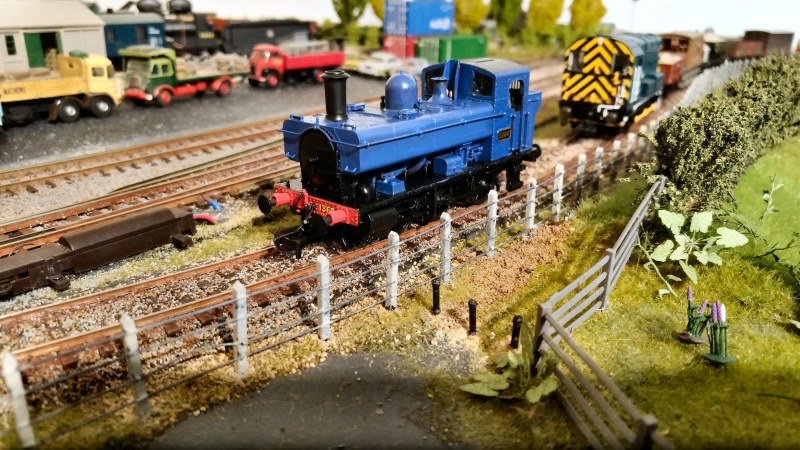
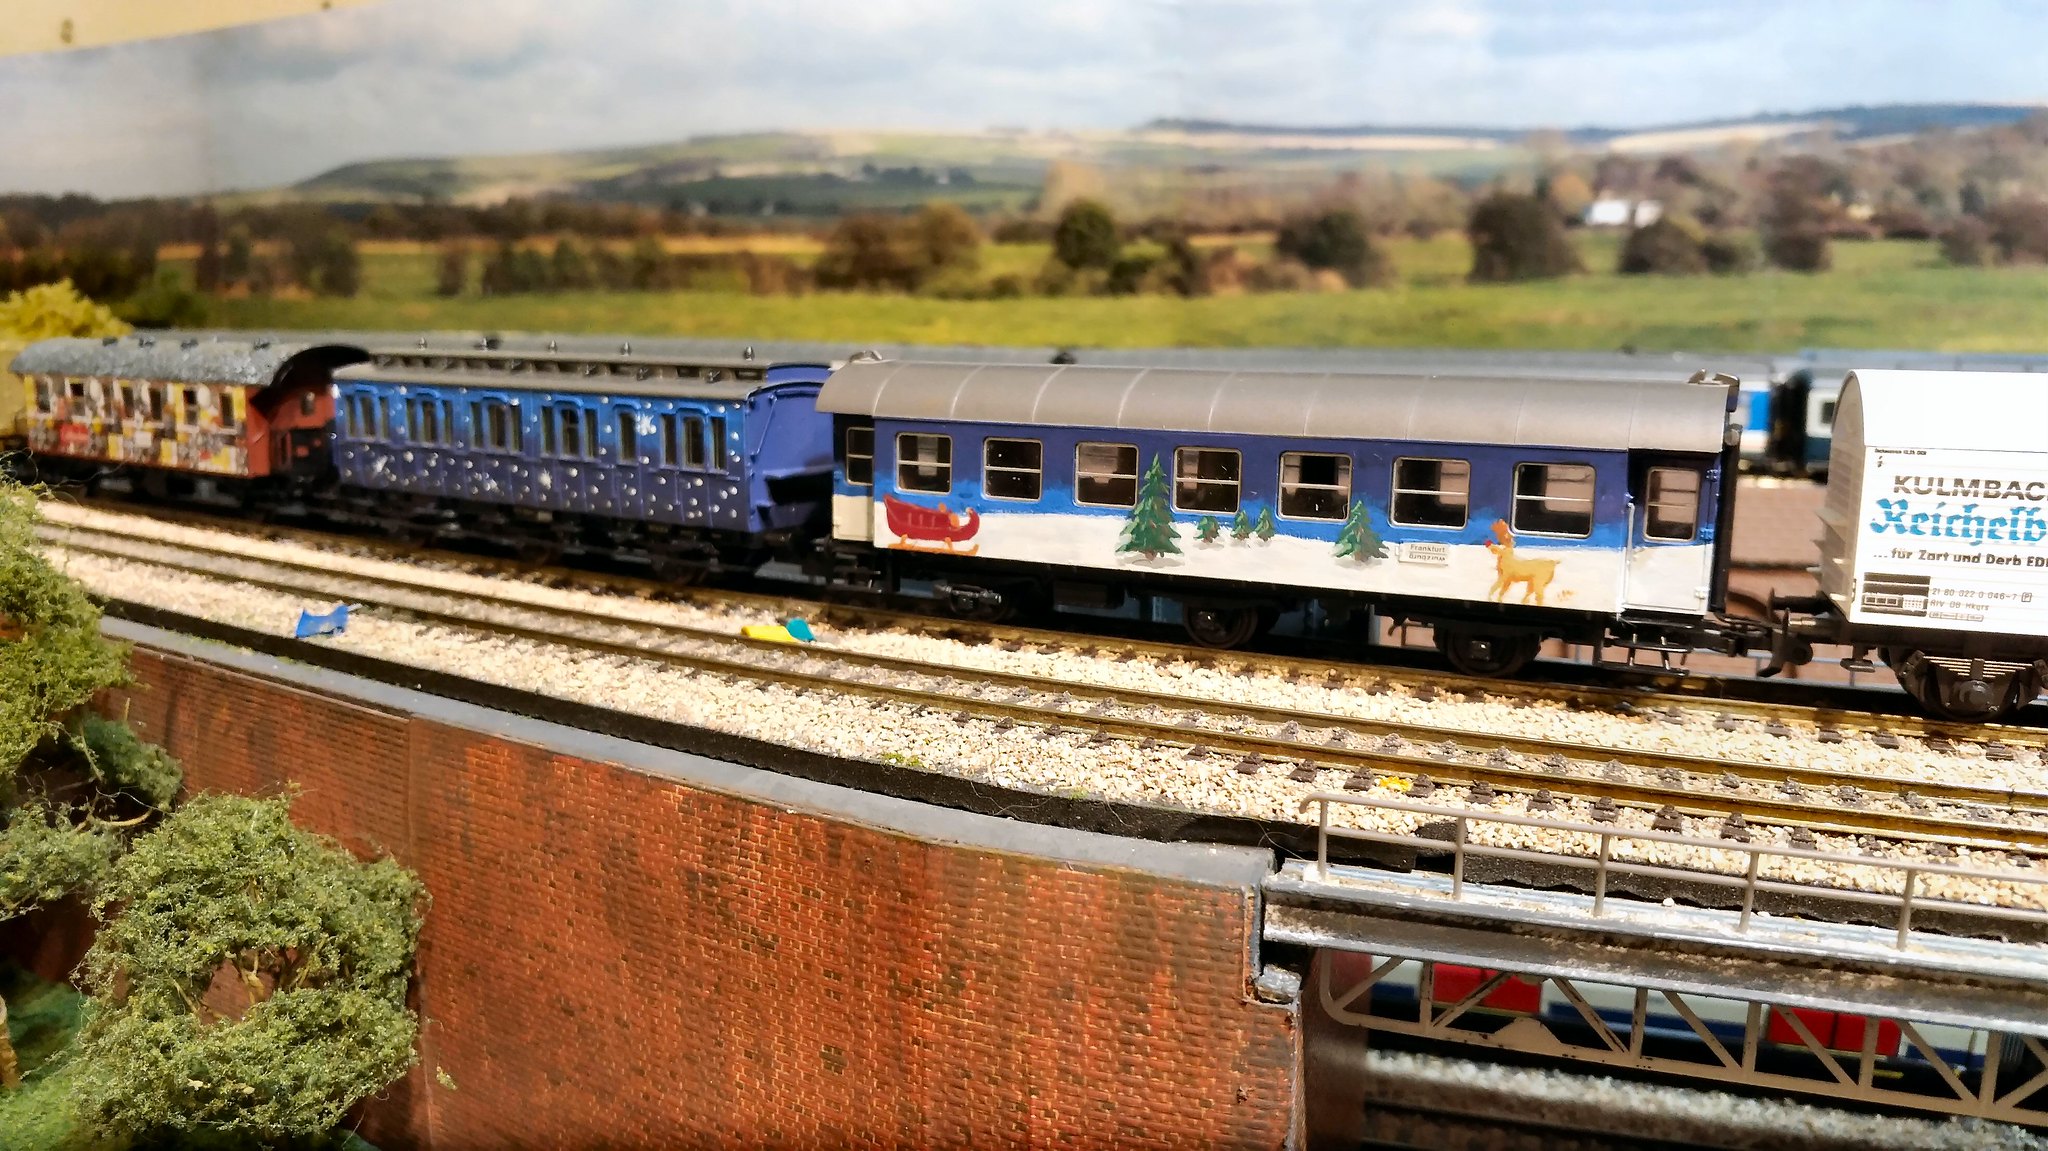
In the meantime, for a bit of fun I have put my European-based Christmas train on the tracks for a run (Christmas in July here in Oz makes a little sense because it is cooler and we can enjoy things like hot roast dinners and hot puddings). I put my blue 1366 pannier tank (itself an unfinished project) on the front. I have a few extra coaches bought quite cheaply, although they are of very good quality, with a view to repainting them into more festive (if fictitious) liveries. I made a start on an early 6-whell 1st class coach, going from an olive drab colour to a two-tone blue scheme, to which I am picturing myself adding some snowflakes or stars. This is very much an experiment, but it looks promising.

1366 PT and Christmas Train in July - cropped 1 by Jeffrey Lynn, on Flickr

P_20200630_165140_vHDR_Auto by Jeffrey Lynn, on Flickr
 Last edit: by SRman
Jeff Lynn,
Amateur layabout, Professional Lurker, Thread hijacker extraordinaire
Amateur layabout, Professional Lurker, Thread hijacker extraordinaire
Posted
Full Member
 P_20200630_221851_vHDR_Auto by Jeffrey Lynn, on Flickr
P_20200630_221925_vHDR_Auto by Jeffrey Lynn, on Flickr
Jeff Lynn,
Amateur layabout, Professional Lurker, Thread hijacker extraordinaire
Amateur layabout, Professional Lurker, Thread hijacker extraordinaire
Posted
Full Member
Also, I love your fun Christrmas train - very imaginative and extremely colourful. Is your Santa a Modelu figure of yourself ? I'm guessing the stars are either transfers or a stencil of some sort …………………
'Petermac
Posted
Full Member
That Class 310 looks very impressive Jeff - what make is it ?
Also, I love your fun Christrmas train - very imaginative and extremely colourful. Is your Santa a Modelu figure of yourself ? I'm guessing the stars are either transfers or a stencil of some sort …………………
Hi Peter,
The AM10/310 is a Southern Pride kit.
I don't, as yet, have a Santa figure. Being in Oz, I can't get myself scanned by ModelU either, although I am approximately the right build!
The stars, comets and meteor trails are all hand-painted with Humbrol matt white and an old dip-type pen. That's why a few need to be touched up a little where my hand shook slightly, or they are a little off-centre. Overall, I am pleased with the result, though. I do want to restore some sort of markings to indicate it is a first class coach, but am not sure which way may show up best without interfering with the stars. Maybe the "1" markings should be in yellow …
p.s. look for the Southern Cross in the otherwise mostly random star patterns.

Last edit: by SRman
Jeff Lynn,
Amateur layabout, Professional Lurker, Thread hijacker extraordinaire
Amateur layabout, Professional Lurker, Thread hijacker extraordinaire
Posted
Full Member
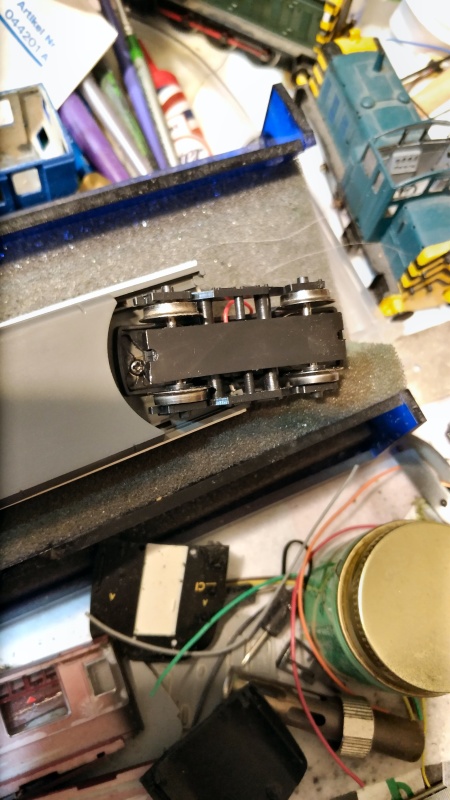
The screws not only act as the guides for the bogies, they also limit the amount of tilt that seems to be the cause of derailments in the first place. For my own layout, both of my present units run perfectly now, but I wannted to see how robust my solution is by testing on a more challenging layout. We visited our good friend DougN and his family yesterday, so I took the opportunity to run DSB unit 5003 on his figure-8 layout with its steepish gradients and tighter curves than mine. The proof of the pudding is in the eating, so the unit was placed on Doug's tracks andconnected up. Initially, the trailing driven bogie was tending to lift on a tighter, uphill curve, but after slackening the screw at that end about a quarter turn, the unit ran perfectly from there onwards. It ran so well that we left it running continuously for over an hour with no hesitations or derailments at all.
The photos show the screws in place, and the video is strung together from shorter clips taken just after the start of the continuous run, and about 45 minutes into the running session.
[yt]tMmx_XrcHm4[/yt]
Last edit: by SRman
Jeff Lynn,
Amateur layabout, Professional Lurker, Thread hijacker extraordinaire
Amateur layabout, Professional Lurker, Thread hijacker extraordinaire
Posted

Full Member
Cheers,
Claus
www.flickr.com/photos/ellef/
Claus
www.flickr.com/photos/ellef/
Posted
Full Member
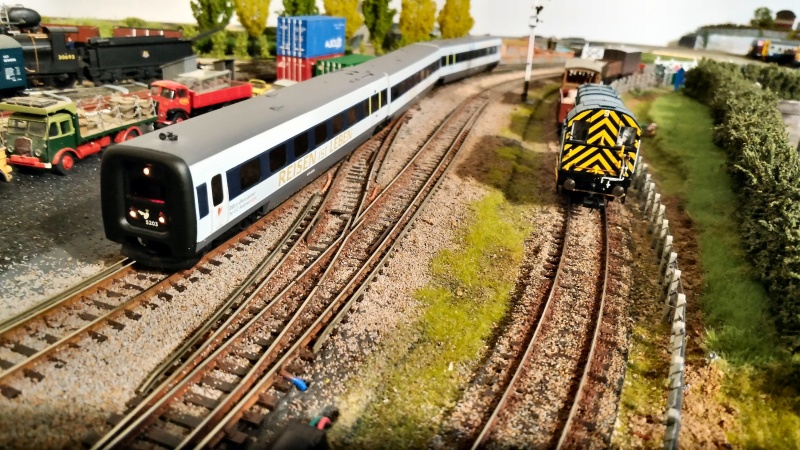
The text on the sides of this unit is actually in three languages: "to Travel is to Live" in English, "Reisen ist Leben" in German, and "at Reise er at Leve" in Danish. The unit itself, 5003/5203 was named 'H. C. Andersen'. The other unit I have is actually in Swedish Kustpilen livery as unit 1367, but would have ended up back in DSB service later. I am tempted to repaint it into DSB livery, but matching the lighter colour may be a challenge (described as light blue but looks light grey/off-white to me).
Agnes and I had a lovely comfortable trip from Copenhagen to Hamburg in 1st class in two of these units in 2018 (changing trains at Fredericia), after staying with my aunt in Frederiksberg, Copenhagen.
The Heljan models are a little crude, but are the only models available of the IC3 units, although McK may be producing a better model in the future; we'll have to wait and see if it actually materialises. The Heljan model works in reverse to the real units, which have the powered driving cars and unpowered centre trailer, while the Heljan model has the centre car driving all eight wheels of its bogies and the driving cars are unpowered.
Out of interest, which part of Melbourne are you in, if you don't mind my asking?
Last edit: by SRman
Jeff Lynn,
Amateur layabout, Professional Lurker, Thread hijacker extraordinaire
Amateur layabout, Professional Lurker, Thread hijacker extraordinaire
Posted
Full Member
Cheers,
Claus
www.flickr.com/photos/ellef/
Claus
www.flickr.com/photos/ellef/
Posted
Full Member
Hi againYour IC3 set is named after the famous Danish writer of fairytales, which you probably already know. The set's 'hometown' is Odense, which also is the hometown of the Danish Railway Museum. All IC3set's are named after well-known Danish personalities from several towns all over Denmark. Even towns not normally served by IC3 trains.
I don't think the names are displayed nowadays, since the units' refurbishments. We rode on units 5058 and 5085 for the two legs of our journey.

P_20180924_125319_vHDR_On by Jeffrey Lynn, on Flickr

P_20180924_180234_vHDR_On by Jeffrey Lynn, on Flickr
Jeff Lynn,
Amateur layabout, Professional Lurker, Thread hijacker extraordinaire
Amateur layabout, Professional Lurker, Thread hijacker extraordinaire
Posted
Full Member
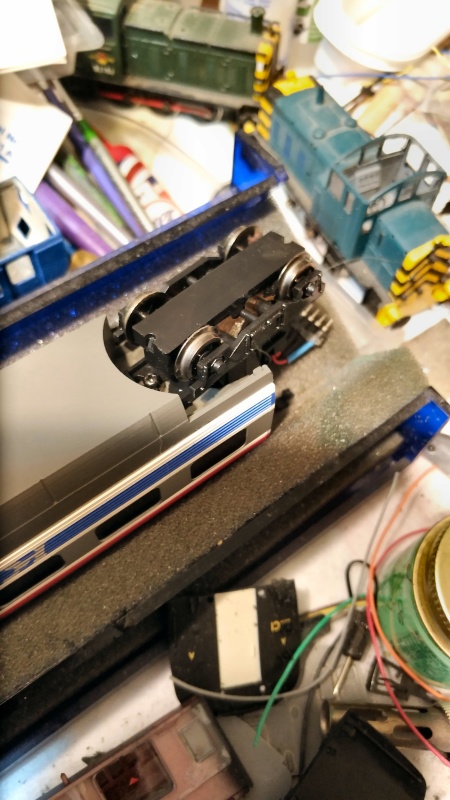
It has been running continuously for over an hour on Newton Broadway today, with occasional reversals to test its track-holding in both directions.
I then tried running it together with the previous unit 5003, but this new one runs a lot more freely than 5003, so I spent quite a while speed matching the pair. They are still not quite matched properly but it was sufficient for me to run the two as a consist for a while, but there was a little bit of pushing and tugging going on.

P_20200716_172946_vHDR_Auto by Jeffrey Lynn, on Flickr

P_20200716_173125_vHDR_Auto by Jeffrey Lynn, on Flickr
Jeff Lynn,
Amateur layabout, Professional Lurker, Thread hijacker extraordinaire
Amateur layabout, Professional Lurker, Thread hijacker extraordinaire
Posted
Full Member
A DCC Concepts 6-pin wired harness decoder was tried and worked fine, but would not fit into the barrel. A rethink was in order. I had a Bachmann direct plug in 36-568 decoder (actually a rebadged Zimo) and I know these work rather nicely in other installations. This decoder has rather long and soft pins, so having tested it and established it worked nicely in Rocket, I very carefully bent the pins over into a 'U' shape, using a metal ruler and a flat file to keep the pins straight and parallel. This allowed me to plug it so it sat straight over the Hornby socket and pcb, becoming so compact that not only did it all fit back into the barrel, I was able to stow the blanking plug in there too so it doesn't get lost.
The first two photos hopefully show this more clearly than my words can. I know the tender is off the rails as I was trying to get a better angle for the decoder view. The third photo shows the whole train in service, after a lot of cursing while trying to couple it all up without accidentally uncoupling the previous vehicle at the same time. Shaky hands didn't help! I have made no attempt to make it a scene from Stephenson's time, with much more modern stuff in view.

I hope this may help anyone who has had difficulty with selecting a suitable decoder for their 'Rocket'. It opens up the field a bit.
One other observation with mine: the stiff wires between loco and tender have a tendency to lift the leading tender wheels off the track. I'll have to see if I can come up with a reliable fix for that. It is rather sensitive to dirty track, so I will have to send the track cleaners around before I can run it properly all the way round the layout.

P_20200722_133733_vHDR_Auto by Jeffrey Lynn, on Flickr

P_20200722_133810_vHDR_Auto by Jeffrey Lynn, on Flickr

​​​​​​​P_20200722_141053_vHDR_Auto by Jeffrey Lynn, on Flickr
Jeff Lynn,
Amateur layabout, Professional Lurker, Thread hijacker extraordinaire
Amateur layabout, Professional Lurker, Thread hijacker extraordinaire
Posted
Full Member
I have not wired the lights at this stage as I have to be careful with the live chassis, but the front light is still wired directly to the track (through the right-hand pickups and return through the chassis). This means that at present, the front lights are permanently on while the rear ones are not operational at all. I will rewire them eventually, maybe even substituting some 5mm LEDs to reduce the potential power strain on the decoder.
I also found a solution for replacing the Fleischmann couplings and setting the replacement Kadees at a perfect height for coupling to adjacent vehicles - those Oxford Diecast self-tapping securing screws are very useful for a lot of things. Eventually I want to put the continental loop type couplers, but don't have any suitable ones at present. Using the Kadees means that the adjacent vehicle has to have an NEM pocket so I can just plug in a Kadee (#20 used here).
One final thing regarding the running qualities. The BR 89 ran nicely striaght off, but tended to jerk on starting. I used the ESU self-tuning facility to good effect. Programming on the main, set CV 54 to 0, then select function 1. The locomotive takes off rapidly for a couple of feet while the decoder sets its parameters. After that, it runs very smoothly and controllably indeed, with only a little 'cogging' evident at speed step 1 (more a characteristic caused by the motor type and gearing).
Also on the workbench is the commencement of ideas on the remaining green coach. I'm not sure if my artistic abilities are up to what I have in mind, but this is a start. There is a little more to do yet. Sorry about the surrounding clutter.

P_20200726_095621_vHDR_Auto by Jeffrey Lynn, on Flickr

P_20200726_095709_vHDR_Auto by Jeffrey Lynn, on Flickr

P_20200726_095512_vHDR_Auto by Jeffrey Lynn, on Flickr
Jeff Lynn,
Amateur layabout, Professional Lurker, Thread hijacker extraordinaire
Amateur layabout, Professional Lurker, Thread hijacker extraordinaire
Posted
Full Member
While I had it in pieces, I took the opportunity to paint the interior as well, although it can barely be seen.
P_20200805_224802_vHDR_Auto by Jeffrey Lynn, on Flickr
Jeff Lynn,
Amateur layabout, Professional Lurker, Thread hijacker extraordinaire
Amateur layabout, Professional Lurker, Thread hijacker extraordinaire
Posted

Full Member
My Hornby Stephenson's Rocket train arrived today from Kernow Model Railway Centre. A quick test on DC showed it to be a bit of a rocket, but it worked fine. Then I set about finding a decoder for it.
A DCC Concepts 6-pin wired harness decoder was tried and worked fine, but would not fit into the barrel. A rethink was in order. I had a Bachmann direct plug in 36-568 decoder (actually a rebadged Zimo) and I know these work rather nicely in other installations. This decoder has rather long and soft pins, so having tested it and established it worked nicely in Rocket, I very carefully bent the pins over into a 'U' shape, using a metal ruler and a flat file to keep the pins straight and parallel. This allowed me to plug it so it sat straight over the Hornby socket and pcb, becoming so compact that not only did it all fit back into the barrel, I was able to stow the blanking plug in there too so it doesn't get lost.
I hope this may help anyone who has had difficulty with selecting a suitable decoder for their 'Rocket'. It opens up the field a bit.
One other observation with mine: the stiff wires between loco and tender have a tendency to lift the leading tender wheels off the track. I'll have to see if I can come up with a reliable fix for that. It is rather sensitive to dirty track, so I will have to send the track cleaners around before I can run it properly all the way round the layout.
Hi Jeff,​​​​​​​
since you've got the ZIMO MX622N chip and that can be easily fitted with a very small Stay Alive system I think you should have room, it might involve removing the socket and going to direct wiring. I did this with the same chip on my old Hornby Terrier here:
http://yourmodelrailway.net/view_topic.php?id=16362&forum_id=21&page=2#p295428
The ZIMO manual shows the locations for the Stay Alive connections, they're two unused tabs on the chip. The two SA wires are not in this photo but come from the end opposite the pins, past the worm gear right to the back of the loco. You'll be limited mostly by how many Tantalum caps you can fit but in my experience even 4 * 220uF will help with minor interruptions. I managed to fit that many in a Peckett!
Posted
Full Member
Jeff Lynn,
Amateur layabout, Professional Lurker, Thread hijacker extraordinaire
Amateur layabout, Professional Lurker, Thread hijacker extraordinaire
1 guest and 0 members have just viewed this.