Jeff's (SRman) work bench and projects
Posted
Guest user
Posted

Full Member
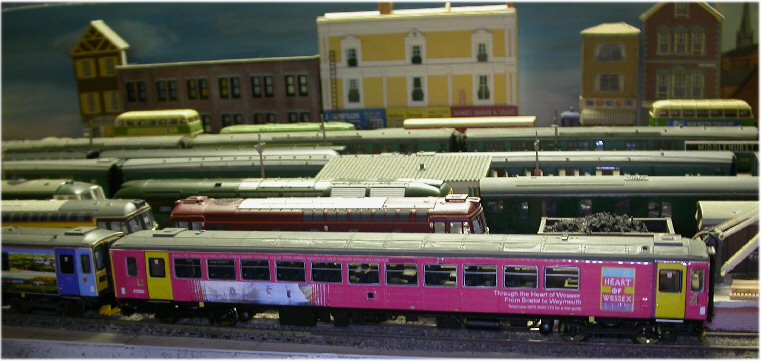
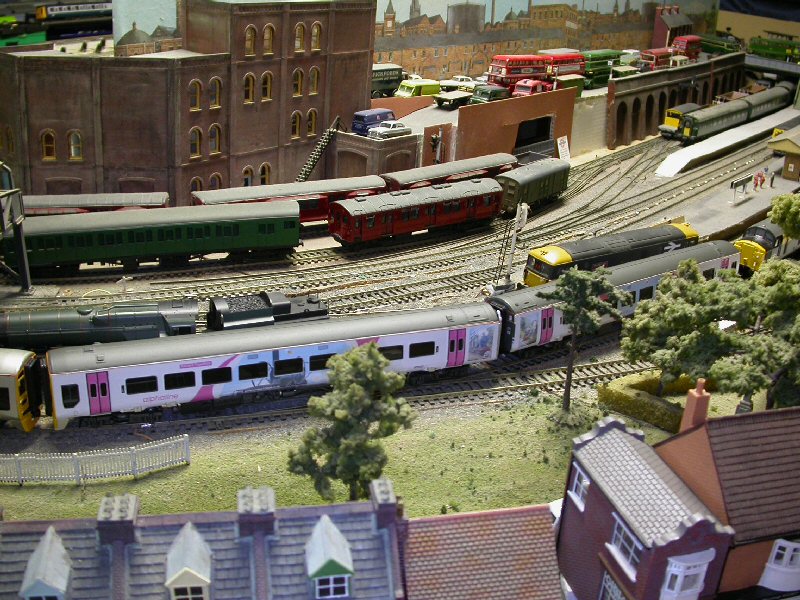
As to the 153s, the overlays fit better than the 158, although there were a couple of bits of FNW blue showing through at one end and near one of the doors, plus the door open light on one side only didn't line up properly and one of the end sidewindows was a little out of whack - not too obvious with the blue livery overlaid on a blue base. The rivets come out rather overscale with the overlay in place, due to the extra thickness of vinyl all around each rivet - that's after using the hair dryer to "melt" the vinyl around all the raised details. I did all that with the body and chassis together in situ, as I didn't want to end up with a banana shaped Sprinter if I used too much heat.
With some reservations, I would deem the overlays a success. They allow liveries that I, and most other average modellers, would otherwise find impossible to do well by hand. The effect from normal viewing distance is great but they don't stand up to really close scrutiny, in that the underlying details are exaggerated slightly.
I still have the pink liveried 153 to do, and I have painted all the possible areas where the FNW blue or gold might show into Barbie pink, which will be close enough to disguise any shortcomings of the vinyls.
 Last edit: by SRman
Jeff Lynn,
Amateur layabout, Professional Lurker, Thread hijacker extraordinaire
Amateur layabout, Professional Lurker, Thread hijacker extraordinaire

Posted
Guest user
Posted
Guest user
Posted
Full Member

As may be seen, I still need to repaint the 158 cab ends as the Wessex Trains "Richard Trevithick" unit didn't have the black treatment around the windows and light clusters.
Jeff Lynn,
Amateur layabout, Professional Lurker, Thread hijacker extraordinaire
Amateur layabout, Professional Lurker, Thread hijacker extraordinaire
Posted
Guest user
I take note of your comment re the 158 outer couplers as well since I am having trouble finding something suitable to join both my units together.
Posted
Full Member
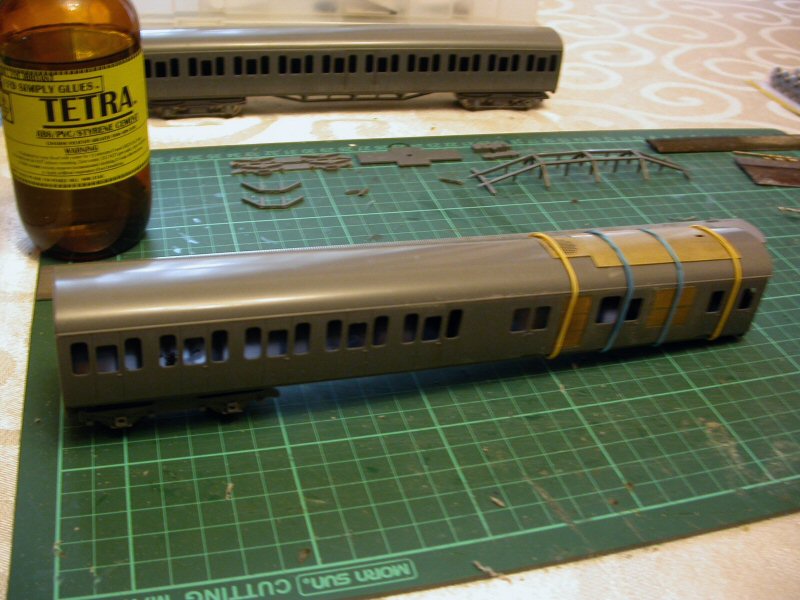
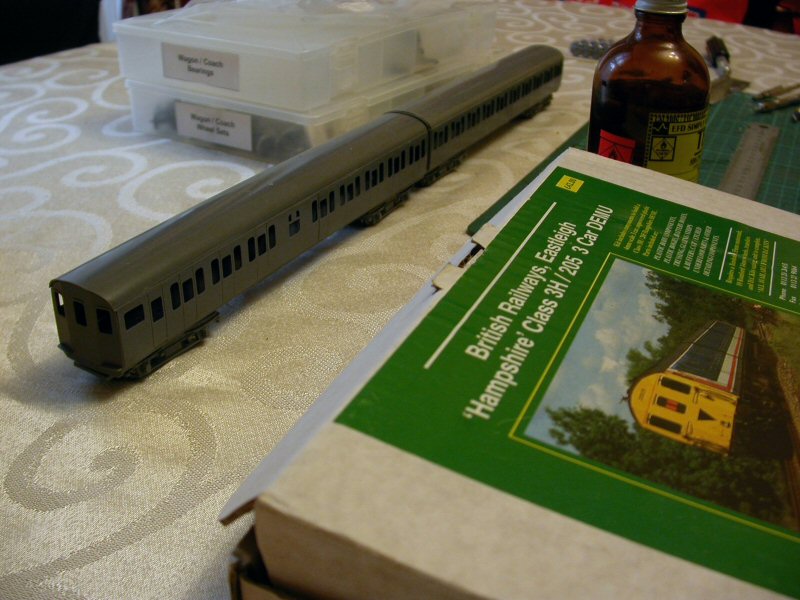
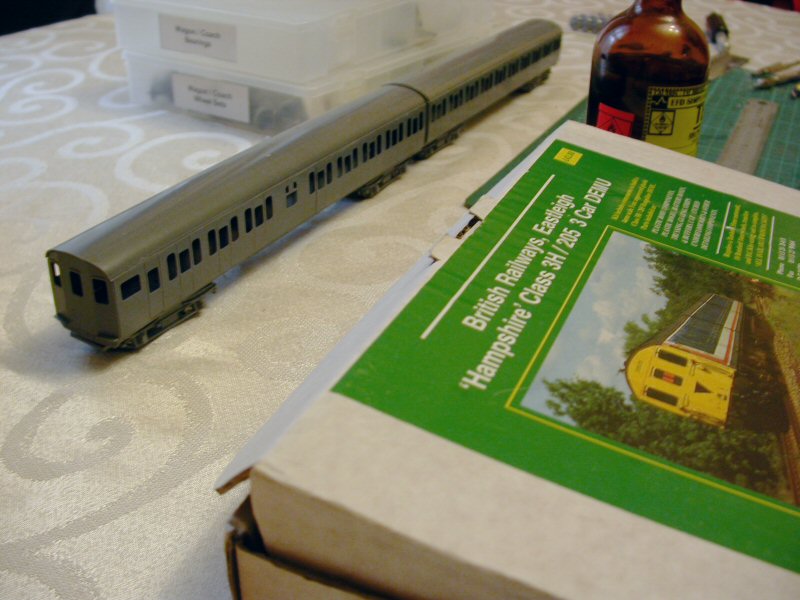
I don't yet have the motor for it but I ordered a BullAnt unit from Hollywood Foundry as I wanted to try something slightly different from the Black Beetles I normally use for such projects. I know they are similar mechanically but I feel the BullAnt may have slightly better traction - will have to wait and see whether my hunch is right or not but it certainly won't be any worse (not that the Black Beetle is bad to start with).
I have constructed the basic body shells and underframe trusses (not installed in the motor coach yet as I will have to cut clearance for the motor) but I haven't done any of the finer details yet as I am still a bit too shaky for the finer work!
I have not yet decided whether to paint it green or blue but as I have done most of the previous units in green I may just plump for blue for a change. Also, I am not happy with most of the commercial SR greens as they seem a little on the dark side.
I have taken a few photos of the progress so far but they are still on the camera's memory card right now; will get them ready and uploaded soon, so watch this space!
I still don't have a proper layout to run on yet but by the time this unit is complete, I hope to have started something.
Last edit: by SRman
Jeff Lynn,
Amateur layabout, Professional Lurker, Thread hijacker extraordinaire
Amateur layabout, Professional Lurker, Thread hijacker extraordinaire
Posted
Guest user
I look forward to seeing the pics when you're ready. I guess you could always compromise and paint the unit in blue with small yellow panel and white set numbers; not many models that I am aware of wear that livery.
Posted
Full Member
:hi
Jeff Lynn,
Amateur layabout, Professional Lurker, Thread hijacker extraordinaire
Amateur layabout, Professional Lurker, Thread hijacker extraordinaire
Posted
Full Member
Jeff Lynn,
Amateur layabout, Professional Lurker, Thread hijacker extraordinaire
Amateur layabout, Professional Lurker, Thread hijacker extraordinaire
Posted
Guest user
But seriously - excellent work so far. Keep it up!
Posted
Full Member

Jeff Lynn,
Amateur layabout, Professional Lurker, Thread hijacker extraordinaire
Amateur layabout, Professional Lurker, Thread hijacker extraordinaire
Posted
Full Member
I have not yet glued the motor bogie sideframes in place but will take a few pics this weekend to add to the story.
Jeff Lynn,
Amateur layabout, Professional Lurker, Thread hijacker extraordinaire
Amateur layabout, Professional Lurker, Thread hijacker extraordinaire
Posted
Full Member
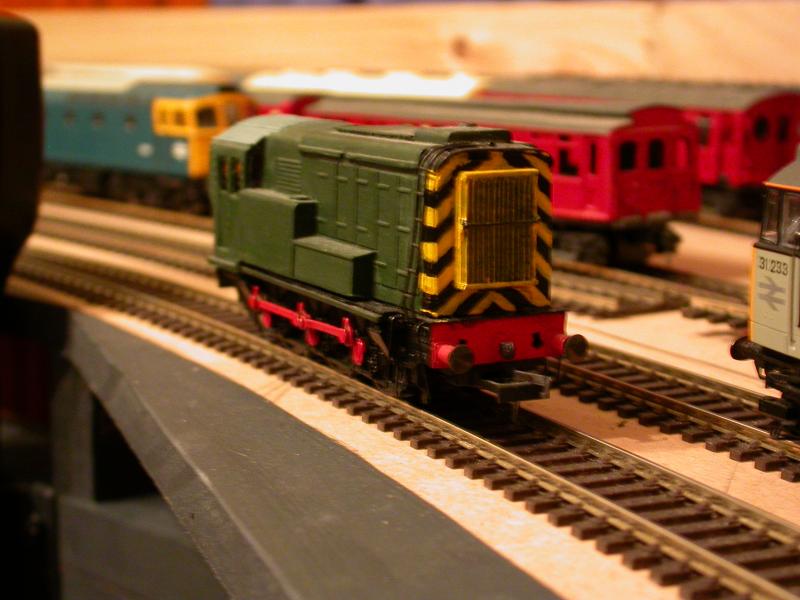
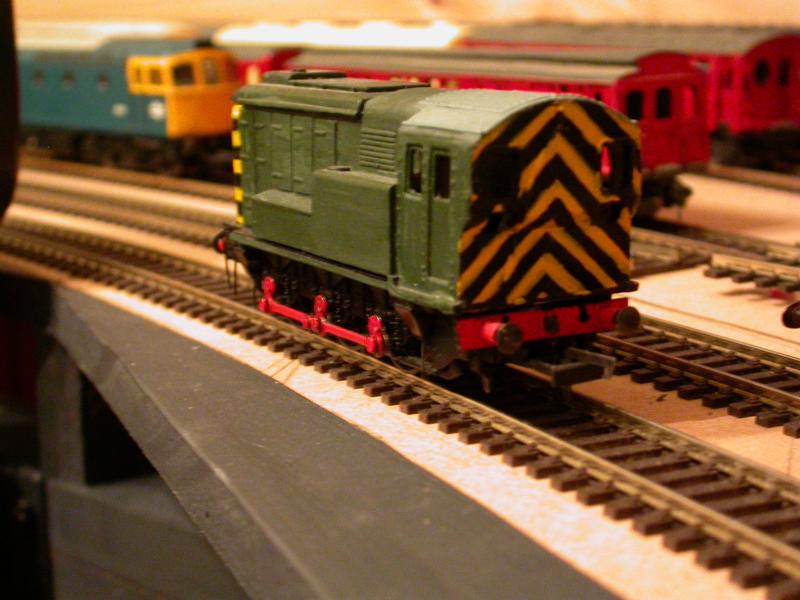
This is a Southern Railway Maunsell diesel-electric shunter in BR 1960s livery, made from a Golden Arrow resin body kit mounted on a modified Bachmann 08 chassis. It is still very much a work in progress and is awaiting glazing, handrail fitment and tidying up of those wasp stripes, which I am hand-painting!
I have not yet fitted a DCC decoder, which will have to be hard-wired as it was an older Bachmann chassis.
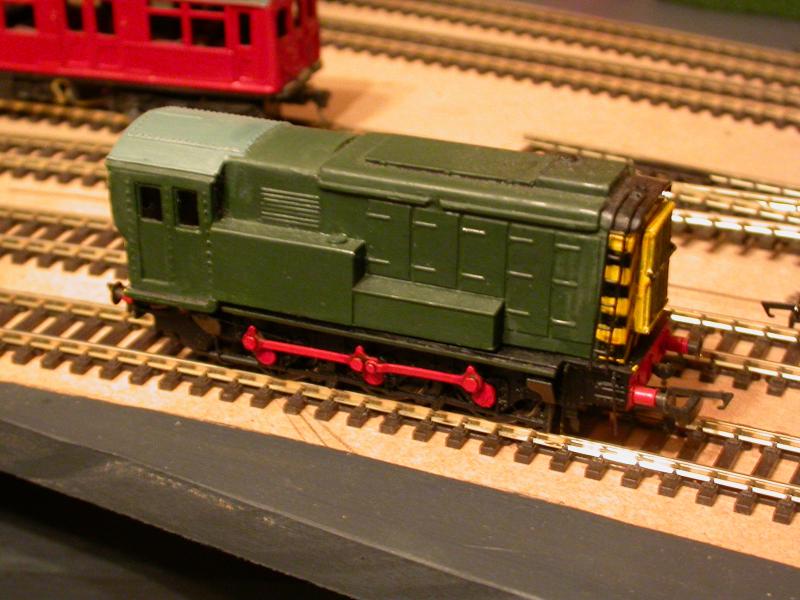
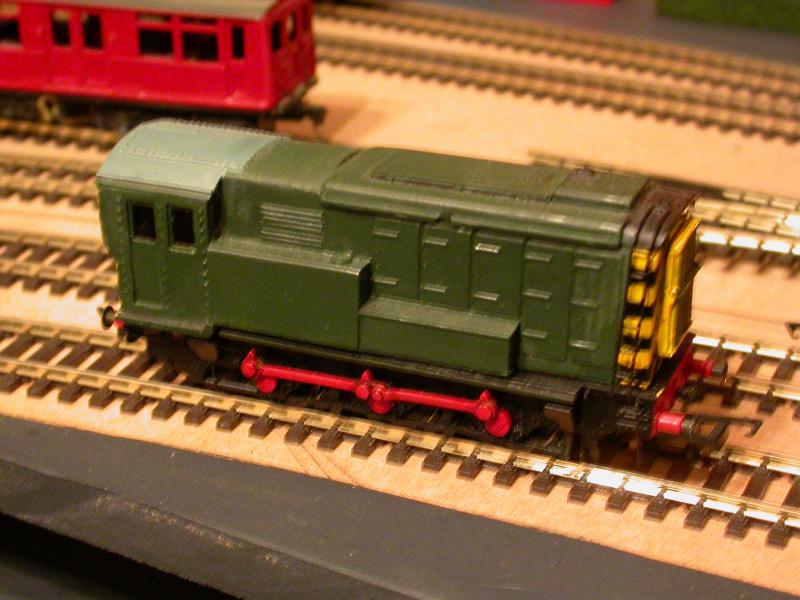
EDIT: I forgot to resize these before posting but they seem to be OK - if they do cause problems please let me know and I'll do something about it.
Last edit: by SRman
Jeff Lynn,
Amateur layabout, Professional Lurker, Thread hijacker extraordinaire
Amateur layabout, Professional Lurker, Thread hijacker extraordinaire
Posted

Legacy Member
Posted
Full Member
Jeff Lynn,
Amateur layabout, Professional Lurker, Thread hijacker extraordinaire
Amateur layabout, Professional Lurker, Thread hijacker extraordinaire
Posted
Full Member
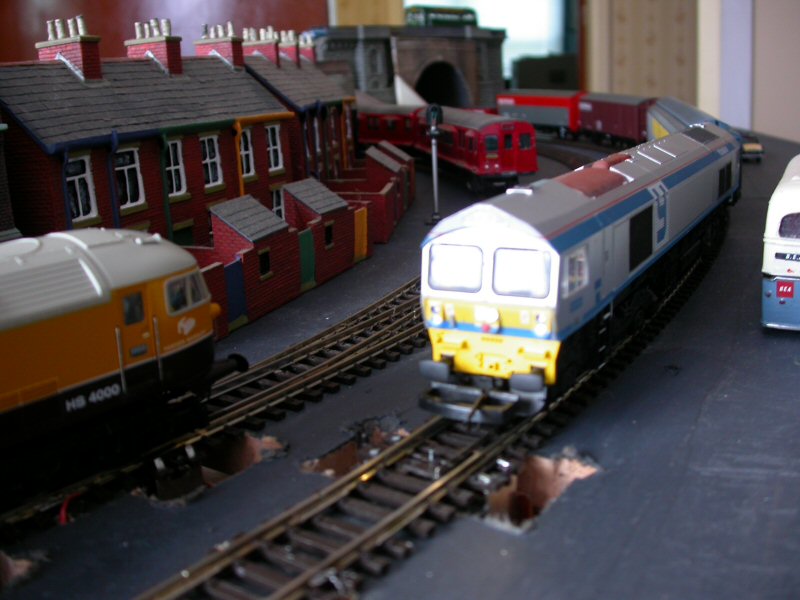
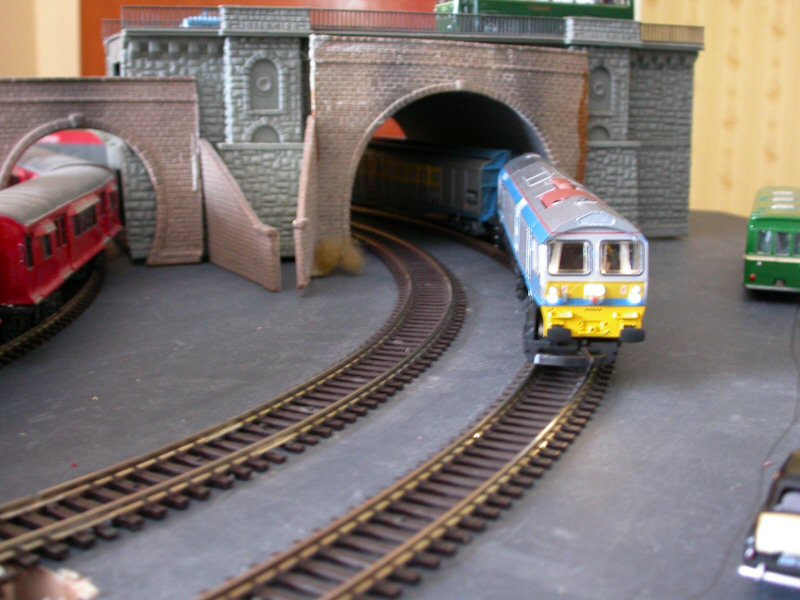
My latest little project has been a Lima Yeoman class 59, 59 005 Kenneth J Painter. I did add a Digitrax decoder to the original Lima motor but it was never a brilliant performer, although mine was certainly one of the better Lima runners.
Anyway, I recently purchased a Hornby class 59 off eBay for a very reasonable price, with a view to swapping bodies with the Lima one. Coincidentally, it was also 59 005, Kenneth J Painter, but in a later Yeoman livery. Unfortunately for Hornby, they used the wrong mouldings for this one as it has the later style 59/1 or 59/2 frontal treatments, so it made the body swap even more justifiable.
The Hornby chassis has a nice smooth running 5-pole motor and is DCC-ready but neither of the chassis had lights. I then decided i would fit lights, at least at one end. I used two types of white LED, one type with a light tower for each of the twin headlights and a slightly smaller type with a dimple rather than a "tower" for each of the marker lights, together with the necessary resistors.
I decided to drill out all of the lights, including the marker and tail lights, even though I had already resolved I was not going to have working tail lights. I worked out the clearances involved and only needed to remove parts of the front of the cab interior dash moulding to clear the LEDs.
I did have to unscrew the decoder socket and solder white, yellow and blue accessory wires to the correct sockets (matched very carefully to the plug on the decoder!). The decoder I used just happened to be spare after I installed two more sound projects, and is a Bachmann (ESU Basic) job.
The initial installation works nicely (a win for me!) but the wiring is a bit messy and goes up the inside of the cab front centre and corner pillars. They are rather too visible at the moment so I think I will re-do it with some of the LED "legs" shortened and thinner wires, plus a neater way for mounting the resistors but, for the time being, I am happy to run with it "as is".
I may do the lights at the other end soon but I will still not bother with working tail lights as they aren't really needed with this model.
I will also need to touch up the yellow panel just around the lights.
Photos will follow fairly soon, although they will show the installation without the cab interior being fitted.
The sound projects mentioned earlier, for anyone who is interested, were a class 57 fitted into a Bachmann Freightliner 57 008, and Kestrel, fitted into the Heljan Kestrel model. I also now have had my Hornby class 31 reblown so it now actually sounds like a class 31 should. All were Howes' sounds. Now I have a complete circuit to run on, I'll have to charge up the video camera! :cheers
Last edit: by SRman
Jeff Lynn,
Amateur layabout, Professional Lurker, Thread hijacker extraordinaire
Amateur layabout, Professional Lurker, Thread hijacker extraordinaire
Posted
Full Member
The lights work nicely although there is still some light bleeding into the tail light lenses at the moment, as well as into the cab interior - I haven't refitted the cab interior moulding at this point.
Jeff Lynn,
Amateur layabout, Professional Lurker, Thread hijacker extraordinaire
Amateur layabout, Professional Lurker, Thread hijacker extraordinaire
Posted
Full Member
On the railway side, I have an Ayjay models resin kit for a post-war 2HAL unit, also known as a 'Tin HAL'. Some of the detailing is a little on the heavy side but it looks like a 2HAL should. I have removed the moulded jumper cables from the DTC end and will do the same at the DMBS end soon, with separate wire cables to be added. I also filed down the over-thick secondman's window surrounds. Both coaches have been primed but I still have to remove some flash from the bogies.
Sorry about the blurry driving ends - I must stand back a little further to improve the depth of field in the future.


With a view to the upcoming Model Bus Association of Australia's modelling competition in December, I have been pushing a few bus kits up the production line. I can only enter two models in each category so one of the 4mm kit-built items for this year will be the Southdown Leyland Tiger Cub with Marshall BET style body, made from a Westward Models/ABS Streetscene white metal kit with a few minor modifications. I am flush-glazing the windscreens and rear window (not happy with the driver's screen right now as I got some glue on it) but I have yet to do the side windows and doors in these photos. I am also not yet happy with the shape of the cream 'V' at the front. The other entry is the Little Bus Company resin 5Q5 of London Transport, as it appeared in the pre-war period. I haven't glazed any part of this model yet.


For future entries, I have started on further bus kits. The next four are all Little Bus Company resin kits. In order of the pics:
1. An all-Leyland Titan PD2/12 'Farington' as run by Southdown in the early 1950s with an open rear platform. Thos one is partly painted but still needs tidying up before glazing.
2. A Southdown 1957 Commer TS3 coach with Beadle Rochester body.
3. A southdown Leyland Leopard coach with Duple Commander body from the mid-1960s.
4. A Southdown pre-war Leyland Titan TD5 with post-war East Lancs body.


Also shown with the Leyland TD is a Royal Blue Bristol LL from Weico Models. This is also a resin kit but comes locally from Melbourne.


Last edit: by SRman
Jeff Lynn,
Amateur layabout, Professional Lurker, Thread hijacker extraordinaire
Amateur layabout, Professional Lurker, Thread hijacker extraordinaire
Posted
Guest user
And a superb "rail replacement" fleet in the making as well. Southdown is quite well represented in the RtP bus market so it's good to se some real modelling of the fleet under way as well.
1 guest and 0 members have just viewed this.