Jeff's (SRman) work bench and projects
Posted

Full Member
The roofs were still in undercoat before and have now had a coat of a darker grey.
The interior shots also show how I have run the wires for the extra pickups rigged in the trailing bogie, plus the lead weight over the leading end (hidden in the van section) and the NCE decoder.
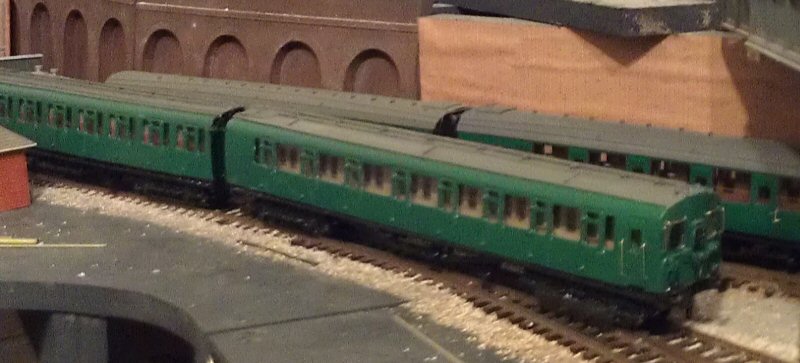
I have left the extra wires at full length on the decoder because I may fit lights at a later date, and possibly a third rail flash over the leading bogie shoe.
 Last edit: by SRman
Jeff Lynn,
Amateur layabout, Professional Lurker, Thread hijacker extraordinaire
Amateur layabout, Professional Lurker, Thread hijacker extraordinaire

Posted

Full Member
I have a couple of Bachmann DMU's to chip but I understand removing the bodies is quite tricky. Also, I'd really like to have a sound chip in at least one of them. The problem is, they're quite heavy so postage (to my "sound engineer" in Blackwood ;-)) would be significant.
I certainly don't have the skill to install a sound chip myself …………….

'Petermac
Posted
Full Member
The Bachmann DMUs are all DCC-ready. The bodies come off on the Derby 108 by undoing a screw, off-centre under the cab end and lifting and unclipping along the sides. The Cravens class 105 is even simpler as it doesn't have the screw (although the side clips are quite stiff). The decoder is 8-pin and simply plugs in (don't worry if you get it backwards as this will merely stop the lights from working (in which case you reverse the decoder plug).
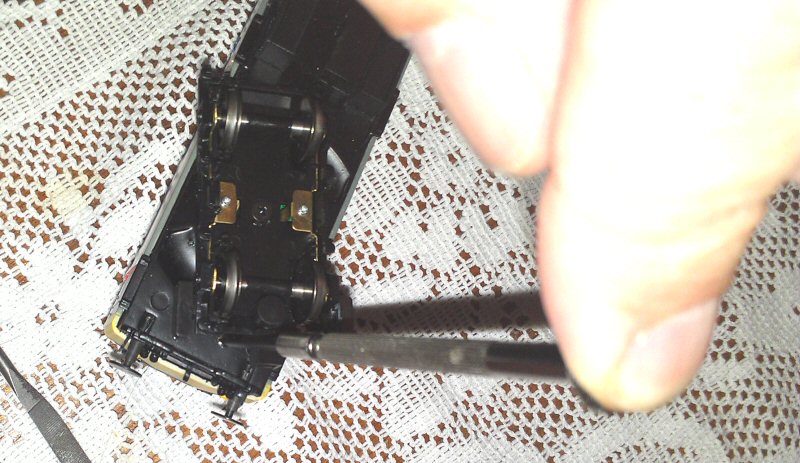
The ESU decoders are too big to fit in the recess on top of the motor block so I put mine on the leading face of the block, inside the passenger saloon. I also removed the seats from the passenger bay ahead of the motor and fitted a larger bass reflex speaker which really brings out the lovely exhaust resonance on the Howes sound chip.
The first two pics show the position of the screw on the 108.
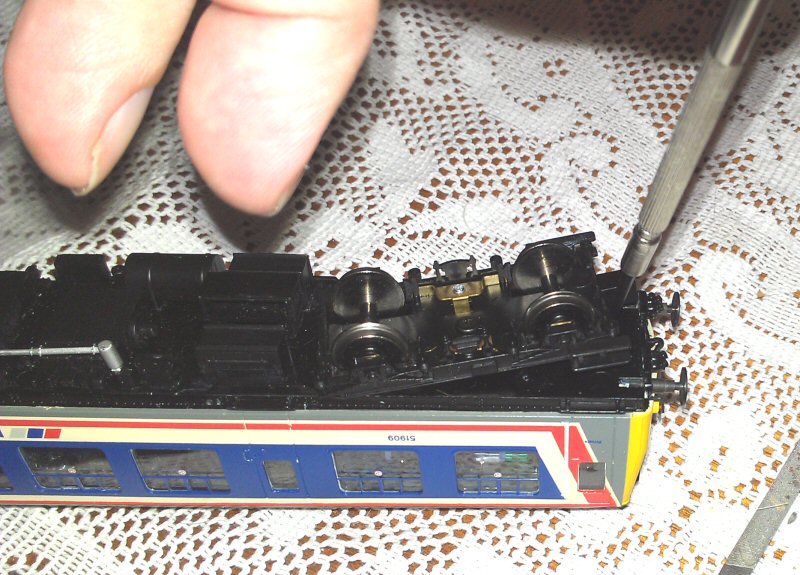
The sides then need to be spread slightly to release the clips.
This photo shows the position of the plug and socket, behind the motor casing, and how I have positioned the decoder, removed seats and placed the large speaker.

Just getting the decoder and speaker and doing it yourself will save you a lot of postage, Peter! If you stick with the smaller speaker it will fit on the seat backs, or you could remove a small section within the seat unit to seat the decoder further down.
I haven't got any of the Derby Lightweight units (early style) but the mechanisms are all but identical to the 108 and 105 units.
Post #0
Last edit: by SRman
Jeff Lynn,
Amateur layabout, Professional Lurker, Thread hijacker extraordinaire
Amateur layabout, Professional Lurker, Thread hijacker extraordinaire
Posted
Full Member
Also, I thought these DMU's needed either 2 decoders or a connection from the motor unit to the trailer car. Somewhere on here, someone used a rather neat looking mini-plug/socket for the connection………:roll::roll:
Do you buy these Howes chips ready loaded with all the sounds just to plug in ?
'Petermac
Posted
Full Member
Was it this by any chance:-Also, I thought these DMU's needed either 2 decoders or a connection from the motor unit to the trailer car. Somewhere on here, someone used a rather neat looking mini-plug/socket for the connection………:roll::roll:
Perhaps we should try to arrange a "chipping" day here in the UK? With some combined expertise and experience, we ought to be able to do a number of decoders in a few hours. Maybe next time you come over, Peter.
(Sorry Jeff, I will let you have your thread back now)
Posted
Full Member
Your offer of a "chipping day" could be one you'll live to regret having made ……………..
 hmm I'm planning a "UK run" in early February…………….
'Petermac
Posted
Full Member
Answering Peter first: Yes they require two decoders (three if it is a three-car unit). Older releases require an 8-pin decoder in the trailer(s), newer releases require a 6-pin decoder. As they are purely for the lighting functions you can use a function only decoder or, as I do, discarded cheap Hornby decoders, which are cheaper than function-only decoders! Or, as you say, you can use a mini-connector to transfer power to the trailer lights - you would need at least a three-pin connection for this.[user=6]Petermac[/user] wrote:Was it this by any chance:-Also, I thought these DMU's needed either 2 decoders or a connection from the motor unit to the trailer car. Somewhere on here, someone used a rather neat looking mini-plug/socket for the connection………:roll::roll:
Perhaps we should try to arrange a "chipping" day here in the UK? With some combined expertise and experience, we ought to be able to do a number of decoders in a few hours. Maybe next time you come over, Peter.
(Sorry Jeff, I will let you have your thread back now)
Geoff: this is a workbench thread so every bit of information that helps someone else (or me, for that matter!) is more than welcome.
Besides, you should read my tag line with reference to thread hijacking! ;-) :cool:
Jeff Lynn,
Amateur layabout, Professional Lurker, Thread hijacker extraordinaire
Amateur layabout, Professional Lurker, Thread hijacker extraordinaire
Posted
Full Member
You know you are welcome any time, Peter. When you have a firm date, send me a PM and we can take it from there. I can easily set us up to fit a few standard decoders and preloaded sound decoders, but I don't have the gear that Max has for loading custom sound projects - although I do know a man who has and who is not too far from here. He may be willing to help as well.That's the one Geoff. :thumbs
Your offer of a "chipping day" could be one you'll live to regret having made ……………..
Posted
Full Member
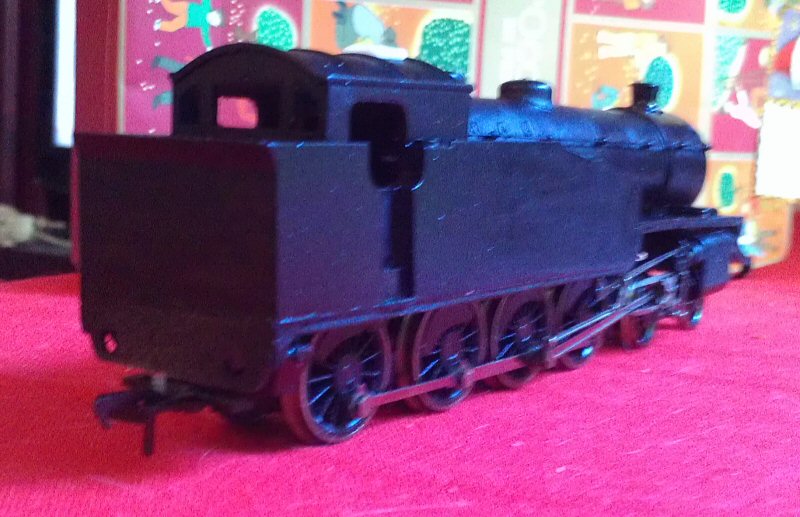
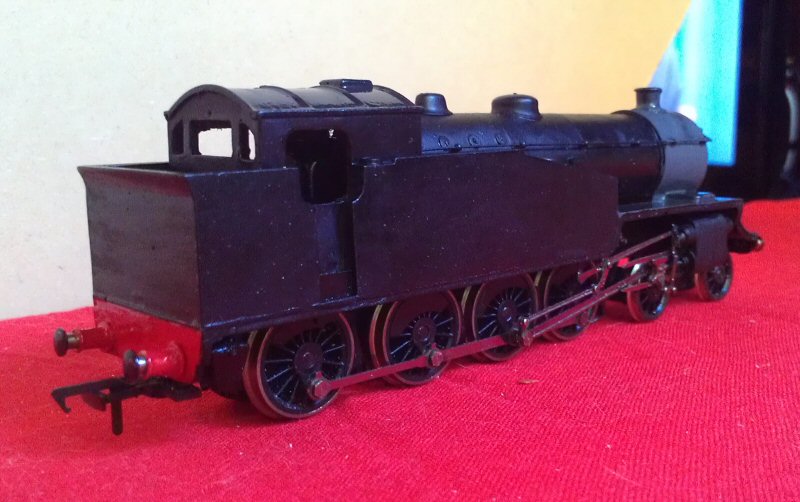
Still to add before painting are the lamp irons from flattened brass wire, remembering that these Southern locomotives had six lamp irons at each end, lubricator pipe runs, and the clack valves and feed pipes near the front of the boiler.
To be added after painting are buffers, safety valves and whistle, plus the cab door hand rails (to be made from modified Peco track pins, as per the kit instructions).


Last edit: by SRman
Jeff Lynn,
Amateur layabout, Professional Lurker, Thread hijacker extraordinaire
Amateur layabout, Professional Lurker, Thread hijacker extraordinaire
Posted

Inactive Member
It is still running OK with all the bits and bobs now in place?
Max
Port Elderley
Port Elderley
Posted
Full Member
There is room for some extra weight to be added although it coped with its first heavy train the other day.
Jeff Lynn,
Amateur layabout, Professional Lurker, Thread hijacker extraordinaire
Amateur layabout, Professional Lurker, Thread hijacker extraordinaire
Posted
Full Member
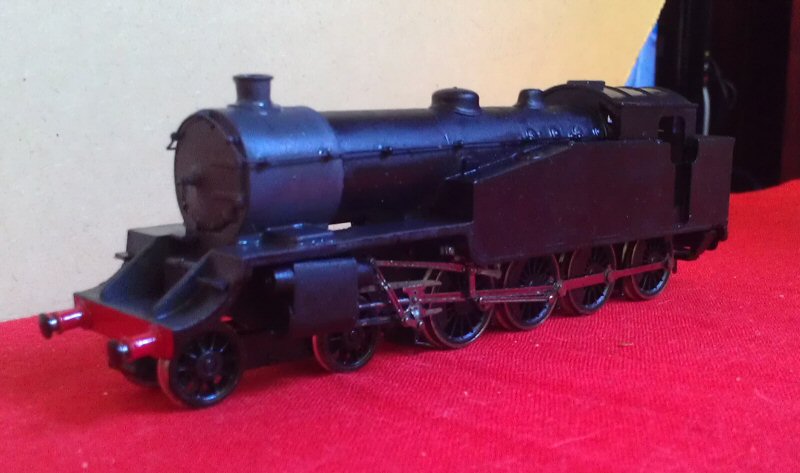
She looks like quite a beastie. I need to read a bit about the prototype I think to see what she was really like in terms of performance.
'Petermac
Posted
Full Member
 :cool:
There were only four of them, then the very similar H16 4-6-2Ts were built (all five of them! The H16s had straight tops at a lower level on their side tanks). All were based for most of their lives at Feltham.
The G16s were used for hump shunting at Feltham but also on transfer freights and empty passenger stock movements, often to Clapham Junction, so are ideal for model railway movements. The H16s were used similarly but got a little further afield, to Willesden on the transfer freights.
The G16s were reputed to be the most powerful tank engines in the UK.
Since my last post, I have taken the front bogie off and filled a little more side clearance for the mounting screw and cut off the cross extensions on the ex-EFE metal spring so it it is now essentially a strip of springy steel with two holes n it.
Jeff Lynn,
Amateur layabout, Professional Lurker, Thread hijacker extraordinaire
Amateur layabout, Professional Lurker, Thread hijacker extraordinaire
Posted
Full Member
There is still a bit of filling and filing/sanding to do but overall the painting can proceed apace. I even started a little of the weathering finish, with dark grey (Humbrol #67) darkened with a little black painted on to the cab roof, smokebox and footplate.
Oh yes … and I have filed down the outer sides of those 8F cylinders a bit.

Jeff Lynn,
Amateur layabout, Professional Lurker, Thread hijacker extraordinaire
Amateur layabout, Professional Lurker, Thread hijacker extraordinaire
Posted
Full Member
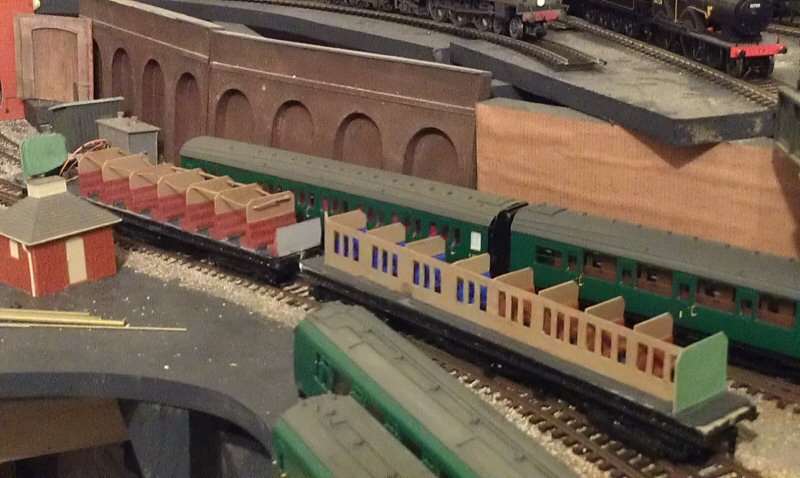
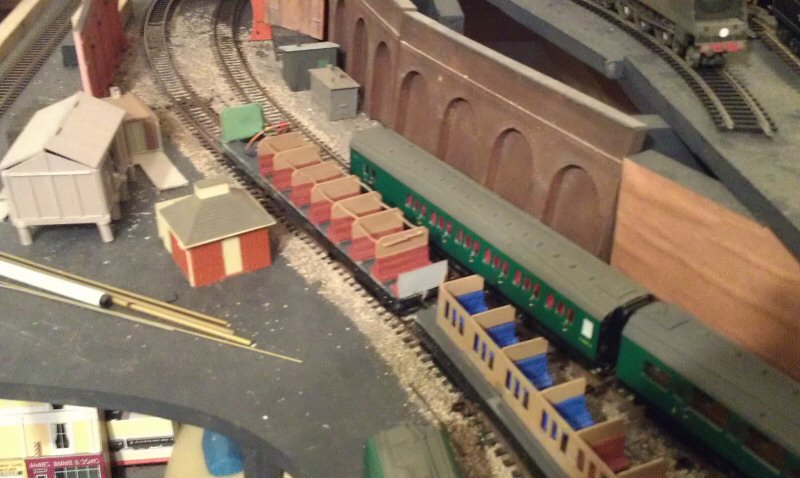
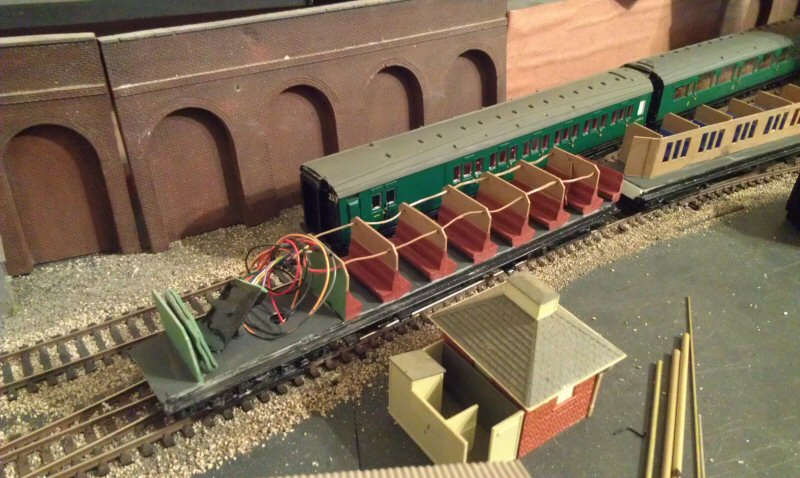
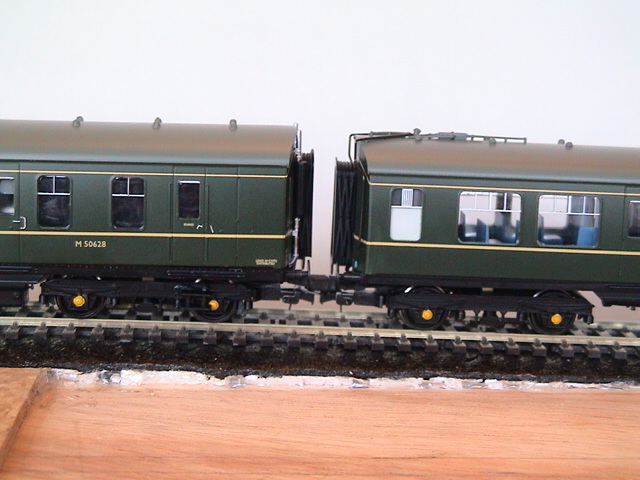
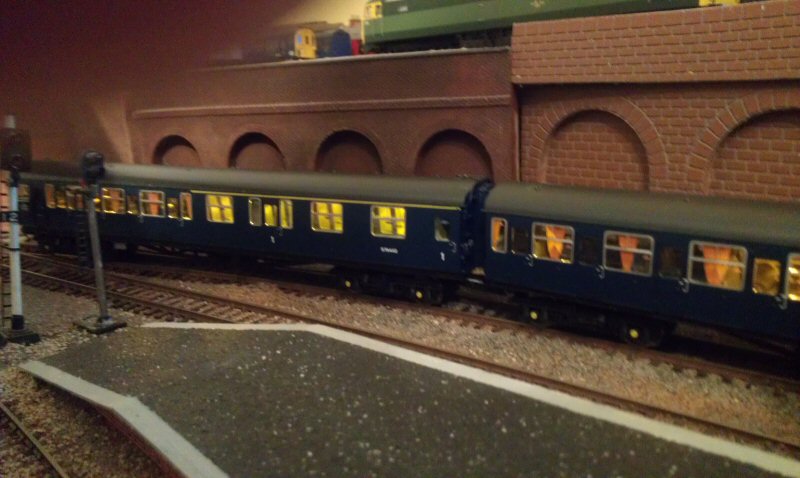
I rummaged through some spare seating units I had lying around until I found a composite unit with four first class compartments. I lifted the Hornby body off one of the Driving Trailer Composite coaches (DTC) - they simply clip off - and checked the compartment spacing against the potential replacement. They matched to within half a millimetre; I figured that I would easily lose that much in the saw cuts when cutting the existing seat unit. I also noted that I would have to remove about 2mm from each side of the new unit to match the width.
Anyway, several saw cuts later plus a bit of cleaning up with a heavy file, I was able to shoehorn the new section in and test fit the body for clearances. It worked well after removing a little from the top edges to fit under the Hornby lighting unit. The only thing wrong was that the lights shone right through the unpainted plastic of the new bit!
A coat of paint soon fixed that last problem. I haven't even bothered to fill the slight gaps in the seat backs where the saw cuts went through, as the 4 VEP curtains hide those quite well.
Here are a couple of photos to show the end result. Now I only have to do this with three more DTCs!
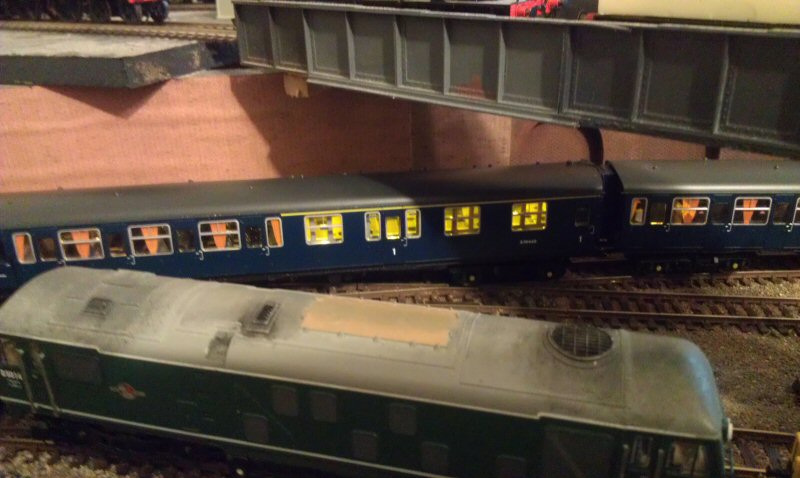
Next time I do one I'll take a photo of the interior before clipping the bodies back on. That will also show how I avoided the wiring attached at the end of the seat unit, outside what should be the toilet.
Last edit: by SRman
Jeff Lynn,
Amateur layabout, Professional Lurker, Thread hijacker extraordinaire
Amateur layabout, Professional Lurker, Thread hijacker extraordinaire
Posted
Full Member
I decided to shave off the moulded on handrails at the front and drill the holes (#76 drill bit) before losing track of the correct positions for the handrail ends. Bending the handrails involved a small amount of trial and error. followed by gluing with superglue (cyano-acrylate). The door handrails were just as fiddly to get right, especially the ones with the bend at the top on the edges closest to the ends.
I partially repainted the yellow using slightly thinned Humbrol gloss yellow (#69). This should not have matched fully but blended with the slight weathering I had applied at some time previously and barely shows at all.
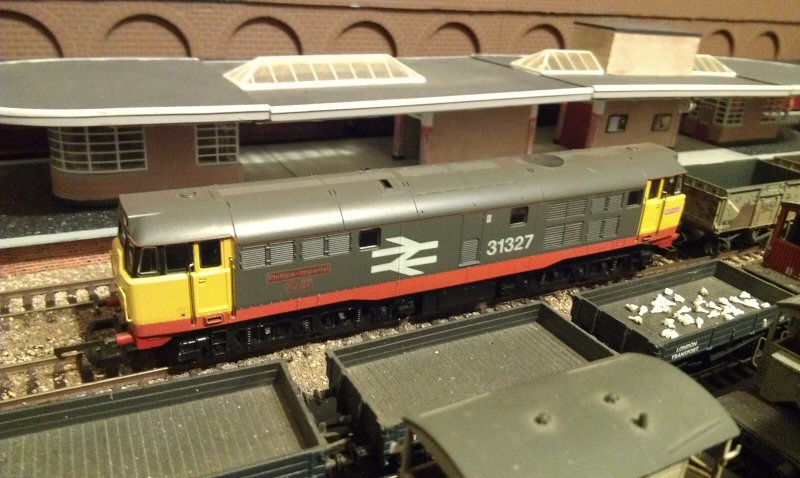
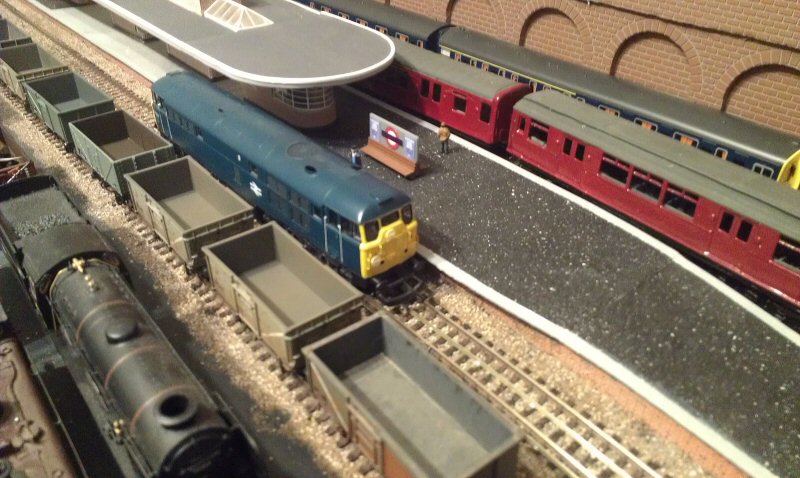
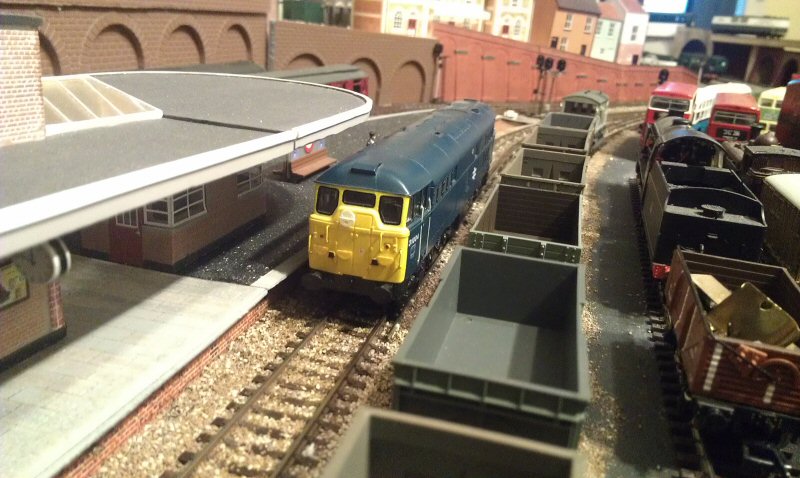
Flushed with that success, I decided to try it on analogue DC and it ran very sweetly, even without cleaning the wheels (I'm not a huge fan of Lima's running qualities but occasionally one could get a 'winner' that ran really well - both of my class 31s are in this category). I decided to try out a DCC conversion, using an old, sidelined Digitrax DH123 decoder, which has the advantages of 1. being expendable and 2. possessing a 9-pin JST connection from the wiring harness into the decoder, allowing me to replace it in the future with a better decoder. I was pleasantly surprised with the quality of the running, even with this non-BEMF decoder, particularly in light of my previous poor experiences with Lima mechanisms on DCC, so much so that I will convert 31 004 as well in the near future.
Now all it needs is a little more judicious weathering and some etched nameplates and I'll be very happy with the result.
Addendum to the 4 VEP in the previous post: I swapped out the Hornby Sapphire decoder and replaced it with an ESU LokPilot v3.0 (rendered spare when I fitted a Zimo sound decoder with Paul Chetter's muti-drive to a class 33, D6585). The ESU decoder has vastly reduced the chatter and growl from the VEP mechanism, although it hums a little right through the speed range. I am still looking for another seat unit with first class spacing. Just had an idea though: I may be able to use one of the old Peco card interiors intended for Kitmaster coaches - I stocked up on a whole heap of these things years ago when a local shop was cearing them out at $AUS0.50 each (approx 35 UK pence).
Last edit: by SRman
Jeff Lynn,
Amateur layabout, Professional Lurker, Thread hijacker extraordinaire
Amateur layabout, Professional Lurker, Thread hijacker extraordinaire
Posted
Full Member
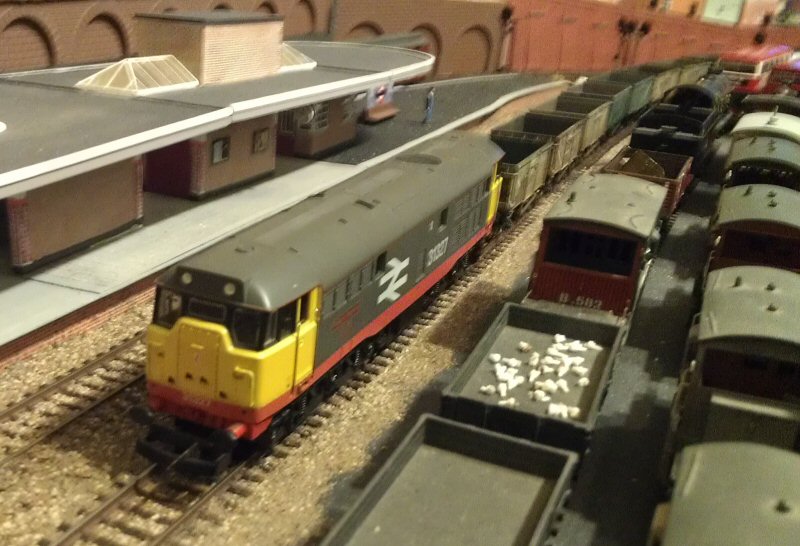
The actual hard-wiring went more smoothly because I knew exactly what I was doing this time. I pulled the Digitrax decoder out of 31 327 and plugged it in to 31 004. It ran like a dog! It stuttered and stopped and refused to complete even one circuit without stalling. I thoroughly cleaned the wheels, oiled the mech, cleaned the wheels again, making sure I got the backs as well, checked the pickups and tried again. It was better but not brilliant, so I tried a Gaugemaster decoder (demonstrating the wisdom of using the JST-compatible decoders!) with BEMF but that was no better (probably slightly worse), so I put the old Digitrax one back in. The Gaugemaster decoder worked a treat in 31 327 though.
After much persuasion (both physical and verbal!), 31 004 has been trundling around the layout for an hour and a half now. Hopefully this will free it up somewhat.
I took a few photos of the hard-wiring process this time so you can see what s involved.
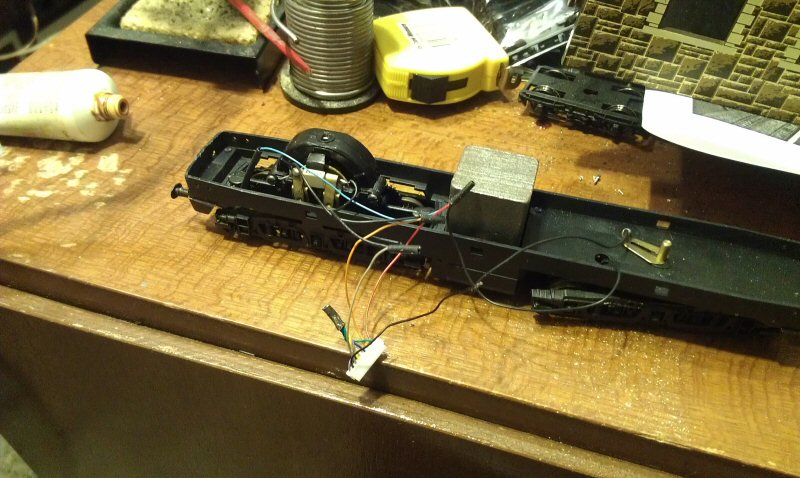
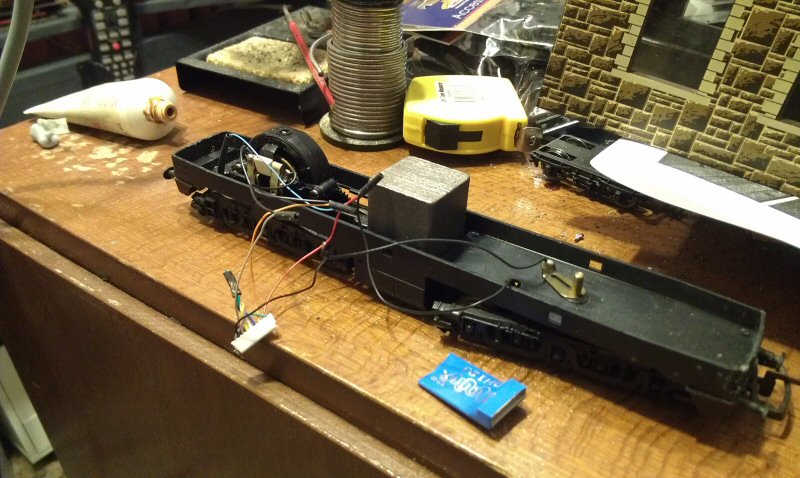

Incidentally, I removed that capacitor between the brushes on both models after the photos were taken.
And here is 31 004 in service. I detailed it with the separate handrails on the fronts some years ago. 31 327 was easier in some ways because it only had two handrails at each end whereas 31 004 has four, albeit they are all straight ones. It now just needs the red circle coupling codes added above each buffer (these early 31s had electro-magnetic control), some pipework on the buffer beam at the end without a coupling, and a lot more weathering added.

Last edit: by SRman
Jeff Lynn,
Amateur layabout, Professional Lurker, Thread hijacker extraordinaire
Amateur layabout, Professional Lurker, Thread hijacker extraordinaire
Posted
Full Member

Fortunately for me, the remaining three axles still have drive, the motor and circuitry are all fine and the ESU LokSOund decoder still works perfectly.
I have contacted Dapol's representative on RMweb (DapolDave) to see about getting the necessary replacement parts, emphasising that this is definitely NOT a warranty claim.
Hopefully I can restore it to full health soon. If all else fails, I can redeem some of it with plasticard and a 'dummy' wheel set (no gear) as the locomotive will actually still run with only three powered axles - I know: I tried it!! :D
Last edit: by SRman
Jeff Lynn,
Amateur layabout, Professional Lurker, Thread hijacker extraordinaire
Amateur layabout, Professional Lurker, Thread hijacker extraordinaire
Posted
Full Member
:cool:
Jeff Lynn,
Amateur layabout, Professional Lurker, Thread hijacker extraordinaire
Amateur layabout, Professional Lurker, Thread hijacker extraordinaire
Posted
Full Member
Robert
1 guest and 0 members have just viewed this.