signal box
Posted
#84
(In Topic #33)
Guest user
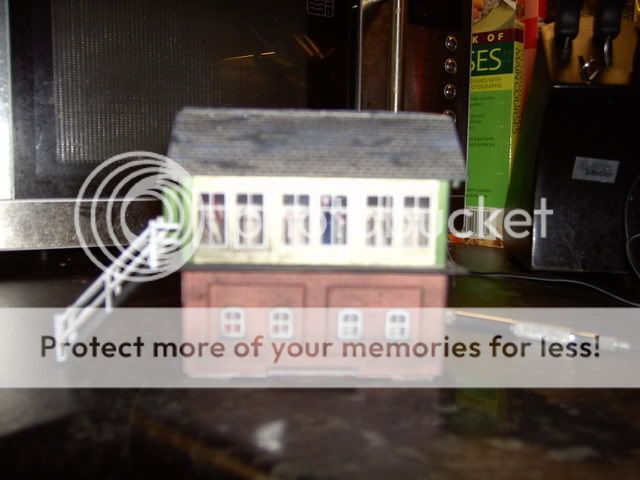
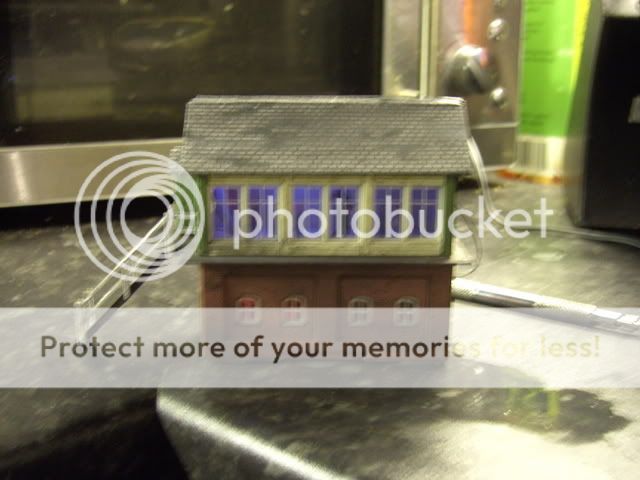
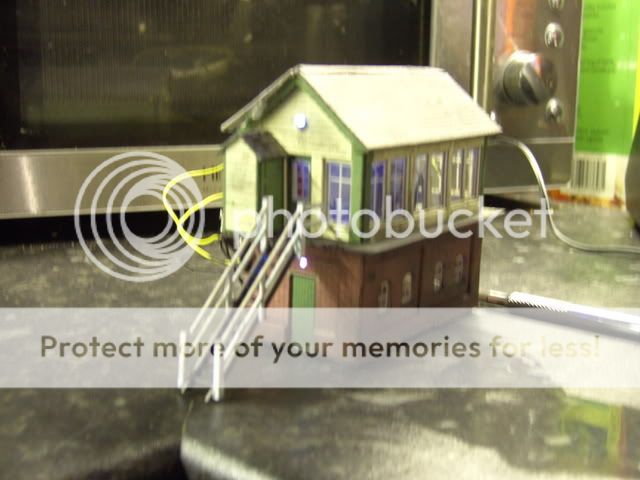
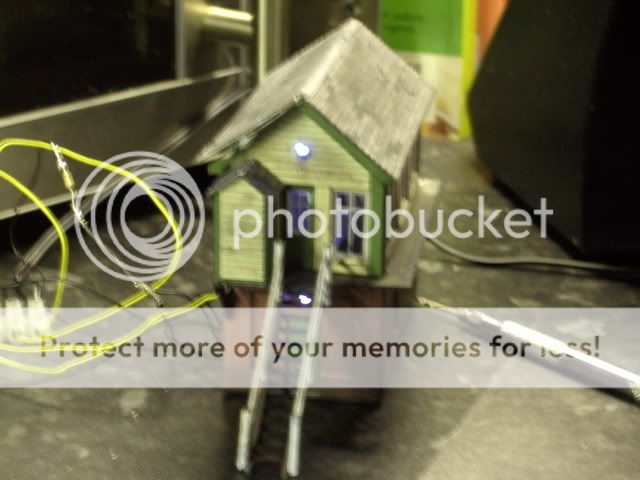
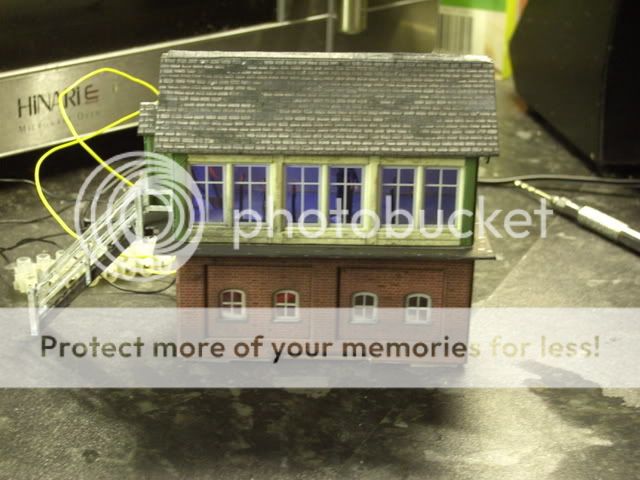
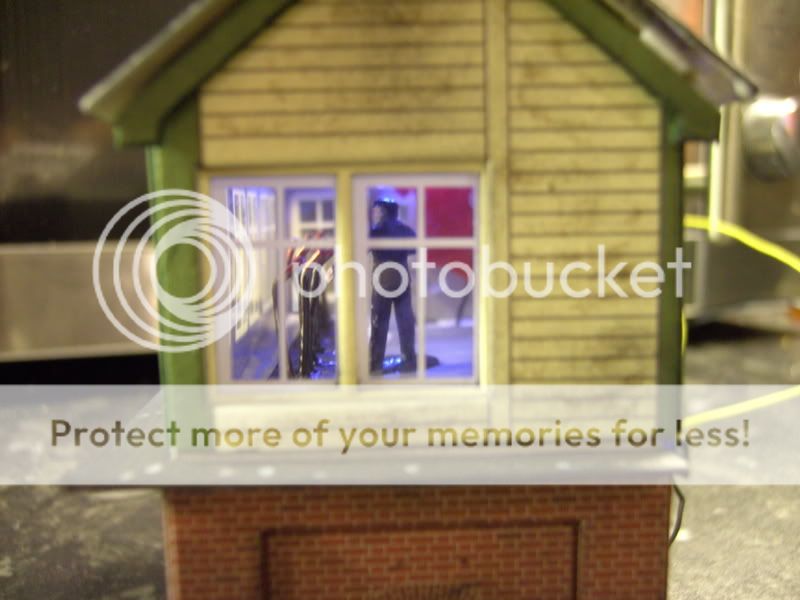
very good looking kit, one of the better metcalfe kits to make. the steps look very plastic so i will be adding some weathering etc to tone this down. i have added LED's, one sbove each door to light the interior and exterior. i have also added a signal man and levers on the inside of the box. i would like to add something to the back wall. i think the problem with the kit is the large windows show the interior (yes i know thats what they are for) but the interior is just a grey box. what does the inside of a signal box look like?
i will add pictures when i am happy with what i have. all the kits are good however if you look at the finished building you can see lots of things to add, remove and play with. the kits when complete are like a skeletons, they need you to add the skin to make them complete :D
Posted
Guest user
As for the interior, Springside Models do a signal box interior kit in O scale. I thought they did it in OO too, but I couldn't spot it. Here's the link to the O scale version. It might help with ideas.
http://www.springsidemodels.com/id117.htm
Mike
Posted

Full Member
I look forward to seeing your efforts. Wills do a signal box interior. I found one for sale on ebay:
http://cgi.ebay.co.uk/WILLS-OO-SCALE-METAL-RAILWAY-SIGNAL-BOX-INTERIOR-KIT_W0QQitemZ230180609840QQihZ013QQcategoryZ69817QQssPageNameZWDVWQQrdZ1QQcmdZViewItem
Also the last edition of Hornby mag had a card signal box with quite a detailed interior. It might be possible to copy or adapt this.
Novice

Posted
Guest user
Posted
Guest user
i looked at the interiors for sale and i think they are exspensive :shock:
didn't think of the hornby mag, i have this in the draw :D
Posted

Legacy Member
Posted
Full Member
Matt said
cheers
i looked at the interiors for sale and i think they are exspensive :shock:
didn't think of the hornby mag, i have this in the draw :D
Matt,
having taken a closer look at the Wills item, I agree you don't get much for your money and what is there could probably be scratch built (less perhaps the armchair) and still look effective.
Novice
Posted
Guest user
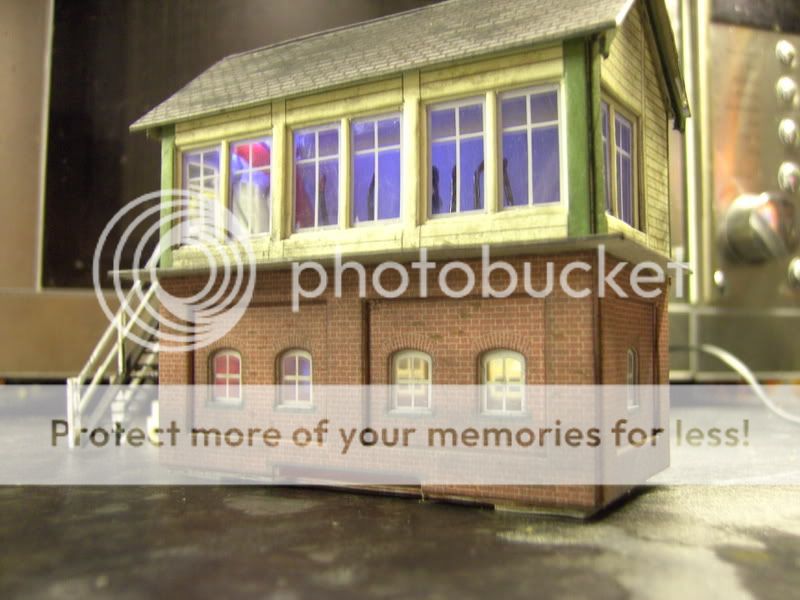
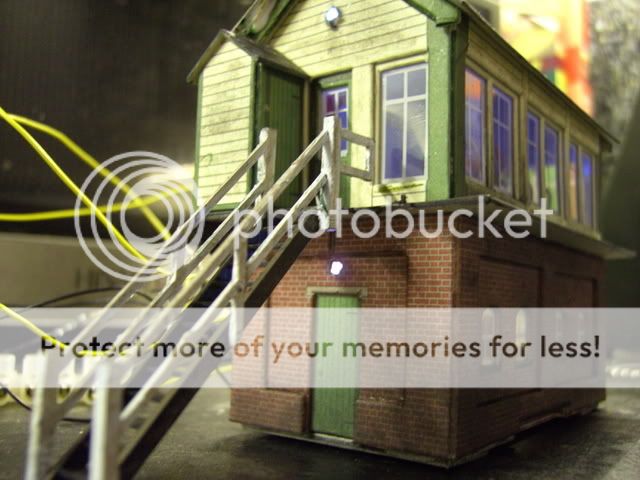
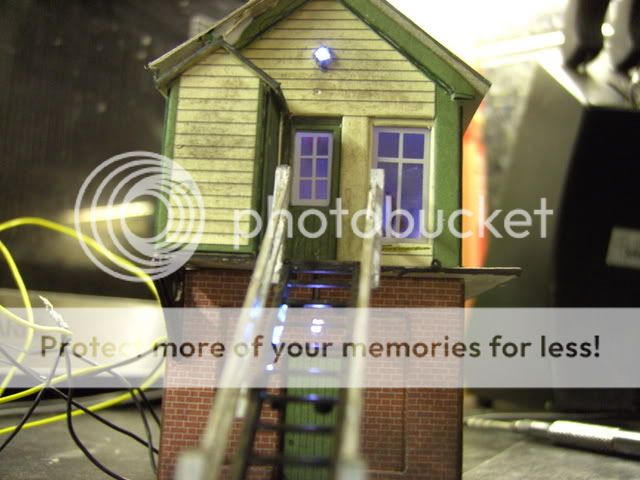
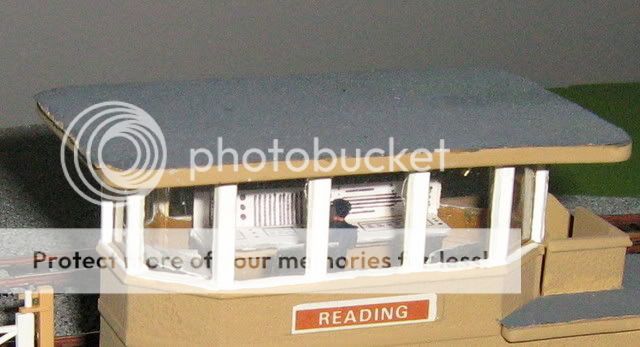
Got round to a bit of weathering on the signal box. I don’t mind negative feedback on any of my posts. If you think it’s too much etc.i am new to all this so feedback both good and bad is ok.
I have just got my new camera up and working so lots of pics. I have been experimenting with the camera (instructions are for girls) so some in focus some out but its all a learning curve.
The original pic of the kit after building
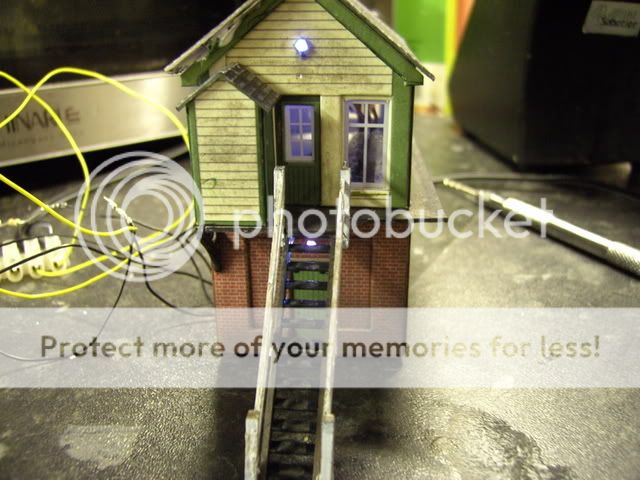
Front view
With flash
Without flash and a bit of a blur
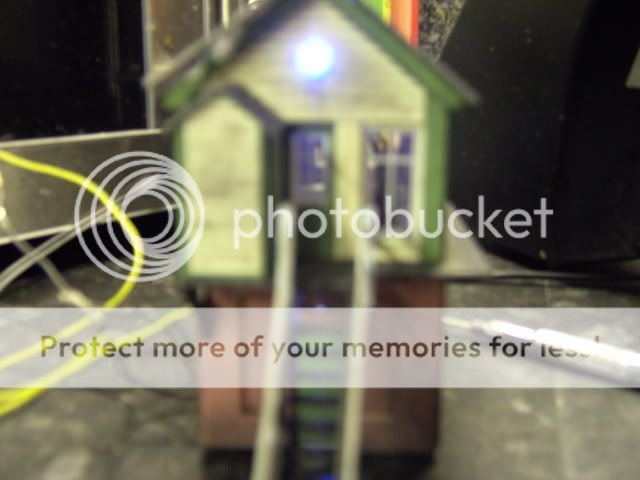
Sid showing lights above doors (still trying to focus
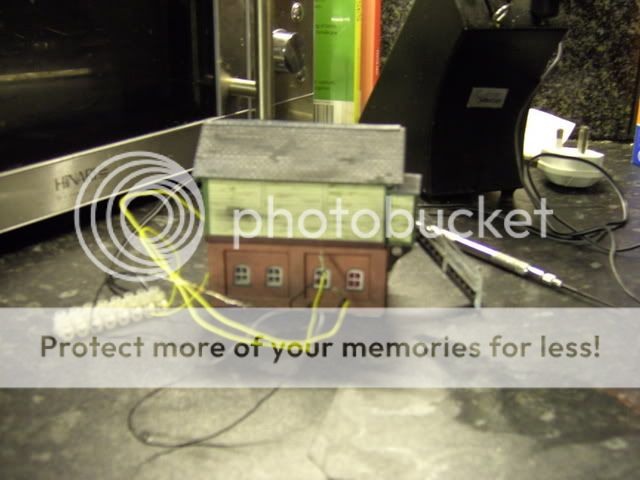
The back
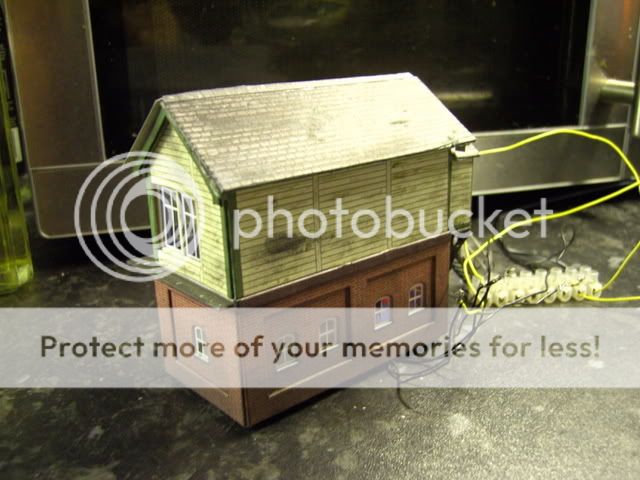
Front again getting the hang of the focus
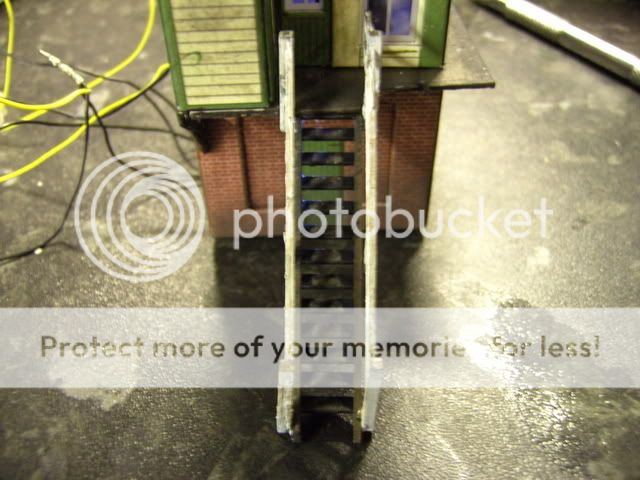
You can just make out the levers I made
Front and side
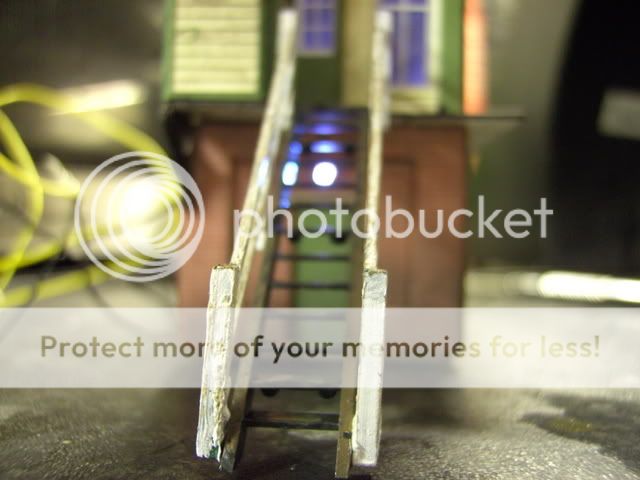
Good shot of the exterior lights and the green plastic stairs that are no more
The roof at the back is still not glued (waiting for the hand of god to add wallpaper)
The weathering on the steps
Close up inside

And when the lights go out


As I said the roof will be fixed once the internal painting is done

Lots of pics but I do have a new toy
Posted
Guest user

As far as the weathering is concerned, I'll make a comment in the way you asked.
Looking at the pictures, I came to the close-up of the box (No 9 in the sequence) and I must say that the walls don't look at all bad. A very good first attempt.
In other places, all you need to look at is slightly less heavy weathering and you'll be there. Try using a drier brush (wipe on a rag then weather) and see if it looks better.
As far as the roof is concerned, that's probably the hardest to get right of all, but once again you've made a decent start. All you need to do is follow a plan (see below) and be "light" in your weathering treatment.
To get it 100% right there's only one way to do it and that's in 3 stages.
- paint the roof the base colour … thinly, do not over paint.
- useing two or three complimentary colours pick out individual bricks in seperate colours, randomly and about 25% of the total.
3) using a mucky dirt colour, thinned by at least20%, lightly brush over all the roof using the "dry brush" technique.
You can also pick out a few tiny spots of dark green, if you want, to represent moss, but this is easy to overdo, so be careful.
Stand back and admire :!: :!:
Don't forget, between each of the stages above you must allow it to dry properly .. don't rush.
Posted
Guest user
I particularly like the weathering on the wall that would face the rails. The greenness below the windows is very appealing to me. Looking again, I think all the brickwork down low looks good.
I'd like to see some subtle streaks down the roof, following its slope.
Personally I'd prefer to see a warm glow from inside the box, rather than the cold bluish one you have, but maybe the camera has influenced the colour anyway. I think something slightly yellower would look great at night. Good job on the outside light. That's a nice touch, but to my personal taste is also a bit cold.
The levers look really good to my uneducated eye.
Thanks for showing this.
Mike
Posted
Full Member
Brian(G)
Posted

Full Member
Phill
Posted
Guest user
I will try some yellow insulating tape around the LED’s to make a warmer glow. If this doesn’t work I think a light coat of yellow paint should do the trick. Again keep the comments coming
Posted
Guest user
My sister just purchased and received an Atlas loco with the same sort of LED. We decided that after looking at it for a while it wasn't so bad. The later, more costly ones have golden-yellow LEDs which look terrific but for some reason I think they're quite a bit more expensive.
Overgrown and industrial sounds good to me.
Keep those photos coming :)
Mike
Posted
Full Member
Nice job. Going back to the question of interior detailing it seems you have done the hardest bit ie the lever frame. Looking at the pictures and given the amount of space taken up by windows I reckon you only need to detail the back wall. You could do this with some embossed plastic card or wood board printed paper to match the outside. Then scratch build some shelving and a stove out of scrap, with a few objects to add interest such as a chair. The addition of some notices and a track plan diagram would finish this off.
As an example here is a very old metal Tri-ang Hornby Dublo box that I detailed some years ago. The interior is simply balsa blocks painted black with card marked with a black pen.

I'm not sure I would use it on my layout today but it shows what can be done with a few scraps.
Novice
Posted
Full Member
Phill
Posted
Guest user
Mike
Posted
Full Member
I like the job you have done lighting the metcalfe model. Where will the wires enter the building when it is installed on the layout? Will you cut through the floor to bring them in?
I have got an old plastic Hornby signal box (the type with the stick on paper decoration) that I intend to detail. This will include the interior. I'll let you know how I get on.
Novice
Posted
Guest user
1 guest and 0 members have just viewed this.