Brake vans
Posted

Full Member
Yes please Terry - that would indeed be interesting. :thumbs……………………………………………. I can post a picture if anyone is interested.
………………………………………………….
Terry
I was a bit thrown by your comment "a very nice job you are making of this kit" …………….I thought I'd virtually finished it ……..now you've got me thinking glass and hand rails ………….
 hmm
hmm
'Petermac

Posted

Inactive Member
Posted

Legacy Member
:thumbs;-):cool:
Owen
web-cam 2.2.74.174:8081
if the lights are off no cam
if the lights are off no cam
Posted
Inactive Member
Posted
Full Member
And when painted:

Terry
PS - Looking at that last photo the penny has just dropped as to why the cut-outs in the end platforms. Just to the right of the cut-out there is a raise strip. I would imagine that on the prototype, this was probably an 'L' shaped metal bracket whose job was to join the corners of the lower frame. Accordingly, the cut-out was required to access the bolts holding the bracket to the frame beneath the veranda end, without the need to remove the concrete slab. Does this seem reasonable?
 Last edit: by col.stephens
Posted

Full Member
Posted
Full Member
it was already on fire when I got here, honest!
Posted
Full Member
They do look good with the handrails and yes, you could well be right about the cut out in the deck. If that is what it was for, it's some pretty good design work from the model planners ………….;-)
Now, another question -
I note in your "pre paint" photo, everything is bauxite - did you spray paint it or was that pre-coloured plastic ? Regardless of why it was brown, how did you then paint the chassis so accurately and what with ?
I tried full assembly then paint, paint the chassis bits first then the cabin before assembly, and also tried everything with both brush and airbrush using acrylics - all turned out to be very awkward and unsatisfactory to do ………………:???::???: I've usually spoilt most of my models at the painting stage

'Petermac
Posted
Full Member
Thanks for this Mick - as Owen said, it makes very interesting reading.
 thumbs
'Petermac
Posted
Full Member
Personally, I'm not a great fan of acrylics. O.k for painting human figures but I much prefer to use enamels for painting rolling stock.
Terry
Last edit: by col.stephens
Posted
Full Member
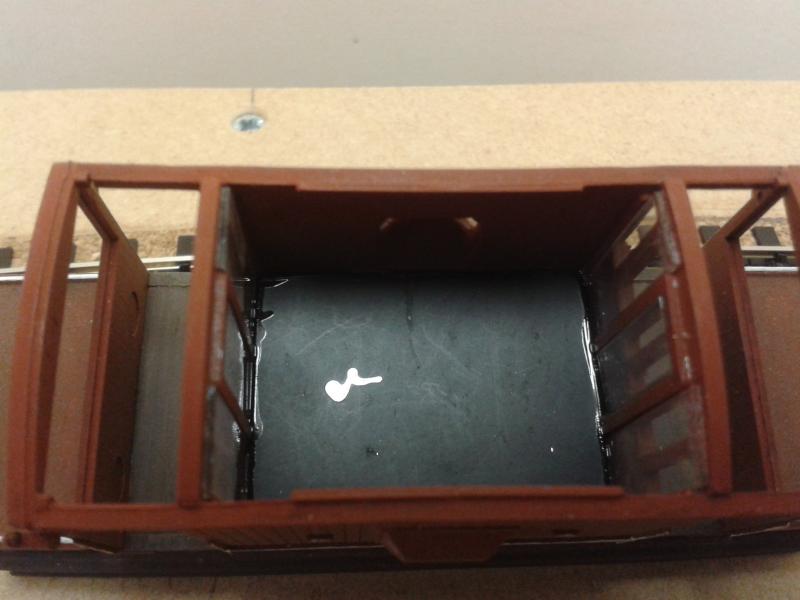
I have fitted a false floor of black plastikard with a strip of lead beneath. This view also shows the glazing in place
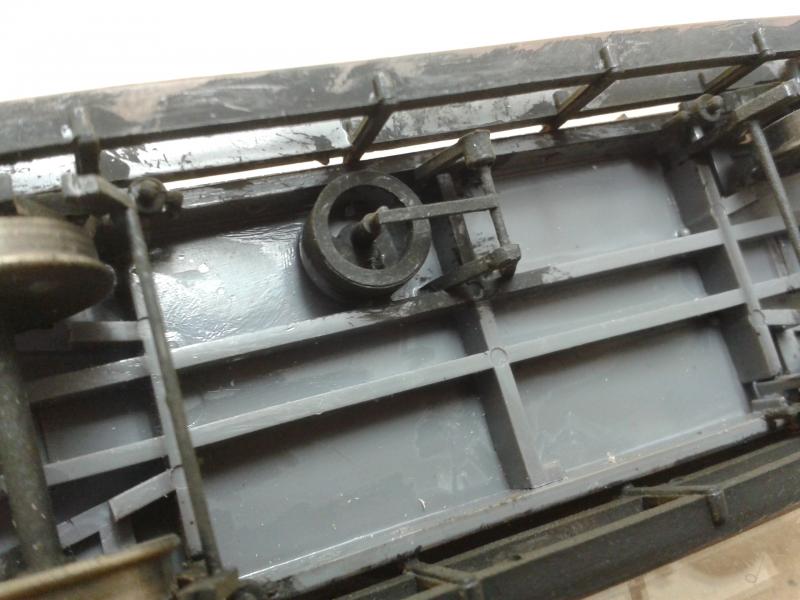
The vacuum cylinder in the kit is in half-relief so I have built up the other half with styrene. I omit the cylinder altogether if the van is to represent a grey, unfitted version. This photo also shows the pull-rods fixed between the brake shoes (plastic rod) and the metal wheels which replace the original plastic wheels in the Airfix kit. Some of these additions are not really necessary as you can't see them under the van.
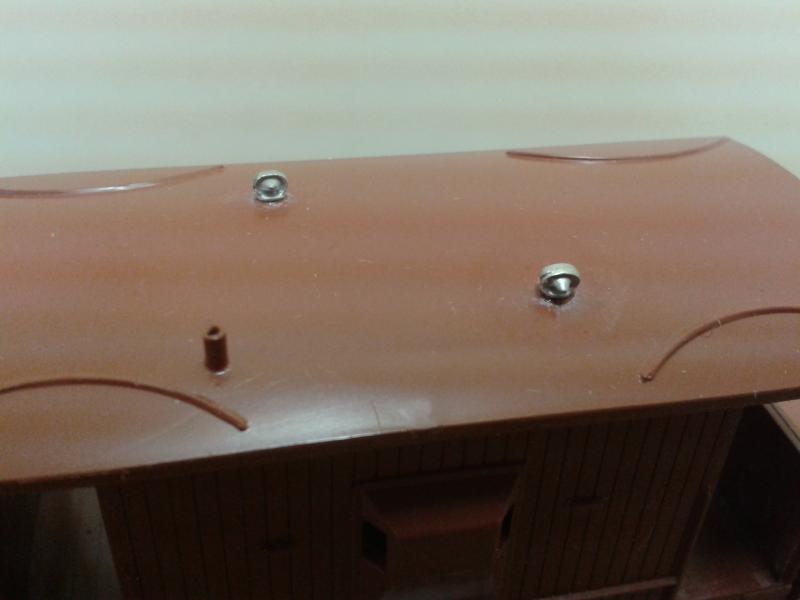
The only other modification to the original kit is to remove the half-relief moulded roof ventilators and replace them with white metal ones. This photo shows them on the, as yet, unpainted van, featured earlier.
All a matter of personal choice, of course, and not necessarily needed to produce a fine model, as evidenced by your original photos.
Terry
Last edit: by col.stephens
Posted
Full Member
Terry
Posted

Full Member
Good to see you posting again Terry and I look forward to your continuing brake van build Peter ;-)
Bill
Last edit: by Longchap
At 6'4'', Bill is a tall chap, then again, when horizontal he is rather long and people often used to trip over him! . . . and so a nickname was born :)
Posted
Full Member
Thanks also for the details on your method of painting. I tried masking off the chassis but found it the very devil to do. Having said that, I had fitted the buffers before I attempted it ………….maybe I'll try again before fitting them on my next (and therefore probably final) kit. :thumbs
It's also interesting to see what has changed over the years. I don't know when your Airfix kits were produced - or at least, when the moulds were, but things appear to have changed slightly between yours and my Dapol offerings. My Dapol kit is moulded in grey, slightly flexible plastic rather than a more rigid ABS - probably a cheaper plastic than that used by Airfix, as mentioned earlier in the thread.
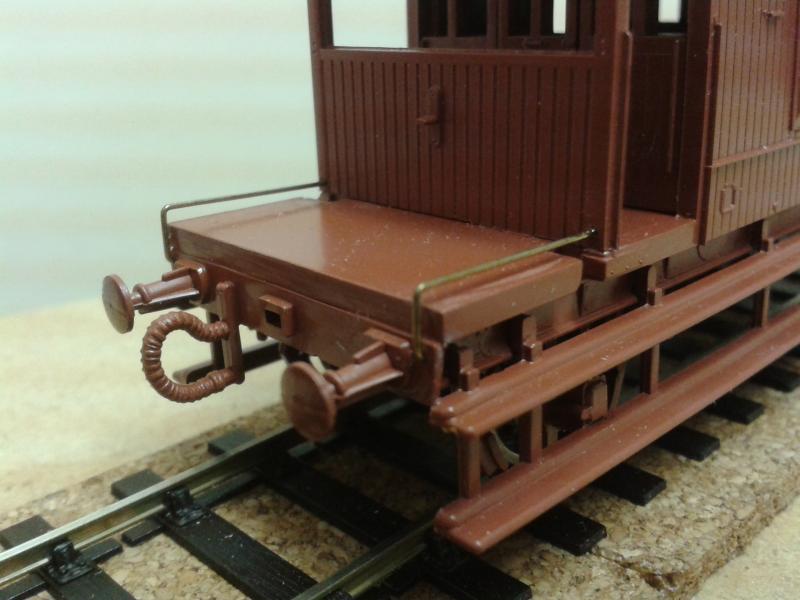
I had wondered about the positioning of the brake pipes on yours - you had them hanging down, as shown here -
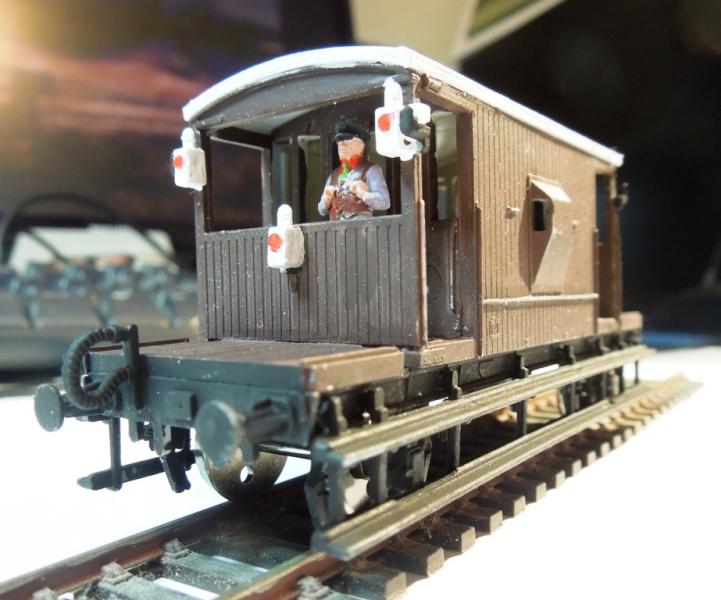
whereas mine, according to the exploded view in the instructions, are clearly shown with their post pointing upwards, as in my model here:
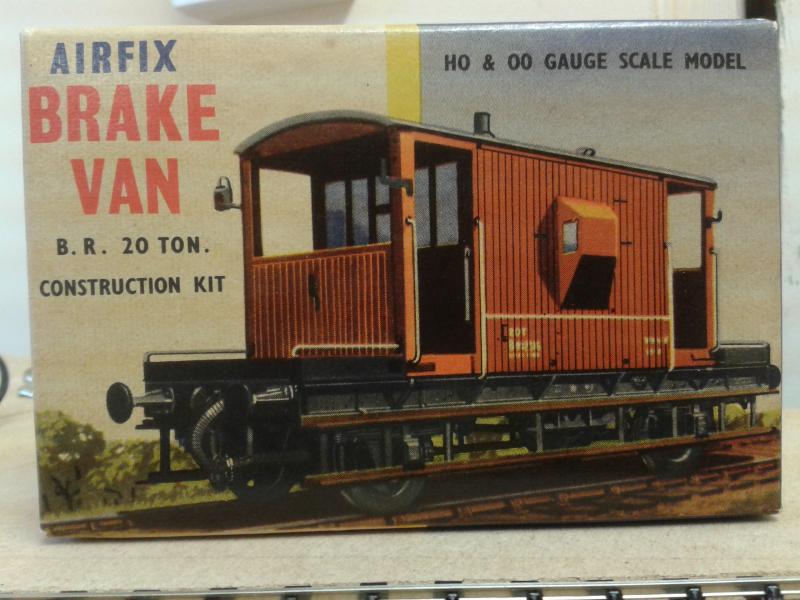
Your box art would suggest that they were indeed reversed during the period your model depicts.
Additionally, you said that the vacuum cylinder on your kit is moulded in half relief. On mine, it's full relief so maybe Airfix listened to their customers at some stage. I'm assuming the brake rodding and vacuum cylinder piston push rods etc. are your own addition - they don't exist on my kit. I like the metal ventilators. :thumbs
Your box art also shows the additional grab rails I asked about on the fore and aft deck. Not shown on mine hence my request for a photo - you must have thought I was an idiot !!!
For the transfers, I'm going to try the "new formula" Humbrol Decalfix. Their online video suggests there's no need to gloss varnish the area first …………….: https://www.youtube.com/watch?v=R7Ywau87mo4
I'll take a shot of the underside of mine and also, one of the box art (now a simple header card
)
'Petermac
Posted

Site staff
Regards
Alan
Born beside the mighty GWR.
Alan
Born beside the mighty GWR.
Posted
Inactive Member
Posted
Full Member
Re the handrails. I didn't actually notice that they were depicted on the box as on the prototype. As you know, on the model they are actually rather crude raised strips on the platform ends and bear no relation to the box artwork.
As regards the vacuum pipe. Interesting point. I must check the original Airfix instructions again but I think that I fitted them as per the drawing. Having said that, the shape of them does not look very natural in the position I have fitted them. They now look to be upside down to me. I have come across at least two photos showing them being below the headstock.
Thank you Bill. Good to be back.
Terry
Last edit: by col.stephens
Posted
Full Member

The NEM coupling simply slots into the small cut-out in the block and is at the correct height to match RTR wagons…
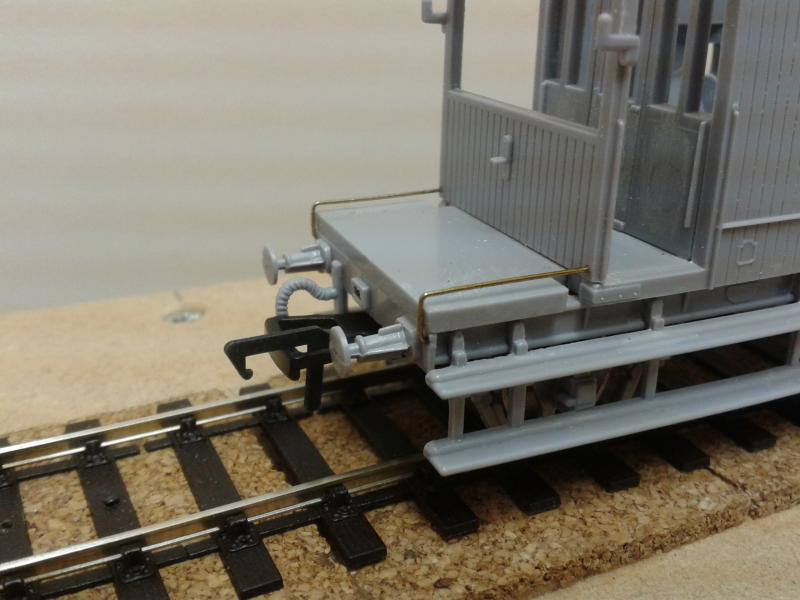
Sorry Peter, back to you…
Terry
Posted
Full Member
Rather fortunately, the Kadee draft gearbox can be glued directly to the underside, as with yours Terry - the height is almost perfect.
I firstly remove all the down-facing projections which are moulded onto the underside of the chassis and buffer beam. This type of "soft" plastic however, isn't popular with my file which quickly clogs so most of the "heavy" work, is done with side cutters or a sharp blade leaving the file to just do the final smoothing. I've used Revell poly cement to fit the draft gearboxes - it seems to be holding at the moment but it is funny material to glue. It's not too keen on MekPak which doesn't seem strong enough to do much welding unless it's used fairly heavily although Plastic Weld seems to work. It, on the other hand, has to be used very sparingly as it can be a bit too "solvent like" ………….something between the two might be perfect. :roll::roll:
'Petermac
Posted

Full Member
There is usually someone here on YMR that holds the important clue…
Doug
'You may share the labours of the great, but you will not share the spoil…' Aesop's Fables
"Beer is proof that God loves us and wants us to be happy" - Benjamin Franklin
In the land of the slap-dash and implausible, mediocrity is king
"Beer is proof that God loves us and wants us to be happy" - Benjamin Franklin
In the land of the slap-dash and implausible, mediocrity is king
1 guest and 0 members have just viewed this.