Bluebell Workbench,
Posted
#170928
(In Topic #9685)
Full Member
Kit Bashing, modifications, kit building.
Hi AllThought I would start a workbench topic on a number of projects I have done over the past 6 years… some rather extreme kit bashes, kit building, scratch building.
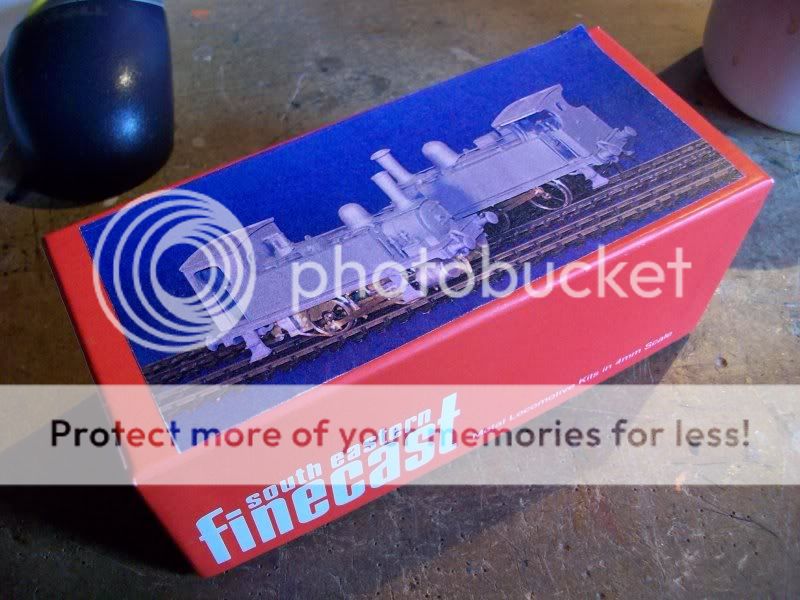
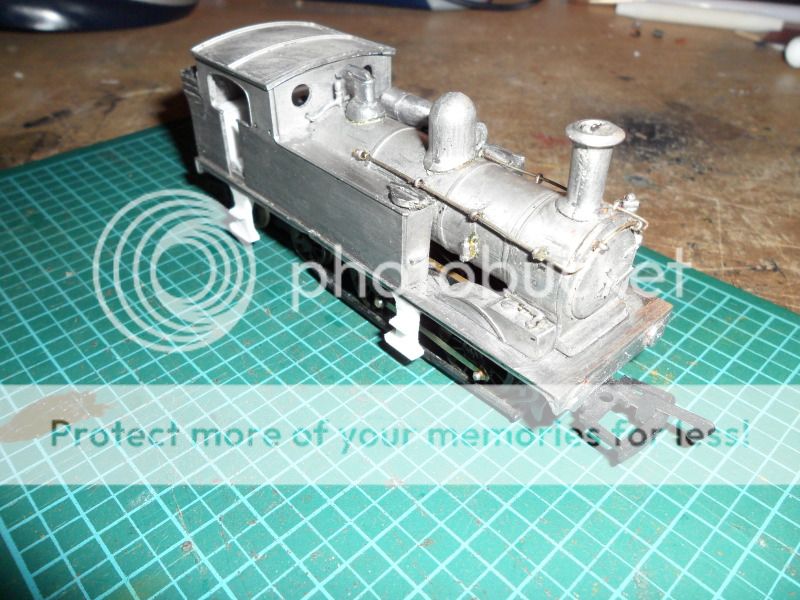
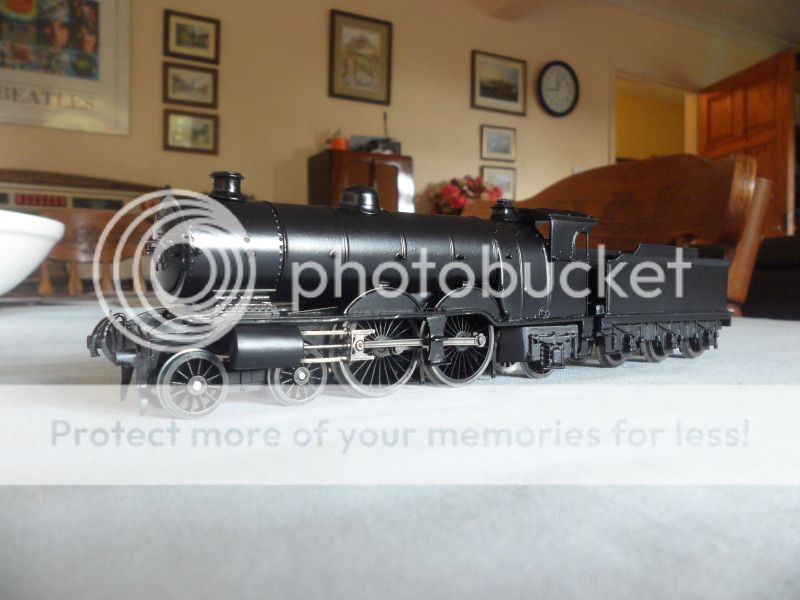
Sat Mar 05, 2011 - SE Finecast Kit, B4
A week ago I attempted to win on eBay an old Mc Gowans LSWR B4. This went a bit out of my range ending at £110…. for a loco with no motor and bit missing and motion locked solid… I decided if I was going to build a proper B4 I would do it with at least a new kit.
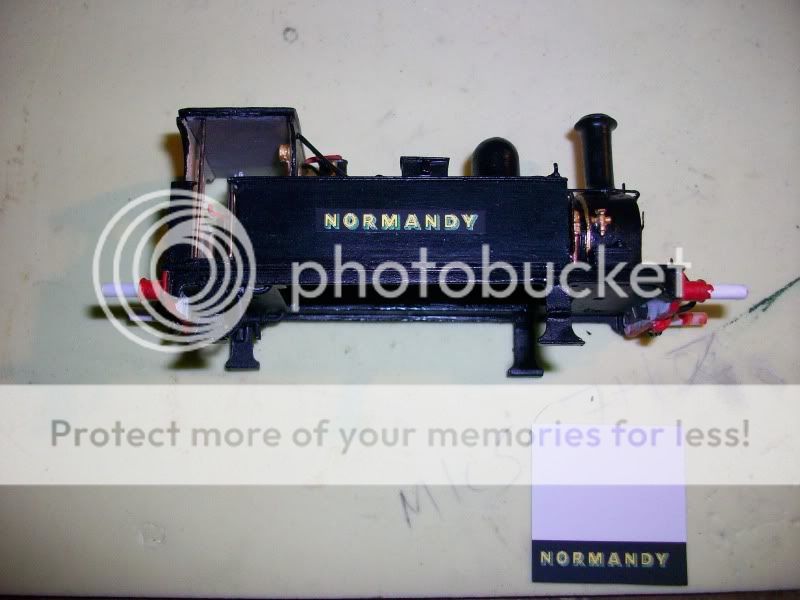
Last year at Warley I spotted SE Finecast were to produce an LSWR B4, the kit would include the enclosed cab and the open type which Normandy has at this time. I decided to call up Finecast and place an order did this at about 3pm on a Wednesday… the next morning it showed up… that's what you call service.
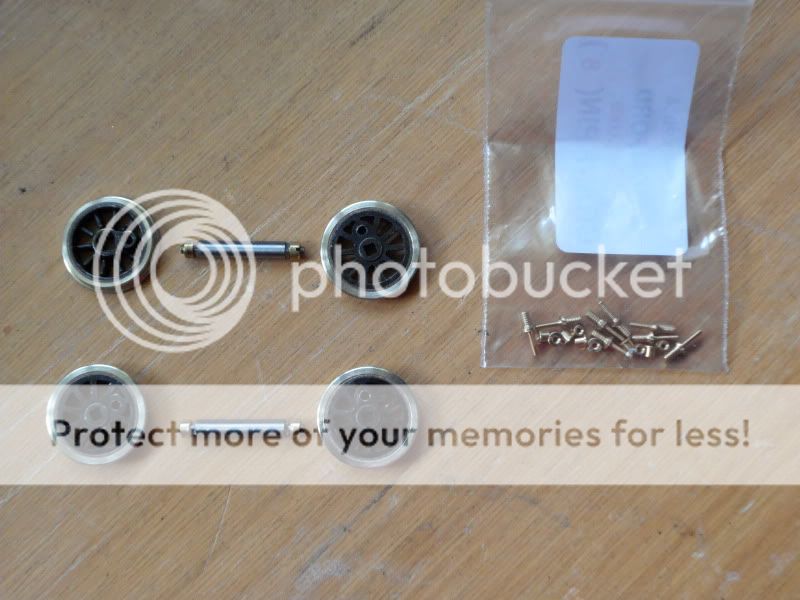
The kit alone costs around £80, and another £20 for the wheels and crank pins ect… if you require a motor and other bits that would be another £20.
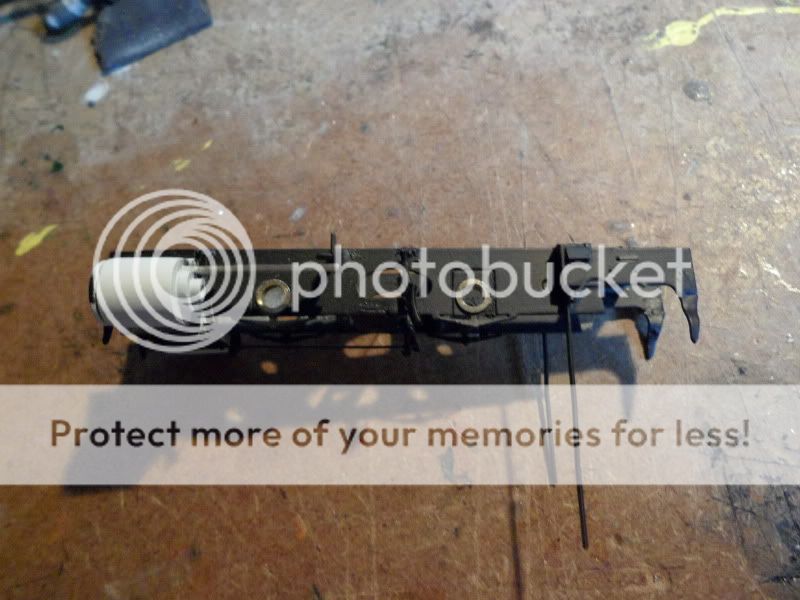
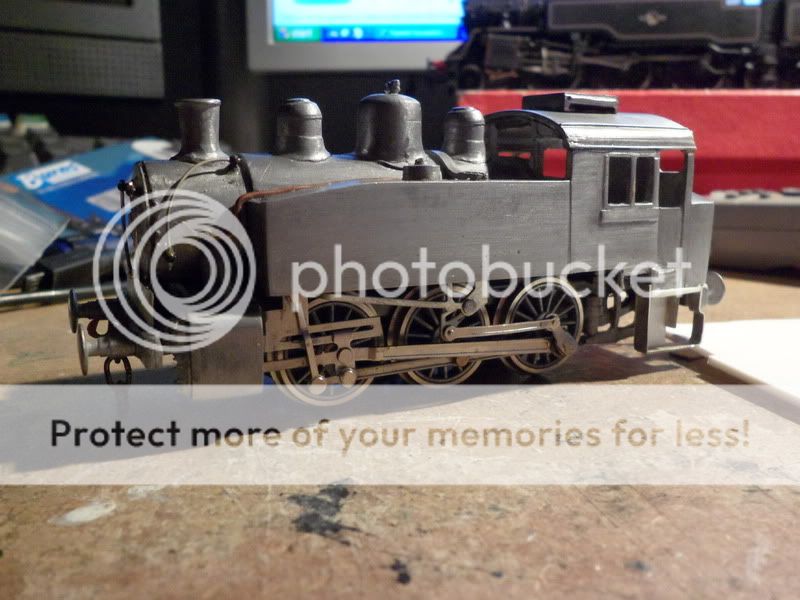
The body is mainly white metal with etched brass Lamp brackets. The Chassis all be it said etched brass on the price list turned out not to be… which was a good surprise as I didn't have the equipment to solder brass, instead this chassis was etched Nickle Silver… I experimented with it and found that normal solder and a normal iron would hold it together no problem, all be probably not the best way!
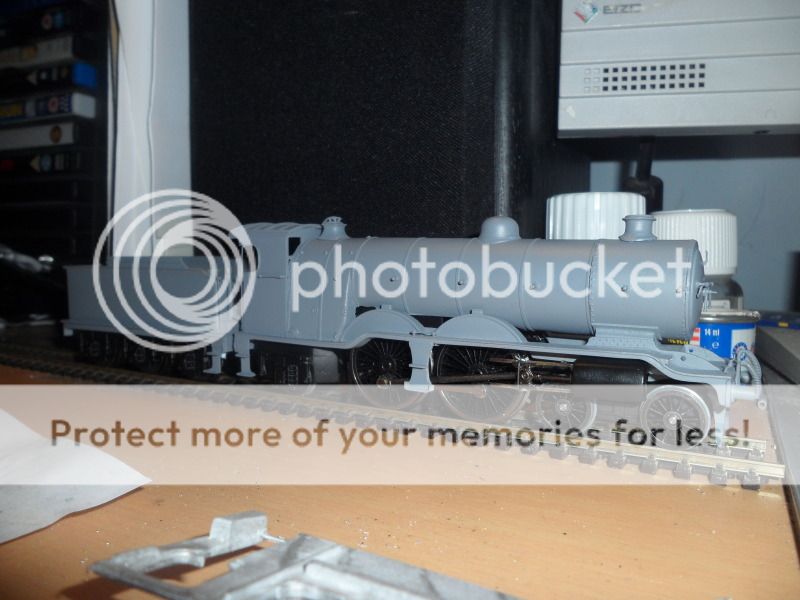
I've been building the kit for a few days now so thought I would show where its at, before I progress much further I will await the wheel pack just to make sure all is ok and level.
here's a couple of images:
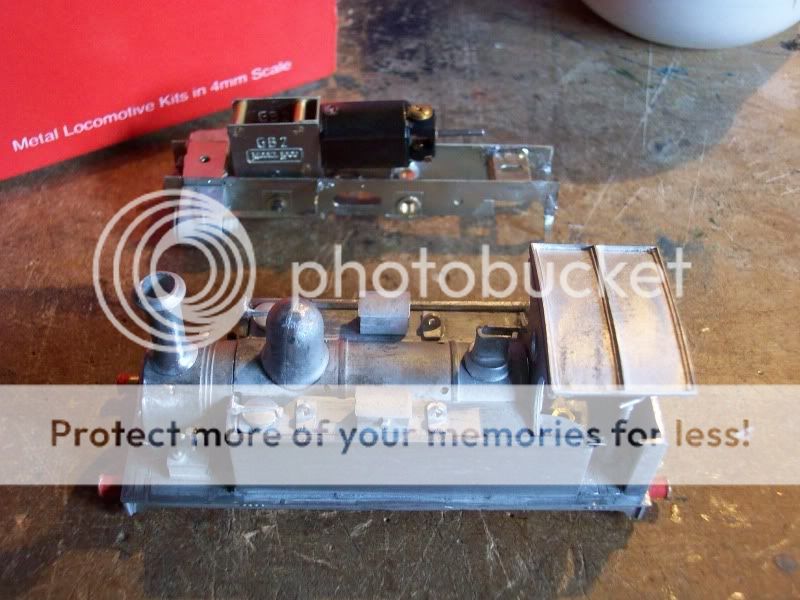
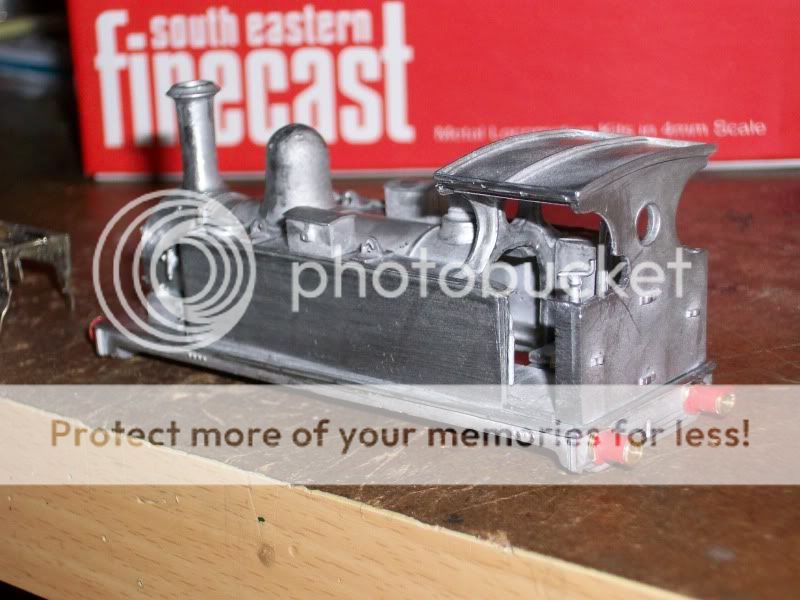
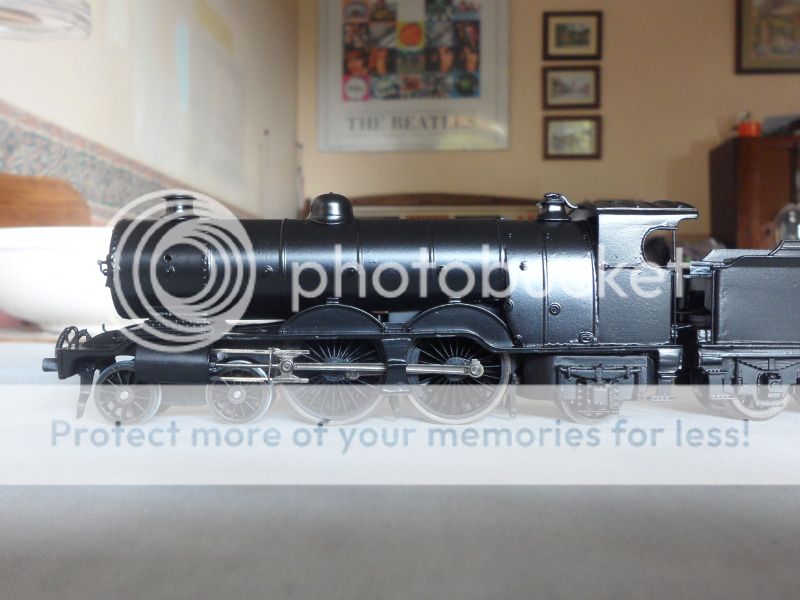
few extra bits have been done to the kit, I've improved the cut away on the rear of the cab, fitted the small detailing parts for lamps and route discs.. also added cab supports, Hand rails have also been fitted around the boiler too.

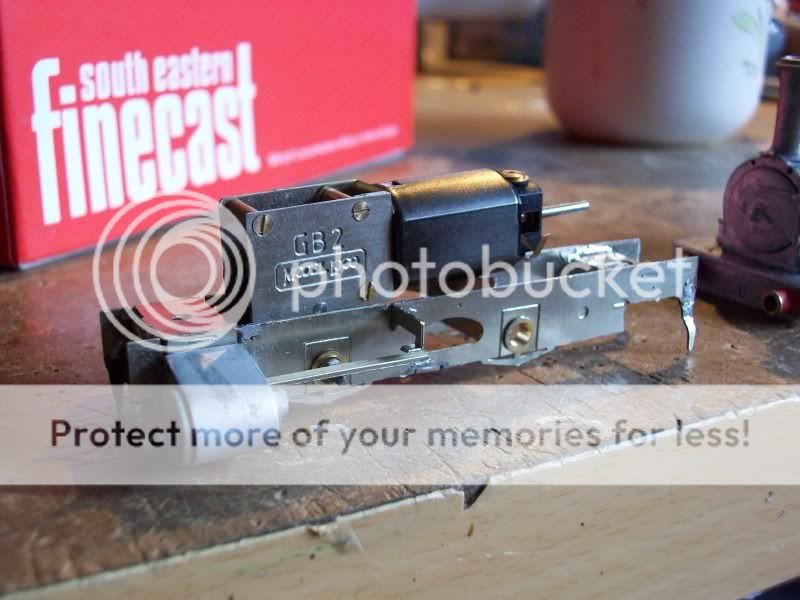
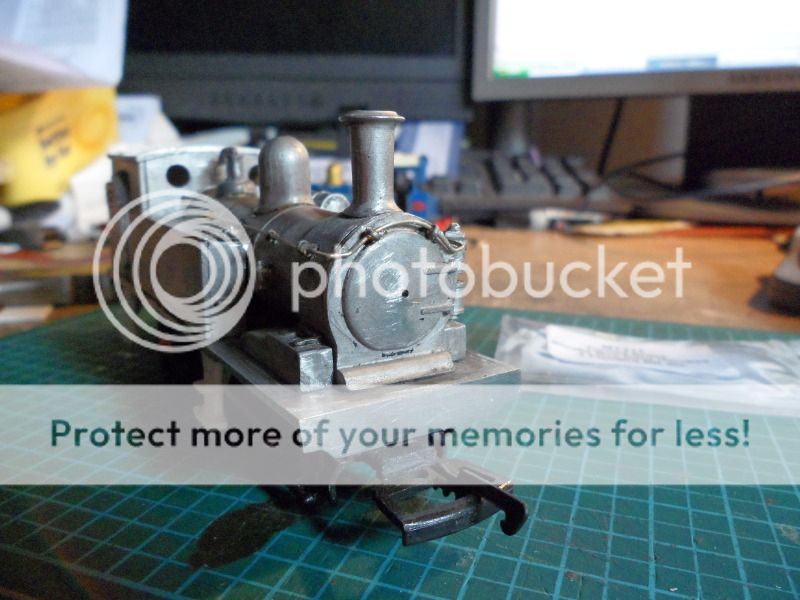
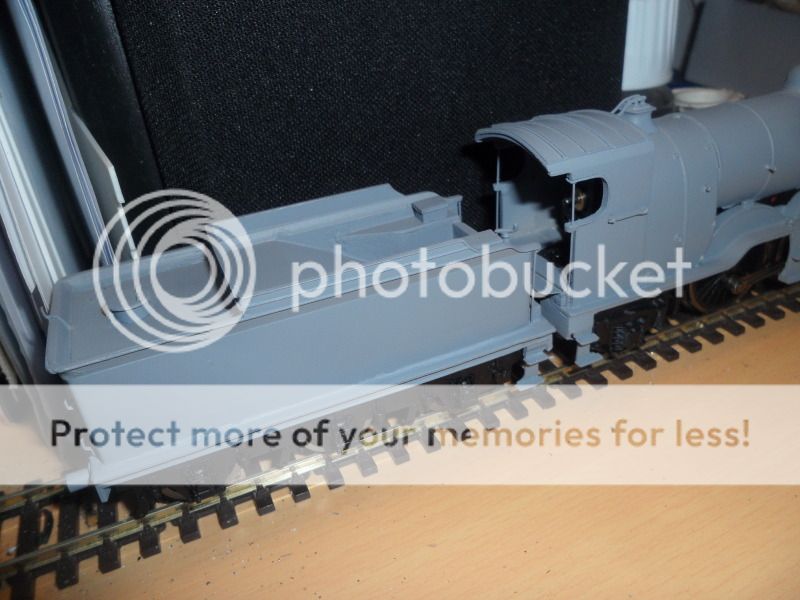
A few extra bits arrived has been fitted to the model. Fly wheel fitted to the motor, hooks and chains also here too will be fitted when the model is painted and finished. Still awaiting some wheels and crank pins.
back head has been painted and will be fitted after everything has been painted on the body.
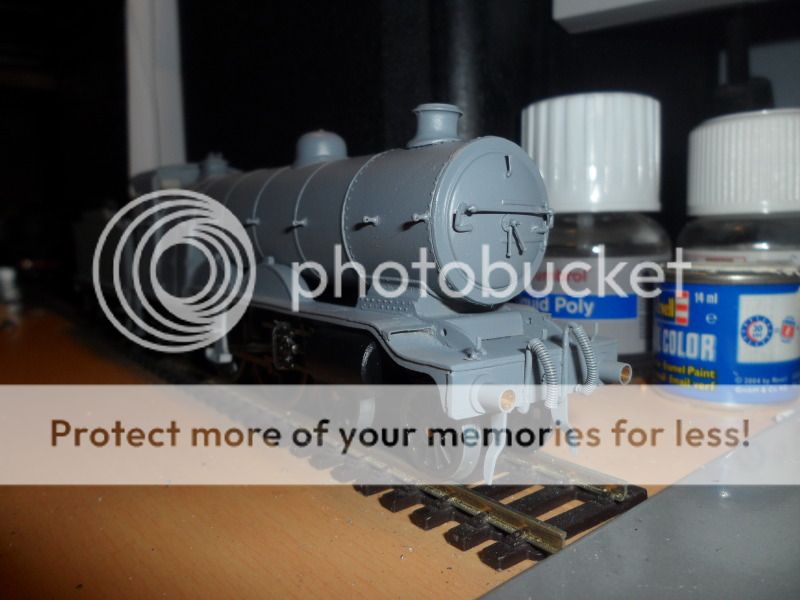
Hand rails added to the front of the tanks.

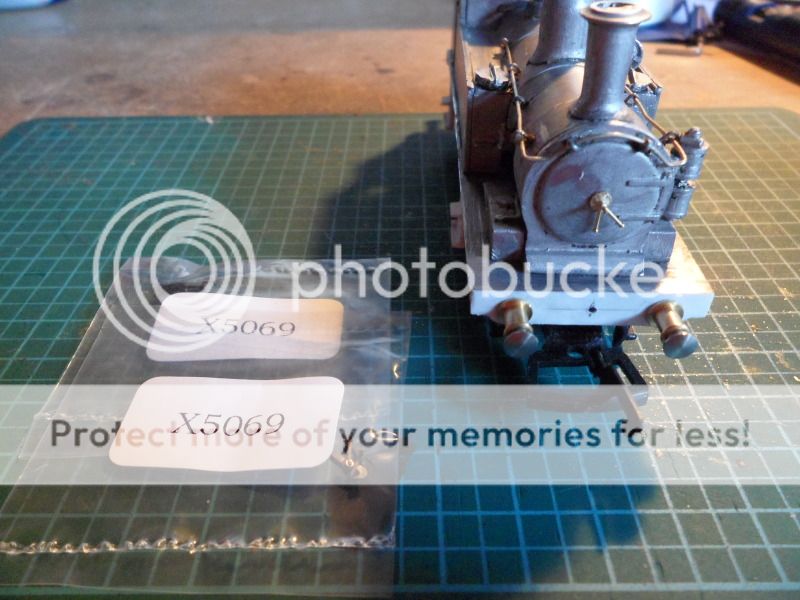
A few more detailing parts arrived a few days ago mainly for the buffer beam, Hooks and chain links from Romford now here. vacuum pipes have been added also.
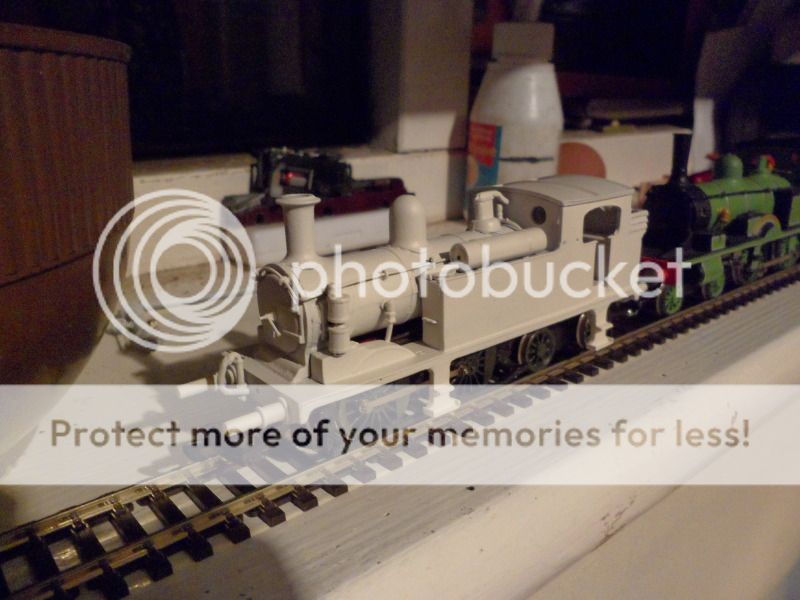
The body was suitably complete ready for Primer, which it now has had, and left to dry for 24 hours. First coat of Satin Black has been applied to the loco Body.
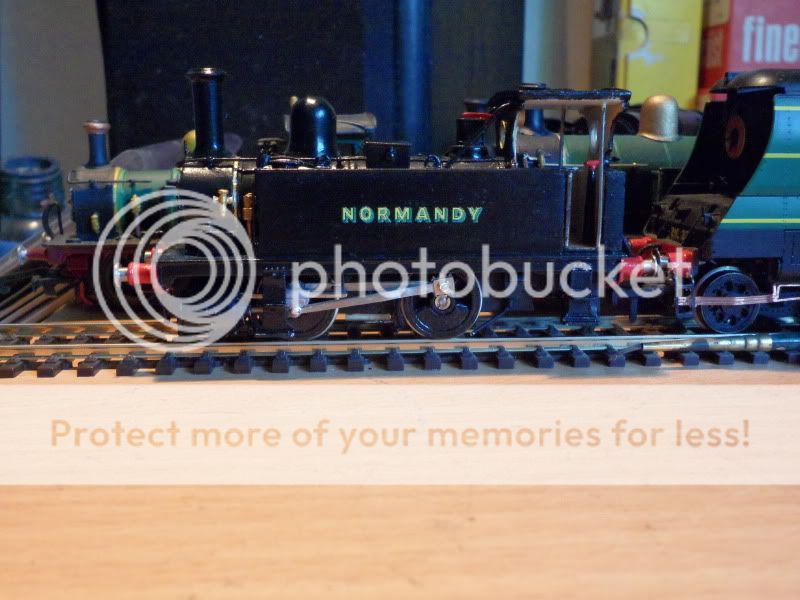
In the next update I hope to have the loco completely painted with work to start on making the transfer, Luckily I have done the name Normandy in the sunshine lettering style on the Bullied website which I will borrow and down size to suit the model.

Most of the painting of Normandy has now been completed, time has been taken to pick out pipe work window frames prior to transfer application.
As most of you know I would have to make my own Transfers for this as Sunshine lettering Bullied style letters are not available.
How ever I was fortunate to discover a copy of Normandy's name in the correct style on the Bullied website, I borrowed this and went about downsizing it to fit the model.
I used white backing Transfer paper to do this as it has light coloured letters so this was needed. These were printed and they work like water slide transfers.
The transfer was trailed on one side, this worked nicely and so the other side was done.
I also received a new sheet of HMRS pressfix transfers to do the Numbers on the buffer beam and the cab. I await some varnish which should arrive tomorrow so I can fit the buffers, and windows.
Hopefully the wheels which are due in at Finecast soon around the time of the Ally pally show which is next weekend, so hopefully the chassis can progress.


Small update regard the LSWR, B4 kit by Finecast… I have finally tracked down the Wheels as Finecast was unable to get any from Markits. I tracked some down at mainly trains, with axles and crank pins.
Some work has already been undertaken and a trial assembly of the motion.
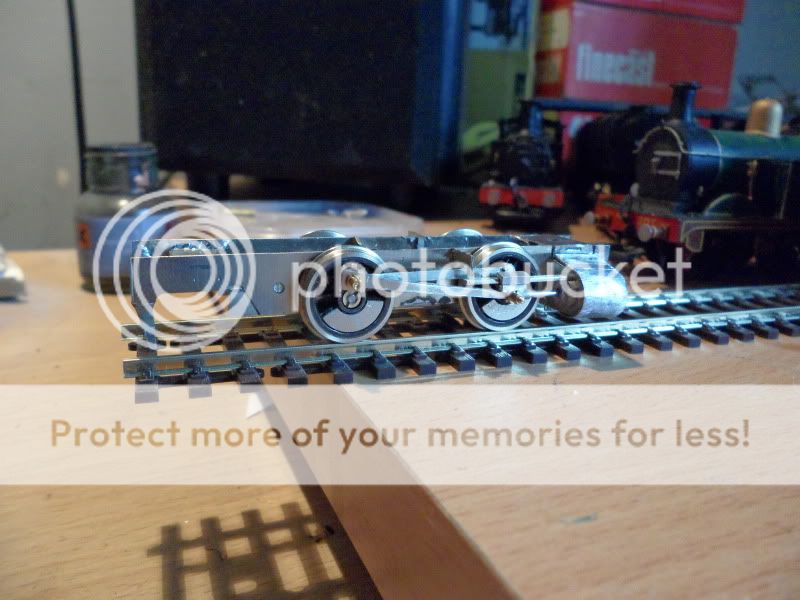
After successful dry run trials everything ran well… which is a surprise as there's usually some tight spots on the motion.
The chassis was taken apart again, Wheels were painted satin black and varnished.
The chassis was primed and painted Matt black.
Sandboxes were also fitted in the priming stage.
Then the installation of the electronics 2 wires soldered on to some board attached with one machine screw to the underside of the chassis.
The axle with motor was fitted with the main drive gear. Wheels were then added, and motion re installed. All nuts were done up to just below being tight so a bit of slack to enable movement. These are made of brass the crank pins and were then soldered.

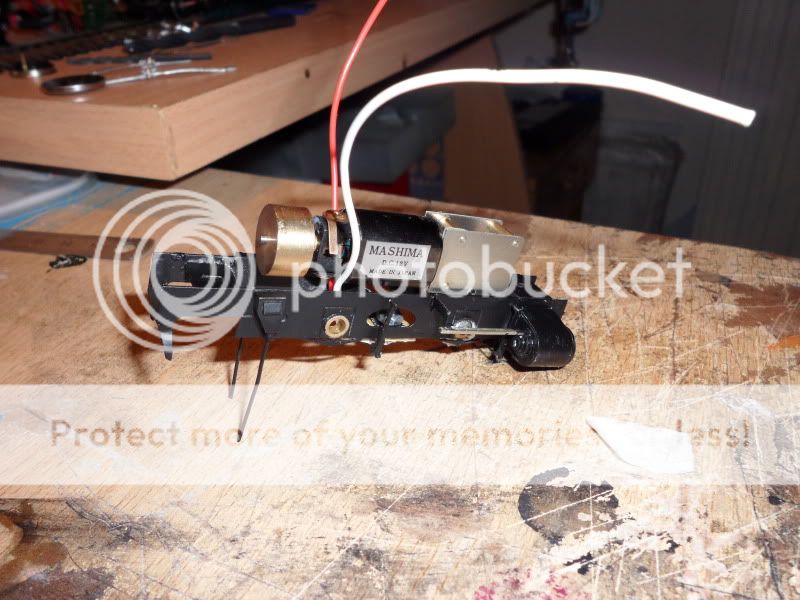
Pickup wire was fitted and checked all was touching the wheels this was then checked on a chassis test run. All ran perfectly well (which was a surprise) with this motor it has a flywheel on it which improves the running dramatically, on any 0-4-0, 4-4-0.
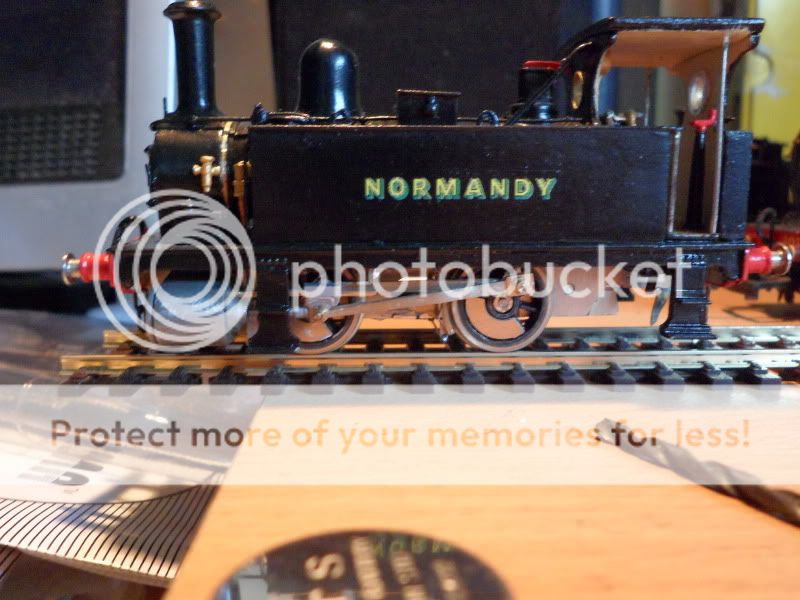
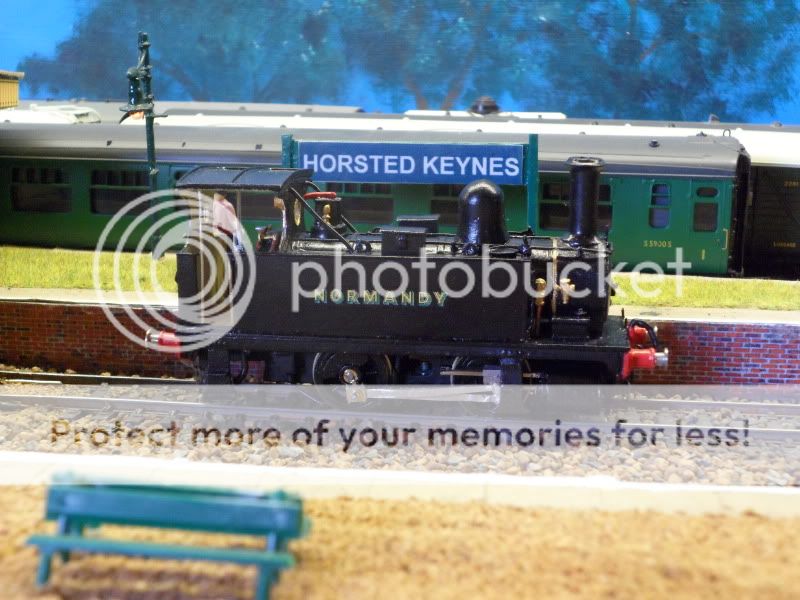
After running on just the chassis the body was added…. a slightly odd problem was found, running forward was fine… running in reverse it seemed to struggle and a grinding noise… after checking I couldn't find anything, but due to tight clearances in the body, and not much room between the back head in the cab and the flywheel I guessed it was due to the motor moving around, this was tightened up, and it improved. Some filing inside the body helped massively and running in reverse was now the same going forward.
Extra clearance behind the steps was added to help the motion and sliding bracket on the cylinder. this again improved the running. and at around 4pm this afternoon the LSWR B4 Normandy (the 3rd) was complete, and was very impressed with its smooth running at slow speed.
Small things to add are the couplings to complete the loco these are at hand and will be added in a few days.
And a small video showing its first run :

Posted
Full Member
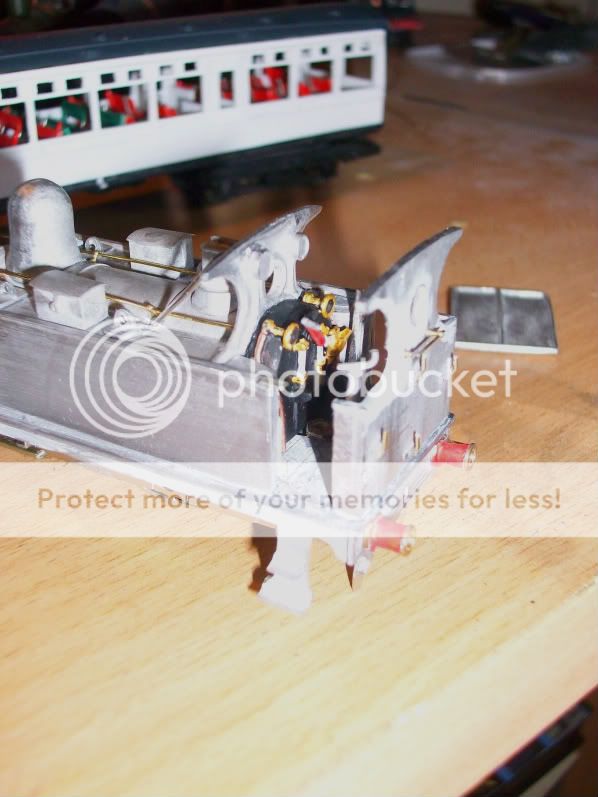
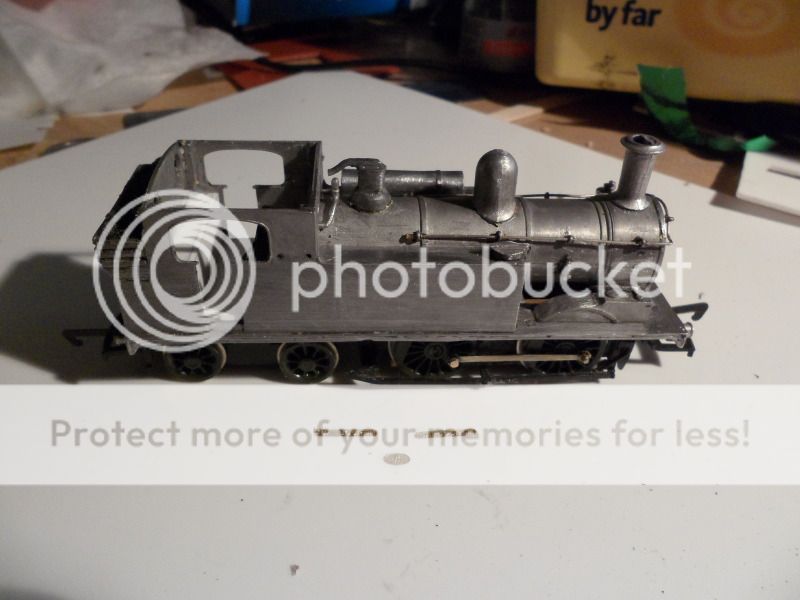
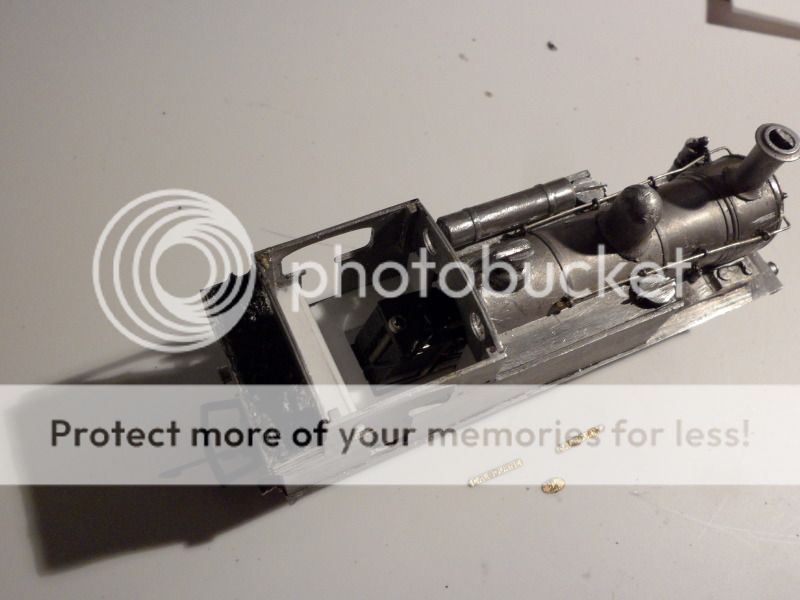
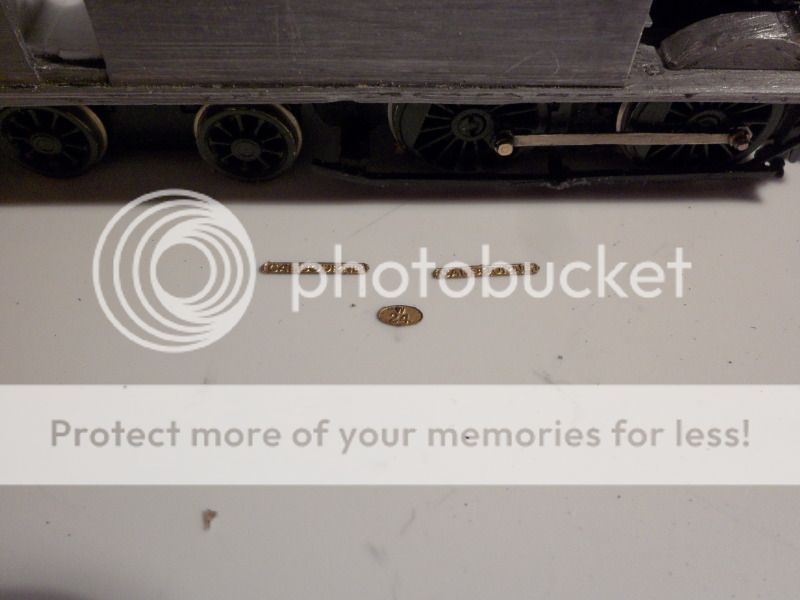
Lately as posted on my layout thread a purchase of another kit one I've been after for a while, a USA Dock Tank, this kit is a Q Kit, its mainly white metal. It was already assembled but missing a few bits which I am replacing and repairing.
A list of things to do
- New gearbox + Motor
- Fit fly wheel
- Assess the motion for tight spots,
- Cab steps missing
- Buffer beam steps
- Paint in to BR green.
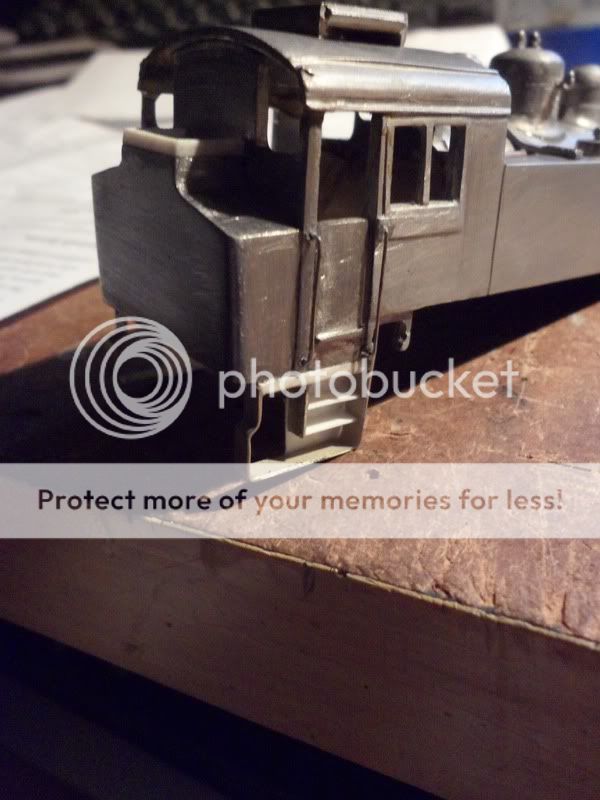
here's some images of work so far….

Work starts on the steps for the cab..
Front end board under the smoke-box on the buffer beam
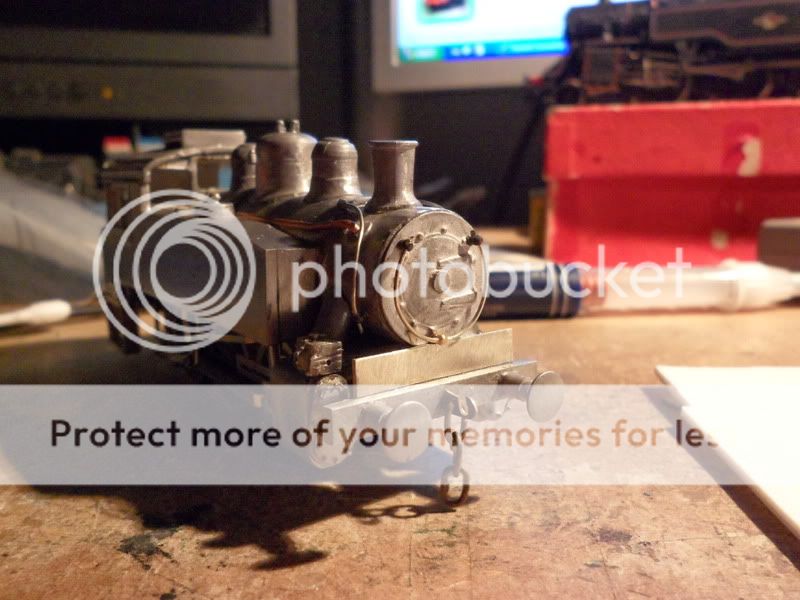
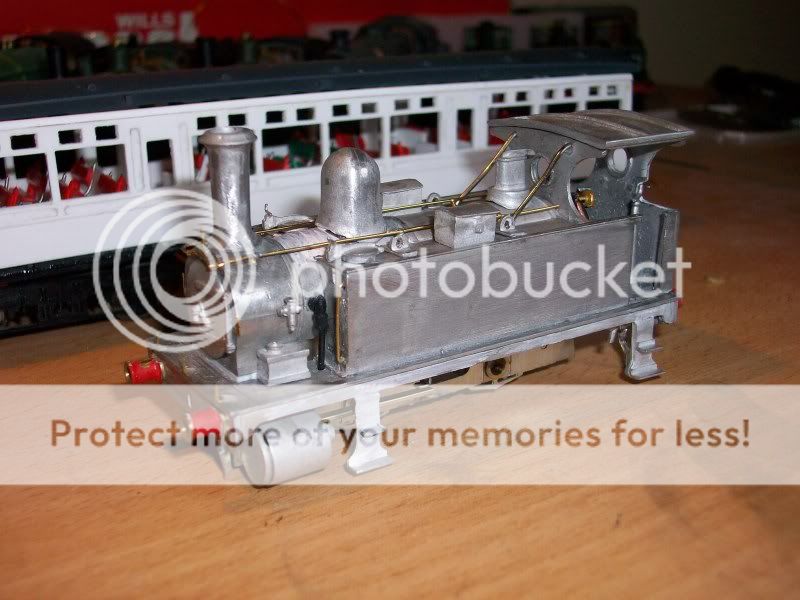
Steps complete on the cab and handrails added.
The gearbox was too small for the gears luckily I had a spare one from a kit I had never used. The motor hasn't been tested, and is still awaiting a fly wheel.
Paint is also still on order and waiting for it, this has been on order over a week, hopefully it will show soon.
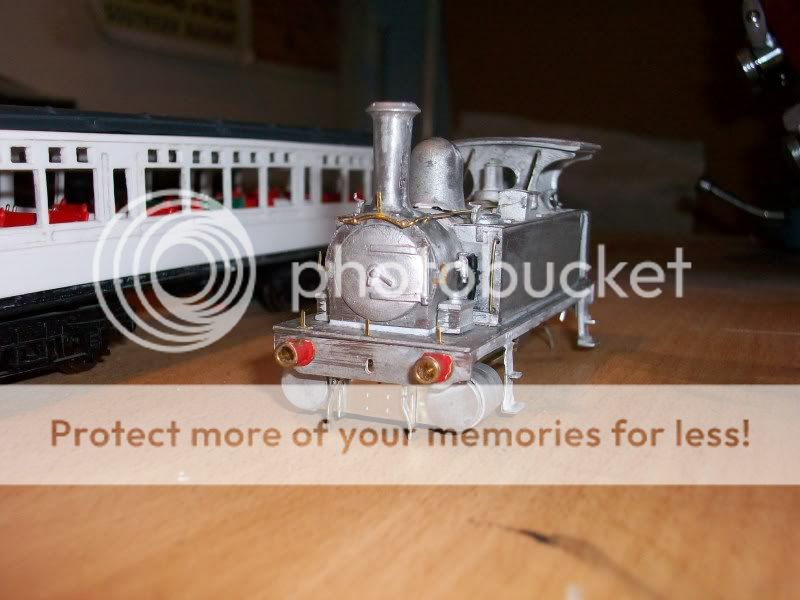
Here are some recent images…


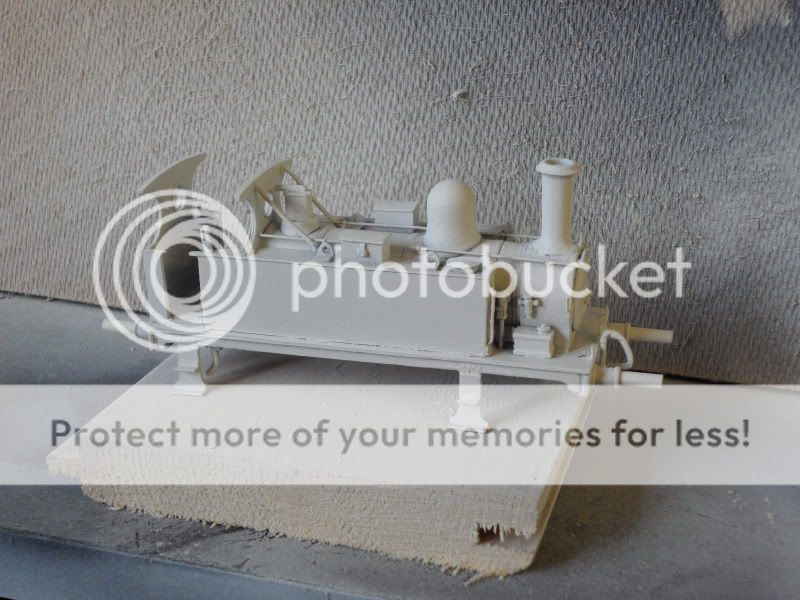
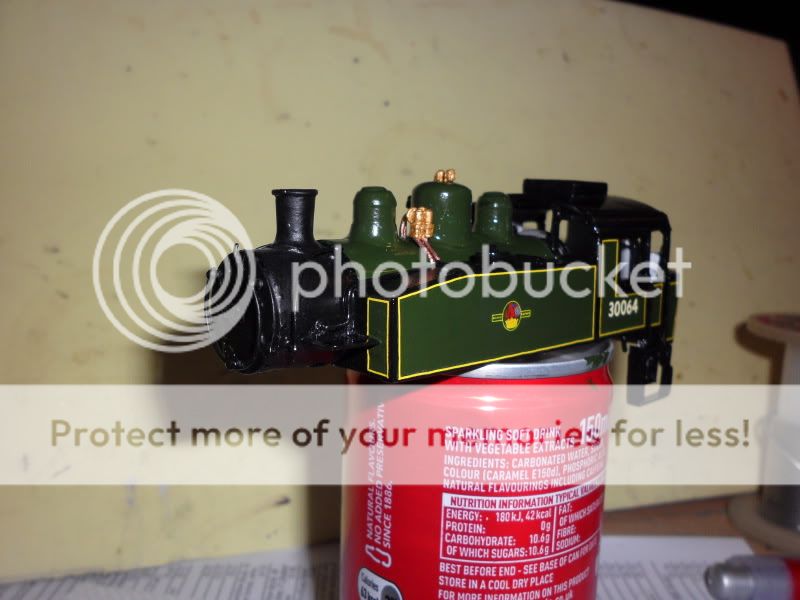
Not a lot of work has been done to the kit, but some small additions to the front end, steps, lamp irons, and other details around the smoke-box. Some paint arrived today so painting will shortly get underway. Fly wheel has been fitted to the motor to improve its performance. Still waiting on pickups for the wheels which should be here in the next couple of days, but for now ill show one image taken last night.

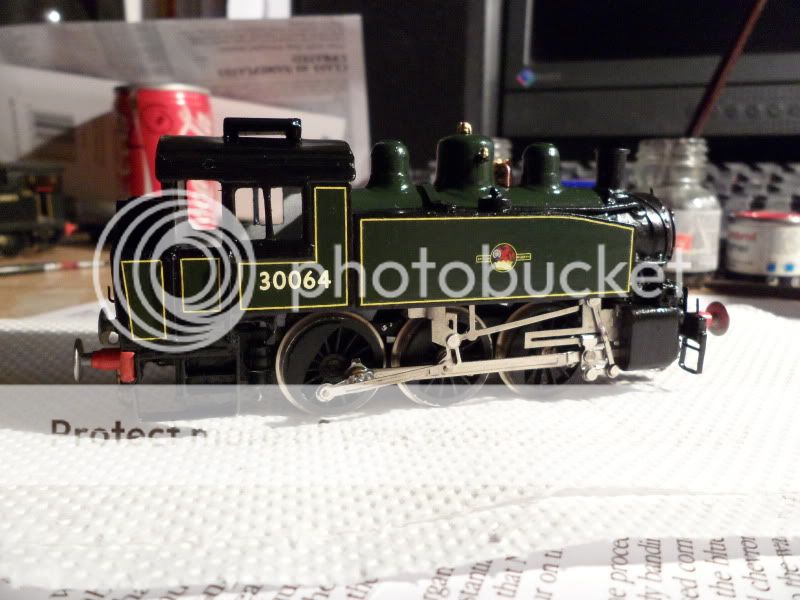
First coat of paint has been applied to the loco, the Chassis is pretty much finished painting. and has been left to harden off and dry, so work can start getting power to the motor as all the bits have now turned up.
There is still a lot of painting to do on the body and a lot of lining work, which will start over the weekend.
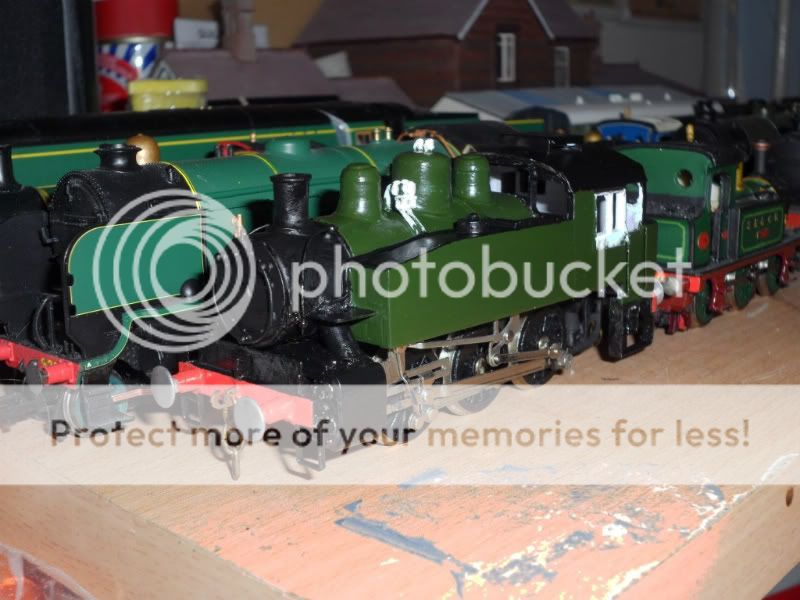
Had a good few days of progress, plus the nice weather the paint dries pretty quickly.
The black outlining was completed last night to start lining today. The lining is Press fix, HMRS, will be Single yellow lining. BR crest, 30064 number all from HMRS Pressfix BR sheet.
The Chassis has been fitted with pickups, and some work on running and identifying any tight spots has begun in earnest.
Here are some of the latest pictures:
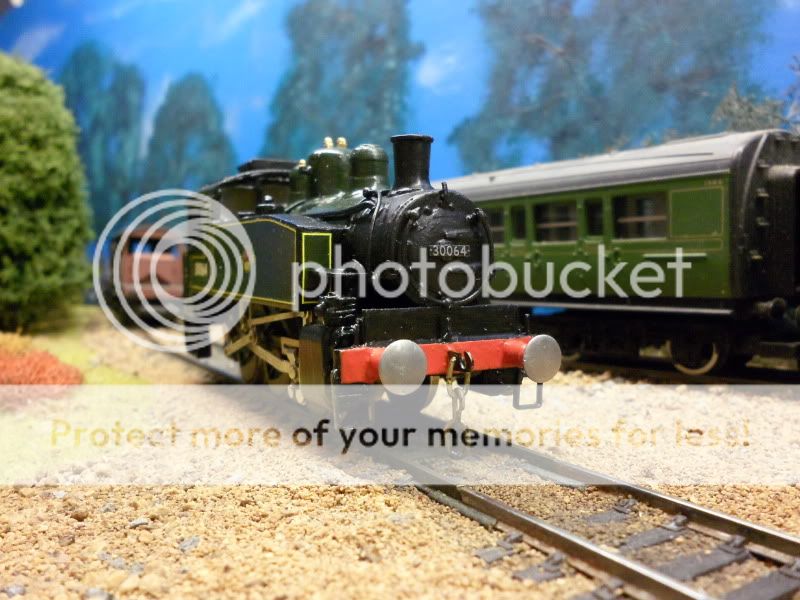
Ok after the last bit of lining and numbering was done this morning, small detailing parts such as the smoke box number were added, it was then varnished.
Whilst that was drying, I dismantled the chassis, connecting rods, and other various bits and pieces to get to the bottom of a few lock ups on the motion. I found finally it was all too tight on the back axle, so I removed a washer from each side, this significantly improved it, There are still a few issues to iron out yet on the running, but ill be running it in properly tomorrow, see if that loosens it up a bit… as it has been sitting in a box for 20 years…. :shock:
Anyway the loco did some running today mainly just back wards and forwards around Horsted keynes, firstly without the body on to see any issues… and lastly with the body on to see if anything was in the way.
I still need to add couplings to the loco which ill get round to end of this week.
here's a few picies from today, and the last bits of work.

Posted
Full Member
Terry
Posted
Full Member
Posted
Full Member
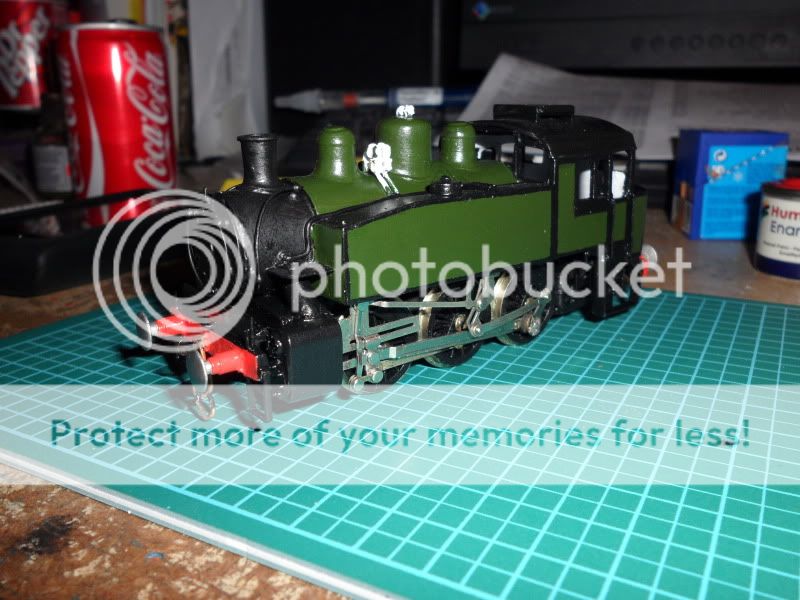
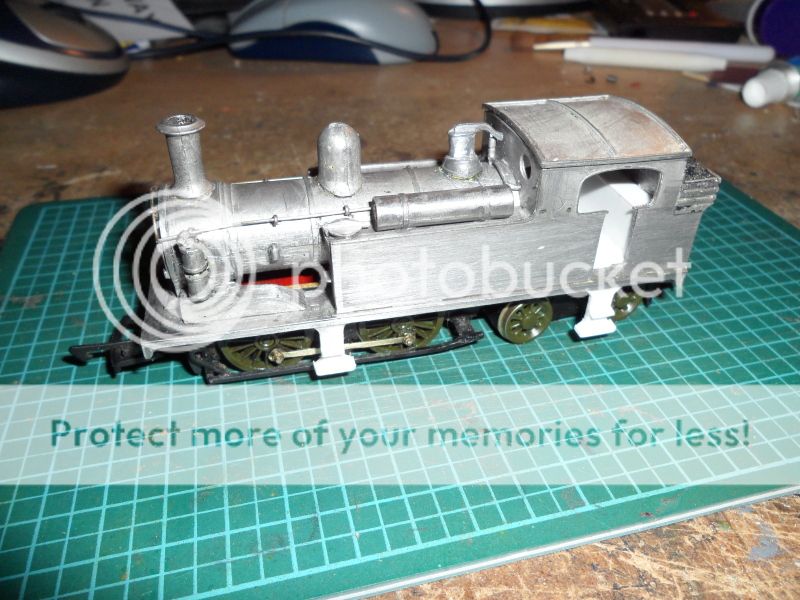
SR, Will's, O2.
Have been giving this some thought for a while, seeing as the new layout is underway, I was looking at old models or ones which I wasn't happy with to be re-done over this coming year, as money will be tight with a new layout being built, and new locos and rolling stock on the horizon.
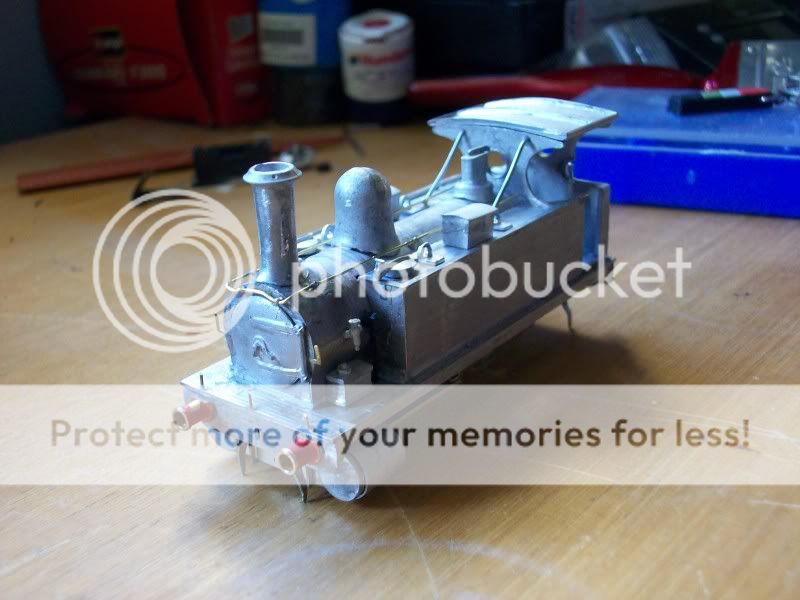
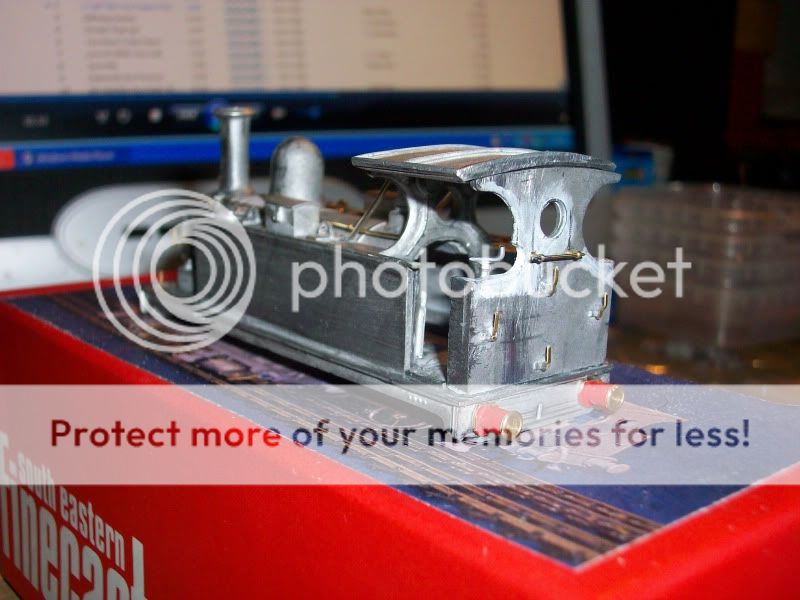
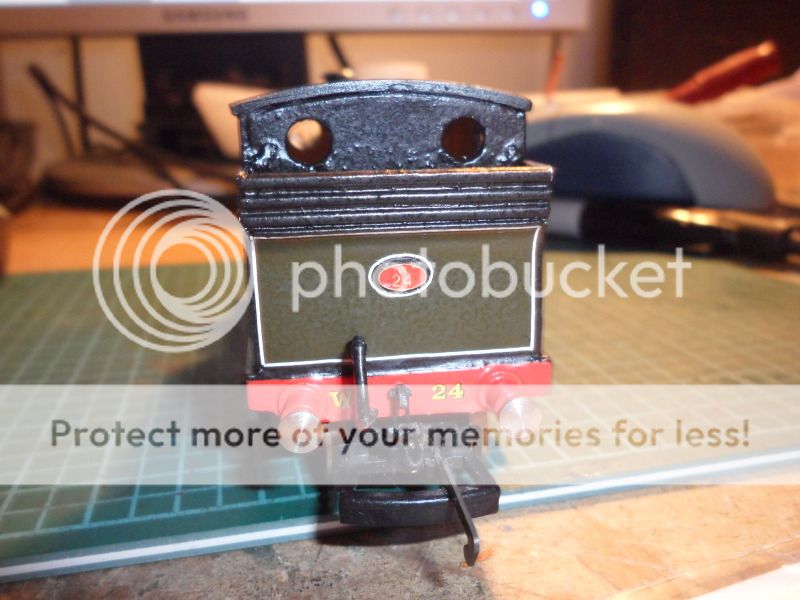
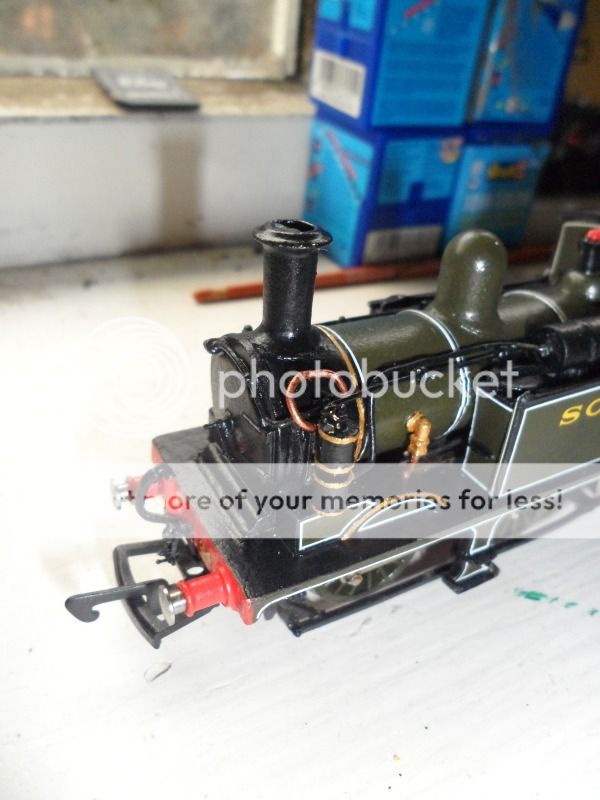
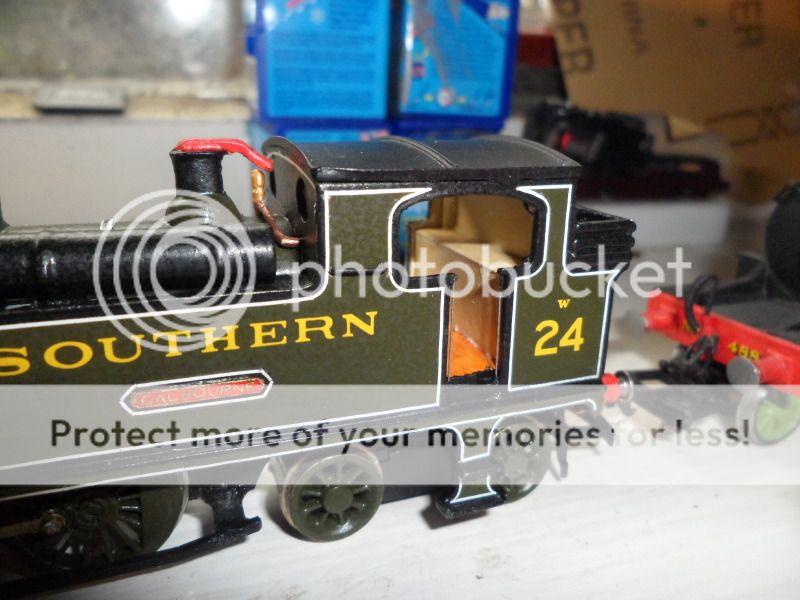
My attention turned to my very first kit I got from eBay, which I had painted and fixed up, this was the SE Finecast, O2 tank, brought around 4 - 5 years ago and painted in SR livery as W24 Calbourne as I have always been a big fan of the Island railways, as all locos were named after places on the island, with Victorian rolling stock.
As many know Kernow, and Dapol are producing the O2, for release December this year (Hopefully) so I've decided to spruce mine up a bit.
So before I got started this is how it looked:


The loco through in experience, had quite a bit of Lacquer / varnish applied and was poorly painted by my recent standards, so first job was to strip it, which took some time due to the amount of varnish on it. Paint was also stripped from the loco name plates which will be repainted later on.
The chassis since I stopped running it has undergone some changes, new driving wheels at the front with new crankpins, at the rear a modified rear bogie, with some nicer wheels, which have improved performance, and look a lot better.
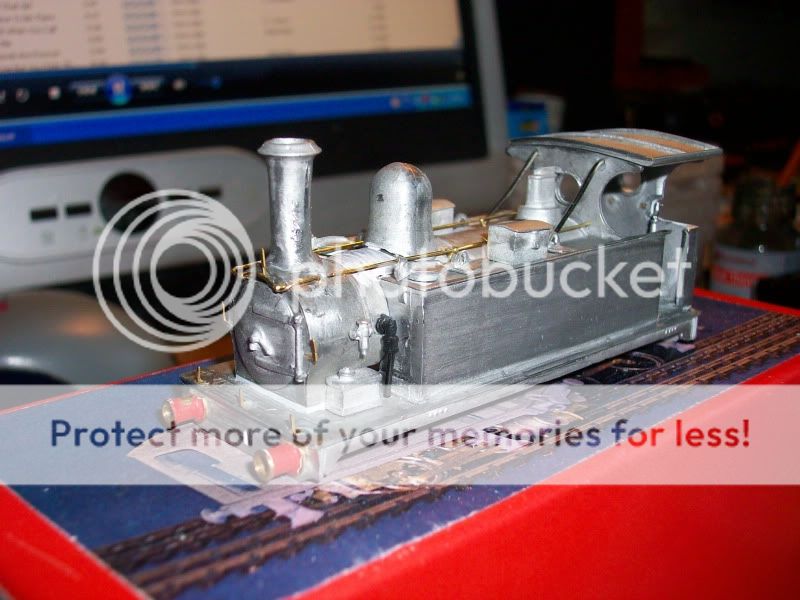
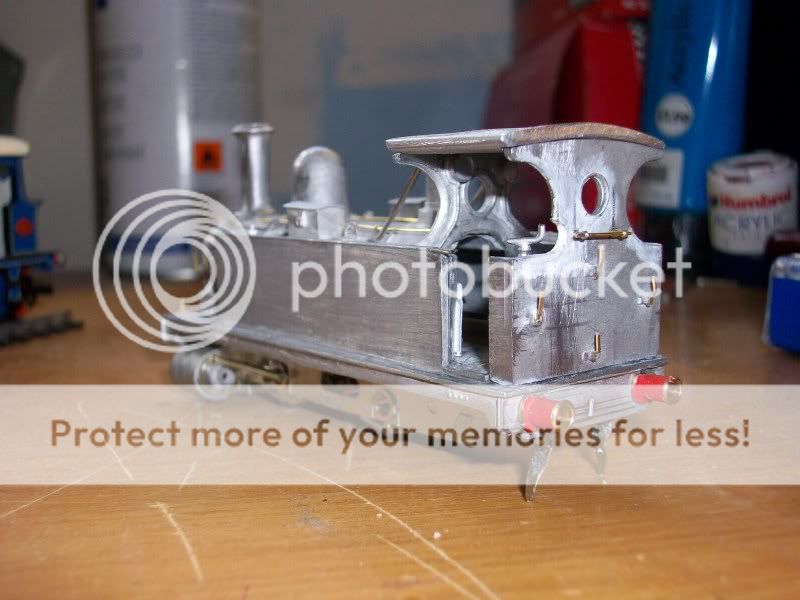
Looking at the body, the work will focus on making a bit more detailed, as it is an 80's kit so most of the detail is moulded on. I will look to, replacing the buffers with LSWR sprung buffers from Markits, The steps which have been broken many times have been binned and new ones will be made from plasticard. A smoke-box door handle by Markits will replace the moulded one, Some slight cab improvements will be made, as there was no base / floor so no where to put a loco crew in. New boiler fittings, clack valves on the side of the boiler will be replaced with some new ones, these likely to be old Hornby ones which do the job.
The loco will be repainted in to the same livery as before 1930's SR olive green. which I hope will be up to the standard of the USA tank, and SECR locos built and painted.
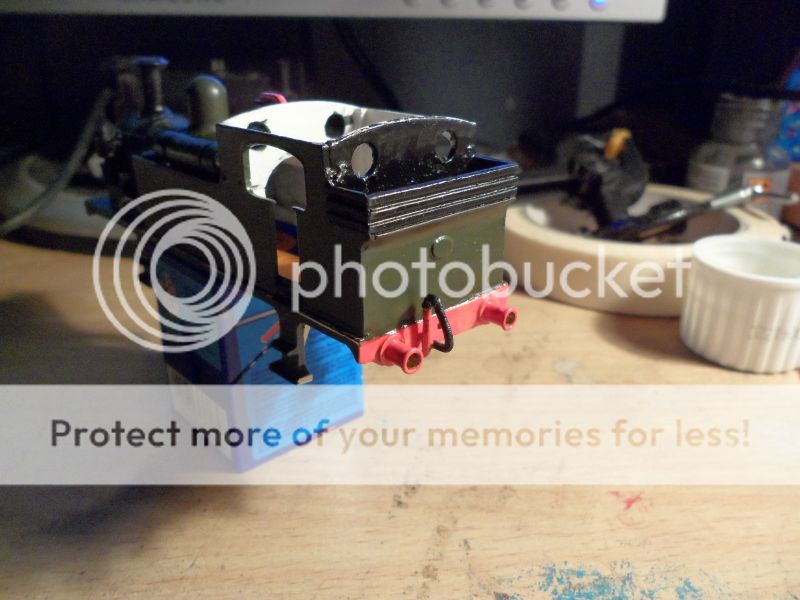
Here is the loco now stripped of paint back to bare metal once again:
You can see some work has already started in the cab space, with a new floor, and bunker, you can see in these older locos the motor takes up most of the room in the cab. But its better than what was there before which was nothing…
As mentioned before the plates were kept after the stripping of paint from the body, these will be repainted before being put back on to the loco.
A small update on the progress of the o2 as a few bits and pieces as well as transfers turned up today.
So first parts arrived for the o2, firstly ordered were LSWR Buffers were ordered from Markits, as well as smoke-box handles which replaces the moulded ones. I also brought 2 extras to replace the P-Class's ones which I didn't put on correct.
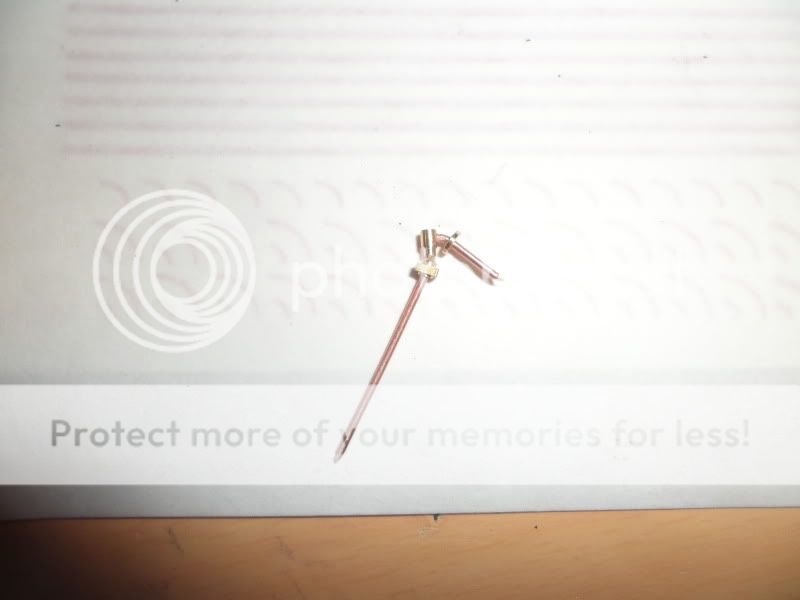
Firstly I filed off the moulded handle and drilled a small hole to take the Brass handle mount.
This is the Handle assembly made of brass came from Mainly trains, also available from Markits.


Next the replacement of the Buffers, the old ones were filed off as they were cast white metal, these new ones made of brass and sprung loaded, and need a 3.5mm hole drilling the buffer beam. To ensure the surface was nice and level I glued a thin piece of plasticard over the front, this also stopped the drill piece from moving.


I still need some additional parts before priming for painting but I can put these on after as these are Screw link type couplings from Hornby models which need just a small hole.
As mentioned 2x more handles were brought to go on the P-Class models, using the same process as above all be care is need as its a resin casting.
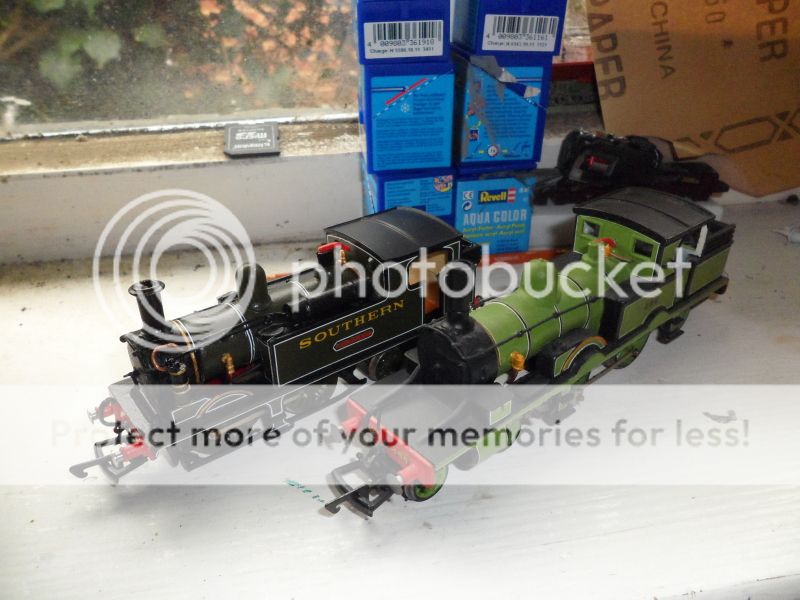
Here are all the locos at the end of the day:

More parts arrived today to be fitted after painting, 2, Screw link (Small couplings) arrived from a Hornby spares dealer, ones that can be found with most Hornby locos.
I decided to use these as they were easier to fit than Romford / Markits, as they would require a slot to fit them, where as the Hornby ones only need a small hole.
These will be also fitted in time to the P-Class and the O1 class resin looks I have.
Some more works been done on the body removing the old clack valves from the boiler which will be replaced by old Hornby plastic ones, which come off the old schools class.
So far its coming along nicely…


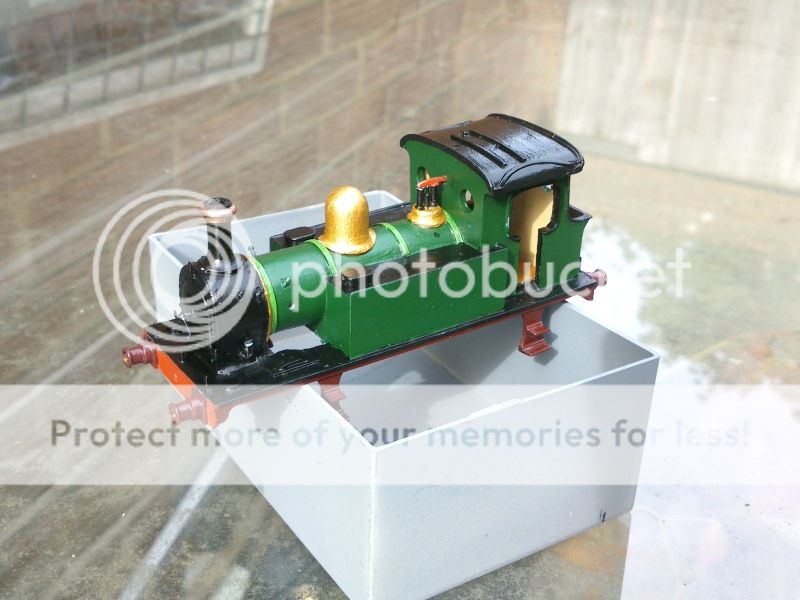
Loco Primed and ready for painting!
Been very busy with this project over the weekend considering I have had absolutely nothing to do.
Firstly after the primer when on I checked for un-evenness in the primer, everything seemed ok, one or 2 spots needed some sanding to get it right but generally was not to bad.
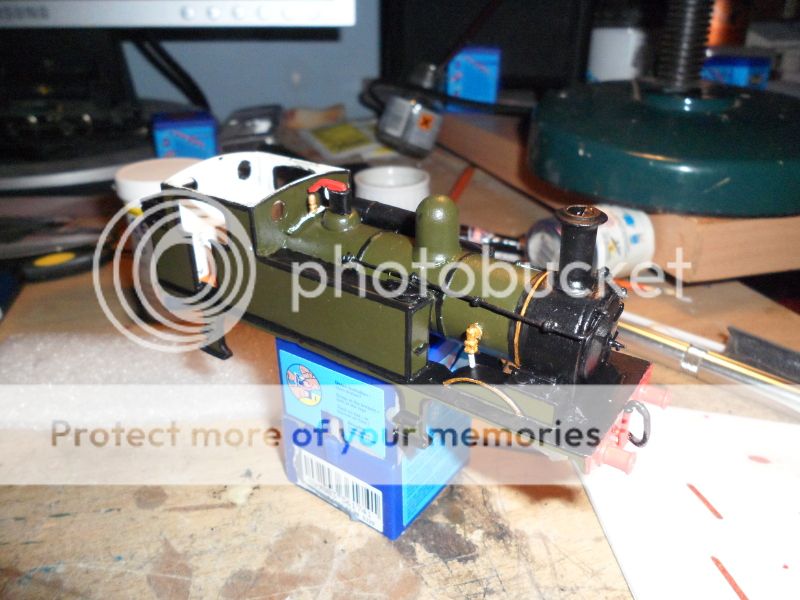
Firstly the Dark Olive Green went on this was from Phoenix paints, fast drying stuff too not that I can say the same for Humbrol, A matt black was used for the main running plate, smoke-box, top of the water tanks and the Air tank on the water tank also.
After these 2 were applied I added the red to the Buffer beam which was Humbrol Satin Red 174, couple of coats were needed for this to fully cover it.
Next day, paint fully dry on the loco I started tidying the paint work up a little, and touching up any areas I had missed. After I began the task of starting the lining, on SR locos they mainly have white lining with a black boarder. The White lining is a transfer which will be applied later. But before I had to outline all the tanks, cab, bunker, splashers with Black Humbrol Satin Black 85, which took around 9 hours to do all of it. Leaving it be to dry off, I also add a light spray of varnish at this stage to protect the paint work.
After it's dried off I began picking out the detailed parts, mainly the gold / Brass colours of the loco. I used Humbrol Acrylic Gold 16 paint for this as it dries fast and its nice and thick unlike the enamel which I find too thin and wishy washy.
The boiler band next to the smoke box, the Whistle, and the splashers where done in this colour.
The loco's plates were cleaned off at the end of the weekend, for this week its all the white lining which may take a few days.

As seen previously all the Painting was done.
The next and very long job was the Lining out of the loco. I use HMRS Pressfix lining sheets, easy to use and could probably line 2 / 3 locos depending on their size.
The lining would be White on this SR livery, HMRS Code 103.
These are simple and easy to use.


Southern Transfers.
Using the same HMRS Pressfix transfers, this time the SR Maunsell loco and coach insignia with also some LSWR transfers.
The sheet has various sizes of numbers and Southern lettering.
Using the same method seen above, work started on putting the Southern lettering on the tanks, and Number on the cab.
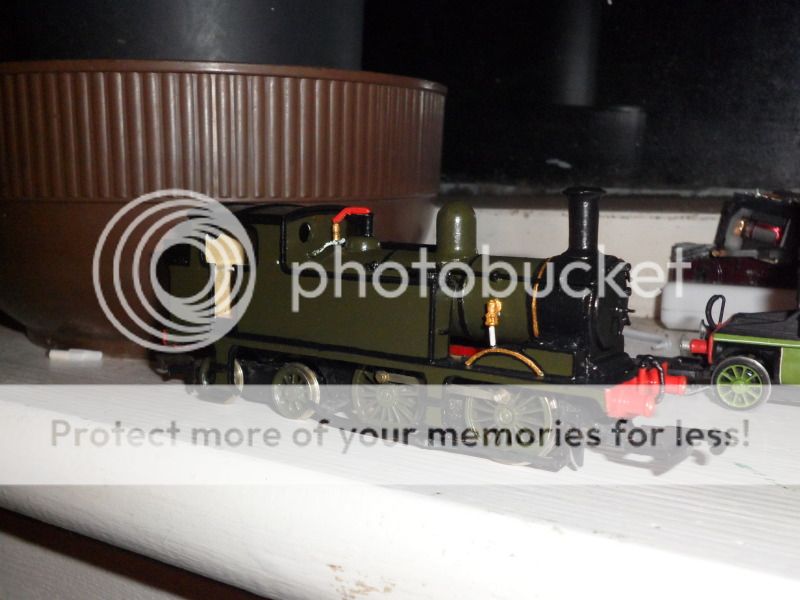
This was done in a couple of hours. here's both sides before another light coat of varnish.

Once everything was set in place more items were added to the body.
The nameplate and bunker plate were fitted using Super glue Gel, once the glue was try, I went a bit mad and decided to add a thin black line around the nameplates and Bunker plate, which I then Lined with the white transfer lining.

The body then was given its final light spray of Satin Acrylic varnish.
When dry a few additional details were added.
Some pipe work around the Westinghouse air pump, on the side of the smoke-box, as well as a pipe from the Air tank on top of the water tank, to the pump on the front of the smoke-box.
As well as this, Hand rails were added to the front of the tanks, and also the cab door, as well as to the sides of the cab.
Posted
Full Member
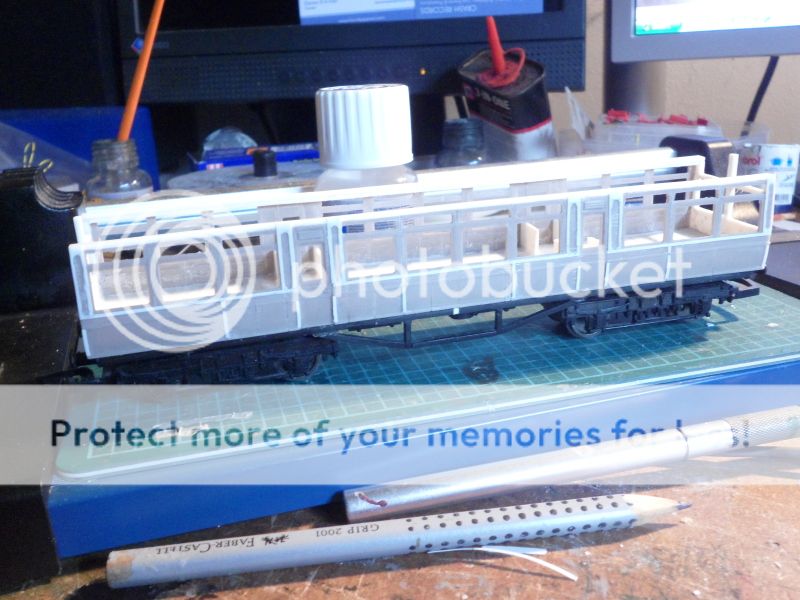
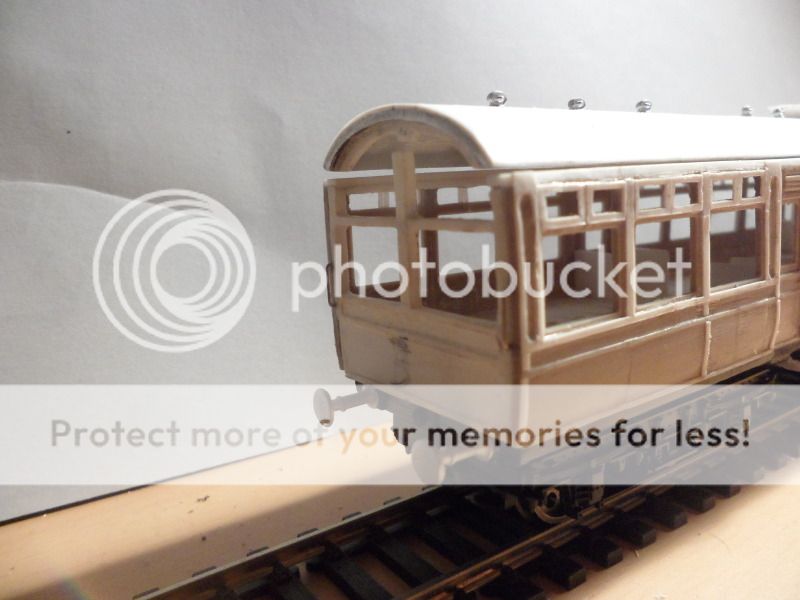
LNWR Observation Car
As of late just before the end of June I took the decision to scrap what I had done on the LNWR Observation car… A few keep asking for progress and for those who are a member of the Facebook Group or follow on Titter or even visit the website they will know that its been progressing quite well as of late… and it is now quite close to the painting stage.
Why start again?
The project to build the LNWR observation coach started 2 - 3 years ago, most of the body was made from Plasticard, and the coach chassis being an old Hornby Triang maunsell coach which was modified to take the body. The project has been off an on for quite a while, the main sides and front and back of the coach were in place… but as I mentioned before our skill levels and expectation as to how it will look when complete changed… and I quickly became un-happy with what I had done. I took this decision just before a photo session for a Model magazine as I was attempting to complete it before then… with time and work against me… and after looking at it… I took it apart just leaving the chassis and the 2 ends.
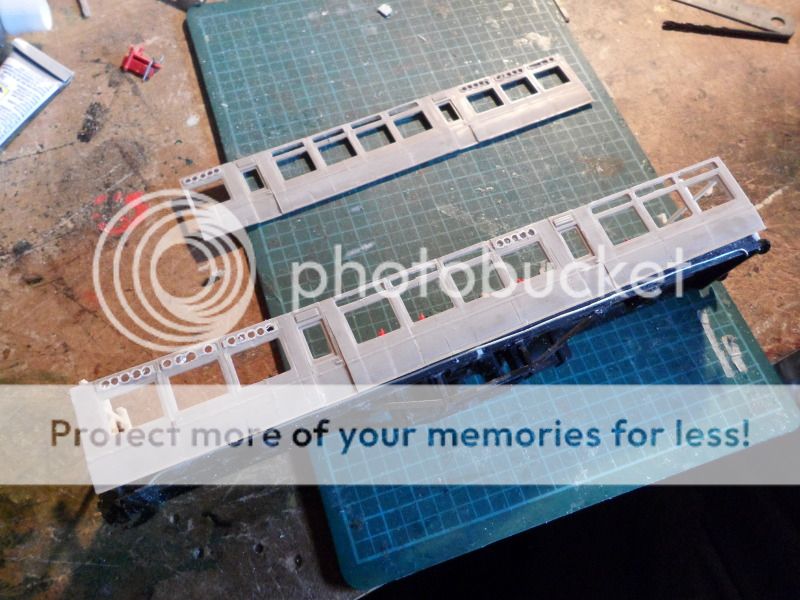
After the first attempt to build it entirely out of plasticard I noticed some issues which occurred over time… due to the inactivity on the project the sides of the coach had bowed and were no longer parallel or straight… so I needed a new way of doing the sides. As well as this the mouldings and the doors.. were proving difficult.
After researching I came across the LNWR ratio kits…. and this got me thinking… the smaller windows were roughly the same size as the previous one I had built 12mm, I then went about planning how many LNWR coach kits I would need to… ruin… to make the coach. In all x3 would be needed. I brought 2 kits to start with to get a feel if what I planned worked… this cost around £20 for 2 kits. The kits I used were the Ratio LNWR Corridor Composite 732, These were cut down and some windows that were too bit were cut down and glued back together.

The doors from the kits were also used on the coach sides, as well as some of the mouldings… even though most of them will be made from 10/000 plasticard.. which should be fun.
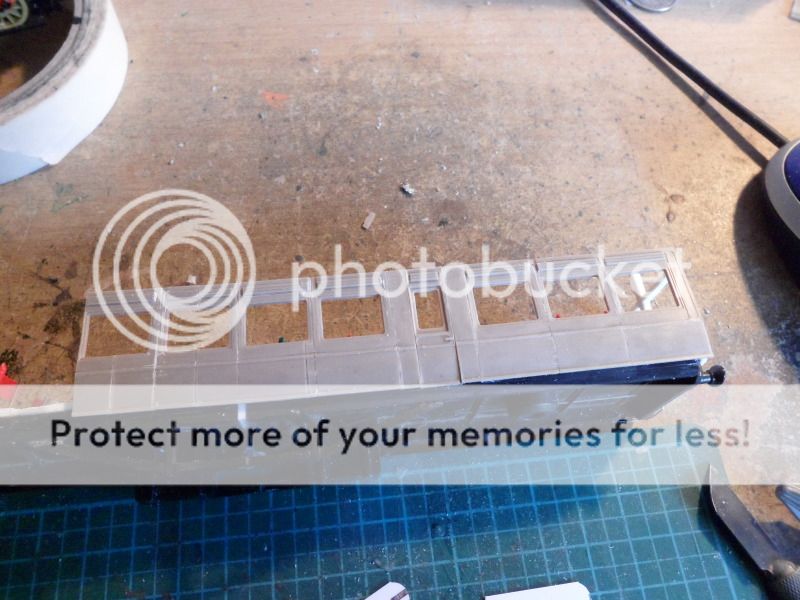

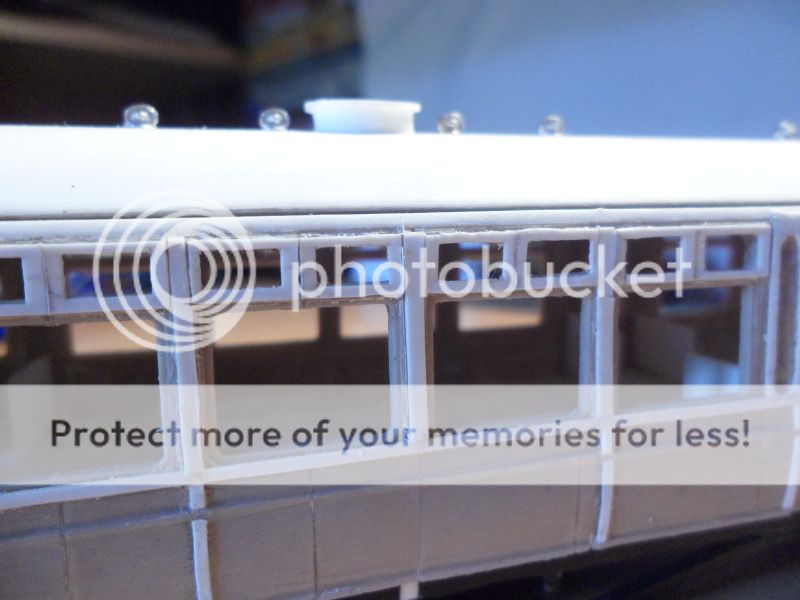
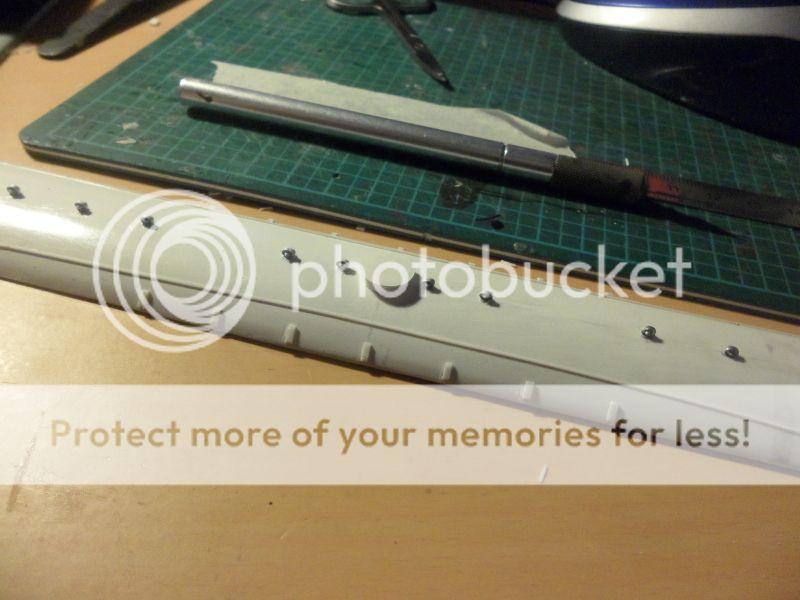
The various mouldings along the side of the coach and the front was made using strips of 10/000 Plasticard, I decided to try and keep this simple, as each corner of the mouldings have rounded edges… I could of done this if I went and got each part Laser cut but preferred to try and do it myself rather than taking the short cut and the easy route… this started in Mid June, and have only just completed it.

The top opening windows on the LNWR coach I decided to do a different way, the Ratio kits, above the windows had vents…. so I decided to remove them creating an opening for the top windows, I made the openings by drilling a series of 4mm holes and the cutting them out with a craft knife. The window will be made from 10/000, 4.5mm strips with the window cut out and glued over the to, with liquid poly.
And this is how they look after the window plasticard is fitted…
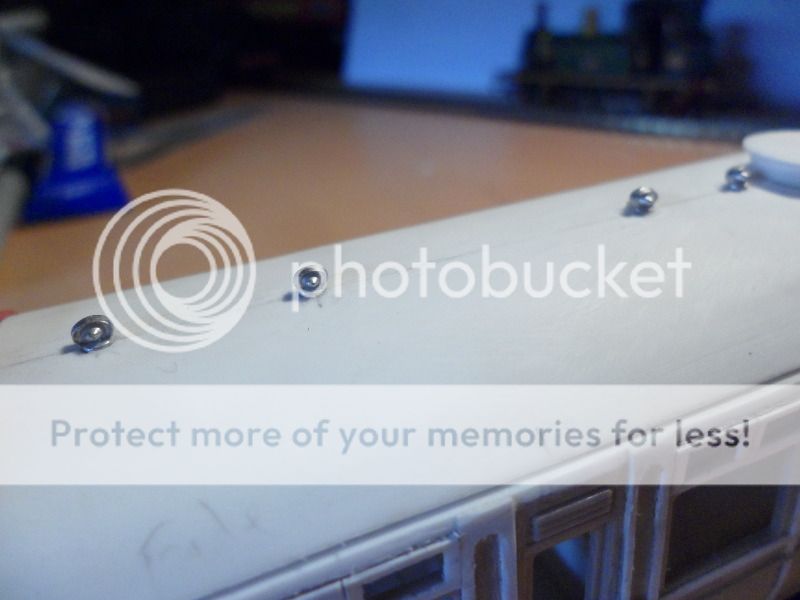
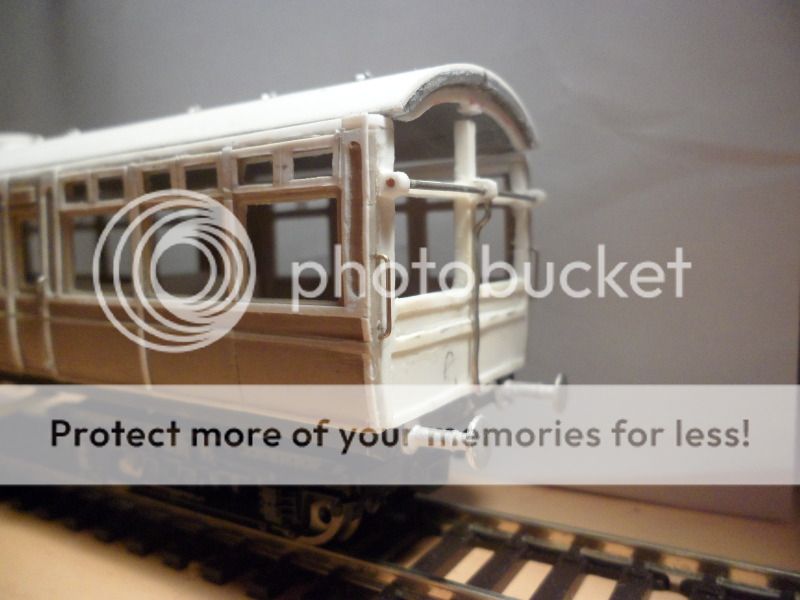
The roof came from Dart Castings, and was a curved piece of aluminium, I also purchased the roof vents from them too, 2940: TORPEDO VENTILATORS (SHORT LATER TYPE - LNER,SR,LMS,BR). the roof was covered with 2 layers of Plasticard, 10/000, this will eventually be painted white.
More details on the coach body were added yesterday, hand rails and various pipe work along the sides, and the south facing end of the coach, the bigger pipes were made with nickel plated copper wire, and the hand rails with old guitar strings. The buffers on the Hornby / Triang chassis were the wrong type, with the Ratio kits came the correct buffers in cast White metal.
As the dry weather continues, work continues at a pace to finally get this project complete after 2 years of being put on the shelf, whilst other kits jumped ahead of it.
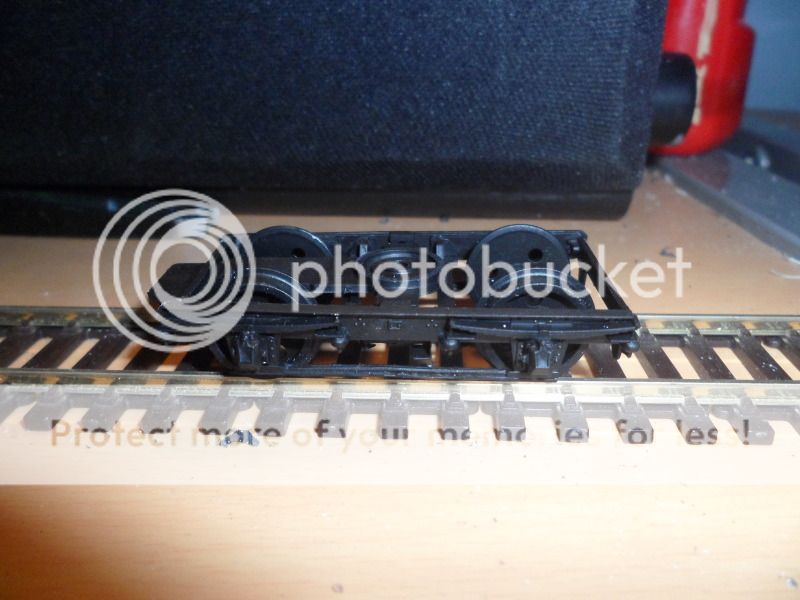
I originally was going to use the bogies that came from the original coach which I had cut down. After a bit of thought, I could see there point so decided to change them. As mentioned I had 3 LNWR coach kits by Ratio I simply took the bogie parts and constructed them add a few bits to them to make them rigid as I always found the Ratio bogies quite poor and easy to brake… these how ever seemed to work ok! I added the NEM couplings to them and fitted the Hornby wheels as the larger plastic type I didn't like.
The bigger job was moving the location of the mounting point on the underside of the coach. This meant grinding / sanding off the old and moving the new mounting point 3mm forward towards the end of the coaches… Despite a lot of work it makes the coach look a lot better.
Some smaller additions and changes were made to the coach before the weekend, a small step was put in under each door, the pipe that runs along the side of the main chassis just under the body was adjusted slightly to copy the originals, also a small change to the under frame, was the under frame trussing which was the cut down from the doner coach…. but I wasn't happy so this got taken off and replaced Friday night and looks a lot better, and about in proportion to the under frame on the original… all be some of the Boxes ect are probably in the wrong place… but I will have to compromise on that.
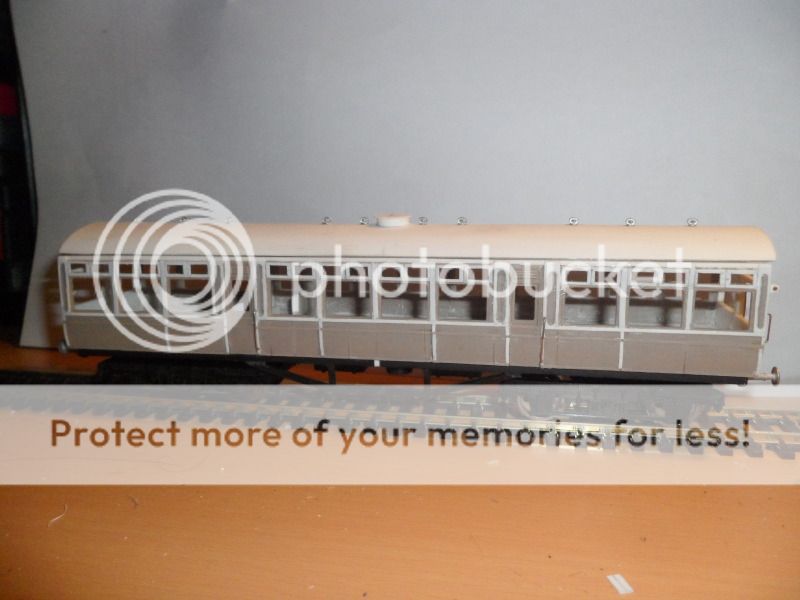
So that was the last changes to be made before painting begins, Primer went on yesterday and any gaps were filled and smoothed out, and painting started last night.
here's a few pictures of the final coach before Priming and painting began:
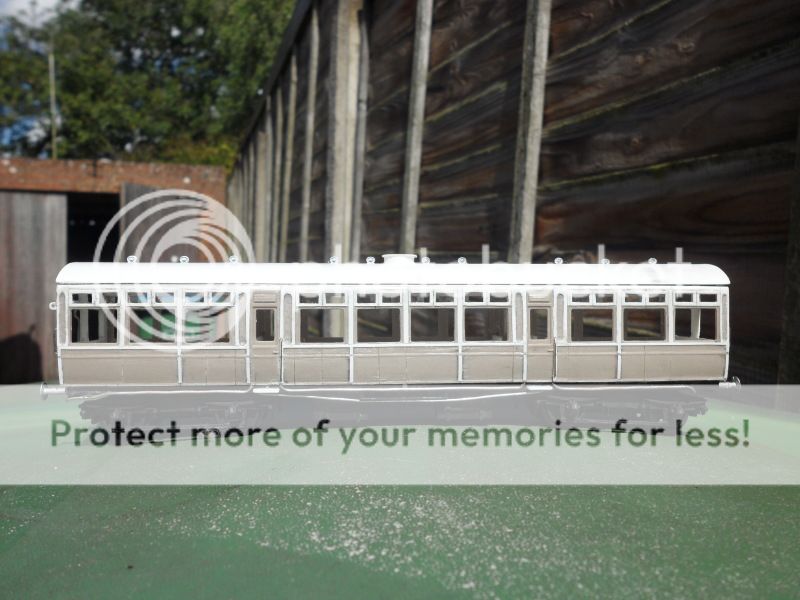

After the last couple of says I've made a few small changes and a little more progress..
Main changes are at the each end of the coach, I've added a bit of plasticard to the thinner end plastic along the top where the roof sits on, as previously it was part of the roof. Took a couple of hours to do and fit as it required some filler.
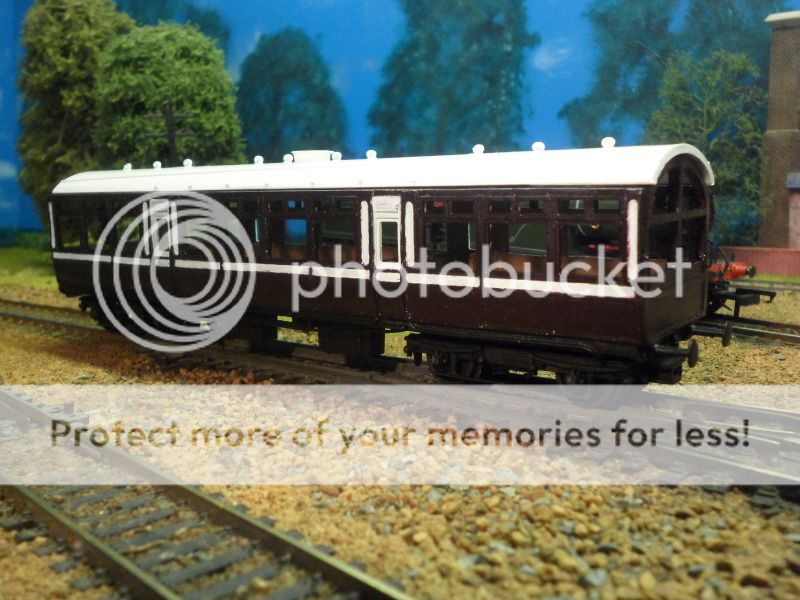
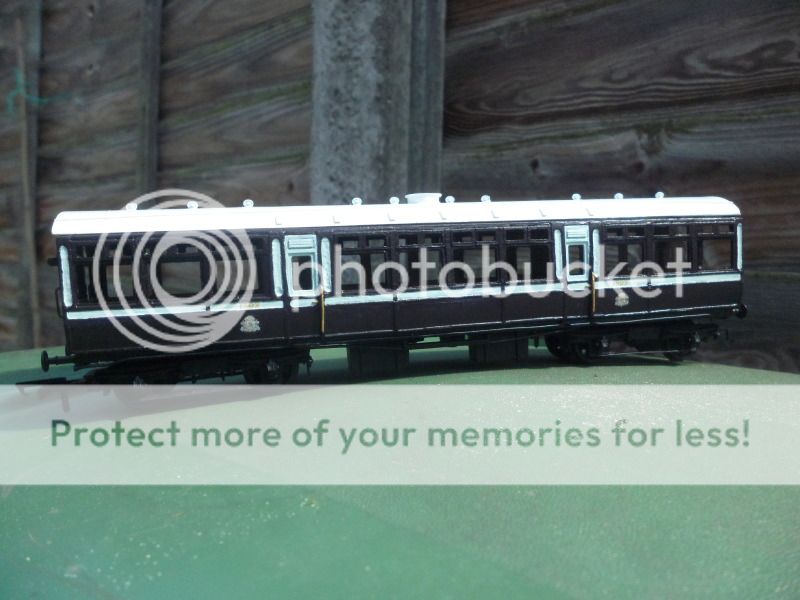
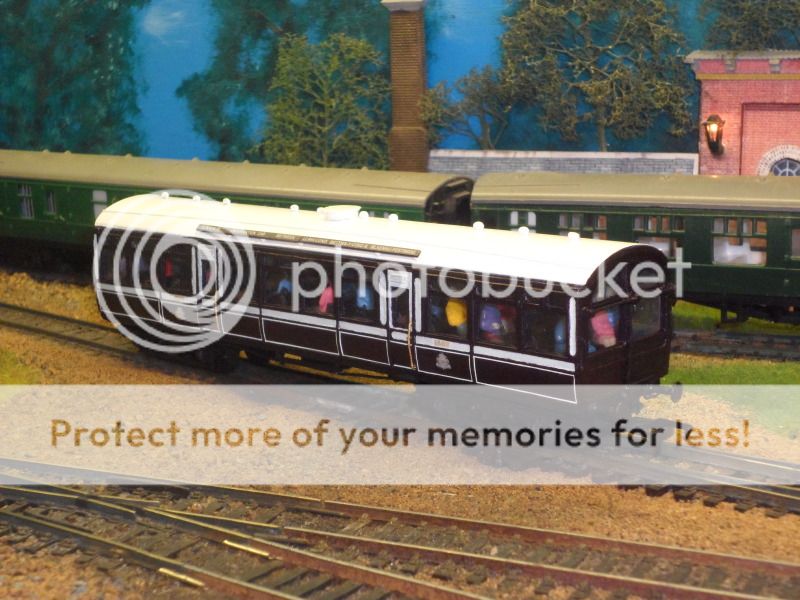
The coach itself has been in the painting stages for a couple of days now, and the main Dark Plum colour has been applied to the coach, white areas are still yet to be applied around the mouldings. The interior has been painted with acrylic paint, The seats still need to be worked on which I will probably start on tomorrow.
The exterior of the coach will be painted with P379 LNWR Coach Plum, and P380 LNWR Coach White
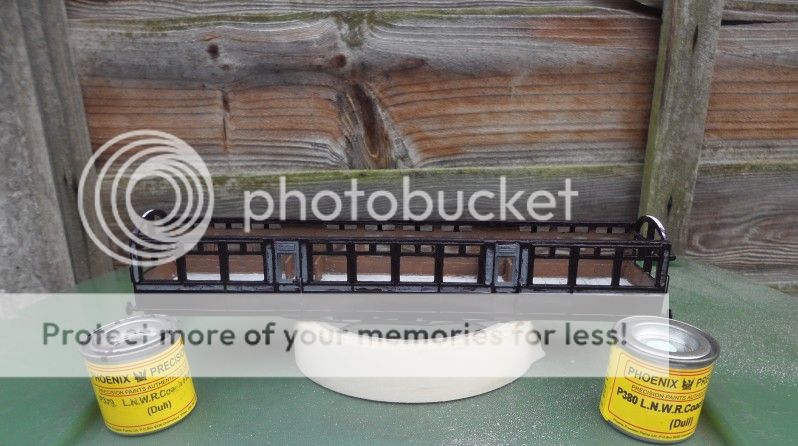
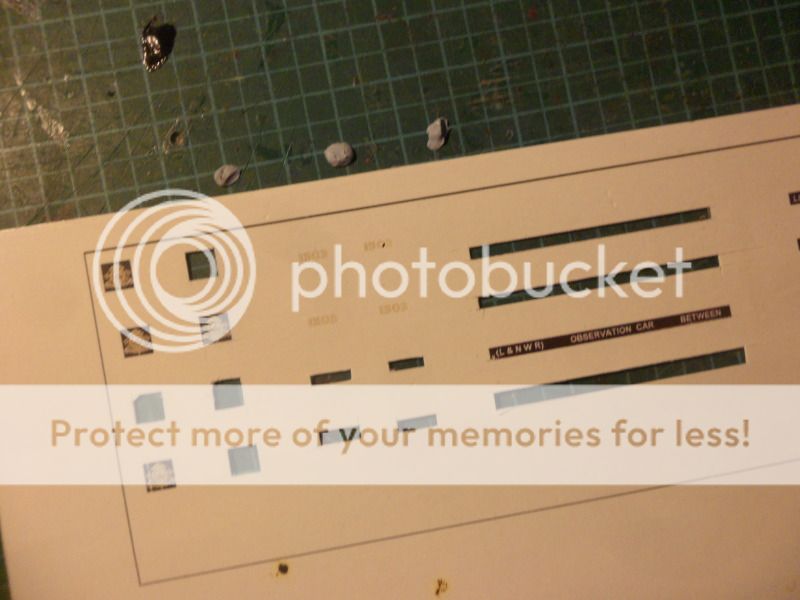
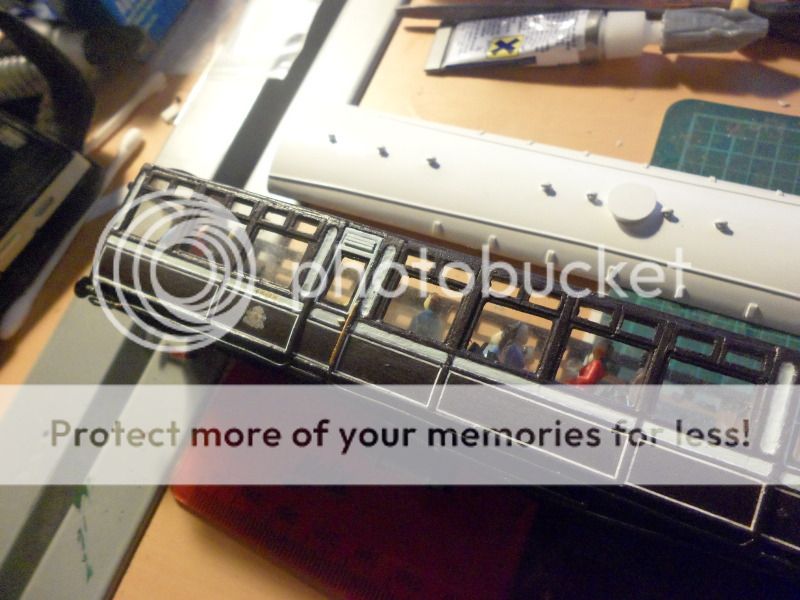
The roof has now been completed, adding the rain strips, which were done with 0.40mm X .50mm plasticard Strip, brought from Model Dock Yard, and the pack contains 10 strips. These were glued on with Liquid poly, by Humbrol.

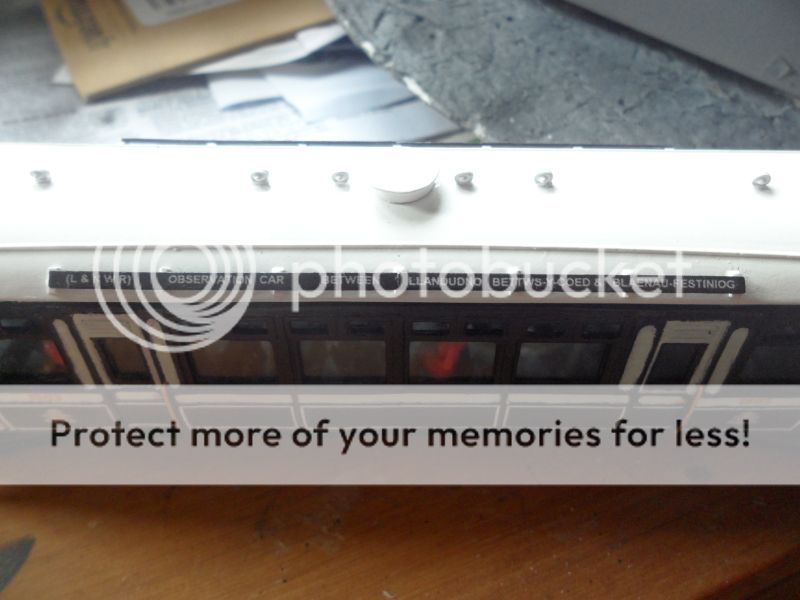
Also added were the destination board holders are fitted on the side of the roof using bits of plasticard strip to mount the boards on to, I will make the boards probably after the coach is completed which will read: (L&NWR) OBSERVATION CAR BETWEEN LLANDUDNO , BETTWS-Y-COED & BLAENAU-FESTINIOG

The roof was then painted with some Humbrol White spray paint.

Progress has been concert rating on the completion of the painting on the main coach body. Adding the white paint around the mouldings of the coach. The lower panels still need a small amount of lining around the edges, Which I hope will be done by the end of the week.
Work has mostly been concert rated on the Transfers of the LNWR coat of arms / Logo, and the numbers. Whilst doing this I also started doing work on the running / destination boards.
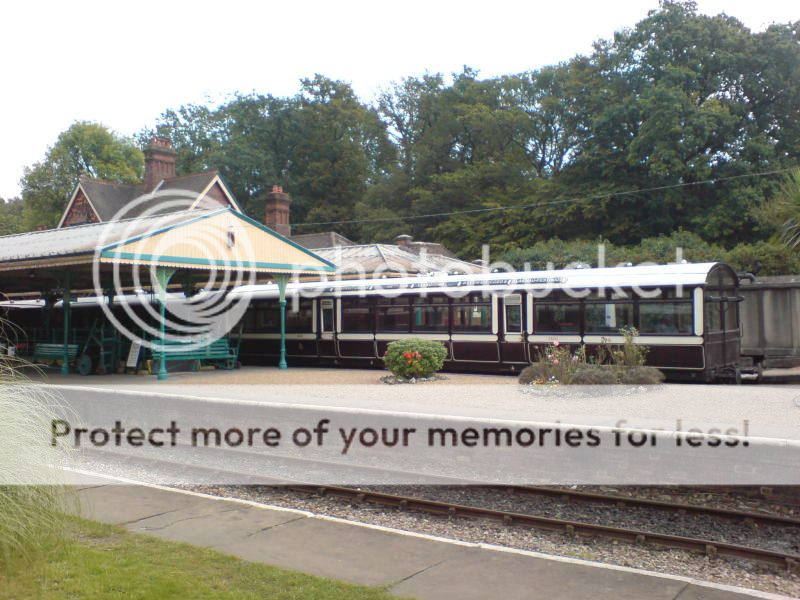
I basically started out using a number of images I took over the years when I visited the Bluebell doing a little research on the coach itself.
I took the images and selected the part I required. I used Photo studio for this.

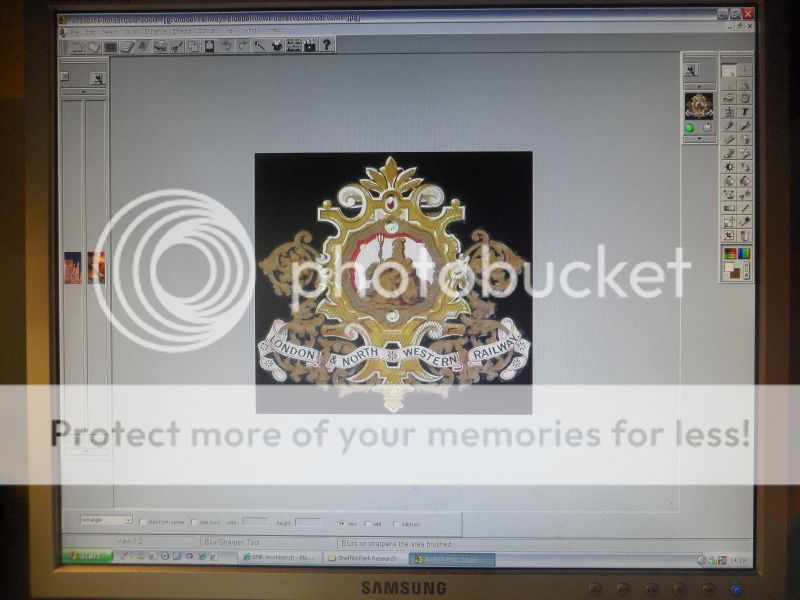

used Crafty computer paper White backed transfer paper. These work the same way as water slides, and can be used with Laser and Ink-jets.. you must select what type of paper for your particular printer. I use a Laser printer, you print on the shiny side of the paper. When printed you simply cut around the transfer / image and soak it in water.

There is still some transfers to be added around the lower panels around the edges… this will be done to wards the end of the week… and then the interior can be then done.
Today I will be on to the internals of the coach which i have just started.
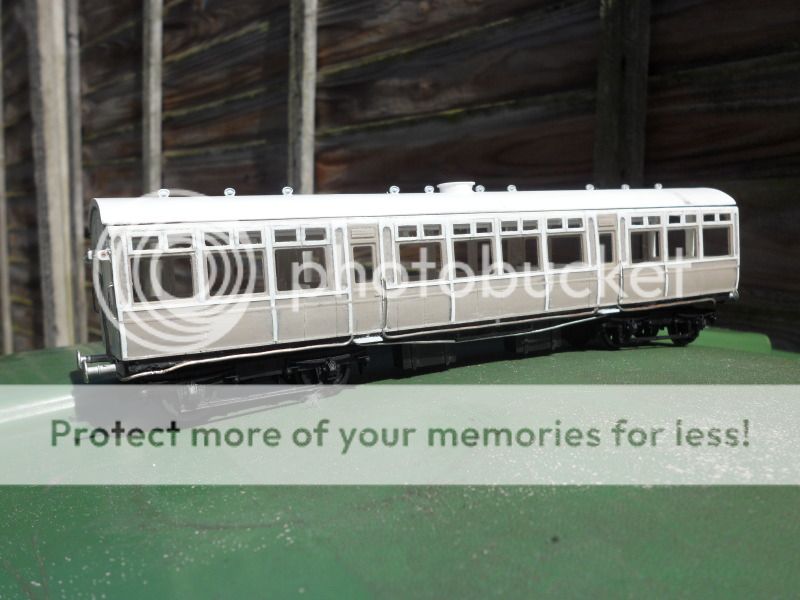
Anyway progress has been getting the external livery complete to the best of which i am capable of. As mentioned I have simplified it a touch as the lining sheets didn't have small enough curved corner pieces… so before I ruined it further I elected to not curve the corners.. Anyway the who coach was varnished in Satin Acrylic.
Anyway this is how it looks:

internals are on there way to being completed… with just the windows to be done… all be I need to get some glue for this, which I will hopefully get sometime at the weekend.
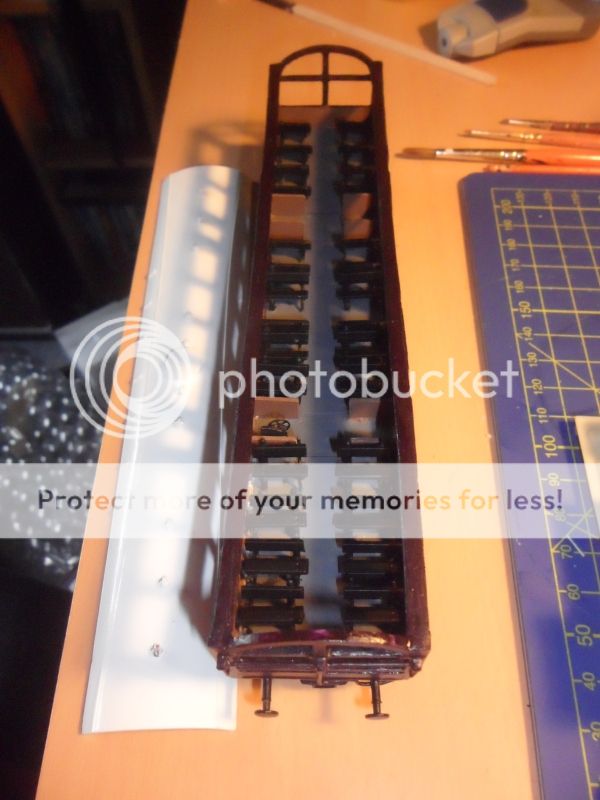
Anyway moving on, next was adding the seating…
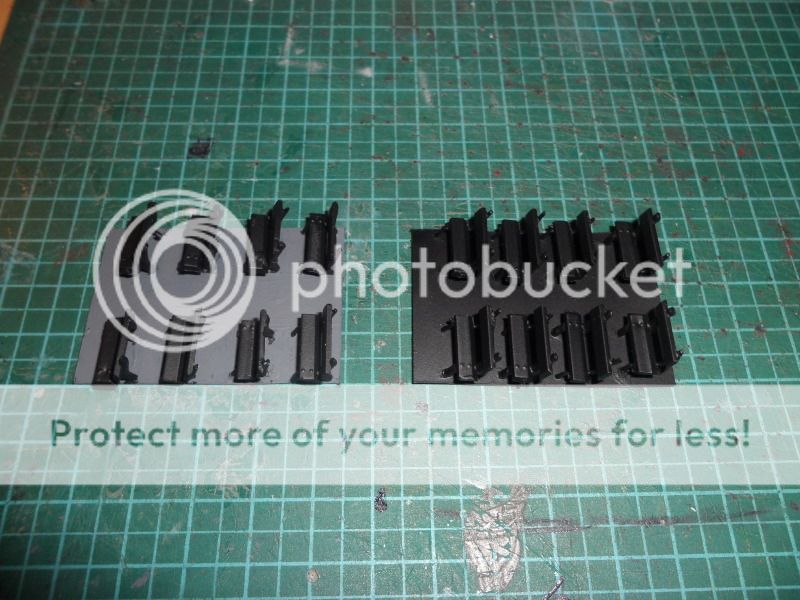
The original seats were made from the peco benches which go on the platforms. Luckily I managed to remove these and not damage them too much from the original coach. The seat / bench is cut in half, new legs and back support is made from bent nickel coated copper wire, and glued in place.

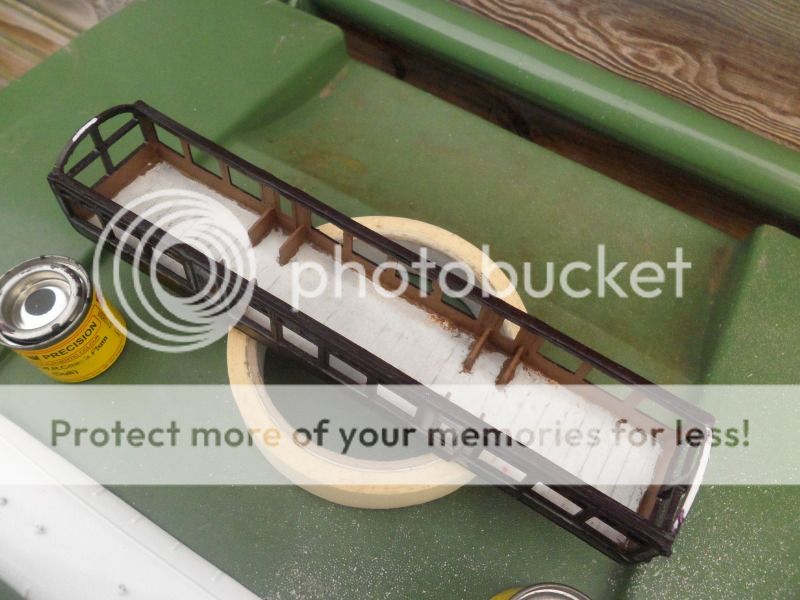
Its too fiddly trying to position the seat with in the coach. So what I did was to get some 10/000 plasticard and cut them to side of the areas i was adding seating too, which made it a lot easier to fit the seats… and also paint them.
Once the benches are done, I painted them with Halfords Matt Black… Once dry the base is painted with a gunship grey acrylic paint.
Sep 01, 2012
Today marked the end of the LNWR project… which has been on going for 2 and a half years.
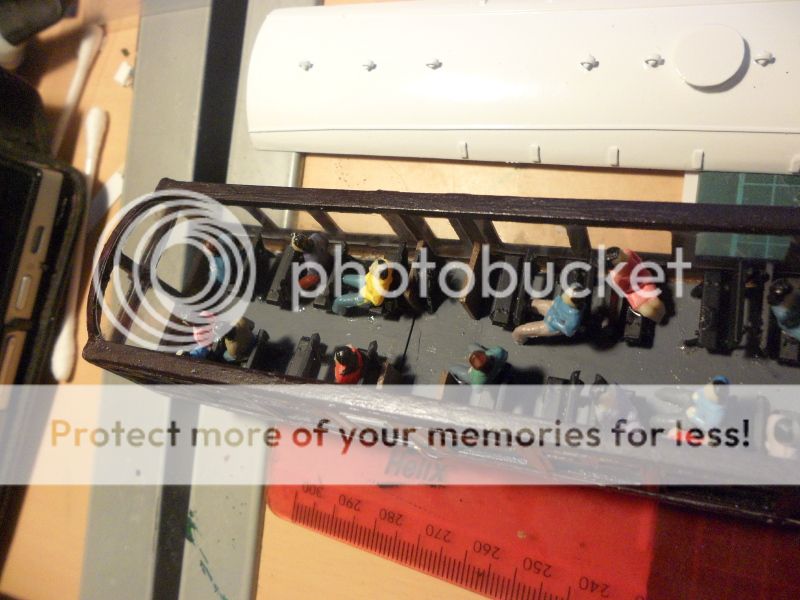
After the passengers were checked and made sure they were firmly fixed in position, next part was putting in the windows… I went for the old fashioned method. I did a number of tests on random bits of clear plastic with glues. To basically hold the window plastic in place… i basically put small spots of superglue gel in certain places and put the plastic in.
Once fully stuck down, I added some Liquid poly which seals it in nicely, as it seems to go in to all the areas there is no glue and not effect the viewable area very much.
I left the coach a day or so, just to make sure the windows were ok and the glues didn't react… which happily they didn't!
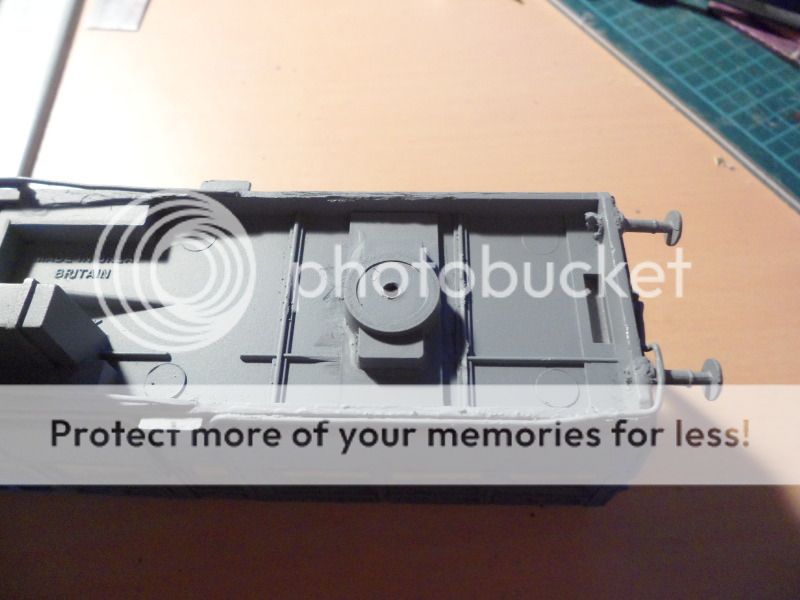
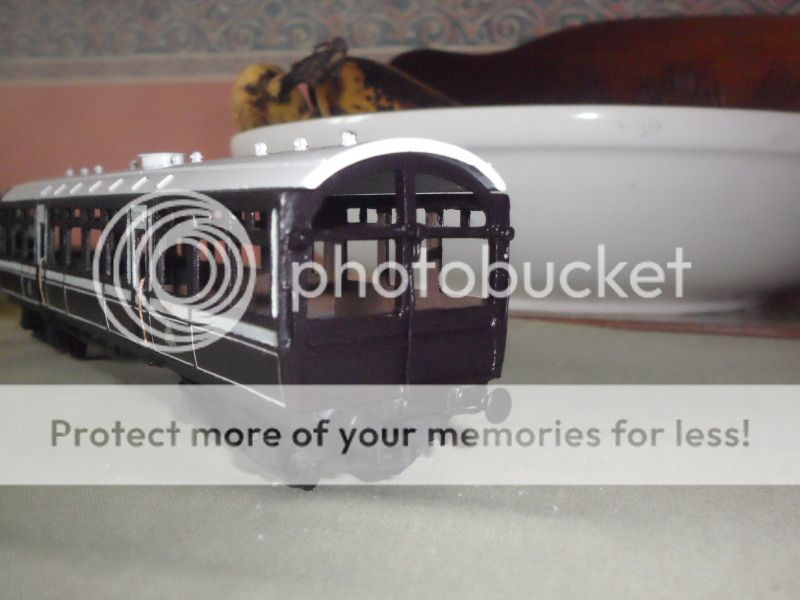
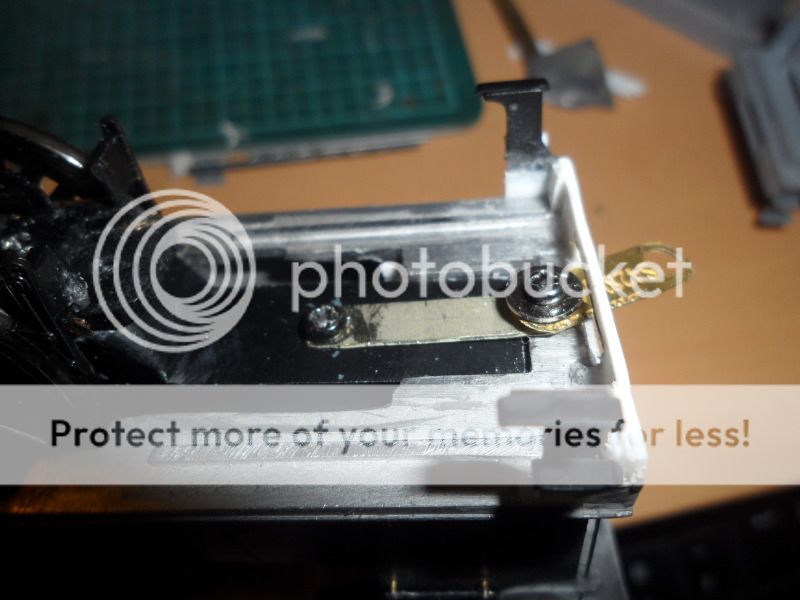
Next part… toping out of the coach, putting on the roof, the part where you can't go back and fix anything… and hope everything is glued in place as well as it can be. I Glued the roof on with superglue Gel, and the rood was held in position with a method showed earlier on in this thread with the LSWR brake van. The roof was glued and placed in position, and then elastic bands were put around the coach and left over night to dry.

This morning I took off the bands, to reveal the finished… or nearly finished coach… a little touching up was needed on a few areas nothing too noticeable… and then I lastly glued in place the destination boards to the roof.
Then the coach was taken to the layout and tested ok, didn't have any issues no de-railments which is always a good… so the final photos could begin… all be not sure what's wrong with my photo skills recently as most were bloody awful, but some came out ok… so here's the finished coach…..


Posted
Full Member
 thumbs:thumbs
Terry
Posted
Full Member
Posted
Legacy Member
reg
Posted
Full Member
September 5th, 2012
Project P has been on going for a number of weeks, and currently it is at the painting stage… so I thought i should start writting it up.
This kit is a SECR, 0-6-0T, P-Class. The kit is from Dean Sidings, who makes Resin based bodies which fit (with some modifications) a Ready to Run Chassis.
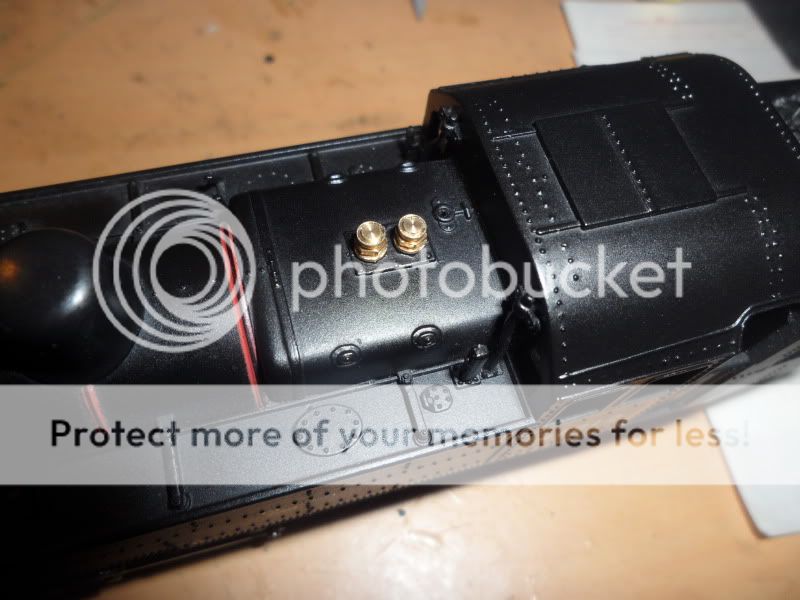
The kit is around £52.50, which sounds alot but its not bad really, the kit comes with a standard resin body, a number of castings for the kit (Dome, chimney, safety valves, clack valves, steam reverser, whistle, Boiler backhead, tank filler caps, Buffers, and steps, as well as a few others)
It also comes with hand rail knobs, and smokebox dart.
So its pretty much a complete kit, all you need to provide is a Terrier chassis… made by dapol or Hornby.


First thing to do, is to clean the body up, Dean Sidings body's are pretty clean and not to much tidying is needed, some around the windows, and around the boiler and tanks area. Once this is done, you can then go about fitting a few items. A word of warning as always… take care when drilling or screwing in to the resin too tight a fit the body will split… so take your time.

Firstly added a number of white metal castings to the body, such as dome, safety valves, and the chimney. A small hole will need to be drilled in the body to take these. 2.5 - 3mm drill bit. Again drill with caution.
Buffers used on this kit were not the ones provided. I chose to go with Markits SR stepped type sprung buffers as I believe these are the type which the Bluebell P's have on them.

As you can see a few items have been left off like the pipe work around the safety valves and the clack valves and steam reverser. This is due mainly to the reaon it will be eaier to paint and line the areas with nothing in the way.
The chassis.
This is a chassis from a Terrier purchased from a good friend on my Facebook group, and comes from the Hornby Thomas and friends Stepney model. The model was taken appart and cleaned ready for the modifications to be made to the chassis.

First bit of work on the chassis, envolves chopping off part of the rear, the amount to cut off is about 5mm, or basically just behind the rear Sander boxes on the chassis… showen hear on the picture below with a red dotted line.


After this minor piece of surgery, the wheels and chassis are primed and ready of paint. The livery will be the SECR green livery with Brown frames.

……………………………………………………..
Part 2….
Whilst the chassis was in the painting stage… I continued with the body…
Most white metal fittings had been added by this stage, and was thinking of priming it ready for painting… for some reason I changed my mind.. I decided to look at my 2 previous P-Class builds… and decided to detail it a bit further. On my previous kits, I had not added any Lamp / Disc irons on the front or rear of the loco.
On this one how every it was about to change….
The lamp Irons added to the loco were made with what I call Cotter Pins… these pins came with a loco kit i purchased a few years ago I kept them for any prupose i would find for them later on… I used them on the Q1 replacing a missing lamp iron on the buffer beam..
I bent the pin in to shape for the buffer beam, and the smoke box which was pretty simple and easy with a pair of pliers… and a 0.3 mm drill bit. They came out pretty well….


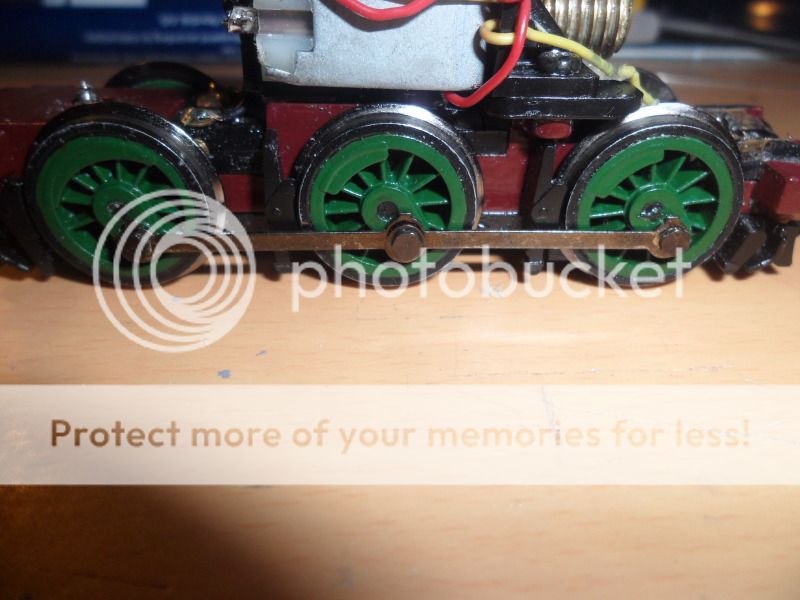
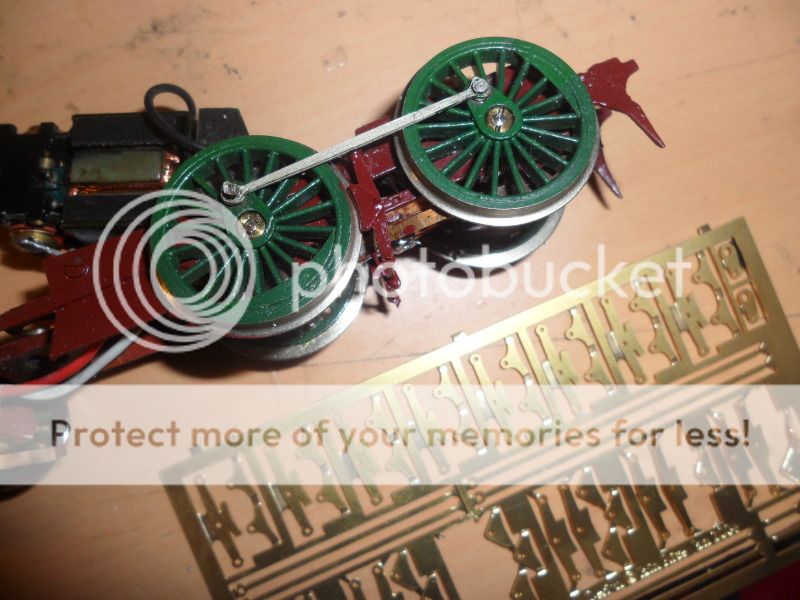
Back to the chassis… the main chassis and wheels had been primed, ready for painting.. the chassis will be painted, SECR Loco Brown P576 a few coats was needed to fully cover the chassis…as can be seen the wheels were still in grey primer… these would be later painted the SECR Loco Green P575, and Satin Black outline from the Humbrol range…

After painting was done, the re-assembly on the chassis could begin.. Firstly on the bottom plastic plate which holds the wheels in place, the Brake rods which on terriers run on the outside along side the wheels, needs to be cut off… to give the chassis the correct appearence… you can do this with a knife or some cutters… and file any excess off….


This was the re-assembled with motor and complete wheels which had been varnished and then given a test run, which went well… this was done to test the newly placed pickups under the cab.
Having a close up on the finished chassis you can see the rear pickup has moved a long way forward. On the plans done by Dean Sidings it says to move the rear pickup under the chassis… which I didn't like too much as it required alot of moving around wires ect…
This method which I do… the pickup block is glued in place between the 2 sander box housing… the pickup block is shortened as well as the bronze pickup strips and bent to what I need them to be…


You can see a comparison on the shot below… Gives you some idea of how much is cut away…

Also this chassis being a Stepney chassis from the Thomas range… ment the connecting rods were red… after a small investigation it was found the rods were painted without chroming them first… so a visit to Abbiegails Hornby spares web page was in order and purchased some chrome connecting rods at a very good price. This shot shows these installed as well as the finished wheels.
…………………………………………………………
Part 3
With the chassis just about complete. Attention turned to the body once again.
The next thing to do before painting, was cab detail. In the kit there is a Backhead casting…no floor, or surrounding parts. The casting position was marked out on a Plasticard card, which is quite far forward 3.5mm from the front of the cab, to give clearence for the gears and motor. The small square area cut out is to allow the fixing srew through.

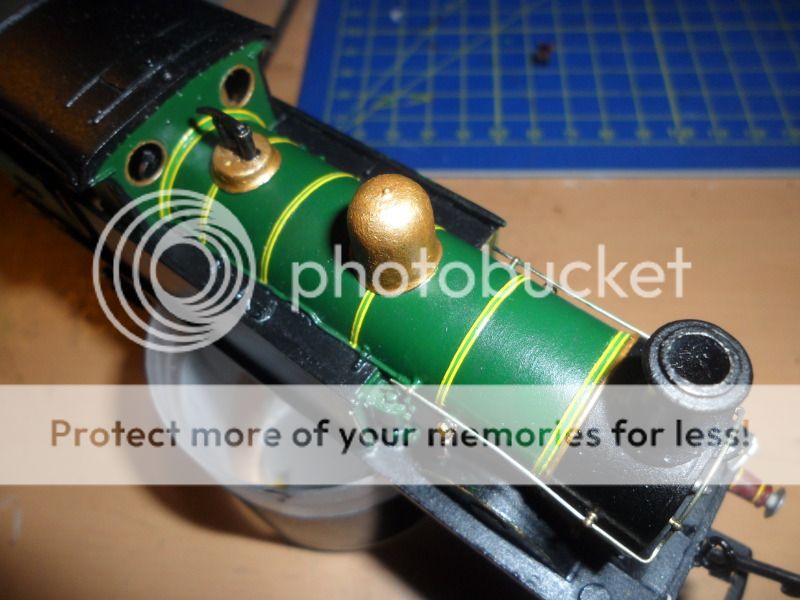
Some additional pipes were added around the boiler to add a little, as the boiler back head is a bit bland and flat…
pipes were made and bent in to shape using some nickle plated wire.

Meanwhile the body was ready for primer, I use Halfords primer, available in a few different colours, white or grey, are the ones I usually use. I apply 1 light coat and look for any areas that need sanding down and levelling and then add a second.


Some painting can now start after priming the body. The paints I use to have accurate colours on these are Phoenix Precision Paints. The start of painting began with the running plate, this in SECR was Loco Brown (P576).
A glimpse of the trail fitted cab which has also been painted up…


As far as the painting goes.. I started out with the main green colour of the livery, SECR Loco green (P575). Some gold parts were then painted, then the lighter green lining and boiler banding, which is called SECR Lining green (P579). Following this the darker colour of black is applied to the roof, running plate, safety valves and smokebox.


Before the buffer beams are painted, a small hole was drilled in the centre of the buffer beam to take the small Hornby detailing screw link coupling.

Once complete and a trail fitting undertaken, once ok, the buffer beam was then painted, as well as the top of the safety valaves. This was then completed ment a start on the final part the transfers, which will be coming up in the next part.
…………………………………………………………
Final part of the P-Class Build….
Last time the loco was painted in its base colours, SECR Green, Black, and SECR frame brown, and any other colour you may find on a loco…
Anyway the fun part of the SECR livery… the lining… yes there’s a lot of it… one of the more complex liveries… which is being Tackled by Bachmann at the moment for their C-Class… I feel sorry for them….
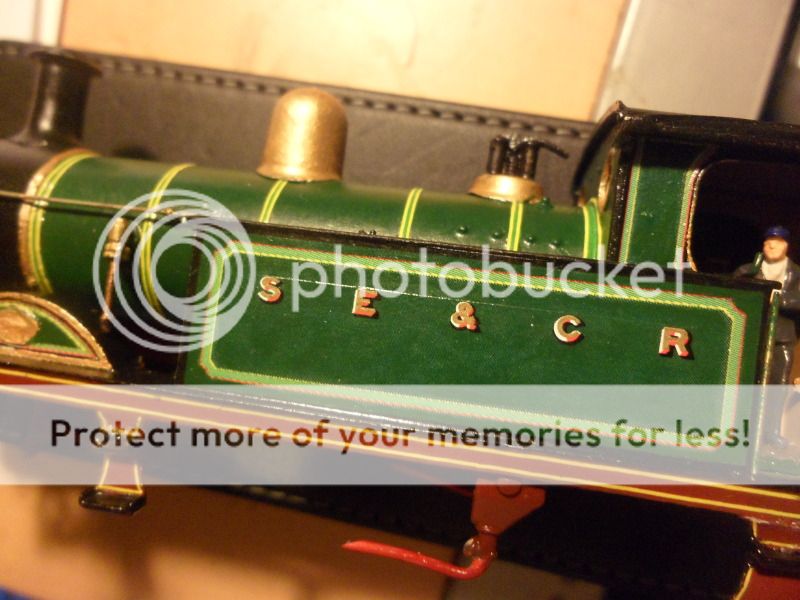
Anyway so the SECR livery… here’s how it looks on a P-Class… As you can see black and red lining around the edges… boiler bands… have 4 lines, 2 outer red and 2 yellow in the centre. The bands themselves and the pattern on the tanks and cab, are done in a lighter Lining green (P579), This is outline again with lining yellow on the inner edger and red on the outer edge.

I wanted to take this build to the next level and do the whole livery and get as close as i could, to the SECR livery, and find ways of doing this as it’s a complex livery to do.
The plan was as I have done before…. to do the patterns on the tanks and cab, I would make my own transfers… with a little help from the Bluebell…. I visited the Bluebell end of July this year… typical of my Luck the night before I learn the P-Class 178 with the SECR livery one was not working due to it being broken.. luckily thanks to the H-Class being returned to service… I could use that one instead…
I took a number of photos of parts of the livery, so I had something to work from….


After my return from the Bluebell I spent around 2 weeks trying to get what I wanted… The difficult park was colour matching the paint with the Laser printers toner… you will never get a 100% match….
Firstly using Crafty Computer paper, water slide transfer paper for Laser printers… I experimented with various types of paper… as you can get clear… or white backed transfer paper…
First off after 2 weeks of drawing I had my first batch to trial on the kit…
These were designed for the clear backed transfer paper, so that the green behind would show through thus being the correct colour… sadly this did not work as the print wasn't strong enough, and pretty much blended in with the backing colour… so back to PhotoStudio….
A week later, I had coloured the back ground with the same SECR Green… or close enough to it…, and did a few test prints for size and colour match…after several tests i fixed the size and colour, and the resolution, and also drew boxes round transfers so i could position them correctly… all be one didn't come out quite as expected but believe i know why…. so Take 2…
First Image was the test piece which I did on some spare transfer paper… these were too large and were decreased in size to around 207 DPI.

The final transfers ready to print…..

Lining out continued on other parts of the loco, the Boiler bands were lined out and fixed in place with some clear varnish… The old waterslides on the cab were removed the next day for the newly re-sized transfers…

So D-Day had arrived…. the new waterside transfers were printed… and applied… amazingly to the right size… which was good… so the plan was working… many may say why not to the whole size lettering lining the lot…. that’s too easy… I have to make it difficult! Anyway this is how it looked after the initial application….


All be the colour of the transfer was not quite spot on… I took the decision to try and blend it in with the surrounding paint work on the body… so using the same paint (p575) I blended it in with surrounding body colour… which was done very carefully….


After leaving it to dry overnight, I returned to kit to make a start on the black outline of the tanks, cab ect… this would then be later lined with HMRS pressfix Red lining. During the morning, I had also started lining the running plate, with Yellow HMRS pressfix transfers. The black lining was hand painted on.

A small hole was made to accept the steam reverser casting which was yet to be fitted… which will be done after all the red lining had been completed.


………………………………………………………………………………………………………
So on to giving the loco its identity… Fox water slide transfers were used for the tanks, on the rear of the card, it says these transfers were to be Used on P-Class locos… well… I must say there a tight fit, looking at various images of P-Class.. the lettering seems to vary in size… but having no other transfers… apart from ones being exactly the same size… I decided that I could just about make them fit….

All lining and transfers were sealed in with Vallejo acrylic varnish Satin, and left to dry over night.


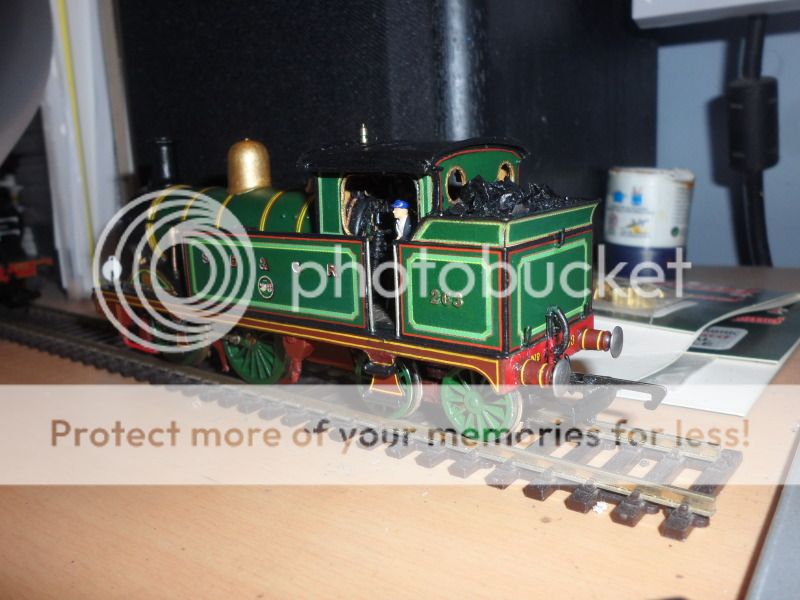
Next thing was to give the loco its number, this P-Class being Primrose, being numbered 27, instead of a plate on the side of the bunker… this P-Class had brass numbers on the side, which I followed on this occasion, and the numbers are Etched brass available from Roxey mouldings… They were glued on with a tiny amount of Superglue Gel.


The kit then received the numbers on the buffer beam…all be these did not come from the SECR sheet, looking at the SECR locos the P-Class had yellow shaded with black outlined numbers… so decided against the gold ones. These applied, and then a final coat of varnish applied…

……………………………………………………………………………………….
Before the last varnish which was to be an all over spray of Vallejo Matt Varnish, the components left off to ease access to the body were put on….


………………………………………………………………………………………
The loco was left to dry and assembled in the morning… and taken for a test run… all ran ok no issues… so off to have its picture taken… the Last P-class I will do for a while is complete.


 Last edit: by BMR2011
Posted
Full Member
Oct 26, 2012

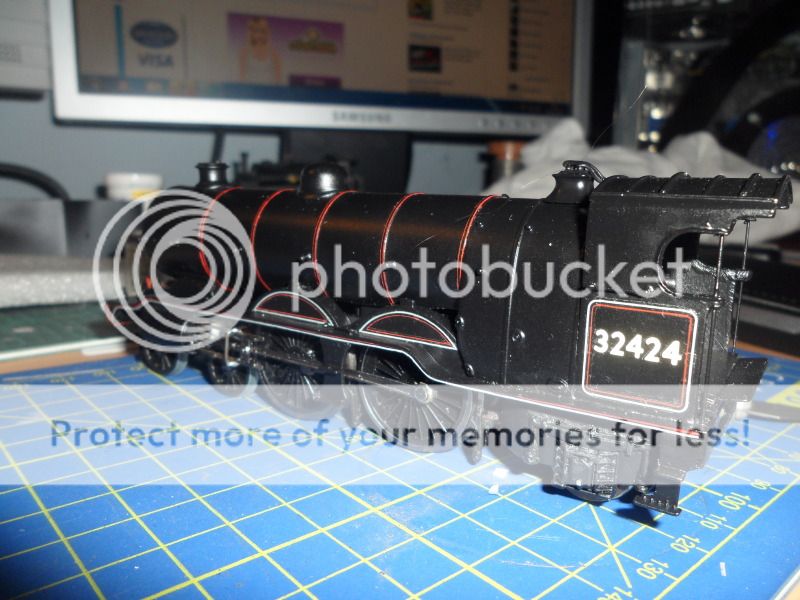
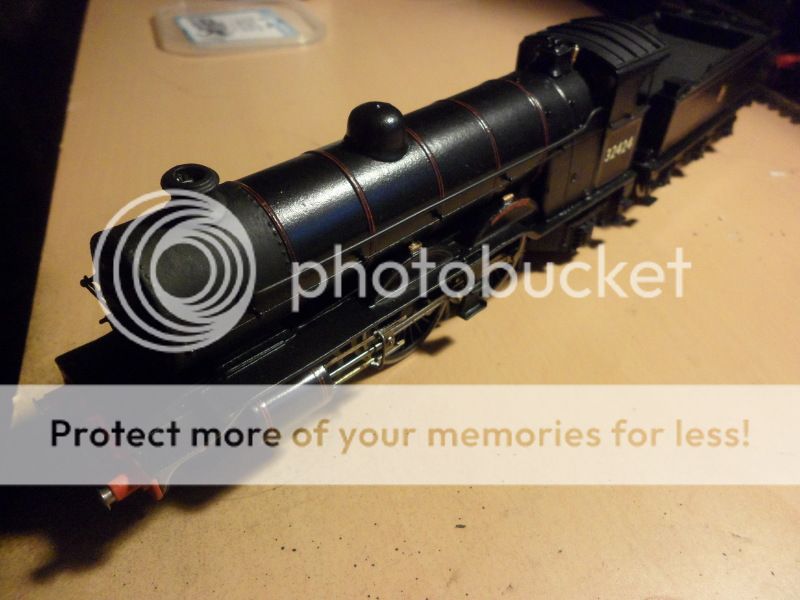
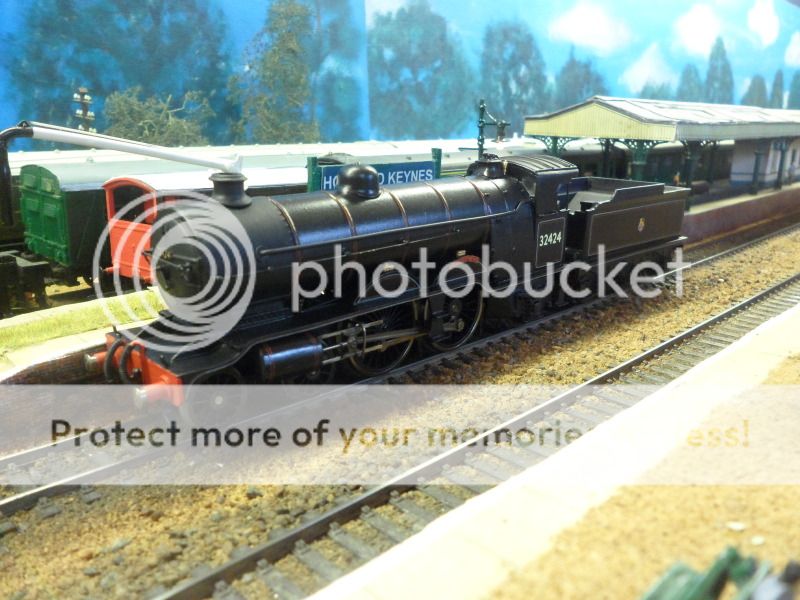
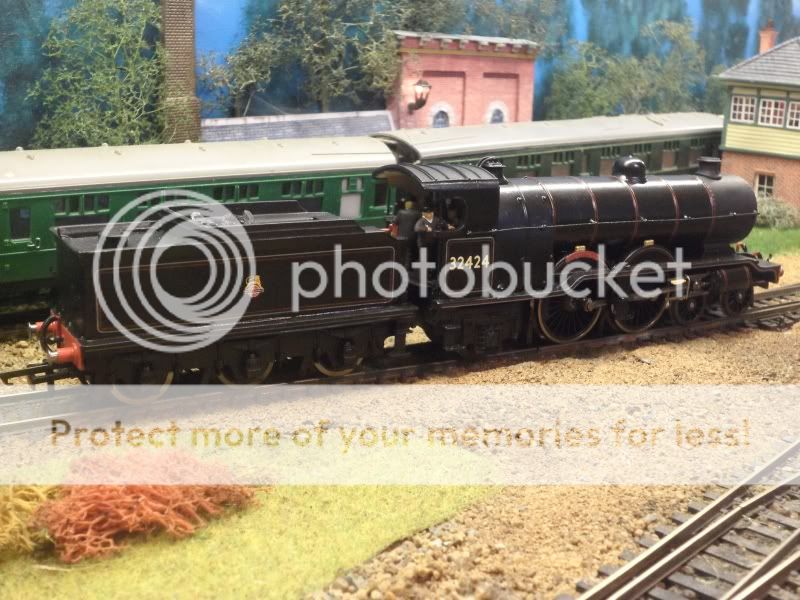
So… The beginning of Project Madness (LBSCR, H2 Atlantic)
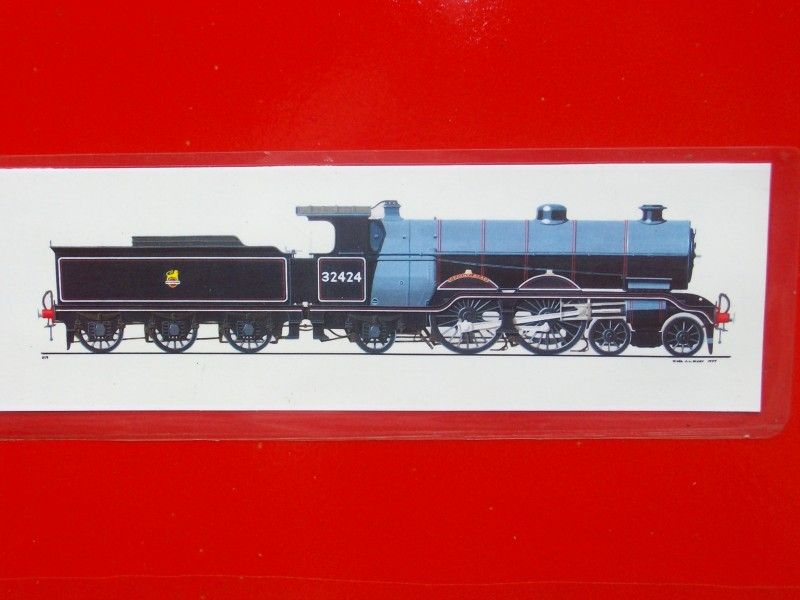
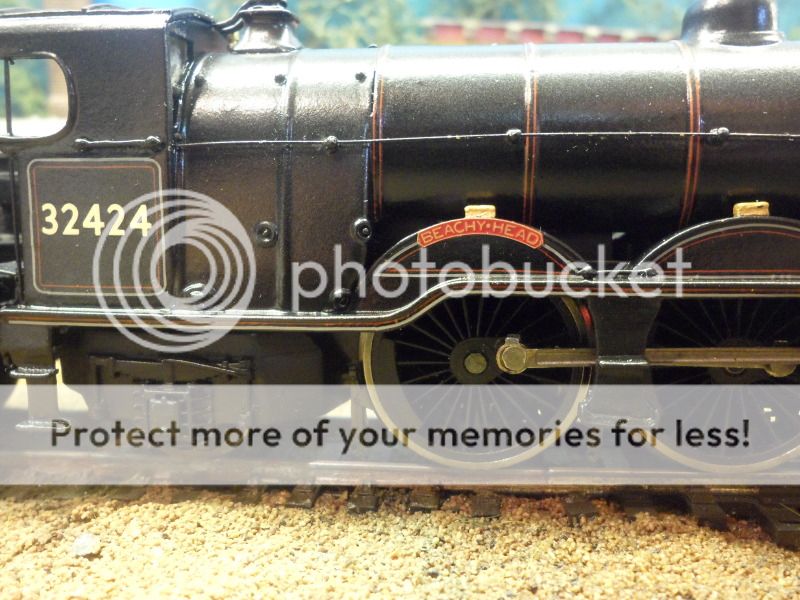
Everyone knows none of these beautiful locos exist, or were saved the last one, 32424 Beachy Head was withdrawn / scrapped in April 1958.
The Bluebell Railway, is currently re-constructing Beachy Head using GN Atlantic boiler, a LBSC B4 Tender chassis, and using the original Regulator handle form Beachy Head, with the rest being built from scratch. A project which is still on going, which may well be complete in 3 - 4 years, with a near rolling chassis.
So got me thinking it was about Time I looked at doing the H2 atlantic… to me a nice locomotive, and looks elegant, when at speed, plus not many 4-4-2 locos are produced by RTR manufacturers… well maybe in the future… but not right now.
So How to go about this project… there are a number of kits available, Falcon Brass, Ace models, DJH… most being brass, apart from DJH, but the chassis was brass… and do not have the equipment to build an etched brass chassis. So what were the alternatives…. well not many frankly…
I had planned this project out in my mind for around a year… but it wasn't until I got talking to Dean Sidings again when I brought my P-Class did he give me the idea. Dean Sidings was to produce a Resin body H2 Atlantic… but was delayed due to a lack of alternative for a chassis. He told me that the chassis they were looking at was the EX-Dapol Castle Chassis… now under the Hornby name.
I looked at several… but the point of where the motor was mounted and the wheel spacing on the driving wheels.. just were not right… so It looked as though I would have to abandon again… but later found out… Hornby reproduced the Castle / Hogwarts castle with a newer chassis.. which drove the middle driving wheel which had a traction tyre… which would date to Mid 2000's.
So I managed to get hold of one and also a body from ebay for about £30 - 35. Which is not too bad, before everyone wonders… why use a castle… its the closest to the Atlantic's wheel size you can get and also the wheel spacing… Read on and find out…

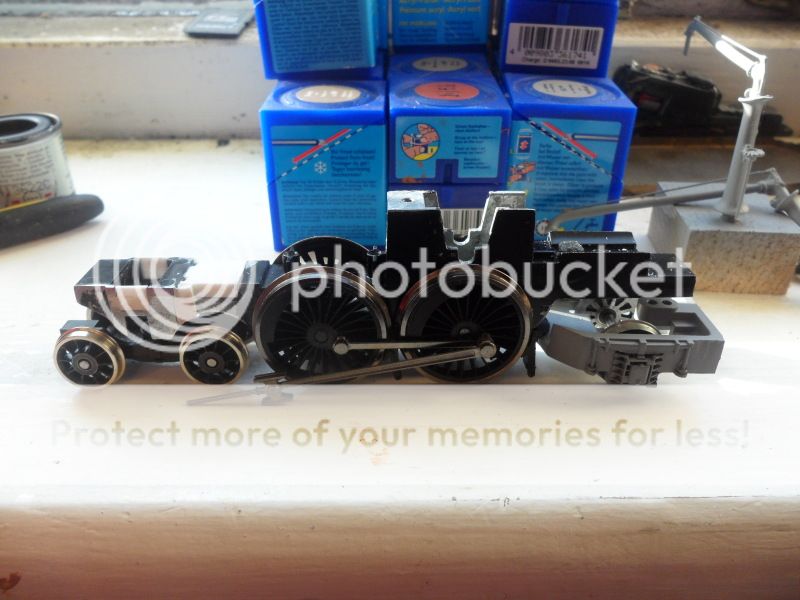
So A Hornby, Hogwarts Castle for a base… this was the first loco for the project, and was to be the main chassis. How many more locos would be included in this build…. lets see if you can guess…. as I can't remember already!
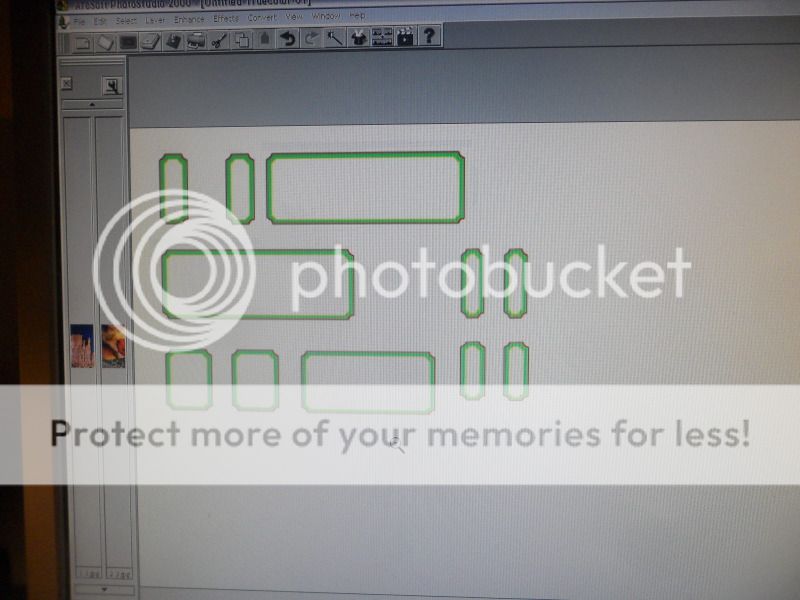
First job was to get some measurements from H2 kits… I got the length… and various measurements and converted them to OO sizes. Then I could re-size an image which I took at the anniversary back in 2010 of a painting / print of the H2 done by Matthew Cousins.
This then became if you like a guide to the build giving me rough measurements of parts and items to source. The chassis was disassembled, and checked up against the print out, to make sure sizes and measurements were correct.

Then the planning of cutting and parts came in… what to use…
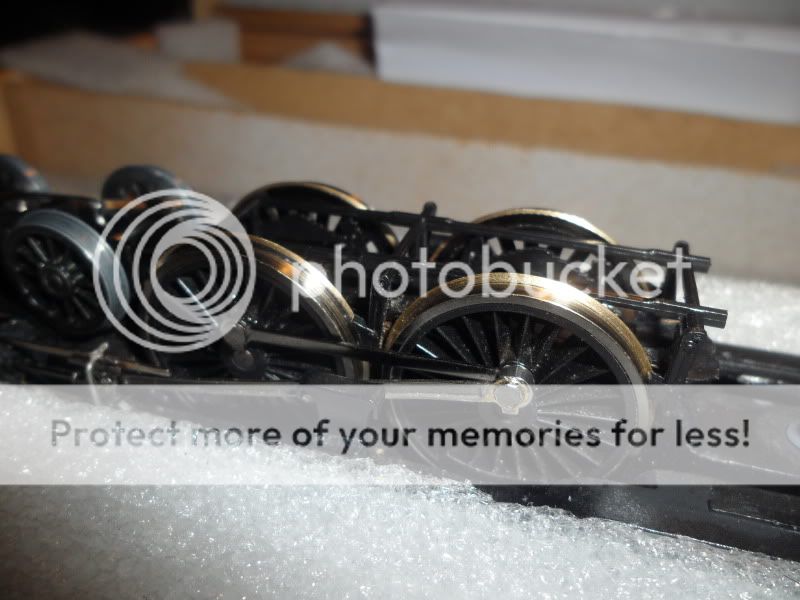
I used the same plan to firstly buy the front bogie… as the spacing on a Castle was too wide… I managed to find a Clan / Britannia bogie. I then replaced the wheels with 14mm ones purchased from the Rails of Sheffield which strangely arrived in a very large box…
Next item was the trailing wheel set under the cab, I purchased a A4 / A3 rear trailing wheel set… which needed alot of modification to fit, a new 12mm wheel was fitted to this as well, replacing the old hornby set.

So up to 3 Ex-Hornby Locos….
Now with the components to make the chassis… i then cut the mounting for the last set of driving wheels off, to make space for the rear wheel set.. now making it a 4-4-2. was quite hard work…. then harder work trying to find a way of mounting it to the chassis…. I cut down the arm which had a hole to attach it to the loco it was intended to go on, and moved the hole closer to the main trailing wheel, so it would have a shorter swing but was in the right position for where the wheels should be.
The first set of castings arrived from Ace Models, a Chimney, a smoke box door, a Backhead, Dome, and Safety valves… which was around £20… which was quite a bit more than what I was expecting… but still least I had some H2 bits!

So 4 locos so far… and more to come!
The latest problem I had was the motion, cross head Cyliners… the length of the stroke was also an issue… but scaling up a hornby photo of a couple of GWR RTR locos soon found me the solution…. the 2800 class. The locos main connection rod from the cross head to the driving wheels was the correct length… and the cylinder and slide bars were not far off as well… so ordered a set from Abbiegails spares…. Alot of re profiling was needed on the cylinders to get them in to the right shape… but more on that later!
More casting news… I contacted DJH, the only main White metal kit for an H2, after much pleading on forums to get an Instruction manual for the kit to order some castings for this project… the day finally arrived were the main body could start…..
But they sent the wrong parts… instead they sent H1 parts but at least I could still make a start… it was sorted out a few days later.

Above the wrong running plate… this one for an H1… if anyone wants it I still have it.
Next part soon.
………………………………………………….
Part 2
So the chassis and various motion was sorted… which was quite a big task… the next thing which was a project all in its self… How to fit a kit body to a RTR chassis…
After a few days of confusion over who made a cock up on parts from DJH, I now had the correct ones.. The parts I ordered were the following:
- Boiler casting
- Running plate
- Cab
- Sides of tender
- Smoke box
- Smokebox door
This was a bit more value for money… only costing £31 for quite large castings.. as i was expecting a lot more so far the bill for this project was in the mid £80's when a full kit for an H2 was around £150.
So to work… amazingly not much work was needed to mount the running plate on the chassis.. as the mounting holes on the castle were not too far out from the casting… only bit of work needed was to lower a section of the chassis after the main driving wheels and around the cylinders. The body needed some modification to accept the larger motor and gearbox… but wasn't too bad.

After the main concern was addressed, i turned my attention to the fitting of the cylinders… working out where they would go and the length of the stroke as the wheels rotate. Strangely they end up in the right place… according to my rough print out… maybe Hornby could save some money here and do it this way too?
The EX-2800 GWR cylinders were re-shaped… and the wrapped up in 10/000 plasticard.
The chassis rolled freely with no problems at all… which was a bonus… the cylinders are glued on to plasticard… which was put there to fill the gaps around the bogie where the old castle cylinders were.


Taking a break from the loco end… I decided to tackle the main part of the conversion which was going to be difficult and rather painful for one of my fingers but anyway… to make a tender base / chassis, I decided to use the Hornby Castle chassis…
The Castles tender is quite a bit longer than the H2 tender… I purchased the side tender castings from DJH to guage how long the tender needs to be… and to find out how far my Roughly sided picture was… which turned out to be around 0.5 - 1mm out which isn't bad.
The tender chassis turned out to be 3 - 4 mm to long… so… this could be interesting…
Very Nicely an error by DJH turned in to a good thing the sent me the under frame of the tender for the kit… which turned in to a good guide on wheel spacing… and how much to cut and from where…between each wheel on the frames i made a cut which reduced the length by 2mm. So 2 cuts and the frame was 4mm shorter.
The 3 sections were then glued back together and strengthened using plasticard in certain areas then filler was used to hide and cuts. Some plasticard was then used to lengthen the front of the frames where it connects to the loco.


So on to the Tender body itself… again I shall use the Hornby tender… which I cut the Tank off just leaving the frame and the running plate…. which sits on the tender chassis. Again I shortened this up so it would fit. Then strengthened the body up using plasticard.
Obviously as stated I have the cast tender sides… but what about the bunker, the back and the front?
From ebay for a couple of quid… I purchased a tender top from a Sell one like this Hornby L7353 Flying Scotsman /Mallard Tender Top… all be not sure about the Mallard part…

You can sort of see Why i brought it.. as it was sort of the same… but anyway 50% went in the bin. What was the reason for buying this? well not only for the front and back… but to save weight. Having got locos with full White Metal tenders… some locos struggle just to pull the tender let alone the coaches behind… so its a battle of getting enough weight but not to much… so the only parts of the tender which were white metal were the sides, front and back from Donner tender and the coal space made from plasticard… using diagrams from the instructions and photos.


Thats the main building part… Part 3 will be adding more bits and pieces detailing ect…
…………………………………………………….
So since last time the main building construction work was done….
Part 3
This really is adding on the little bits and finishing off before painting.
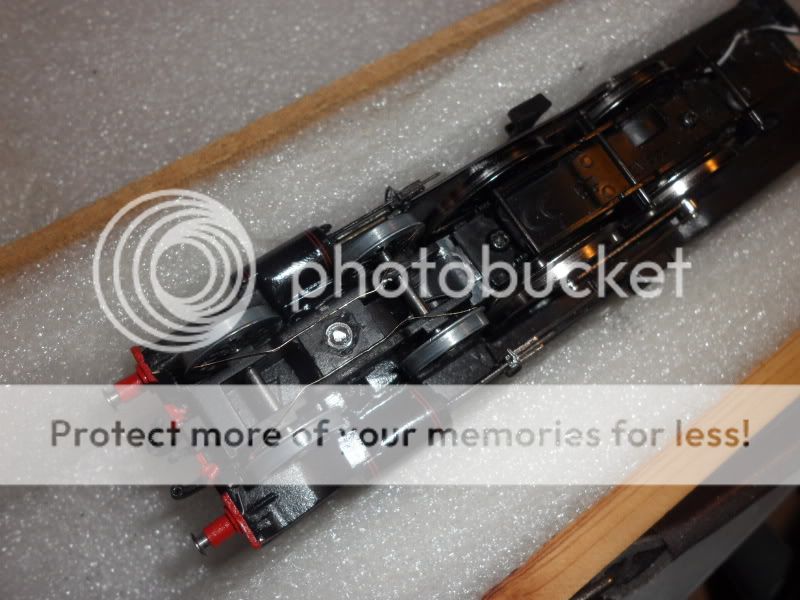
Before that I decided to Test the chassis… as every thing had been connected and freewheeling for quite a few weeks.. This would show if my mad plan would work… or it would fail… so time for the rolling road…

Click view video.
As can be seen it ran OK, quite alot of movement but thats to be expected when theres no weight on the chassis, should settle down with the body on top, the advantage to having white metal bodies.. weight = traction.
Anyway detailing, On the tender Lamp / Disc irons, holders, these were made from some split pins, bent in to shape with some pliers, drill a small hole and glue and fix in position. The split pins were brought from mainly trains and they were 1/32 inch, by 1/2 inch.
Also you may of spotted newly installed brass buffers, these were purchased from Ace models.. as I saw from a picture theres had LBSC buffers… and brought a set for a reasonable £5.50.
Also found in my spares box is a brake column i guess from the B4 kit, and also not pictured tool boxes on either side of the coal space.


I did have a small go at making my own steps… but they didn't come out to well, trying to use some 30/000 plasticard, and off cuts of brass for the steps… i made a couple but didn't think they would last too long… I put the loco on the desk and thought about it for a little while… returning for drawing up some plans for guitars ect, it suddenly dawned on me…

You can also see on this image above some 1mm brass was ordered from ebay, and bent to make i guess the blower pipe from cab to smoke box.
My H2 was was sitting right next to the answer all the time… my N15 which I don't run much as it won't go round the corners… but looking at the cab / tender steps compared to the print out I have… they were pretty close… so an Order went in to Abbiegails Hornby spares… and to sets of detailing for an N15 arrived, heres a comparison….
Also purchased some small handrail knobs to do the loco boiler, and also the medium type, which will be use mostly.


After some additions to the tender… the tool boxes and also the back of the coal space, the tender was then primed… and any issues filled and sorted,, ready for painting.

The Loco….
So on to the loco… firstly I worked on the back-head which i brought from Ace Models, I have extended the back of it by 2.5mm which some plasticard to made sure there was room for the motor. Other issue with this motor is about 2.5mm of motor shaft sticks out the back. Sadly this meant leaving some space, or in other words drill in the back head before painting… anyway, sadly on these things… you sometimes have to compromise.
A floor was put in the cab, which sits around the tail of the Hornby chassis.. and rests on a lip around the top edge. this raised the height to be just equal with the floor on the tender.


I then turned attention back to the buffer beam, adding various pipework and due to my N15 part order I also took the 2 spare Couplings from that and added those to the tender and loco buffer beams. As can be seen in this picture the hand rail knobs have been fitted, to the smoke-box and the boiler, these are the medium type, as well as the smoke-box handle.

After this I also did another test run of the chassis but this time with loco body, I made some adjustments to make the slidebar a bit more smooth running to cut down on some movement, and lubricated the gearbox.
The weight of the body or modifications made to the various parts seem to improve the performance….

Click image for video.
On to the loco roof, which didn't exist, now it does, made from 20/000 plasticard, and also fine plasticard strips which i purchased for another project which I believe was the LNWR observation cars roof, The Styrene strips 0.4 x 0.5mm were used to go round the edges and across to the roof to create the ridges.

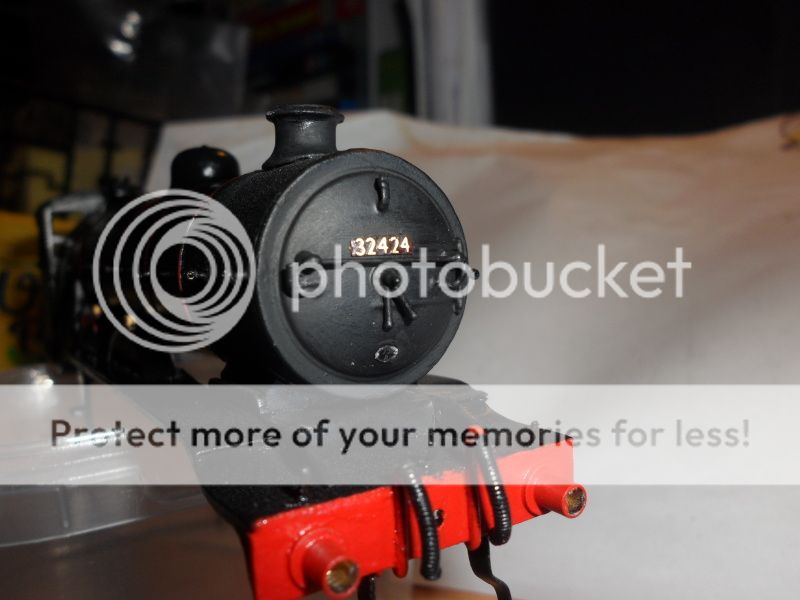
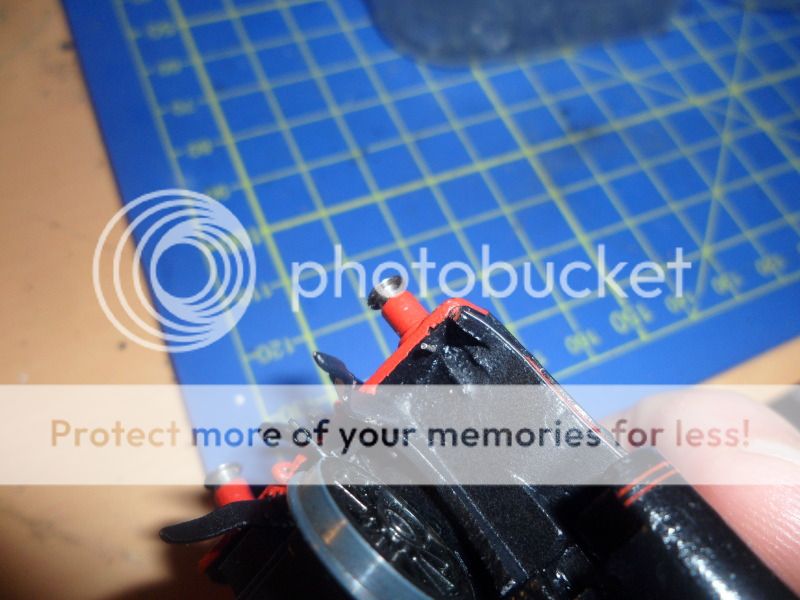
The Safety valves also got some attention… the safety valves on this Atlantic are a twin lever type.. unlike the one you find on most locos. I drilled 4 holes, 1mm Die, and inserted some wire in to the holes, I tinned them with some solder, then went back to the trusty split pins and bent 2 in to the shape of the levers above the safety valve housing. which came out ok. These were then soldered on to the wire bases.
Same split pins as before, on the right you will see one already bent ready to be copied.

Back to steps… I made the final 2 steps which are located between the 2 driving wheels, these were scratch built using 30/000 plasticard, 20/000 for the middle step, and 10/000 for the bottom step.
Also some had rail was added to the cab hand rail knobs, as well as the smoke-box. Also hand rail in the cab area was fitted… this is not normal hand rail wire I'm using… old guitar strings are used… saves some money…. seeing as I'm around the £105 mark.


Another addition to the front of the loco was the guard irons which are placed in front of the leading set of wheels, front and rear, to avoid anything going under the wheels. These were made up from spare bits of brass, and bent in to the shape required.

More work on the cab, a 20/000 plasticard was fitted to the cab floor as well as some more brass to make the fall plate I think its called… this worked out quite well, and was glued in to place sandwiched between 2 layers of plasticard, the back head was also trial fitted. and was enough clearance around the shaft.

Part 4 - Connections and painting….
…………………………………………………………..
Part 4
In the last installment, the loco build was pretty much done….
Now the tricky part… fitting the body to the chassis… now its been lust resting on the chassis.. and not fully attached with screws. One fixing position was pretty simple.. between the 2 cylinders, in the original position as the old fixing screw… all it needed was countersinking, as it lined up perfectly with the hole in the underside of the smokebox…. and no I did not plan that… pure luck!
Generally I want 2 screws holding the body on the chassis one at the front, and one at the back….
The back was very tight and very compact…
I had to some how… put a screw in to fix it to the body, thus avoiding the swing of the trailing wheel, and also some how to add the draw bar for the tender….
After some trial and error… I came up with a solution.
I had to modify the trailing wheel set casting again… to increase room for the screw head, and draw bar, as well as increase the swing as well as making sure it didn't hit the screw above… after cutting, sanding and filing…. a solution was found…
Using some spare / scrap brass etch… i made a sort of bracket… drilled 2 holes one end to attach it to the main chassis… and another hole at the other end thus giving something to support the body and also have something to attach it too.
Looking at the old Hogwards castle body and bits i had ripped off it i found, the old brass housing that the screw would go in to, to attach the body to the chassis… i removed this and filed the outside down making it smooth. This would give me a nice column for the draw bar to swing on.
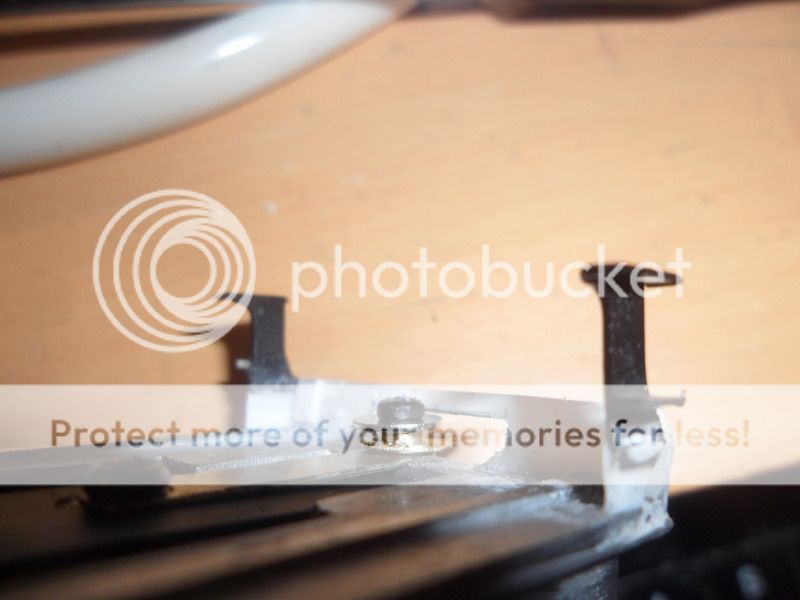
The draw bar was made up again from spare brass, and 4.5mm hole was made, to fit the plastic column in the tender… and finally the 2 were together… this solution may only be temporary… seeing as they couldn't be disconnected this way…
Painting
The messy bit… all be sometimes enjoyable.
learning from past mistakes… and other builds.. I went over this build before priming, filling holes sanding down any marks imperfections ect… making sure it was OK for the start of painting. As I say to people… I usually paint my locos with a brush… people have been asking why don't i use an air brush? well when doing one loco at a time… theres really no point… as theres alot of cleaning, setting up ect… to do before you start.
To be honest you won't get a good result unless the surface your painting on has been prepared properly… as someone once said to me… 99% prep…. 1%brush. And he was absolutely right.
The first job after spot checking, and filling any holes… was a light coat of primer… after that had dried another check… and more filling sanding, This process would repeat 2 - 3 times more… until i was reasonably happy. The primer I use is Halfords Grey primer as a base.
This is how it looks after 4 - 5 light coats.
After a final check… I was on to painting… time to put some colour or lack of it on to the loco.
The livery which I was told will be on the loco when it is complete and enters service will be BR livery Early crest, so I'm working to that.
Firstly, I now usually use Acrylic paints… faster drying and for me a bit easier to work with. Seeing as this loco is all Black… no point in hand painting this one, so I purchased a can spray from Humbrol, Satin Black. The loco was given 4 - 5 thin coats of this. The advantage of this paint it drys very quickley… so you can apply coats in the space of an hour… and its pretty much dry / touch dry in an hour.
The parts that require a lighter colour, the Buffer beams were covered to avoid getting much paint on them, when they get round to being painted.
Sometimes, you only see things when the paint is on, any imperfections in the surface as the primer doesn't have a shine to it so can't see any problems too clearly. On the tender there was a slight problem on the right side, which was easy to sort out by just using wet and dry sand paper and sanding away the high spots and then building the layers up again.
The Lining…
You would of thought after the SECR P-Class… lining and making transfers for it… that I would of gone for something with less lining….
But I didn't, again for this loco, will be using HMRS Pressfix lining (BR mixed Traffic or LNWR loco Lining) Sheet 22, for the BR logo / crest I'm using Pressfix again, Sheet 14 (BR Steam era loco and coach Insignia).
What I decided to do as I have had issues with choosing the right size numbers and the position of them in the past, so to help, i made a small template to guage the positioning of the numbers and lining. I choose to to do the number first on the cab. I took the original pint a photo I took a couple of pages back and measured the model cab, and made the shape on photo studio, and cut around the print of the H2 and transfered it on to the area i had measured, and printed it out to size. This gave me something to work from.
I started on the cab numbers using my custom printed guide. I did about 3 numbers… and stopped, as before I went on I wanted to make sure I had not put on the wrong sized numbers… checking with the other types on the pressfix sheet… these were a tad larger than the ones on the print out but all the others were way too small.

After a mail to Tom92240 you can see his O gauge works on his thread (Tom92240's Workbench - 7mm LMS Dining Car - Page 1 - New Railway Modellers Forums) to ask Tom's opinion if they were correct or looked about right, which he kindly confirmed they were, so I carried on… and also adding the lining round the outside…

After this is was on to the main lining splashers, boiler running plate…. I basically did a side a day, and did the tender last, as it had to line up with the lining on the cab, so thats why the loco was done first. Heres a series of shots of the finished lining….


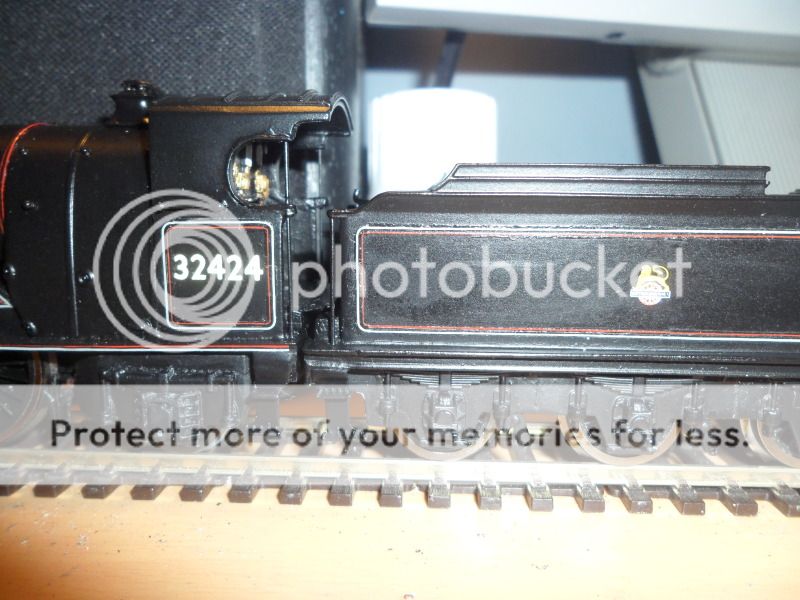
Next stage will be just adding paint to the bufferbeams… a bit more painting and then fit the nameplate, smoke box number and shed plate… and also electrical components in the tender… then it should be ready.
…………………………………………………………….
Part 5
Its been just over a 2 month project, The loco has been finished… earlier this morning at about 2am, and had a little run today.
So the buffer beam was the first thing to be tackled, painting this with Humbrol Satin Red 174, this was then varnished along with the who of the loco, was given 3 light satin coats… and a very light Matt varnish after to take the shine off.

The next part after this was a spot of more painting. The loco was done in Satin black, but leaving the whole loco this colour was a bit boring and lazy… A modeller frien Graham Muz a great southern modeller, uses Matt Back on smokeboxes, and various other parts of the loco like cylinders. You can view his blog here : Southern Railway, Fisherton Sarum, Canute Road Quay & Westhill Road – The model railway world and mainly Southern Railway meanderings of Graham 'Muz' Muspratt
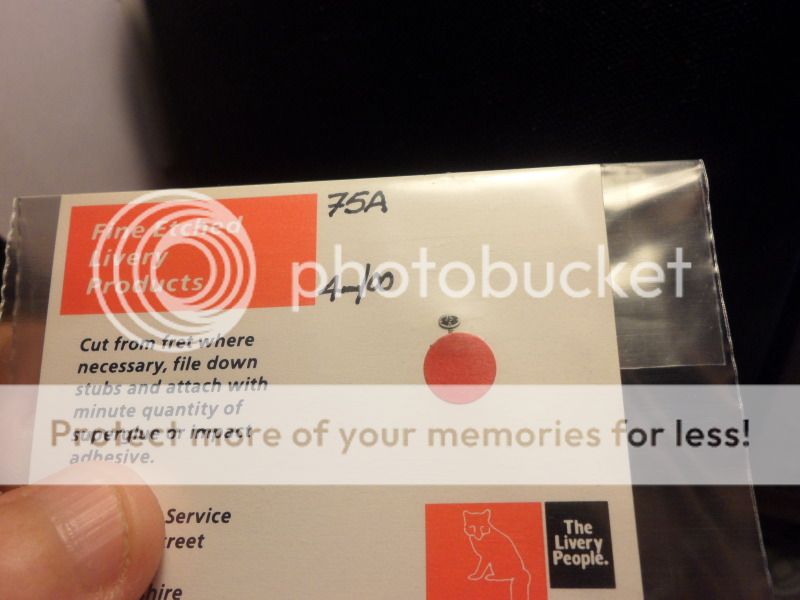
Prior to this, I also order the various name-plates, Smokebox plate and also shed plate, which was 75A. The smokebox plate and name plates came from Modelmaster…and were delivered very quickley, The shed plate was purchased from Fox Transfers. All plates were secured in to place using a dab of superglue gel.
The pipe which goes from the Cab, to the smokebox was also fitted, which was painted matt black, and also has a 1mm washer around where it goes in to the boiler. the pipe believe to be the blower pipe is made from 1mm brass rod.

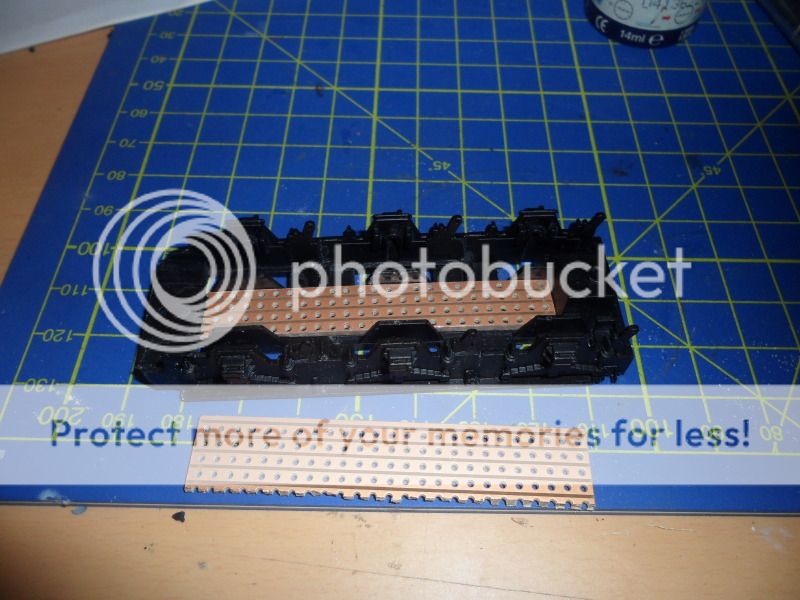
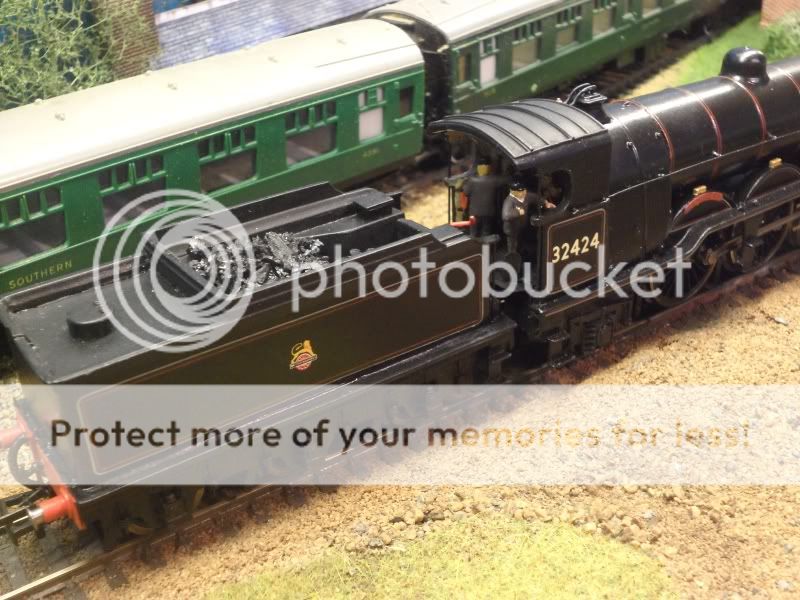
]Tender…
It was always the plan to give the loco tender pickups to help it over point work ect… Some bits were sourced from DCC supplies, Copper strip board (9 x 25) and a 2 pin micro plug, to connect loco to tender. I used some Bronze wire from the board to pickup on the back of the wheels. The board was fixed in place with 2 screws with x2 plastic washers to stop any shorts.


Some more parts added to the bufferbeam, were the sprung buffers, I have never come across these before and never have i seen the way they are secured used before. They were purchased from Ace models / products, and have the smallest springs I have ever seen, as well as the smallest shaft to put them on / over as well you may need a maginifying glass for this one. This next bit is a bit tricky.. the end of the shaft… unlike markits is not threaded for a nut… this one you have to bend… carefully.. and getting the 2 buffers correct length is a bit troublesome… but got there in the end…
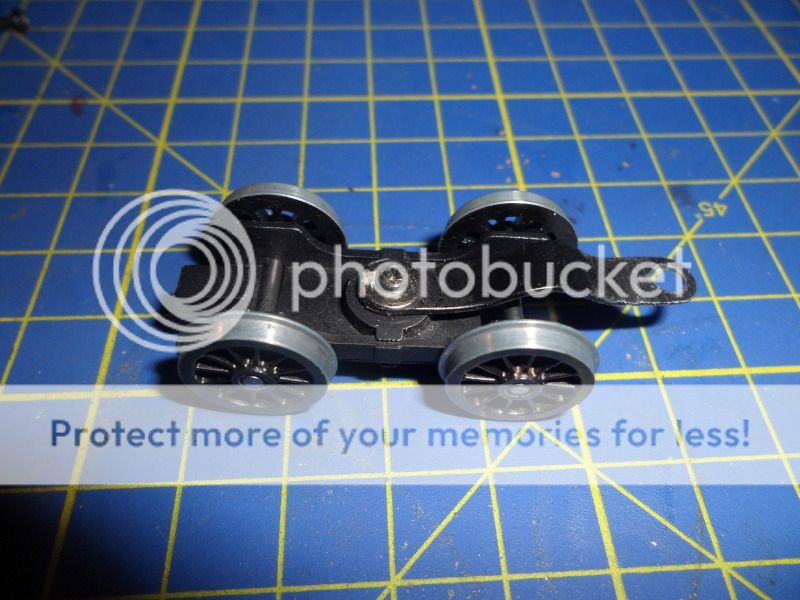
I mentioned way back in the post about the front bogie and some modifications that had been done, its a bit late but I'll post it here, The main bogie is off a Clan loco, this has the correct spacing, required for the build, the normal wheels were taken off and 14mm ones fitted. Where the swing arm fixes to the bogie, the base was filed down to give a bit more room for the bogie to move up and down, as its quite close to the chassis once the screw and washer are on top of the arm.
The Arm itself is the original one from the Castle, this was bent to allow the max swing, and also shorten how far the bogie sits away from the mounting point.

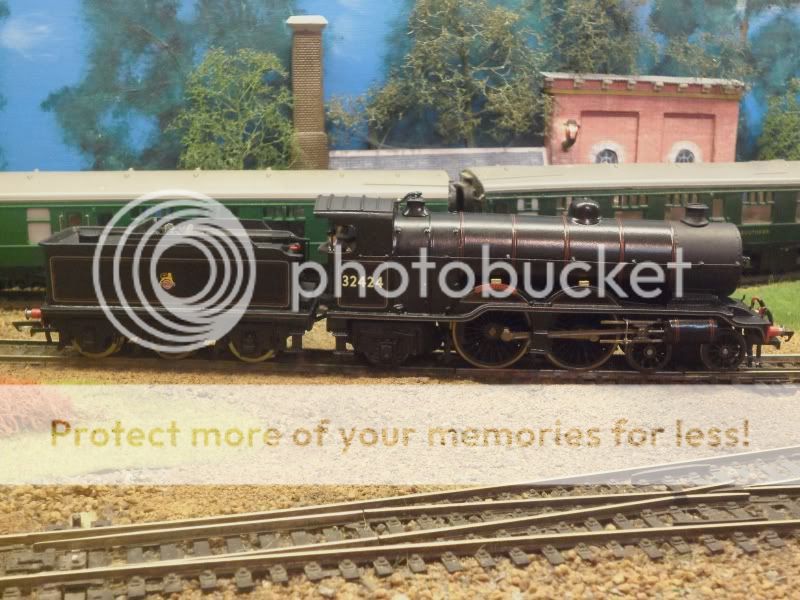
The loco cab was painted with a cream colour… god knows if thats right probably not… the glazing (clear plastic) for the windows was fixed in place and then Backhead glued in to position… all be I still need to add the reverser at some point… All that needs to be done is to add Coal which was done after the photos I took of it on the layout…. but heres some photos of the finished artical… there is a video of it complete working on the rolling road… but not put that together yet.


…………………………………………………………….
Just a few final shots of the project… been using it for some photos and bits and pieces…. Coal and crewed, just need the route discs adding…. but heres some final shots of this interesting project…
Coal and Crew added:
And a couple on the layout complete as well as a small video:

Video:
Just a small pic from me… trying to replicate the picture on the Bluebells website, on the rail tour, Southern Counties Limited, 24th February 1957,
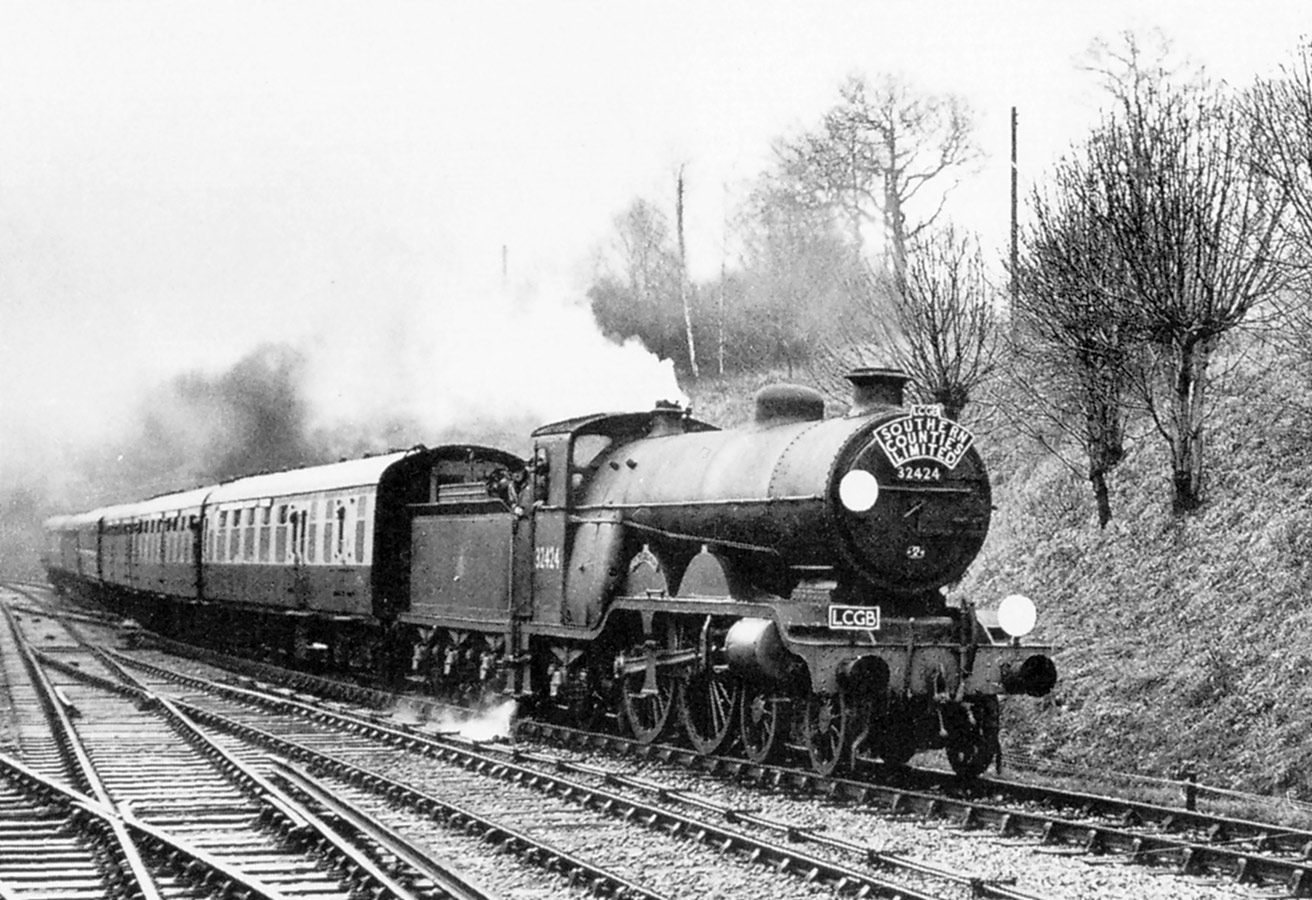
(Click to enlarge)

…………………………………………………………..
Updates…
A little while ago the H2 was completed, with my layout being out of action due to winter and remodelling various other parts, The H2 was taken to the High Wycombe and District model railway society, for a test run. It first went through running in, which seemed ok, and ran pretty well.
I then undertook a loaded test run, the test track has gradients built in… the loco started with 5 coaches but was apparent it was struggling up the gradient, it seemed happier at 4 coaches and ran with those 4 consistantly, which you can see in a video below.
H2, Features 8 mins in to the video.
I had lined up a number of tweeks to be done to the H2, the kit ran with no weight added, relying on just the weight of the body. So more weight was added to the boiler across the 2 driving wheels. More pickups would be added fitting a new front bogie from a Hornby L1. As the Hornby Castle is quite an old model the flanges of the wheels were pretty large compared to models which are on the market today. So I decided to change the main driving wheels to a set of new ones from the New Hornby castle.
Sadly this didn't go to well as the wheels were overall 1mm bigger than the older spec… and the wheels touched as the sat in their housing in the chassis.
Instead the old wheels were turned… by putting them in a drill and running the flange up agains a file to bring the side of thee flang down… this work very nicely, and also has no problem with modern / finescale track work.
Along with this the wheel spacing was double checked to make sure all were 14.5mm appart.
The loco is now around twice the weight it was before.
Some of the wiring to was also tidied up, unded the footpate where the 2 pin plug goes under and out the back to connect the tender.
………………………………………………………………………………………………..
H-Class - SE Finecast
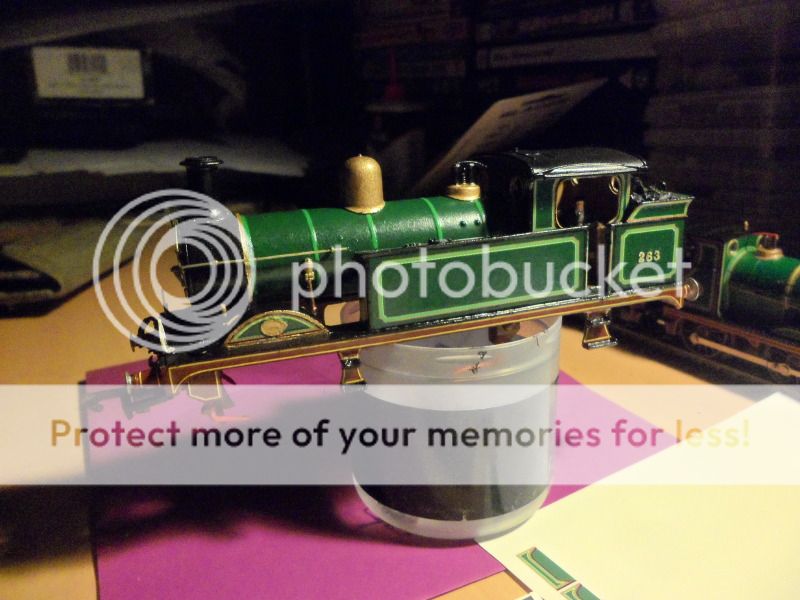
I took the decision again to update this kit, this kit I have had for a few years now, and have not done to much to it appart from change the number to 263.
From previous work on the P-Class the SECR livery was now possible for me to do on this kit.
So last week, I drew up from measurements taken from the kit the livery on photoshop and done a number of tests, to get as close as possible to the colour and size needed. I made some of the shapes around the cab and top of the bunker and splashers by taking photos of the kit and and re-sizing them and creating a template to make the transfer.

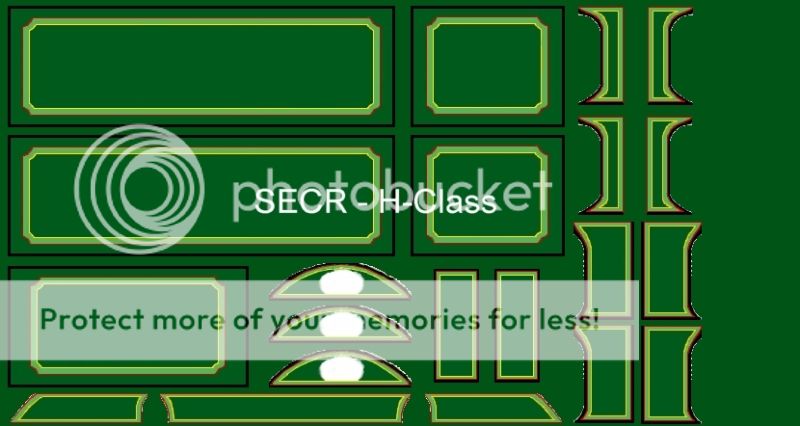
Last night I started applying the transfers to the loco, as can be seen there is a colour difference between the kit and the transfer…. if i was to add varnish the transfer would appear even lighter so to stop this from happening, I use a diluted amount of SECR paint from Pheonix and applied it around the loco so it would all blend together as you will never get printer ink or toner to match the paint colour.

…………………………………………………………………………………..
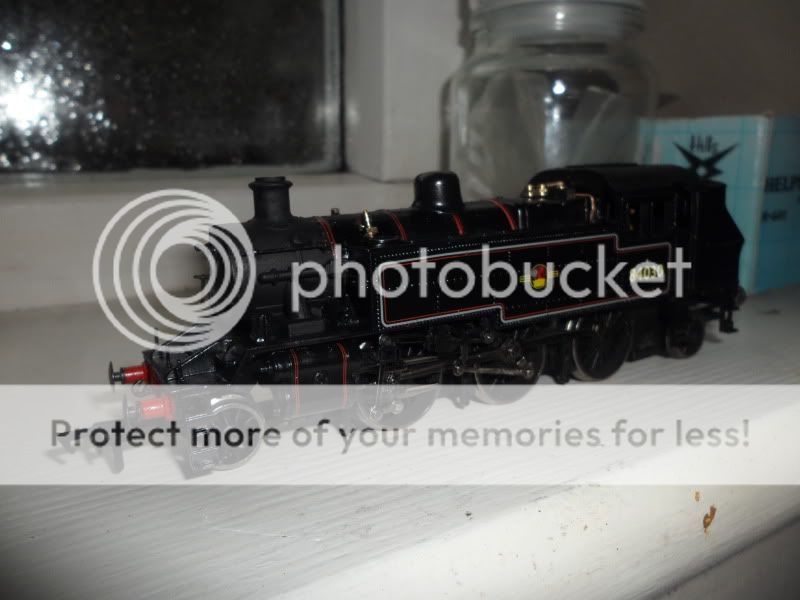
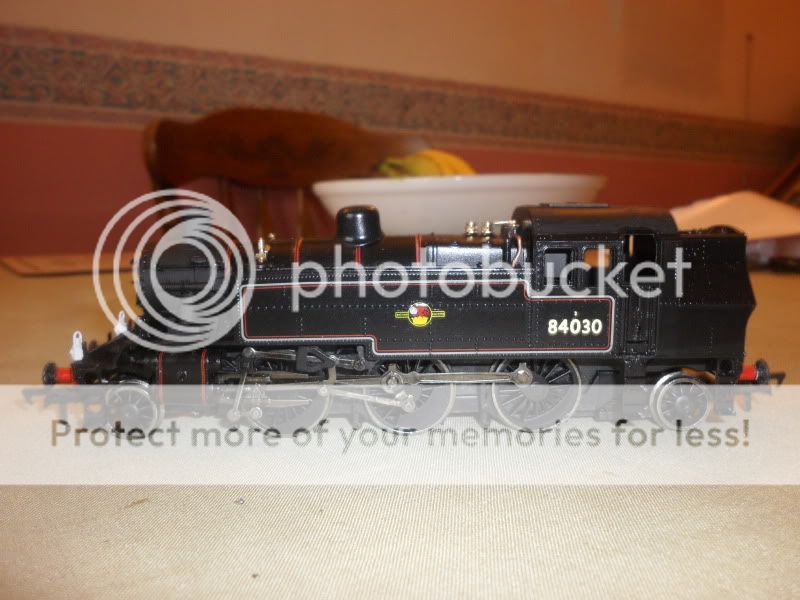
Another project which I will start towards the middle of the month is a BR Standard 2MT, which in a way will be a conversion from a Bachmann Ivatt 2mt. Picked this up for around £28… with the parts costing £30.
Not much has been done so far as I am waiting the parts from Markits to start this project.
Posted
Full Member
The loco has been progressing slowly, due to the number of bits I have ordered to complete the kit.
After the transfers for the main SECR livery were applied and blended in with its surround paint work, the main SECR lettering and logo went on to the tanks of the loco, these came from Fox transfers. The black outline of the tanks was re-done using Enamel Satin black from humbrol, these were then lined in Red with HMRS lining transfers.
The boiler bands were also lined out as well as the cab, again using HMRS transfers, Yellow and Red, 2 yellow in the middle on the lighter green, and 1 red line eitherside on the darker green.
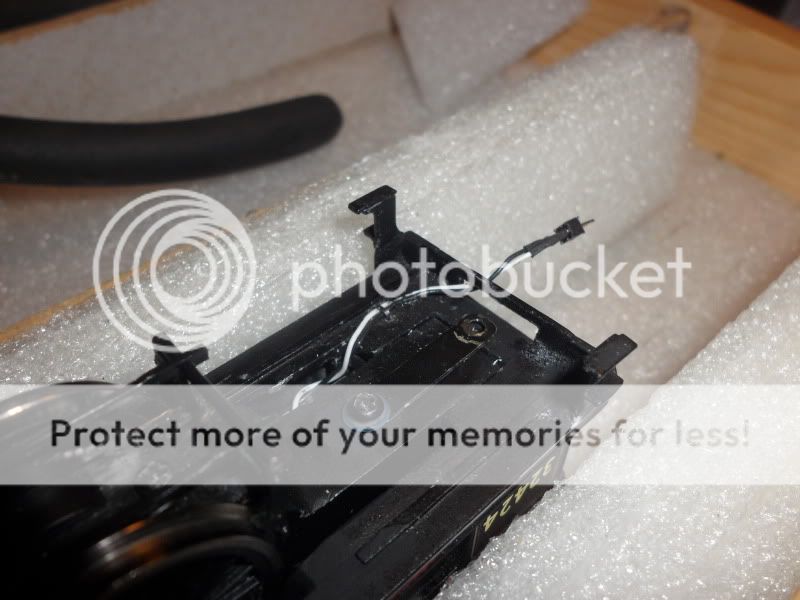
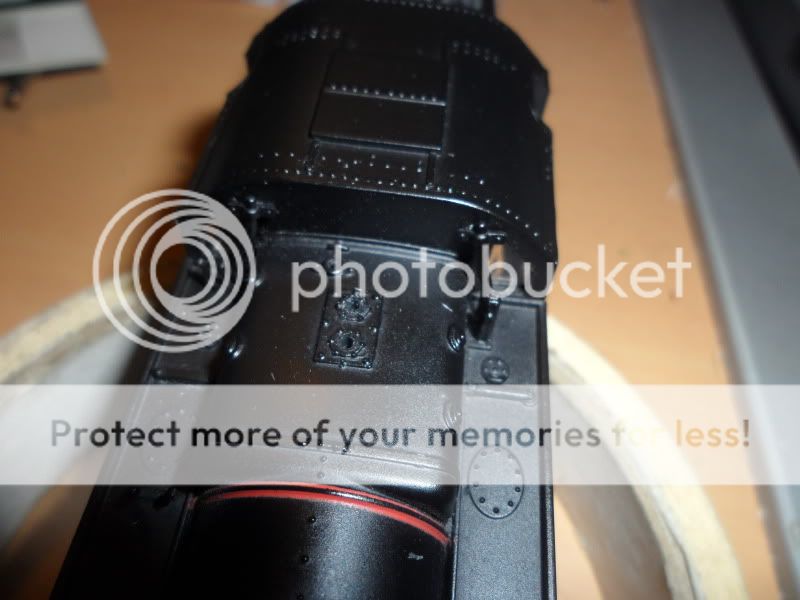
Upon inspection of the body I noticed an area around the underside of the smokebox which seems to of gone walk abouts or gone adrift… the area was where the screw from the chassis attached to the body, and this area was empty… I then decided to rebuild this with plasticard, and replace the missing Nut, not quite sure how the chassis and the body stayed together but some how they did.
Also spotted was a difference in height between the front of the loco and the rear of the loco with the body on. I later measured it and found the rear to be 1mm lower than the front.. another part missing? Well what ever this was proped up with plasticard.

The chassis also had a review as a number of parts had falled off… for example the Brake hangers from the trailing driving wheel, these were not well secured when I purchased the kit, so I brought some etched brass ones from Mainly trains and fitted them together to replace the missing set, and painted them in SECR brown, the front driving wheels hangers are part of the body.
The whole loco chassis recieved a repaint to the correct SECR Brown, as the previous owner had just painted it brown.

The loco after one month of work has been completed tonight, and ready to be tested and then a debut next week at the model railway club in High Wycombe to see how it runs, this will be taken with several locos for further testing like the H2 for example.

Posted
Full Member
I purchased a Ivatt Class 2 shown above in the previous post after reading that the Class 2 Ivatt and the 2MT were virtually the same loco, with one being slightly heavier, and of course having small differences, in regards to the running plate, and valves, and pipe work round the cab as well as some other small differences.
This Bachmann Ivatt tank is ideal i feel for this, nice and heavy, reasonable level of detail, and not to much work to do to it to make it what i would like.
I purchased the Ivatt for £28 which was a good price, After looking what I would need, I put in an order to Markits in Watford, the total price of the parts was around £30.
I ordered the following:
- BR / SR / ER Clack Valves (Mclack BR)
- BR Smokebox handle (M4SBD1)
- BR Hex ross pop Safety Valves (M4SftyV09
- Horizontal BR Whistle (M4 WhistBRH)
- BR Loco steps (M4StepsBRset)
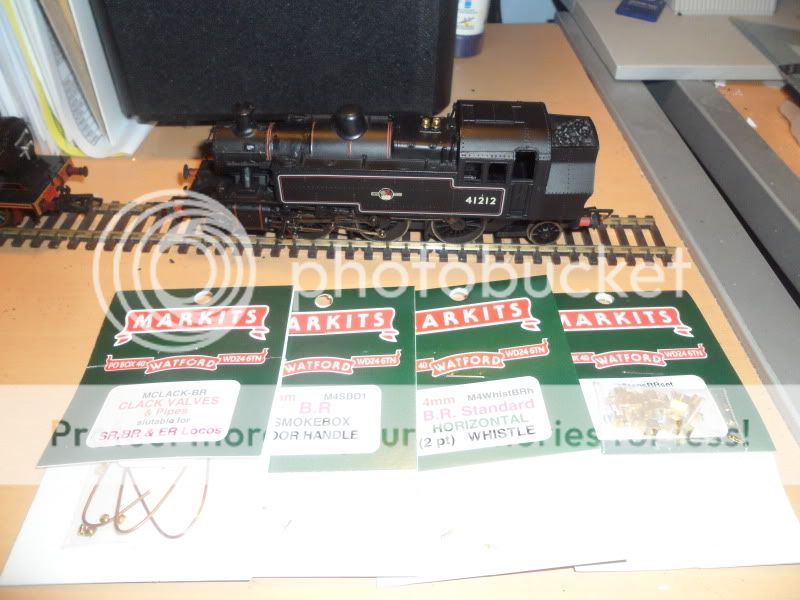
These are the parts upon arrival and before work starts on the body.
While i was waiting about 7 days for the parts to arrive i took the loco appart and started painting the cab and the back head… as its quite an early model so decoration and painting in the cab was some what lacking.
I used some Filler on the inside of the body under where the enclosed clack valves were on the body, this was so when the top part was removed there would be no hole there due to the filled being in void where the mould was.
The rest of the metal parts - Safety valves and whistle were taken off the loco, ready to start work on fitting the new ones.
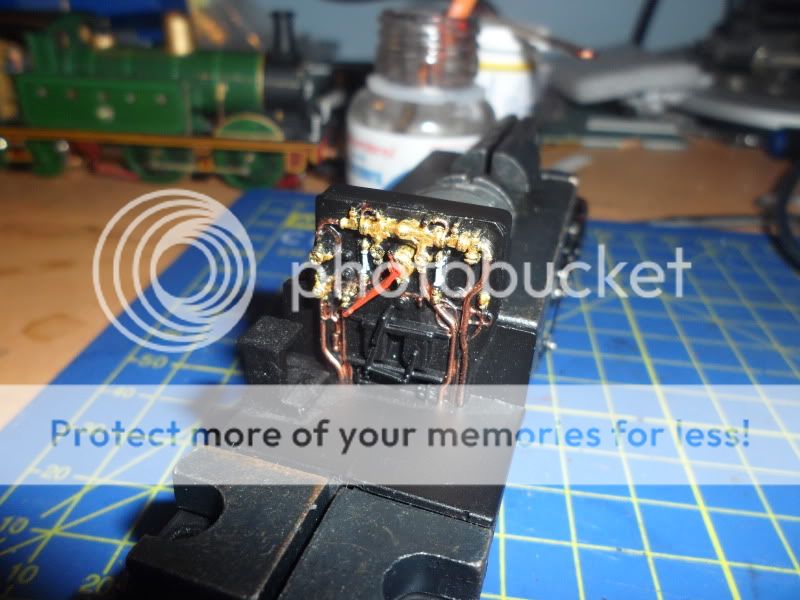
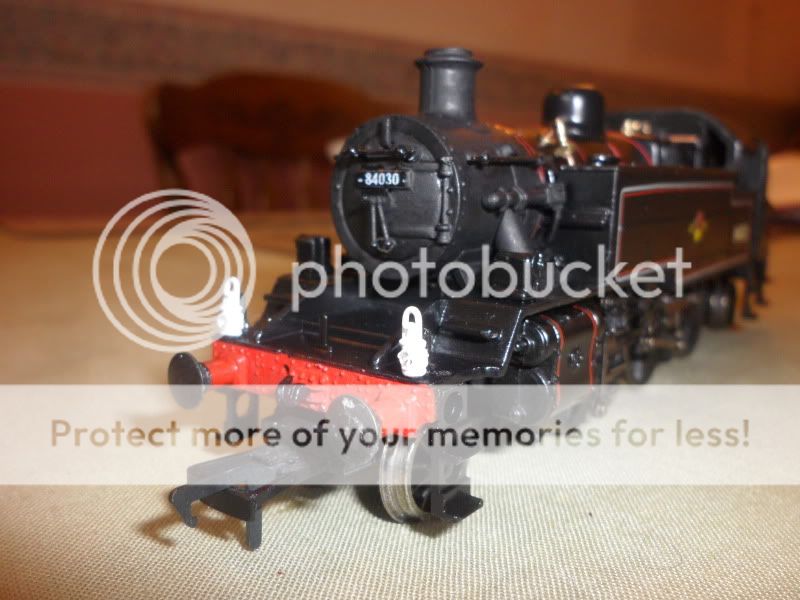
First new parts to add were the clack valves, these are quite fiddly to make up, but once together they look very good, the Clack Valves came with the copper wire for the pipe work and would come in handy later to do the rest of the pipe work around the cab.

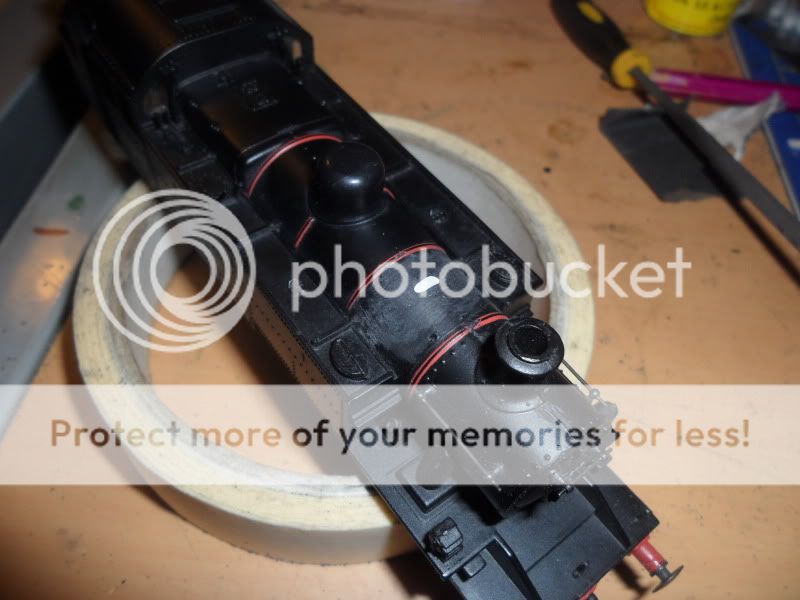
The smoke-box door, again being an older model it had the door handle moulded to the door which isn't great these days, so I removed the handle by filing it off carefully, and also using a knife to scrap any remaining plastic off. It was then replaced by a nice brass replacement by Markits.
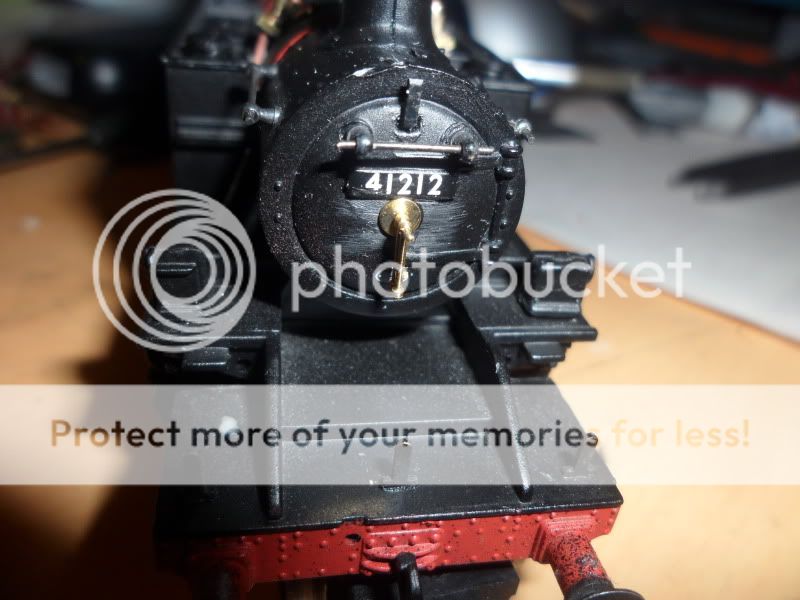
with those parts fitted this is how it looks at the end of a days work…

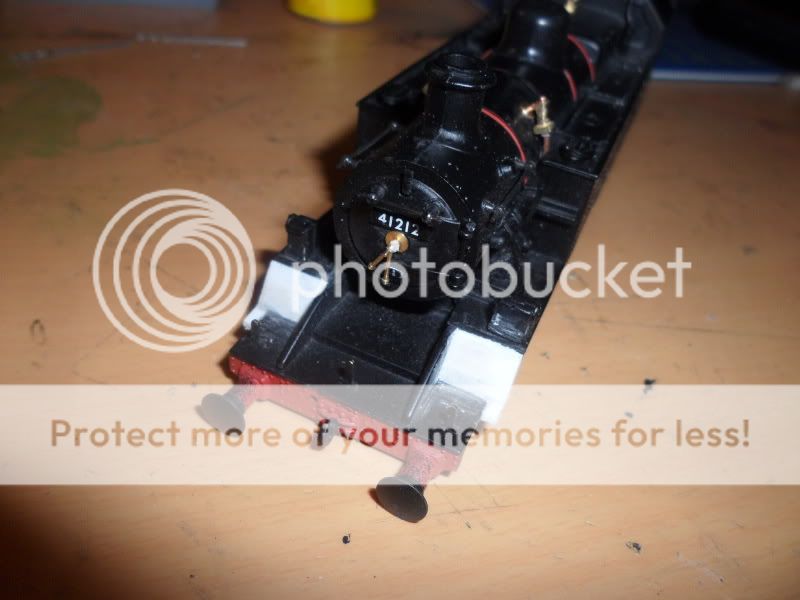
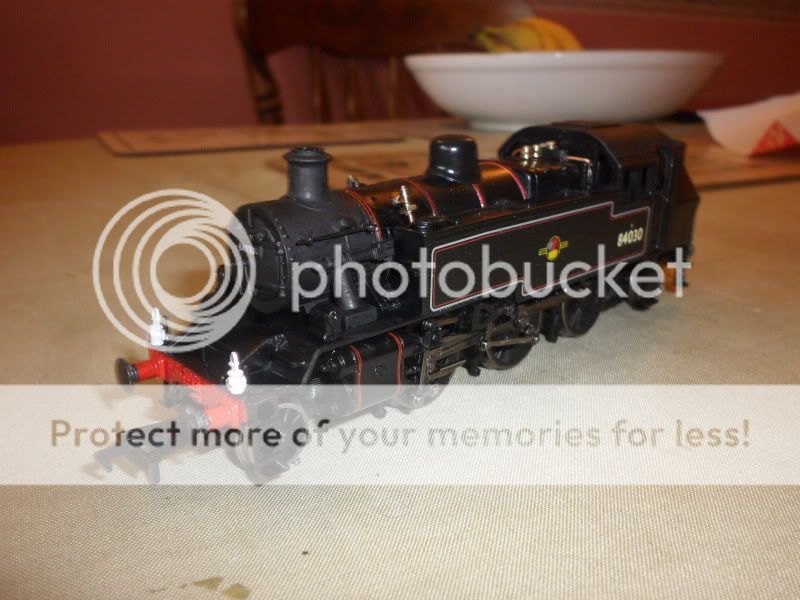
So after most of the new bits have been added, I turned the attention to the running plate which is slightly different around the front end, as the Ivatt has a gap between the upper and the lower running plate. Some modification was done by filing the original running plate away, to add the new sections in which would be made from plasticard.
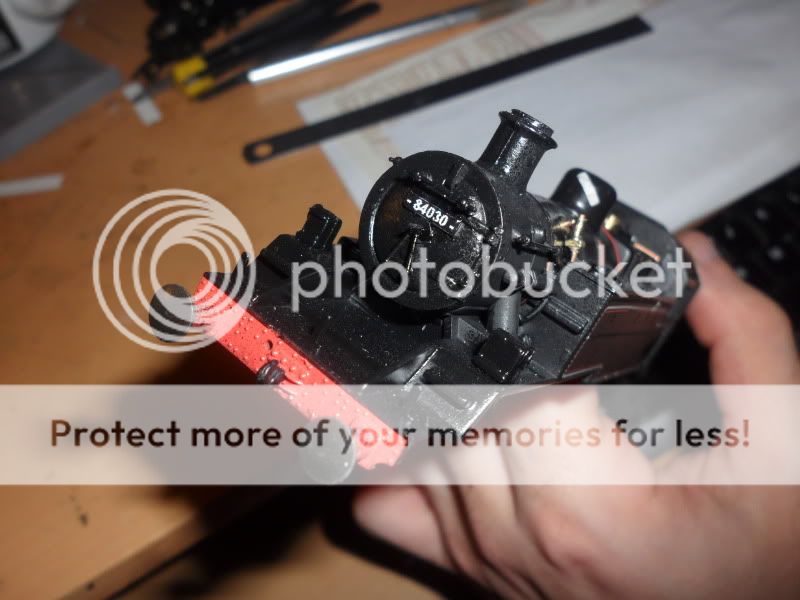
This was all superglued in to place, and then painted satin black.
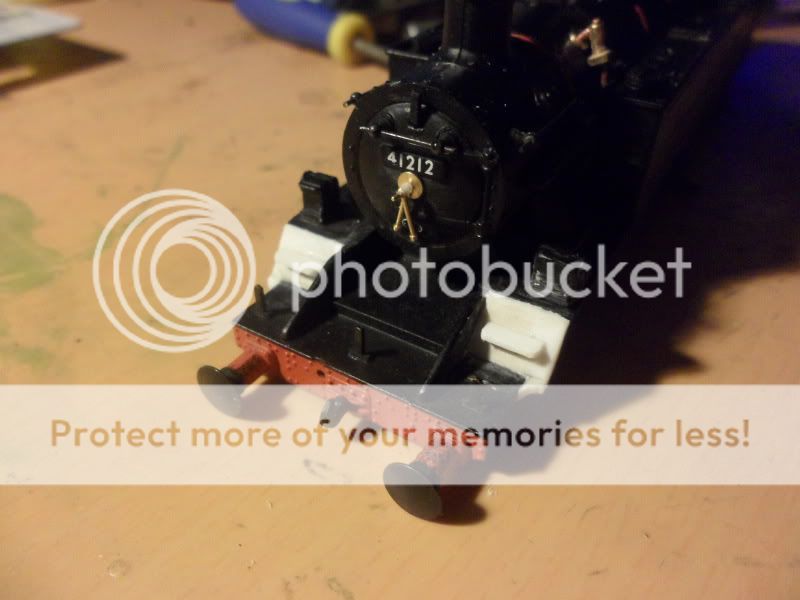

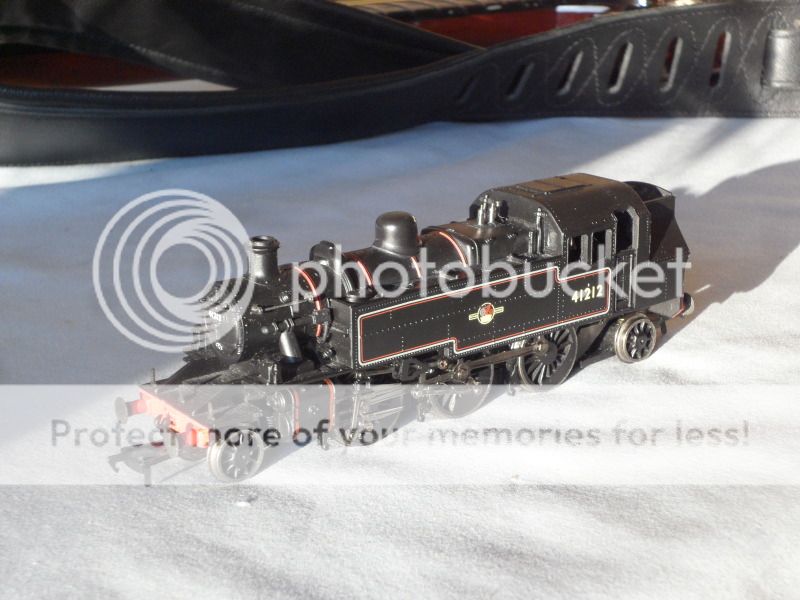
After this I then went about thinking about the smoke-box smoke-box door number plate. For those who don't know the Bluebell s 2MT that they are converting started life as a BR Standard Class 2MT 2-6-0 tender locomotive. So there was never an 84030, so etched plates was off the list… instead I turned to my good friend the water-slide transfer… and made my own using crafty computer paper… and came out pretty well I feel.
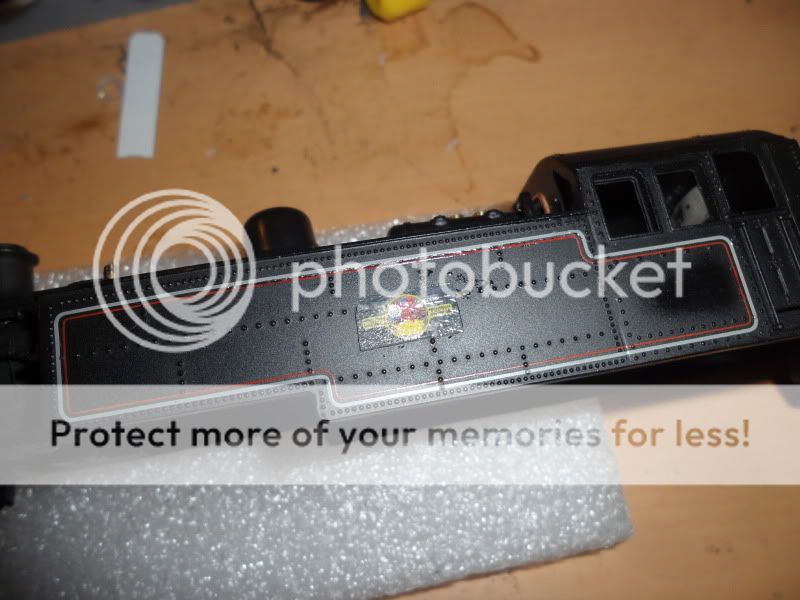
With that done, attention was then turned to the lining and re-numbering of the cab, the lining application on this older type Bachmann tank engine is quite poor… and can easily be scratched off… or like me if you mask something off to not get paint on it, the tape will take the lining off too. So using the HMRS BR / LNWR loco lining transfers I repaired the parts that were taken off or damaged.
The numbers were rubbed off using some enamel thinners which came off very easily… this was then re-numbered 84030, using pressfix transfer from HMRS, sheet 14, BR Steam era.
I painted the Markits Machined BR steps which were quite pricey but are I believe worth it as they are brass and won't brake to easily like plastic ones, these were painted in to Satin black, and a small 1 mm hole drilled in to the body to glue the steps in place.
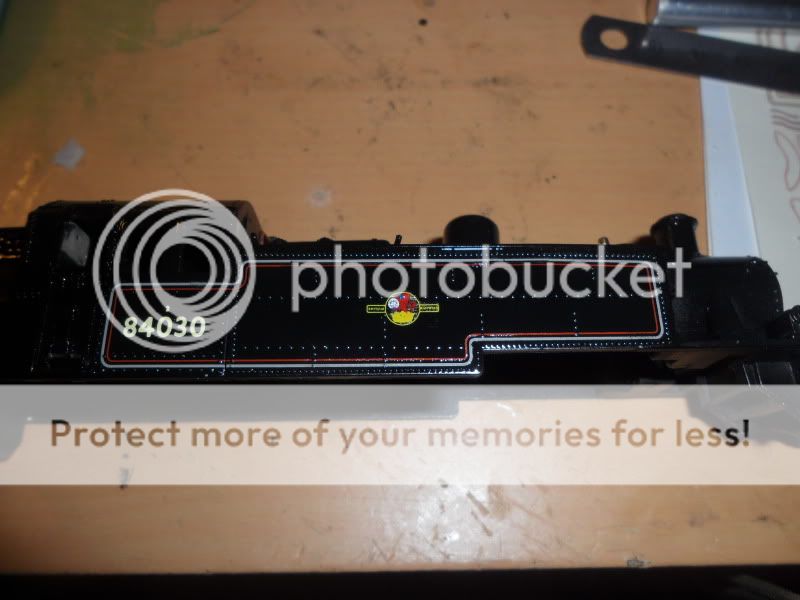
The loco was then given a satin varnish, and when dry the cab roof and smoke-box were painted with Humbrol Matt Black paint.
After a plea on my Facebook group as to the idea of what shed code plate would the loco be fitted with when complete, at this time it is a new build as it were so really what ever I choose or the group… it could still be wrong…in the end thanks to another member on the forum, tom92240, we came to a shed plate code of 74B for Ramsgate…. who knows if this will be correct or not…
Anyway the plate was ordered from Fox Transfers and despite the time of year arrived the next day.
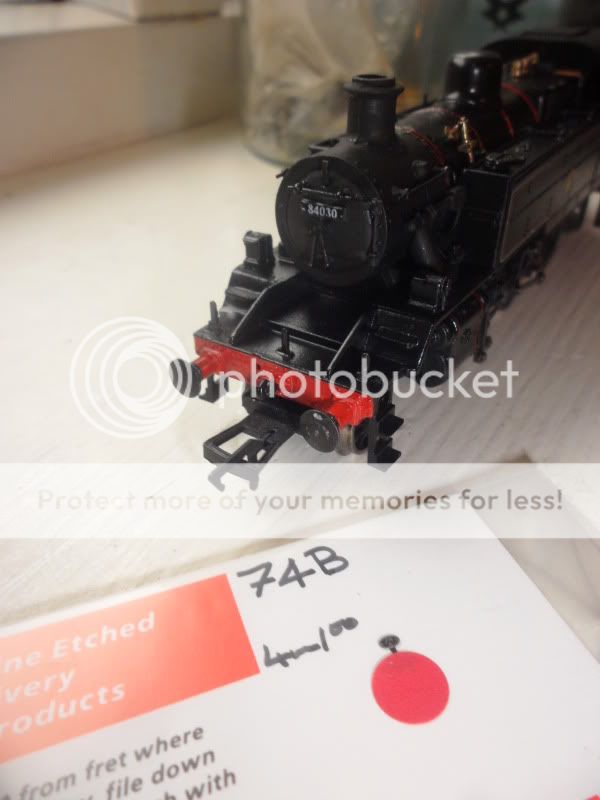
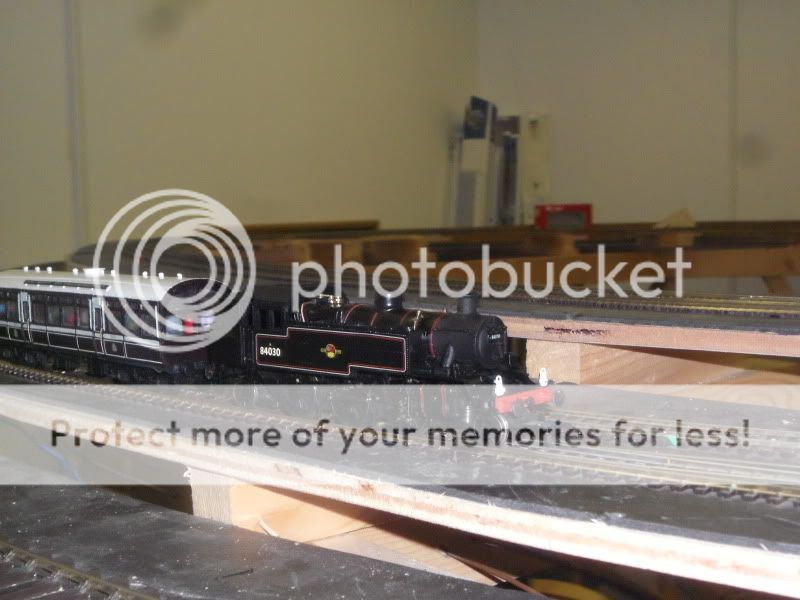
After being fitted the Model of a loco which is yet to exist was complete… in model form… the loco was about 95% complete as more work is needed, putting the windows back in the cab, and adding more pipe work ect… but still it was in a runnable state to be taken to High Wycombe Model railway societies fun run on Wednesday evening, were it did 3 hours of running on the test track.
Last edit: by BMR2011
Posted

Full Member
Having once fitted a DCC decoder to a Bachmann split chassis V2 l0ocomotive, I know where my limits are …………..:oops::oops:

Great work
thumbs:thumbs
'Petermac
Posted
Full Member
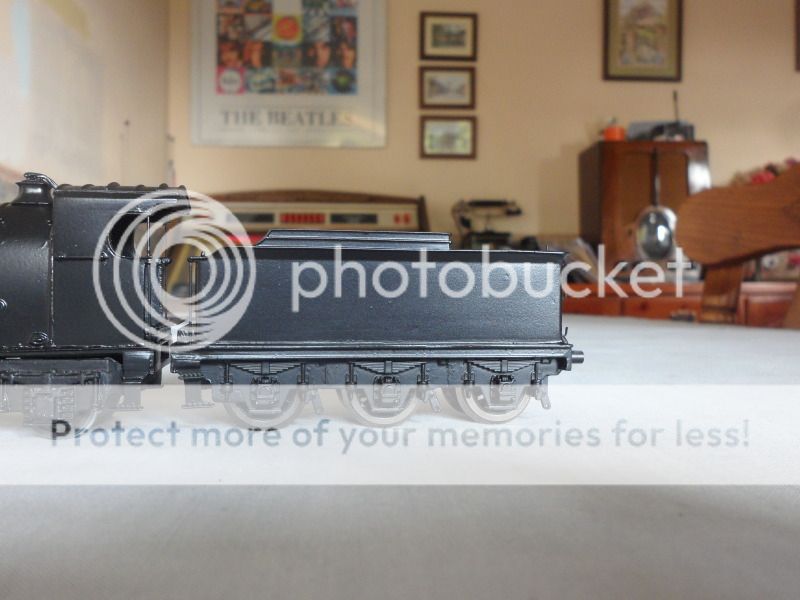
generally the kit needed rebuilding, by stripping it back and starting again. I have a hatred of White metal tenders, so I soon got rid of that to be replaced with a Bachmann N-Class tender, much lighter…. easier to pull.
This next write up follows the rebuild, it is also available in Video form on Youtube which you can get to under my picture on the left.
Will's U-Class, Rebuild
Last weekend I purchased a quite sorry looking Kit from Ebay. This kit was titled as an N-Class.. but it was quite plain to see with a number of 1638… and larger wheels that it wasn't and was actually a U-Class. I managed to get this model for just over £100, and was aware it would need a lot of time, and repairs to get it right and working properly as well as looking good.
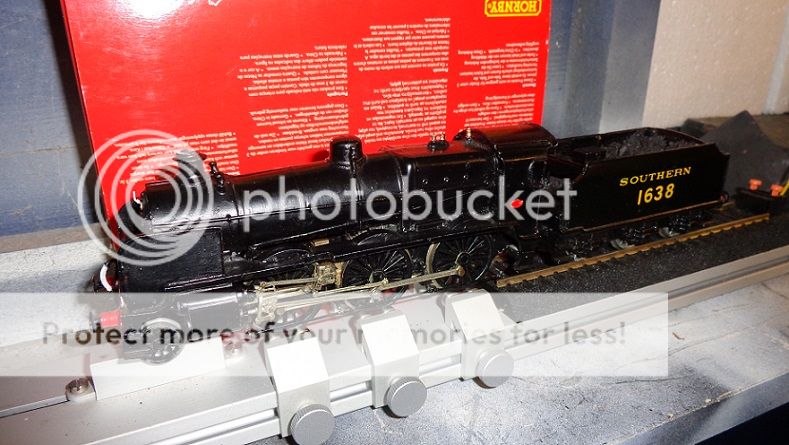
U-Class kits do go for a lot of money if its well built and the kit produced by DJH you will be looking at £250 upwards.
This kit produced by SE-Finecast is a sort of compromise, you can make an N, N1, U, U1 class locos.
The kit arrived on Tuesday, and first things first I inspected the kit to see how it was built and what needed repairing or replacing, The Chassis was quite well built, and assembled, sadly not running even though it said it was on ebay, this was later traced to a broken wire, and by the amount of insulation tape a total re-wire was needed.

The kits rebuild will be posted here and also a more in depth video to show you why I do certain things and how I go about doing these kits especially restoring them.
……………………………………………………………………….
Well the loco's body has been stripped down and assessed to be repaired and replaced various parts. After stripping the paint off the body, I decided to replace the tender with an N-Class tender made by Bachmann, which is lighter than the white metal one it came with.
The chassis was checked over and repaired, it will need a total re-wire the chassis was also repainted like the wheels and the cylinders to SR Dark Olive green.P76.


A set of parts were ordered to improve the loco, new sprung buffers, new pickup wire, new safety valves, new buffer beam pipe work, and also some brass rod, and hand rail knobs.

The safety valve housing was modified to take the new Markits Tall Ross pop safety valves, which are pictured below, a small hole drilled to take the brass safety valve, and then a slightly bigger one to sink them down a little rather than sitting well out of the housing.

The repair that was needed was to the running plate where a section had been cut out to allow the expansion link to fit, even though the main part what its connected to was fitted incorrectly meaning it was sitting higher than it should of been. this altered, the running plate was fixed with plasticard, and using some filler to fill in any gaps and to smooth it over.


Next the new buffers were fitted to the front buffer beam as well as the Tender body which came from mainly trains for £2. These buffers are from Markits and are the SR stepped buffer shank type. The shape of the buffer beam will also be changed on the ends and slant inwardly towards the bottom.

I brought some Copper wire to redo the cab, and various other bits on the loco, drain cocks, lubrication pipes ect… I found the wire from various bead websites that produce kits for necklaces… and provide it in various thicknesses.


I then went about replacing finer details on the body, handrail knobs to the front of the smokebox to replace the cast ones, also started to fit the Lamp irons using the same method seen on this topic by bending split pins.
I also removed the casting of the pipe which goes from the cab to smoke box… I guess something to do with the blower? no idea.. anyway I replaced this with the 1mm Brass rod I purchased from Hattons, you can see it on the image below as the one higher up and not the hand rail wire which is amazingly thick which I will eventually replace.


Next thing to turn up was some spares i brought for a Schools which the steps were modified slightly and pinched and put on the loco as I disliked the cast ones being very bulky. and reducing room for the front pony truck to swing. You can also see the modified buffer beam narrowing down to the bottom, which you will see on the U-Class locos.


The tender finally got a chassis yesterday big thanks to James Mower, for donating a spare tender, I've given it a light coat of Matt black paint later that afternoon, and you can see the tender top and chassis attached. I later started lining the tender out work never stops even on your birthday.

And finally an overall view at present…
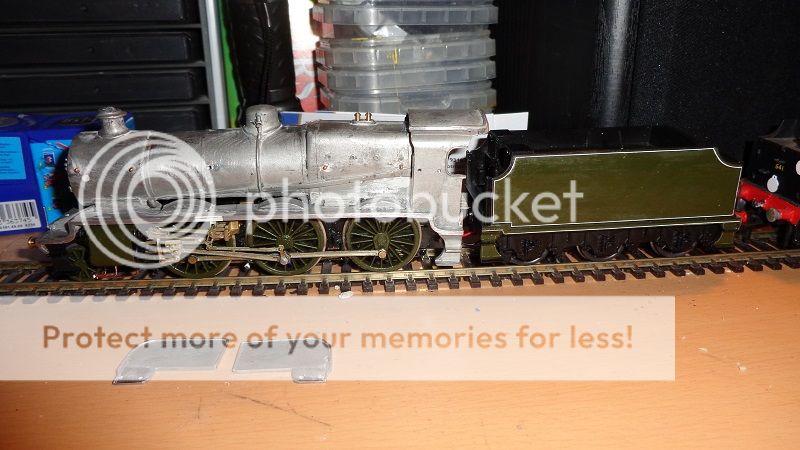
22/03/13
The lining out and numbering and letter of the the tender has begun as well as sorting out a way to put pickups on it, being a Bachmann N-Class tender, greatfully donated to the project, doesn't have pickups. Anyway, the tender is being lined out with HMRS Pressfix Transfers, I usually use just the White lining sheet and paint the black outline by hand.
Instead im using an LNER lining sheet which uses Black and white lining, and is also a bit finer than the normal white lining I commonly used before.
On the picture below you will see the black and white lining has begun going on the tender, some of the larger areas between the lining will be painted black.
The numbers and letters are from HMRS pressfix sheet, SR maunsell sheet.

The tender pickups was another idea which came out of comparing wheel spacing on tenders. I spotted on the new Hornby Schools class, the tender wheel spacing was the same to the N-Class Bachmann tender… I think everyone knows whats coming next…
I found the pickup unit which attaches to the underside of the tender, this was purchased from Peters Spares. To bring it up to Axle height I glued 3 bits of plasticard together, to bring it up to the correct height.
The axle housing was enlarged to take the Bachmann axle, but it fitted very nicely in to place, and glued to the underside of the N-Class tender.
The tender pickups will be attached to the loco by a 2 pin micro plug, which has been ordered from DCC supplies.

On the loco side, small parts have been done to the main body, I have removed the old Hand rail brass rod… and put on new hand rail knobs made by Gibson, shot ones on the smokebox and fire box and one medium one in the middle of the boiler barrel… ensuring the line of the hand rail is reasonably straight.

On the smoke deflectors sadly I couldn't get hold of any from Bachmann seeing as the model is no longer produced… must of forgotten about the modelzone one… never mind. I decided to take some thickness off by filing the back away to make the overal thickness a little less. I then went about making a new fitting for them as the old one was very big and bulky, so i inserted some thin wire 0.5mm and soldered it in to 2 holes drilled in the deflector and and filled the otherside to hide the hole. I also filled the hole in the leading edge of the smoke deflector which will be moved upwards.

I did some work on the front end, adding the vacuum pipe to the top of the bufferbeam, and finishing off the lamp irons made from the split pins shown earlier in this workbench. I also took the oppertunity to test fit the smoke deflectors.

And back to the Tender, the filling in of the gaps around the lining with black paint, you can see here underway, still touching up to do and a second coat.

Until the next time… which will be after Alexandra Palace at the weekend, which then render me completely poor.
………………………………………………..
27/03/13
Alrighty, update time
The loco body and smoke deflectors have now got a coat of primer, and then was checked over and a bit of filling was done around the cab, and smokebox. A second coat was then added, I use Grey Halfords primer. You can see the hand rail wire has now been test fitted.

After leaving the body to dry, painting could begin, I hand paint all my locos, and I used on this one the Phoenix SR Maunsell P75 Olive green to paint the loco, On this particular image the loco has had its first coat, by the end it will usually have 3 - 4.

Satin black was also applied to the top of the running plate, smokebox, and cab roof. The cab roof and smokebox will eventually after the varnish has been applied get a coat of Humbrol Matt Black which makes the loco look more authentic. The buffer beam was also painted red Humbrol 60 Matt Red.


I turned my attention to finishing off the electrics and the pickups, a replacement piece of copper strip board, was fitted to the underside with 2 screws insulated with 2 plastic washers. Bronze pickup wire was used to pick power up from the back of the wheels, on the photo's below it shows i did this to both sides… i later removed the second set, as I found it was causing a short.

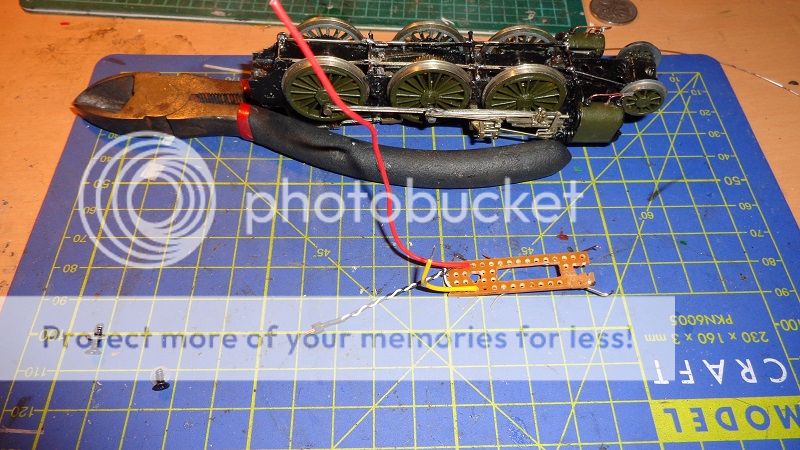
And fitted to the underside of the loco:
You can see the 2 pin plug brought from DCC supplies, for around £6 this connects power from the tender pickups.


The loco was taken to the layout, to sort out the issues, and get the motor in the correct position, as there was an issue with gear and worm which would run fine in reverse but lock solid going forward. But this issue has now been resolved. The lining will follow next.


Getting towards the end of the restoration of this U-Class kit, so now I start the lining out… not as extreme as the SECR livery but still quite a lot to do.
The tender was done earlier on as seen above. Lining the smoke deflectors first went without an issue, for this lining I decided I wanted some lining which is a bit more finer. For years, I have used HMRS White lining transfer… which are a little thicker than what should be normally used.
This time I am using HMRS Pressfix, LNER lining, same white black white lining package… the loco was done over 2 - 3 days, if your unsure how to use the HMRS transfers, read back earlier in the thread.


The extra black around the white lining will be added soon after the transfers are fully dried and fixed.
Attention turned to painting the back head and various cab components ready for fitting after the varnish was applied, so not to change the finish off the Matt black painted back head.

After the satin Black was added round the outside of the lining, the loco was varnished, after leaving the varnish to dry and harden for a day or so, A couple of coats of Matt Black were added to the Smoke box and cab roof. Mean while I also painted the inside of the frames red, which you can see below. Brass fittings were added, whistle and safety valves.


Cab fittings were then added, the reverser to the right of the cab was painted and fitted, the Cab windows were also fitted as well as just after the back head was fitted.


Crew were then fitted to the cab, only last thing remaining to added and still awaiting to arrive the cab side plates.

Today I took the loco down to the shed for a small run up and down the layout, here's one shot of the loco in action on the layout.

Last edit: by BMR2011
Posted
Full Member
This is how I built my kit:
Adams Radial Tank - Dean Sidings kit.

As most will know or have seen, I own or did own a K's Adams Radial….. I brought mine from ebay for about £40, not working….. with the motion and wheels locked solid. After the repairs, the repaints and new motor and gearbox, its hardly ever seen action on the layout, looking over scale compared to the coaches around it.
I became aware that my favorite kit producer Dean Sidings, started to produce a resin body to go on a RTR chassis. After speaking to Dave at Alexandra Palace, and having a look at his display model, I decided to go ahead and buy a kit, to replace the over sale, and quite old K's Kit.
This Kit, is one of the harder one he produces quite complicated….. I have seen a few struggle with it….. So I am going to post a step by step walk through of the build which I hope will help people.
The kit comes with all the detailing parts, you can shake a stick at….. as well as the front bogie wheels. You are left to find a 14xx chassis made by Dapol or Hornby. I did look in to a Hornby M7 chassis as it had the right wheel size but for reasons I decided against it….. which you will see why during the build.
The kit comes with parts to built 3 variations of the Radial….. 3 chimney's, 4 domes, 2 safety valves, 2 types if cross heads for the cylinders, 2 styles of cab, square or round windows.
This is one reason why I like Dave's kits, he gives you everything….. and for the price I would say they are very well priced considering the amount of castings and detailing parts you have….. Handrail knobs, wire, smoke box door handle.. its great…..
Price of the Kit: £67.50
You get 3 pages of written directions, and also 2 double sided pages with illistrations….. which is good, but hopefully with photos I post here will help those who are not sure.


The Chassis:
First steps on the instruction sheet focus on the chassis and getting it to fit the body. Some cutting with a junior hack saw, and filing required, as well as a small Philips screw driver and a craft knife.
So step by step according to the steps written by Dave of Dean Sidings,
Figure 1 and 2.


- Remove the cast sandboxes from the front of the chassis by undoing screw A, Replace screw for now… probably so you don’t loose it.
- Remove coupling from the front of the chassis by loosening screw B on the underside, then replace screw. (For now)


-Carefully slice away plastic guard Irons at the front of the chassis, by cutting flush to the plastic chassis. Keep the plastic side frames but not the brake hangers or associated rodding being the front drivers.
-Cut away the plastic side-frames at the rear of the chassis, the fire-box casting and the battery boxes. Keep the plastic side-frames but not the spigot for the pipe-work on the original 14xx.


-Cut off 5mm from the motor mounting bracket. This will leave proud screw C. This will be removed or a small cut-out made in the mounting plate, below the coal bunker, on the body itself.
-Cut off the sand Boxes behind the rear driving wheels cast as part of the chassis. Take care not to ‘nick’ the wheels and keep metal filings away from the
motor.. (Or you could just strip the chassis meaning this won’t happen)


A dry test fit to the body, not fixed, was carried out to make sure all was in order.

Continuing with the Chassis work….
Now that I'm clear that the chassis fits the body, I can now proceed to add the extras on, In my view some of it is in some areas is quite well through out but others are some what not easy….. hence some deviation from the plans or some adaptation.
The front bogie:
Reference to diagram [Fig 4 & 5]

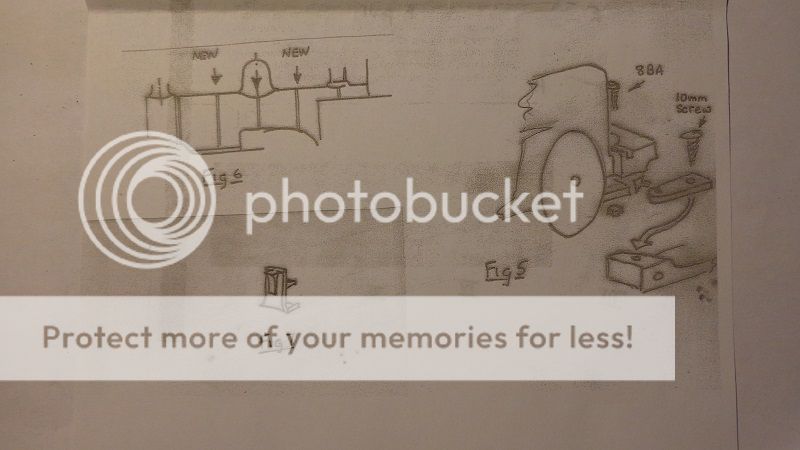
Here's a shot of some of the resin parts and white metal parts that will be used on the chassis and body in this section.
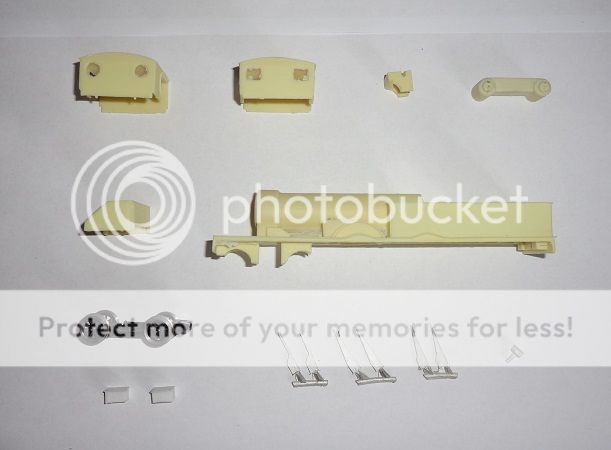
Here's a shot of the white metal components, to produce different periods of the locos operation.
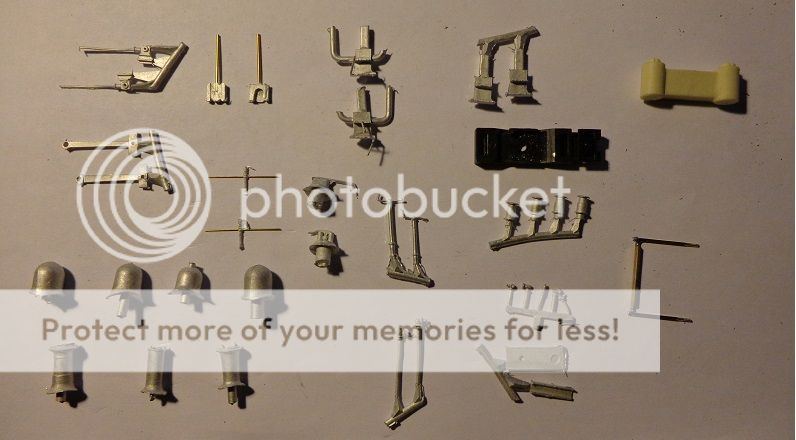
Part 3 (Chassis extension) is fixed to the front of the chassis block with an 8BA bolt through the plastic keeper plate and trapping the trimmed bogie swing link Part 1, between the chassis and the keeper plate using the nut provided….. ( I just cut down the old screw and the bolt mentioned to keep the resin extension block and the plastic keeper plate)
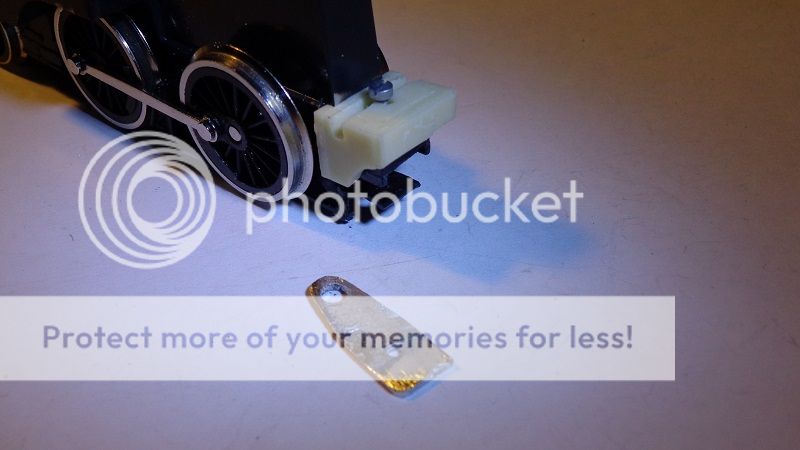
This should pass through the smaller of the 2 holes in Part 1. A 10mm self tapping screw is then used to attach the bogie block Part E, which actually comes off a Hornby Castle. There should be free movement in both these points on the chassis and the bogie.
Check the clearance with the wheels on the bogie between the wheel and the resin chassis piece. The wheels come supplied with the Kit.
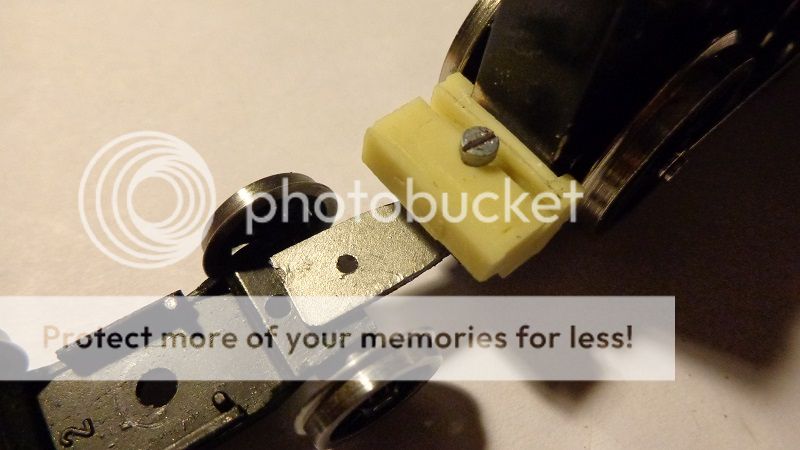
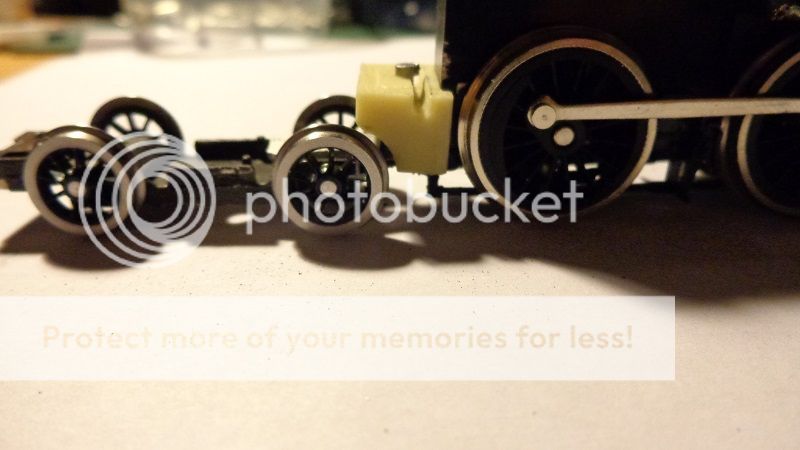
I then under took another test fit of the body on the chassis, to check clearance on the bogie, as can be seen quite a lot of the resin needed to be removed to enable the bogie to swing from the side to side. I then re checked the clearance.
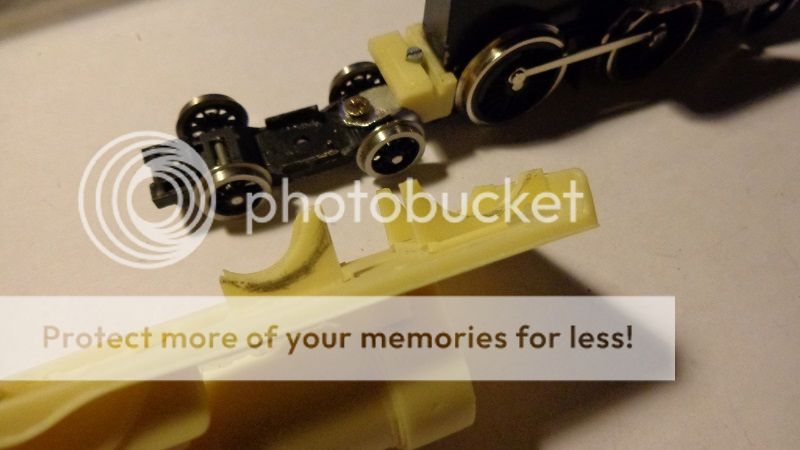
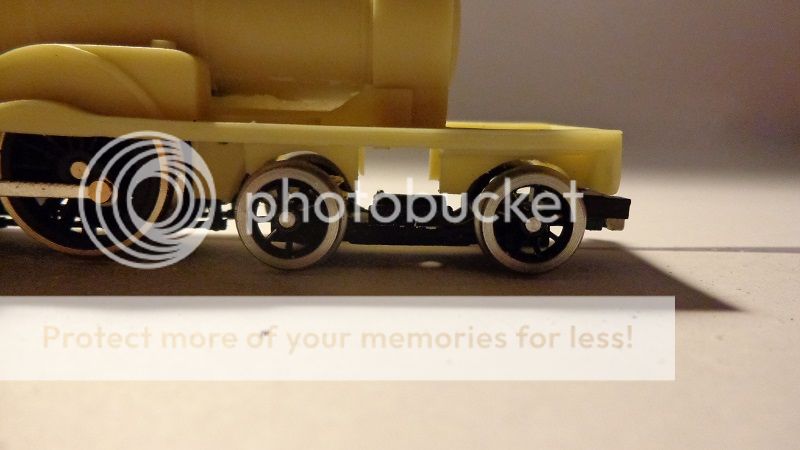
Whilst on the subject of resin and filing, you may wonder where the cylinder block has got to?
Well after looking at the diagram and looking how the motion and slide bar worked, after much looking at it.. I didn't think it would work to well. Almost being the same as the K's kit system, but in my view the let down of the K's is the finer detail….. with the cast slide bar bracket, and the connection rod. So I have put this to one side for now and will be reviewing it next week.
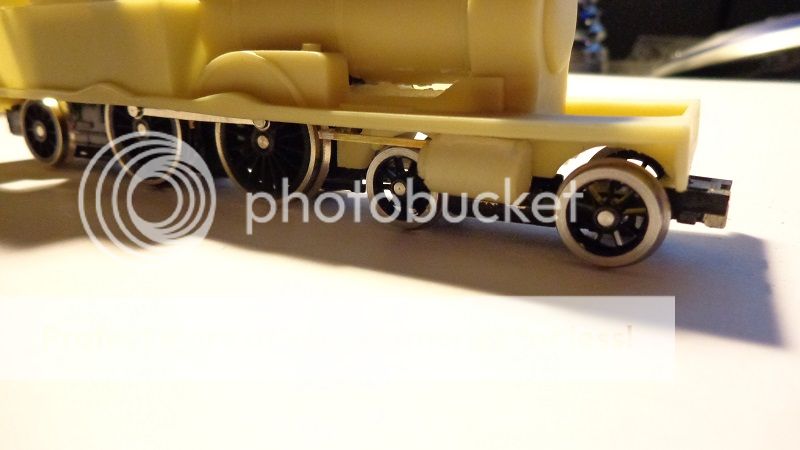
I also made an improvement to the chassis, I changed the driven wheel set, as most will know it has a traction tyre, not something I'm a big fan of, so I purchased as spare wheel set from Peters Spares, costing £8, I took the wheels from the front un-driven set took them off the axle and replaced the traction tyre set with a normal set. making use of all the power pickups on the chassis.
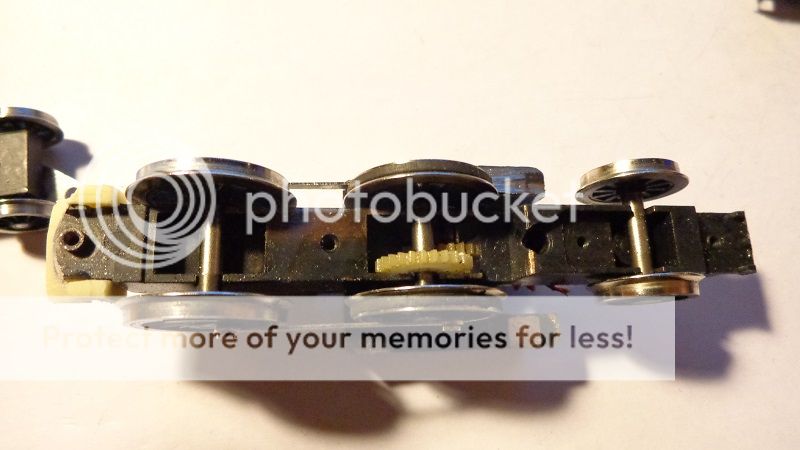
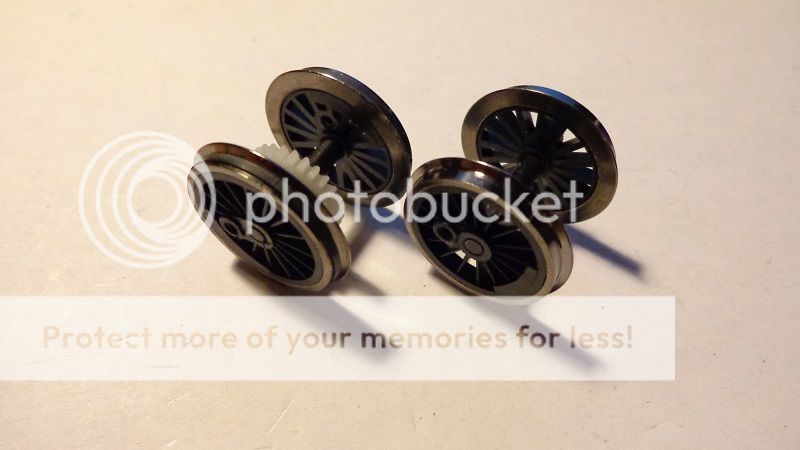
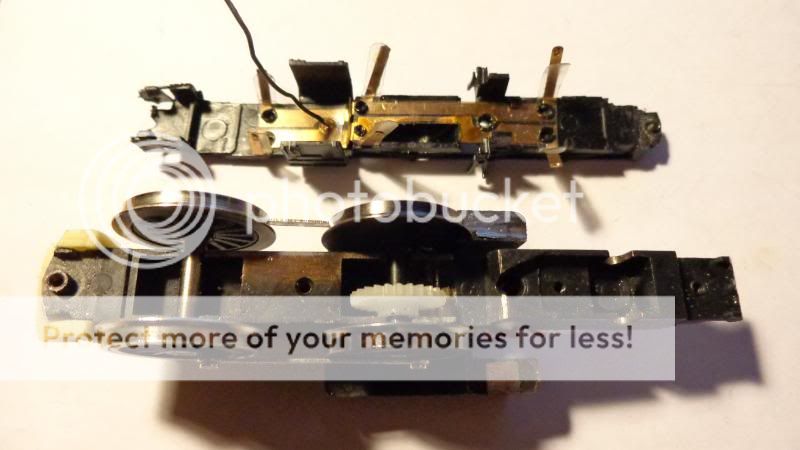
…. ….. …. . …. …. . …. …. . …. …. . …. …. . ….
The body:
On the Dean sidings kit, Dave gives you all of the detailing parts, castings, handrail knobs, wire, as well as all the different styles of parts to suit the period of the loco.
Being a preservation modeller, I picked the parts that I felt are correct to the Radial today. Cab with square windows, Stove chimney, Short dome, enclosed safety valves common on most Adams locos.

To fit the parts I use super glue, but you also must drill a hole to fit the parts in position, be very careful, Resin can crack and split and sometimes even shatter, I advise a hand drill. Using a dremel to open the hole out if needed.
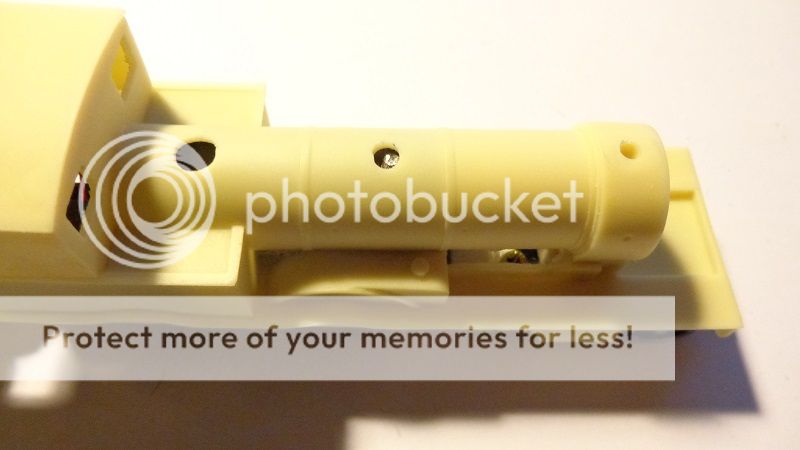
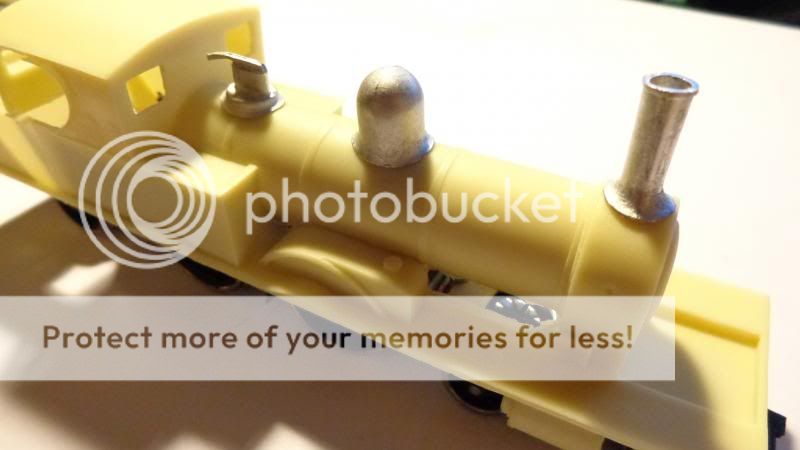
Body, additional parts added.
I started adding a few more parts to the body, around the front end, the frame extension to either side of the smoke-box, there's 3 variations to choose from. I chose the sharp drop and then a long narrow section to the front end. As mentioned I am building this to preservation spec, so it will probably be a right odd part combo.

Moving round to the bunker….. this should be fun.
There's a resin piece that needs to be fitted in between the outer walls of the bunker, this adds much needed strength the back end as its quite flimsy towards the back even with the cab roof glued in place. There is a small casting for the bunker piece, a small indent to the top in the centre of the flat section is to add the Filler cap for the tanks at the back and sides of the loco.
You can see that the motor is still showing….. which I will attend to in the next stage.


Some of you may of noticed in the parts, that something maybe lacking for the rear end….. like the bunker extensions.. I've still yet to ask why they are not in the kit, seeing as most of the variations are covered with the parts provided apart from the bunker extension changes….. so a least something for me to build!
I used some thin Plasticard to make the extensions, around 6mm tall, I have used the same plasticard to create a box around the motor in the bunker so it cannot be seen….. this will not be seen when its painted and coaled up….. so shouldn't raise too many eyebrows.
Once the frame around the top of the bunker is complete I used some thin strips of plasticard, 0.4 x 1mm to make the raised sections around the sides of the bunker. leaving a margin at the top and bottom.

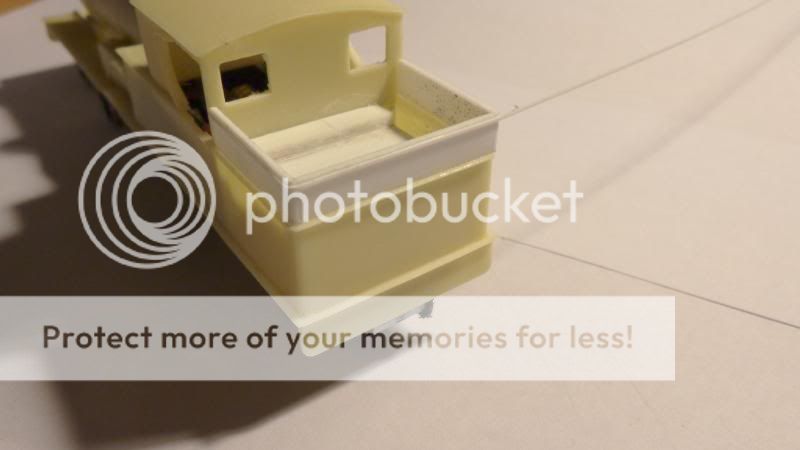

That's it on the body for now….. its only a small update tonight….. but tomorrow I will get round to writing up the interesting bit as some spares arrived today….. This may make the valve gear easier….. or harder….. I'll wait and see what people who read it think….. for me it was slightly easier….. and it worked first time.
Back to the Chassis….
Right start off with an easy bit… for me on the 14xx chassis the trailing wheel seems to me… too large compared to the actual Adams Radial tank with the top of the wheel being around the centre line of the driving wheel.

The rear axle on this is sprung and picks up power… I had a rummage through my various spares, and found a wheel set originally from a Hornby Hogwarts Castle front bogie.
One small issue the axle is a hell of a lot thinner on this set of wheels… so what to do… I sat there and thought for a moment and the answer was staring me right in the face…A biro pen… strange I know… but think…. The ink is in a plastic tube in the centre… I took the tube out and took the wheel off the new / spare wheel set I had… and well the axle fitted perfectly inside… and is almost the same diameter as the old axle…. What are the odds…
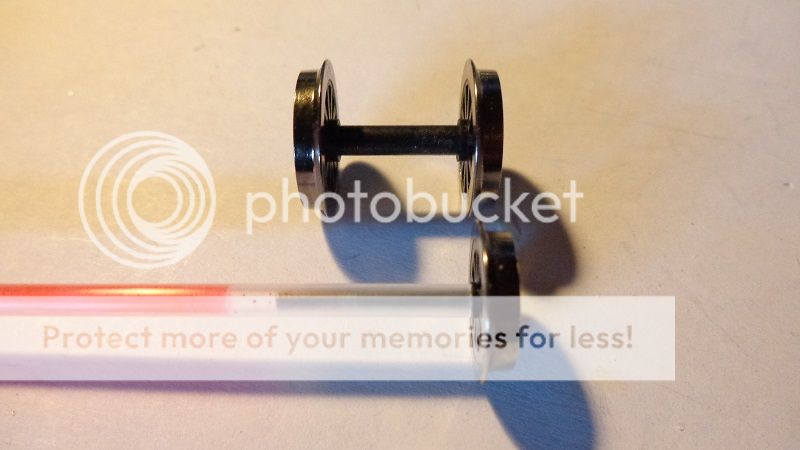
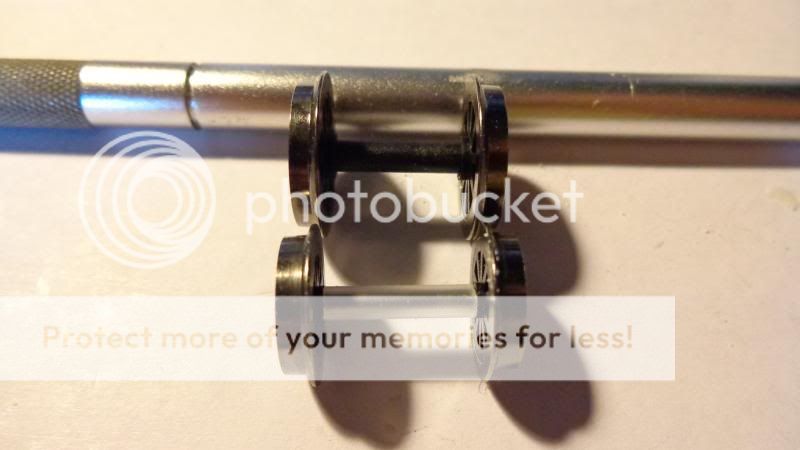
I put the back end back together and works absolutely fine… bit of thinking on your feet…. Not actually in the instructions but still… always good to add your own twist on to things.
………………………………….
The Cylinders + Motion
This has been one of the more challenging parts…. I stopped assembling the motion and cylinders as I wasn’t too happy with how the castings looked, or went together… it’s a tricky thing to get right… but I’m sure with time, patients and a lot of swearing it can be done.
So the Original parts that came with the kit for the motion.
Well you get the 2 types of slide bar… twin or single.
These are in the form of the single bar, 2 Brass slide bars soldered with another piece towards the back of the slide bars which go across the resin piece seen when building the mount for the bogie.
To do the twin bar type another 2 brass square rods are provided to fix in to the additional holes of the cylinder block.
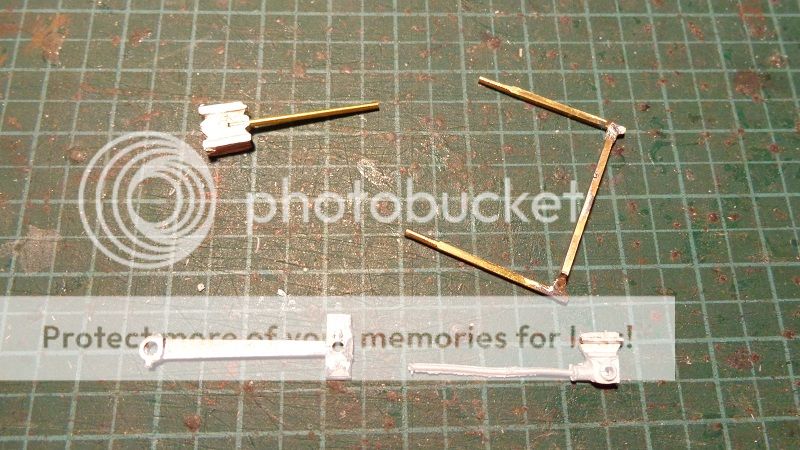
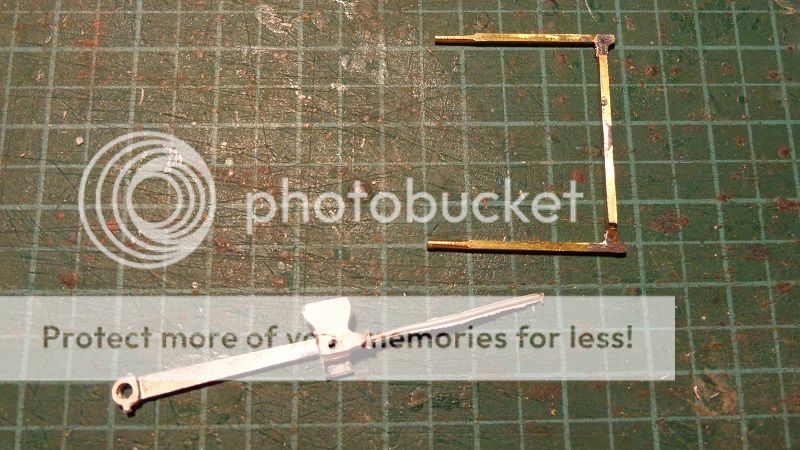
The castings for the single type, are quite basic, and similar in design to the old K’s type… the bar in to the cylinder is a casting… which can be easily damaged… the back of the slider is cast ok, you must use a part of the other cross head to enclose the sliding bar… which to me quite weak , but this was the type I needed for my 488 Replica.
The other cross head, which used the 2 slide bars has a brass rod inserted to it to slide in and out of the cylinder block… a better idea certainly, but still a better detailed casting, or maybe one can change it with a Markits version ect…
The one thing for me that stopped me using the parts, is the connecting rod from the front wheel set to the slider… looking bulky and out of place with the rest of the motion.
So what to do…….
After some research I found one loco produced by Hornby that had a similar slide bar arrangement, the Hornby L1. So the kit would hopefully work I chose this route to do the motion… you can do the same if you wish but I found this easier to assemble than the parts that came with the kit.
So I ordered the motion Valve gear from Abbiegails spares, in the spares you get the slide bars, the connection rods, for the wheels and to the slider, and also the hex screws for the wheels. The code for this part is X6219, costing £8.50

All I require from this bundle of parts, is the slider, and the connection rod, the rest is not needed. I was also looking at using the slide bars, which you can do… but when I found they were made out of plastic I decided to not use them.
So using some cutters I removed all the parts I didn’t need, the link to the slider I just cut off and the plastic holding the slider bar and other parts of the motion can just be cut off leaving you with the slider, the slide bar, and the connection rod.
Next challenge was the length of the connection rod… which proved quite a bit longer than first thought. How to fix this problem, I managed to very carefully pop the connection rod off the back of the slider, which is held in place with one of the small rivets, you may need to squeeze it with a pair of pliers to get the rod off the rivet / pin.
Using the kit’s cast connection rod, I used this as a template to see the actual length to trim the rod to and the new location of the hole which attaches on to the slide bar Pin / Rivet.
Before trimming the rod, I suggest you check the size of the drill piece in the hole which connects on to the back of the slider, too big and it will be useless, too small and well it won’t go on. It needs to be just right to clip of the head of the pin / rivet to stay on.
I have taken around 4 – 5mm off the connection rod.
You can attempt to make the head of the pin / rivet slight larger to stop the rod coming off due to it being removed, I used one of the parts which came with the bogie wheels,
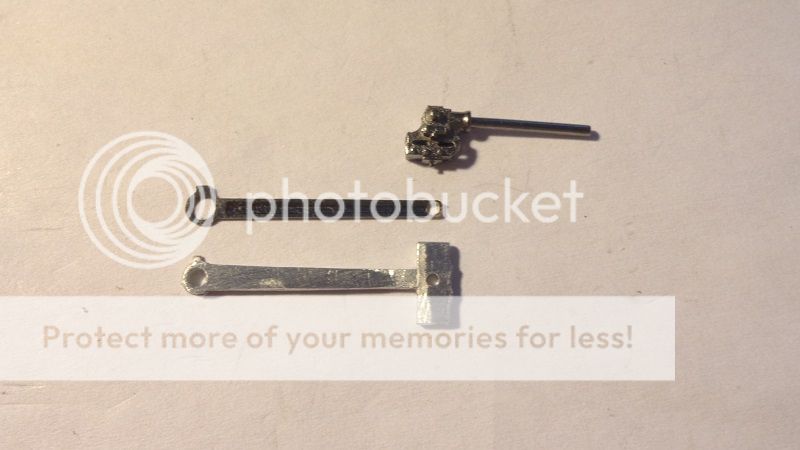
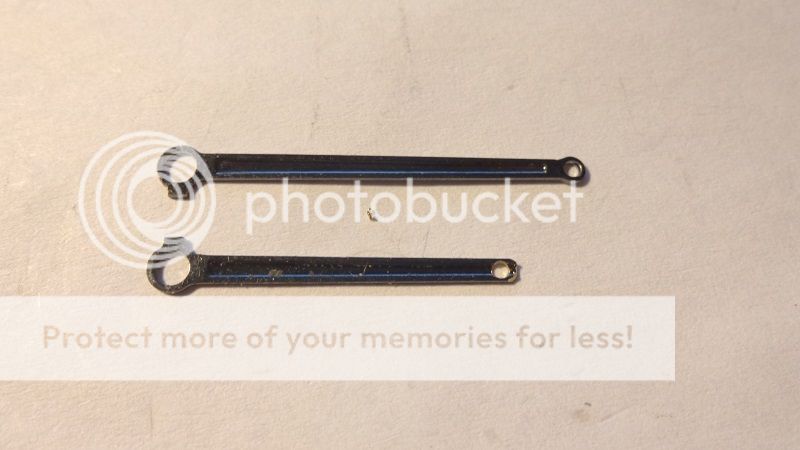
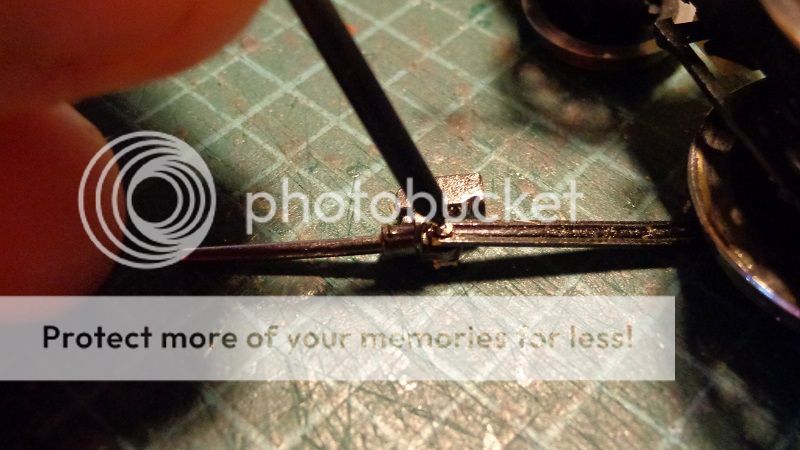
I was going to use the original Plastic slide bars from the L1 motion but decided against this, as they seemed a bit flimsy, So just before proceeding with the cylinders I checked with the original brass ones that came with kit, and the good thing is they fit, and work quite nicely.
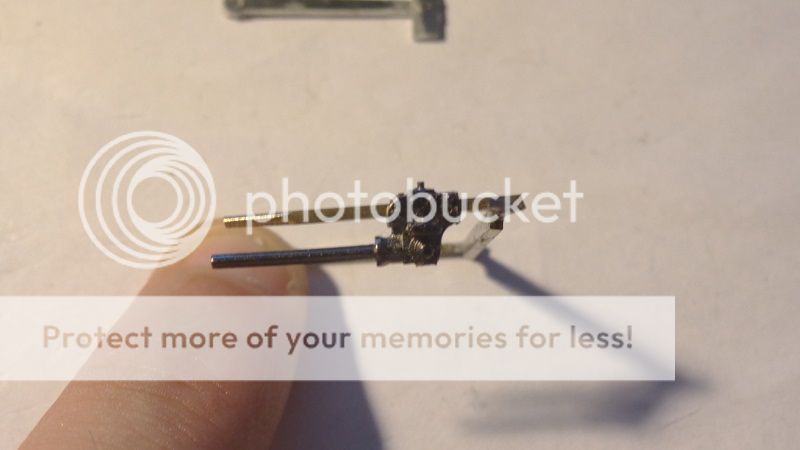
The connection rod was reassembled with the slider and tested.. and amazingly it worked..
So I best tell you about the resin Cylinder block, not much has been done on this, apart from filing the top to its nice and flat, so it sits flat on the underside of the body. I didn’t use the soldered 2 bars for the single slider, instead, I used the 2 loose bars which were the extras for the twin bar arrangement.
The 2 single extra bars were glued in position with super glue Gel, and left to dry and set. I determined the length to the old position of the bracket that when across the chassis.

Once dry drill the hole to attach the cylinder block to the body, I used a spare, brass machine screw 2.5mm I have also counter sunk the head in to the block so its nice and flush with the surface.
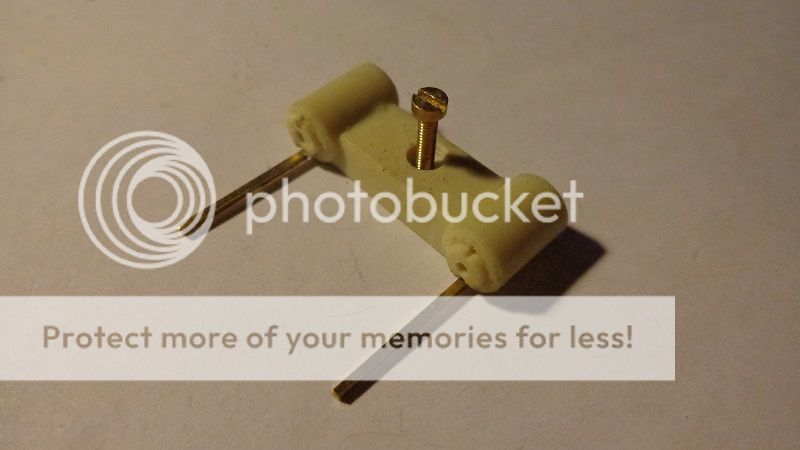
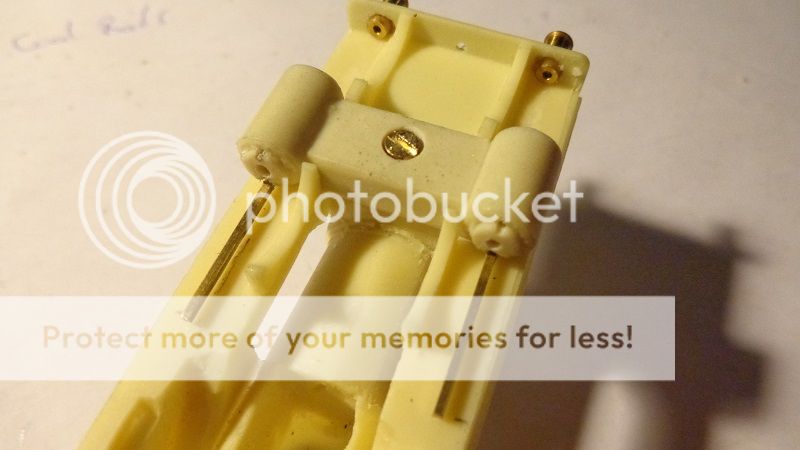
To attach the connection rod, for now I used the original push fit crank pin, till I can find another long enough to take an extra rod. For now its just pulled out a fraction, but does work well.

Last little modification was to file the top of the slider, as the space in this area around the slide bar is very tight. To remove the additional material I just used a needle file, and there should be just enough room to allow it to work.

When assembled it should look like this….. and tomorrow I will upload a small video of it on test.

So next to go on, was the parts that go on the smoke-box, 2 castings which I think go on the side of the smoke-box of the Radial in real life they are brass fittings….. sadly we shall have to make do with white metal and painting them gold. A small pilot hole is drilled a spot of superglue gel and then the part which I have no idea what its called is put in to the hole and left for the glue to set.
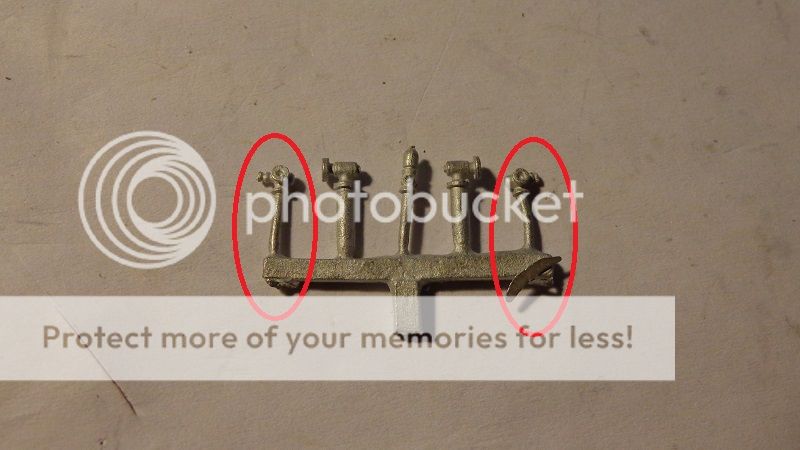
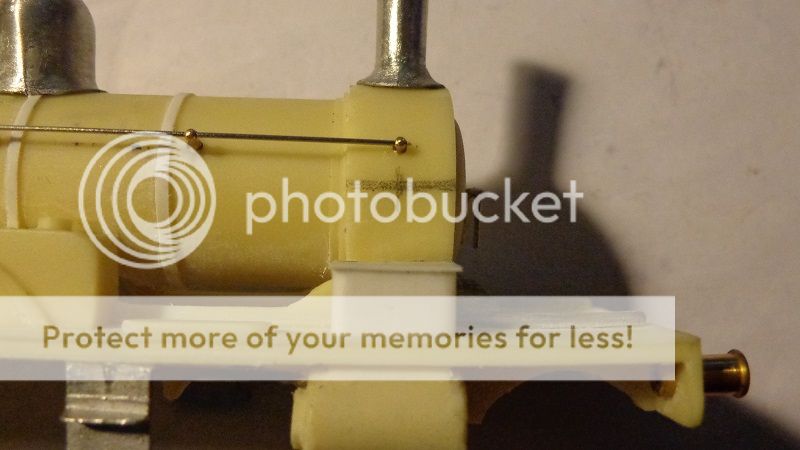
After this back to the hand rail, this time the more complex bit, around the front of the smoke-box, using the wire and hand rail knobs supplied with the kit, 2 short knobs on the front, and then make the shape with some pliers around the smoke box, the hand rail wire is soldered on to the side smoke-box hand rail knobs.
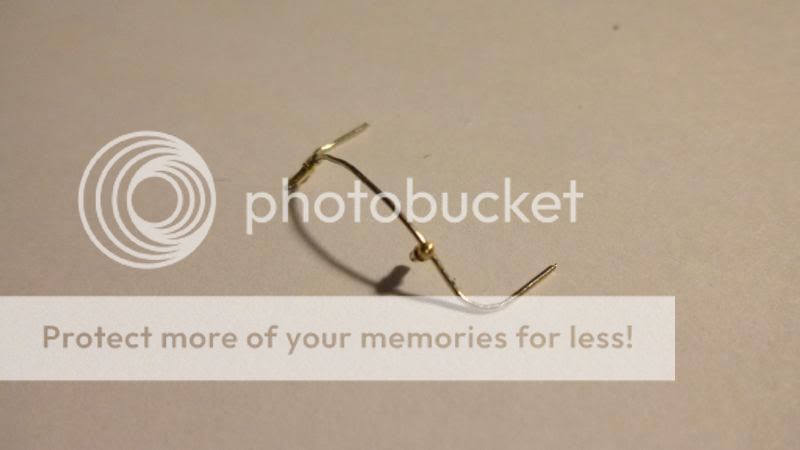

Other fittings added to the boiler last week, was the Clack valves, these are situated on the side of the boiler between the first 2 boiler bands. The clack valves and pipe work is a one piece casting….. sadly for me….. I like copper wire now, so I snipped off the bottom of the casting, drilled a small hole to take the 1mm thick wire, and glued it in place, enhancing the look of the casting, and adding some additional detail. These will be fitted once the loco is painted and lined.
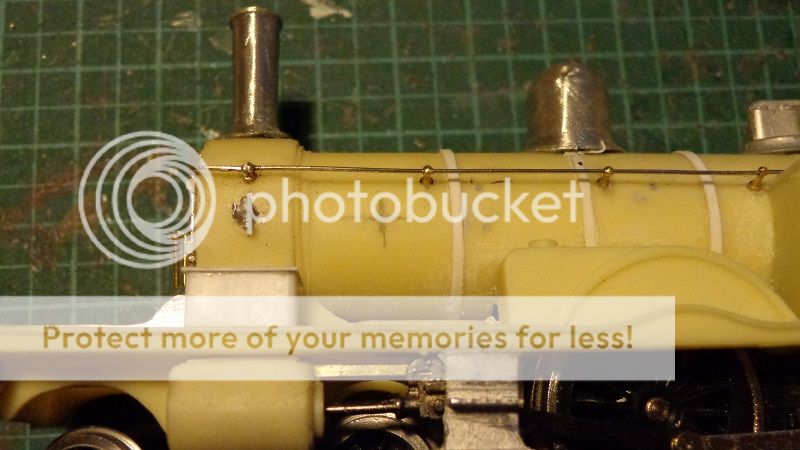
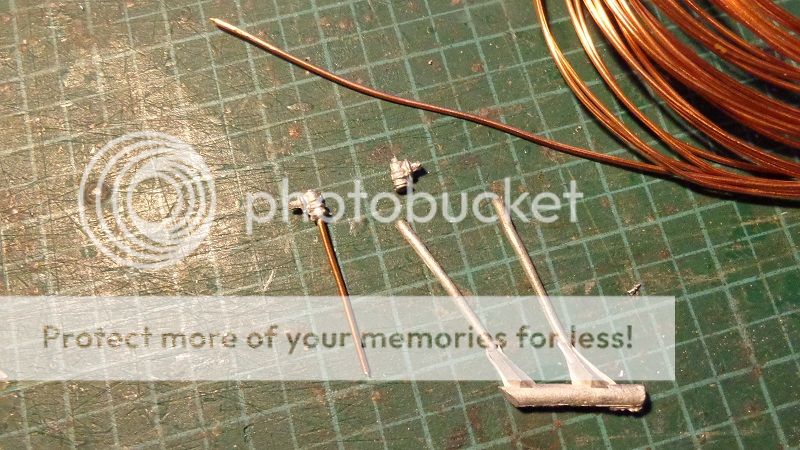
Around the cab now, as picked out by another member of the forum, something I spotted a few nights before, was a pipe coming up from the water tank at the front of the cab, either side of the windows….. luckily I had some left over 1mm brass wire….. which I think I brought from Hattons….. a 1mm hole was drilled in the tanks, in the location suggested by the pictures, these will again glued in place once the cab is lined.
Another small detail is a small hand rail around the middle of the top section of the cab, I used some of the left over hand rail wire to make this section.
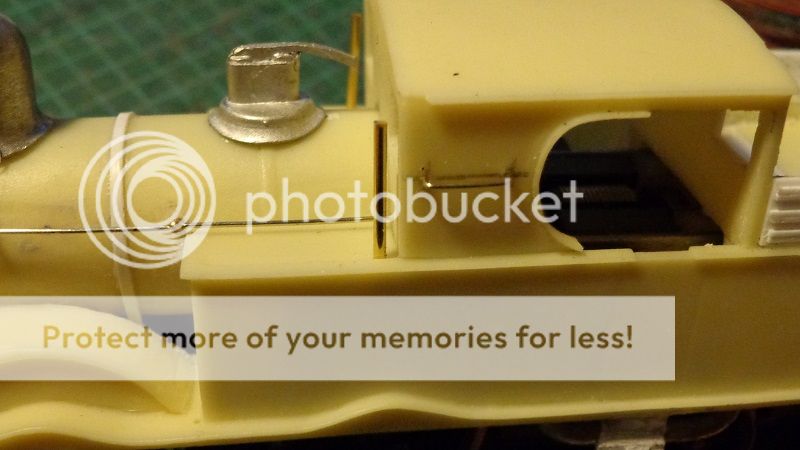
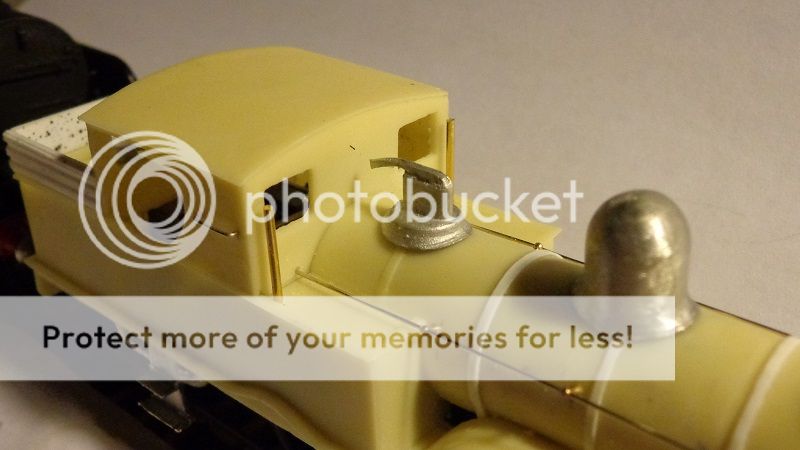
So this is how the model looks so far….. until i decided to go a bit further…..
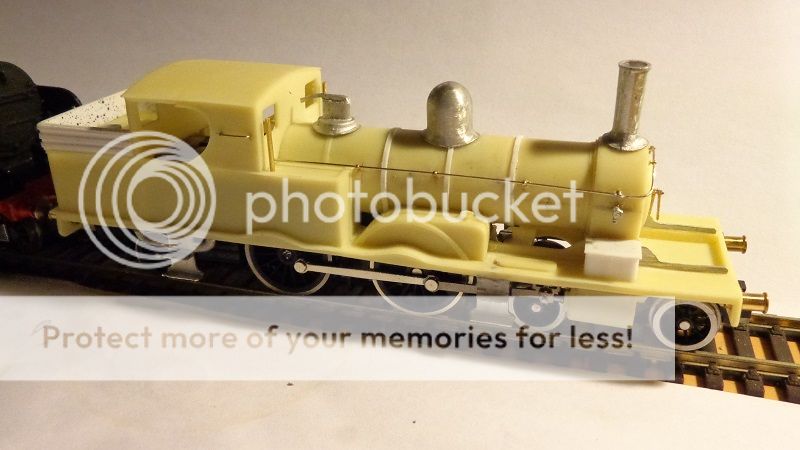
So what extra have I done….. sadly nothing exciting, Ive just added addition hand rails to the front edge of the tanks and to the front of the sand boxes…..
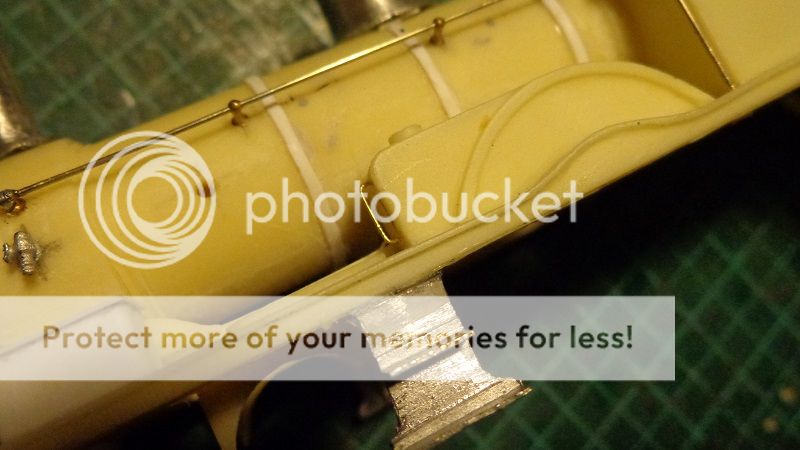

Some may of noticed some bits missing on the front…..
Last edit: by BMR2011
Posted
Full Member
This project is more of a restoration project than a kit build… but does show you can pick up a kit for a reasonable price to restore it back to good working order… and not look too bad either.
It’s been a while since I posted anything due to effort going in to the 3D print side of things.
This E4 kit, I purchased from a friend of mine, who tried to sell it off on ebay due to Bachmann’s E4 models, of which we expect the tooling samples very soon.
The kit was mostly already built, along with the chassis, although missing its trailing radial axle. The hope was to rebuild it, and strip the body of paint, and put it in to a new livery.

Firstly look over the model and see what needs doing, the body needed a few new bits on it, but generally it was ok… new sprung buffers, and buffer beam detail ect…
On the chassis I was quite surprised by what I found, a nice etched brass compensated chassis… also a small 2 stage gearbox, and a Mashima motor believe it might be the 1224 version… the good thing is with this motor it had a double ended shaft, so a shaft exiting out the back, meaning good for a flywheel to be added to improve running performance.
To the radial axle… no evidence of one or part of the chassis… but must have been one at some point due to the underside of the body being hollowed out. I decided I would use a similar method of the other Roger Stenning kit I own, using a pony truck from a rtr model which would require some work on the chassis.
Also needed was some brake gear… as there wasn’t any…
Anyway let’s start on the Chassis.
The chassis was stripped down and taken apart, and assessed, on first inspection it was noted that the axle boxes were out of alignment so these were moved, so they would move up and down freely as the front and middle axles were sprung. The wheels were in good condition, looking at the connection rods, they were a tad thin in places, and were coming apart. Luckily I already have the newer version of this kit and had not built the chassis, so spares were… pretty available to say the least, so the connection rods, and crank pins were renewed… a dry test with no motor showed that it rolled quite freely without any oiling.
The trailing axle I decided to use an L1 front pony truck so an NEM coupling could be used, I previously used an 8F pony truck on my other model. To attach this to the chassis I changed the rear end slightly, by removing the old spacer, I fitted a new version spacer from the newer kit, which was secured from both sides with a screw.
Brake blocks and gear were made up from Mainly trains etchings, and some brass rod.
Trailing wheel was from mainly trains with a diameter of 16mm.

The chassis was reassembled with new pickups and wiring, also the flywheel was fixed in place, you can get these from Mainly trains or Roxey Mouldings. The chassis was sprayed Matt Black, and the wheels sprayed with Satin Black. This was given a run on the rolling road for an hour each way, to check the gear box and any tight spots on the connection rods…. This would undo any of the crankpin nuts.

The Body.
This probably needed quite a bit of work, and quite a bit of filling in areas…. After stripping all the paint off and salvaging any bits that may of fallen off… I started the job of filling and repairing….
The main area was around the splashers at the front where a lot of material had been removed fore the wheels and give room to the crankpins.
I started doing some detailing adjustments, for example the clack valves, I removed the pipe casting and replaced this with 1mm copper wire.

On the front end, the buffers were removed to be replaced with Slaters parallel sprung buffers which were similar to the LBSC Type. Romford braided pipes for the vacuum pipes on the front and also Markits steam heat pipes were to be fitted to the front and rear.
Also you can see holes had been made for the lamp irons which will be made with split pins as seen earlier on this topic.
Various other details were to be added like a Smoke-box door handle, and also renewal of the handrail wire.

An additional piece of Brass rod 1mm was used to the place the missing pipe from cab to smoke-box.
You can see in this picture after all the details had been fitted to the front and replaced all the handrail and pipe work.


Around the cab, the old Westinghouse brake pump casting which was still on the model I decided to remove it as the casting was a very basic representation of a Westinghouse pump. I replaced it again with an item from Mainly Trains, which is made by Gibson, I’ve added some copper pipe work which is copper wire again, around the pump, which makes it look a little more prototypical…

Body painting…
On to the painting… as per normal I cleaned the body, then applied Halfords Grey primer, after I inspected it made sure there were no gaps or issues, if there were gaps some filler, and some wet dry fine sand paper, then another coat of Primer.
I used Satin Black again Halfords brand, 3 coats of this, and 3 coats of buffer beam red was applied, this then allowed the lining out to begin.

Lining out / transfers
I used HMRS press-fix transfers on all of my models apart from the SECR locos. On this particular loco I am aiming for the BR early livery, so will be using the LNWR / BR lining sheet from HMRS brought though mainly trains, with the BR steam loco and coach insignia (sheet14).
If your unsure on how to use HMRS read back through the topic you will find various write ups on lining and applying numbers ect…
This loco took about a day to do… which isn’t to bad.

After this a couple of light coats of Satin varnish is applied, to seal all the transfers in and stopping them moving around. After these additional details are added, such as clack valves, pipe work, crew, coal, whistle, Window brass etches and the windows.


So the smaller details are then added, such as, the smoke-box door number, you can get etches, but I decided to so my own custom transfer, with an etched 75A shed plate… which is still in the post….
Plates are applied with a very small amount of super glue Gel.
I have also gone over the running plate, smoke-box and cab roof with Matt Black just to break up all the satin black.


Posted
Full Member

(Click to enlarge)
So as some of you know just after Christmas I fancied a little bit of a challenge, so after hearing many negative things about the Duke of Gloucester model, I decided to go and purchase the cheaper of the 2 models, being the R3168 Railroad model.
From research and pictures I found very little difference in terms of details on the locos. Yes one had separate handrails on the deflectors and a detail pack and also some etched plates… Which I found out were not etched.
So price difference:
Railroad: RRP £82.99 / £63 – 67
Special : RRP £119.99 / £96 – 110
These prices are a range compared to the retail price Hornby state. Now my model was £66… was pretty much the same as the other model same chassis same body… ect… apart from those parts raised above. Also some parts were unpainted such as clack valve pipes and bearing on the caprotti valve gear and the axle boxes.
So the challenge to myself… could I use the difference between the 2 in price.. say £30 – 35 to improve the railroad range model to make it in to a model equal if not better than the special edition….
I listed a number of things that I wanted to do.
- Repaint – Proper BR green, and red for buffer beams.
- Line out in orange black orange. 6.50
- Paint details, cab, pipes, axle boxes, bearings ect….
- Details to be found, Sprung buffers, buffer beam detail, steps.11 6.50
- Etched plates. 12.55
- Hand rails. 4.20
First job was to find and acquire these parts and paint if needed, if you have done some models / kits before like myself, you may have some paints already. The finding of parts took a day or 2 and were placed on order with various suppliers.
Prep work.
I started with the tender much of which was ok, although the moulded handrails had to go as well as the moulded buffers, so the moulded handrails were removed with a knife and small dremel bit, the buffers were given the chop, and a 2 – 2.5mm hole drilled in the centre, and any of the casting was removed with a needle file.
Once happy with the work I hand drilled 0.5mm holes for the hand rails and the back and sides of the tender. Using 0.45mm brass wire and fixed in place with a small amount of super glue gel. I had some spare brass wire from various other loco kits, but you can find a pack of 10 for about £2.70.
On the buffers I wanted to add sprung buffers… so I went on the hunt for some Hornby replacement parts, I came across some on Hornby Spares / Abbiegails spares, sadly soon to close due to poor health, so with items reduced to clear I found a pair of buffers which fitted the bill, X6206 - Buffers (pk2) which are £1.20. Some slight modification to the chassis to enable the buffers to spring so some more drilling was needed to remove more material from behind the buffer beam.
A small mod to the back of the buffers, I removed a slight extrusion on the back with a knife and a file to make the back flat to glue directly on to the buffer beam, again done with super glue gel.

Transfers and lining were removed body and cleaned. I will be painting the loco with BR green post 54 which you can get from Phoenix precision paints. Hand rails were taken off the loco, glazing in the cab removed… which is quite easy to do when you figure out the drivers seat and the backing to it is part of the window glazing… so it’s just a matter of putting a knife between the side of the cab and the glazing / seat… and turning it easing it away, then it will come straight out.
Smoke deflectors are held on at 3 points, 2 under the running plate, to weaken the glue use acetone, the 3rd is on the side of the smoke box towards the back of the deflector which is causing some to look rather bent, as there’s nothing maintaining the gap at the front of the smoke-box. This should snap cleanly I did try the acetone but that didn’t do much apart from taking the black paint off.
After painting the body with some proper BR green, I then set out to pick out some details, like the pipe work to the clack valves on the boiler.

On the front of the loco this is where most of the work was going to take place. The moulded smoke-box door handle was removed using a knife and a small dremel piece to gradually remove it, a small hole was then drilled in the centre.
The horrible plastic moulded buffers didn’t last very long, receiving a hefty snip from a pair of cutters… the stub which was left was filed flush, and a 2mm hole drilled in the centre to receive it’s new buffers.
Also mention to remove some material from behind this hole, as there is a metal beam on the chassis that runs the width of the buffer beam so 2 small notches need to be made to enable the buffer to spring.
The buffers in question and smoke-box door handle arrive a day or 2 later, the door handle came from Mainly trains, the buffers from eBay, X9313R which are from a Class 31 Diesel… see they are useful for something.

%20(this%20link%20will%20open%20in%20a%20new%20window)"><figure%20class="attachment">
<figcaption>Image</figcaption>
<div>
<div%20class="attachment_details">
<a
target="_blank"
title="(this%20link%20will%20open%20in%20a%20new%20window)"
rel="lightbox"
href="http://i1351.photobucket.com/albums/p796/bluebell-railway2/WIP/71000%20Duke%20of%20Gloucester/DSC03542_zpsf0dfabf8.jpg"
><img
alt=""
src="https://yourmodelrailway.net//uploads/auto_thumbs/1100__http%3B%2147%2147i1351.photobucket.com%2147albums%2147p796%2147bluebell-railway2%2147WIP%214771000%213720Duke%213720of%213720Gloucester%2147DSC03542_zpsf0dfabf8.jpg"
/></a>
<p%20class="associated_details">(Click%20to%20enlarge)</p>
</div>
</div>
</figure></a>) ]
]
As you can see a much improved front end!
The smoke deflectors were a bit of a pain… hopefully someone will do some Etched smoke deflectors for it at some point, but I shall work with what I got.
The old moulded hand rails were removed using a knife and a dremel, watch your fingers! I left a small amount of material where the moulded hand rail knobs were to aid as a reference for drilling holes for the new ones.
I used small / short turned hand rail knobs, on the deflectors, and used some 0.75mm brass wire.
Results were pretty good. These were then sprayed Satin black Halfords brand paint,

As you can see from the image above I had left the ends of the transfer / print, to aid as a reference for the new etched name plates from Fox transfers, which you can see below. This pack costs £12.55.


The hand rails were then painted silver to match the special edition version.
Going in to the cab to tackle the moulded black plastic mass which is the back head on both models… so much can be improved here… So setting to work, some general research in to cab fittings and colours, and then to the paint. Having done this to a few locos already that I own I have most of the colours I needed… so no money was spent here..
To paint the pipes copper, I used an old GCSE art trick I picked up in school, using a slightly blunt pencil, and dipping it in to the paint, and just dabbing the access off, I could easily paint the pipes with no problem… you may need a steady hand!
Here’s a before and after :) note the glazing has not been re-added, certainly will try and fit them better than Hornby did obviously….


Anyway time for lining…
Lining used was Orange black Orange so GWR / BR lining, these are HMRS pressfix again brought from Mainly trains, it would take a couple of days for normal people to line a loco… me well I tend to do it all in one go… till about 3 am in the morning that way no interruptions.
Here’s the results after day one… minus varnish.

I then started to add back the hand rails paint them silver, as well as adding the etched numbers to the cab, I did this using varnish and then placing the numbers and manoeuvring them in to place with a cocktail stick the varnish will hold these etches no problem.
I added the gold outline around the forward facing cab window, as well as the overhead wire warning transfers.
The next day, a friend of mine arrived to put the name plates on his Duke of Gloucester as well as re-number his standard 4 tank to 80151, and already even at this incomplete stage… you can see the improvements… bearing in mind… mine was the railroad model compared to a Special edition..
I will let you the reader judge…. At this time I was in budget at around £25 / £30

Later that evening I decided to take another step forward, I decided to pick out the pipe work in front of the cab… again using the blunt pencil method and small brushes… I managed to pick it out quite successfully…
I used satin black and some acrylic gold paint which I then dulled down with some thinned down matt black paint which I applied after varnishing. Then the loco’s cab received it’s glazing back as well as silver paint for its hand rails.


A few small bits were done after the varnish, a light coat of matt black on the roof, running plate, and smoke-box was added, as well as this being a little clumsy I managed to know the whistle off… oops… but I have replaced it with a temporary replacement, an old turned brass one which Hornby made quite a few years ago

Smoke-box door plate was fixed in place with a small amount of super glue gel.

So apart from a detailing pack… which I would assume Hornby will provide as a spare at some point that’s a complete rebuild… I think at least it looks a bit better….

Last edit: by BMR2011
Posted
Full Member
I have purchased another kit to do up and fix up, which is an old Will's Finecast Q-Class kit, which has a nice Etched 4F chassis, this was brought from eBay for around £100, has been stripped down cleaned, and assessed, will probably require a new gearbox and motor, won't be fitting any tender pickups will be using a flywheel.
The body will be having some adjustments done and some improvements in the detail, in the cab on the front end and around the steam reverser.
I have now also started on the DJH U-Class which has been sitting in my Cabinet for about a year, mainly due to the cost, as it needed wheels costing £30, which it now mostly has awaiting the pony truck wheels, also replaced the tender with a Bachmann N-Class tender so it's lighter, needs a fraction of the work to finish, also needs a motor and gearbox again £30, also going to try no additional pickups and use a fly wheel on this U-Class.
Should see some progress in a month or so.

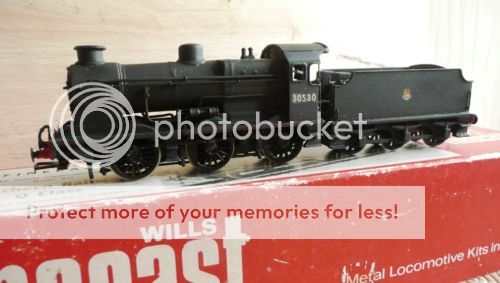
Q-Class:
Well the chassis has been completely rebuilt, runs nice and freely. The new motor, and gearbox has arrived, but sadly had the wrong worm in the pack and a replacement is due tomorrow with the correct Bore on the worm. I am trialing a new pickup arrangement, if successful I will use it on the U-Class kit also.
Gearbox is by Markits, motor is a Mashima 1220, which will be fitted with a flywheel so no additional pickups will be needed. Gear set I am using is 40:1.
All purchased from Scale link, apart from the Flywheel which came from mainly trains


All attention has now been focused on the Will's Q-Class kit before working on the U-Class.
I have now placed an order with Narrow Planet for the cab side plates for 541 and 1618 which will arrive in a few weeks.
So as you have seen the chassis for the Q-Class has been rebuilt, re-motored, with a whole new gearbox, quite pricey but worth it.
The chassis was one of the main reasons for purchasing, which instead of having a standard chassis as the kit is just a body kit it had a nice etched 4F chassis.
But the main area of work was the body, being quite basic and quite old, so lacking quite a bit of detail, so I comprised a list of
areas and bits to improve on.
- Front end:
- Sprung buffers, New lamp irons, handles on cylinder covers, replace chimney, add rivets to the smoke-box.
- Sides:
- Grab handle on running plate, lubrication lines, improve detail to reverser, Etched plates
-Other:
- Turned safety valves, new whistle arrangement, new backhead, re-use old tender from the old Q-Class.
- Total repaint, filling and repair castings, adding sanding pipes.
On the front end of the model, I used the same method for lamp irons as I have done in the past as seen previously in this thread. I use 1/32 x 1/2" split pins which I purchase from Mainly Trains, you can also use Bambi staples which is another option. You can also see the grab handles on the cylinder covers on the front made using 0.3m brass wire.

Sprung buffers being used are the SR stepped versions, I decided to go with Slaters this time I usually use Markits, I have to say they don't look anything like SR stepped buffers, but they are here now so might as well use them, next time back to Markits. These are fitted by drilling a 4mm holes, and also removing some material from behind to allow the movement of the buffer.

The loco body has also had a lot of work filling and repairing work done to it, I use normal model filler then sand it flat and re-prime it.
Work done also around the steam reverser, a new bracket behind the cylinder, and new pipe work running from the cab to the bracket, also an addition lubrication line has been added on this side which you can see above the pipe work for the steam reverser.

Some improvements on the top of the firebox, re working for the safety valves and also a spare whistle from a DJH U-Class.

Some other main detail improvements are mainly on the side of the lack of rivets, mainly on the smoke-box which is completely bare of detail and rivets.
A while ago I brought some resin transfer rivets which were for another project which was to change the Dukedog tenders, but didn't need them in the end So these came in handy for this job.
They are really fiddly and fragile to get in the right place, but once they are in place and sealed in they certainly do the job.

Also added as wire to the sandboxes:
You can also see the additional grab handle behind the step on the running plate:

So after check overs the first couple of coats of satin black was applied, there will be additional coats as well as selected areas of Matt black to break up the satin black.


Last edit: by BMR2011
Posted
Full Member
This was left to harden while that was doing that, I did some work to the tender, stripped that and also repainted it, still needs some work to the brake gear underneath which will be done a bit later.
I would of posted this a lot sooner sadly, due to getting more clumsy I had a slight accident with the model so had to rebuild the cab as it was smashed to bits.
On the main loco body small details were started to be added, in the Cab it was painted, and readied for glazing, which is quite easy to do, for the side windows at least where as the front ones were a right pain. I use acetate sheet for windows glued in with canopy glue.
Also whilst in the Cab area I have added a piece of brass strip to act as the fall plate to try and hide the gap between loco and tender. You may also see added underneath this a piece of brass wire has been added to connect the tender to the loco.


The old back head from the old Q Class was salvaged and repainted and repaired in a couple of areas, I brought this a long time ago and sadly the company that used to supply them has to my knowledge gone out of business which is a great shame. The back head was fixed in place using superglue gel.


Before adding any details to the running plate or smoke-box, I had a bit more painting to do, generally I find painting locos just pure Satin Black a tad boring and also look a bit plain / flat and lifeless. So to add a bit more dimension to the model I usually add some Matt Black in this case Humbrol 33 to a few areas to give it a used look and not so boring.
I apply the paint to the cab roof, the top of the running plate and splashers, as well as the whole smoke-box. You can see the general look of the model when you get to the bottom of this post.

Whilst looking at the front end you can see the buffer beam has been painted red (Revell 31) and also a Vacuum pipe added. I have also added the number to the buffer beam using HMRS Southern pressfix loco transfers, same was used on the tender. The buffer beam was then varnished using some Railmatch acrylic satin Varnish I have lying around just to seal the number in.
Also added are the buffer heads, which are sprung, and also Hornby's screw link coupling, again glued in to place with superglue gel. Also added the letter B to the side running plate near the buffer beam, which I think designates what region worked in.

On to the boiler, I have added some reworked castings that came off the model, firstly the clack valves on the side of the boiler, I removed the cast pipe work from these and replaced it with some 1mm copper wire, which looks much better than painted white metal. These were bent in to shape using some pliers and working from pictures a bit of glue on each end and that should hole it in place.

On top of the firebox, the Markits safety valves Ross pop tall valves have been added, nice turned brass, again better than the castings which were there originally. I have added an additional casting to just in front of the cab which holds the whistle which comes off my DJH kit of the U-Class, I would of usually removed the whistle and replaced it with a turned brass one, but the casting was pretty good so I didn't see much point. I will also add some copper wire going in to the manifold at some point.

Etched plates are now on order for 541 and 1618 from Narrow planet, who now offer cab side plates for standard gauge locos including now 2 types of southern plate, thanks to my ordering of plates over the past year or so. But overall this is how the model stands, still needs some finishing off in some areas but you can see how the Matt paint works ect…
I have made some tiny changes in the body and chassis to fix some issues with the fly wheel hitting and occasionally touching, but all seems to be working well.

1 guest and 0 members have just viewed this.