00 Gauge - Keyford Junction
Posted

Site staff
Regards
Alan
Born beside the mighty GWR.
Alan
Born beside the mighty GWR.

Posted
Inactive Member
I got back with my primer made a temporary spray booth in the garage out of old cardboard boxes, the bridge is too big to get into my other spray booth, and half emptied a can at it.

At least the joints aren't quite so noticeable now.
I found Plastikard easy to cut and fold so give it a go, and they do have a fair selection of textures.
Regards
Chris
Posted
Inactive Member
Now I've started painting, not my strong point, I'm more into engineering than art.
By the way in case anyone is wondering the bridge deck is balsa wood I found the card a bit wobbly. The parapet capping stone is also balsa strip.
Regards
Chris
Posted

Full Member
The real I Like trains kid !
Posted
Full Member
Andy
Posted
Inactive Member
I do like your trackwork as well.
How is it all coming along?
regards,
Derek.
Posted

Banned
Cheers, Gary.
Posted
Inactive Member
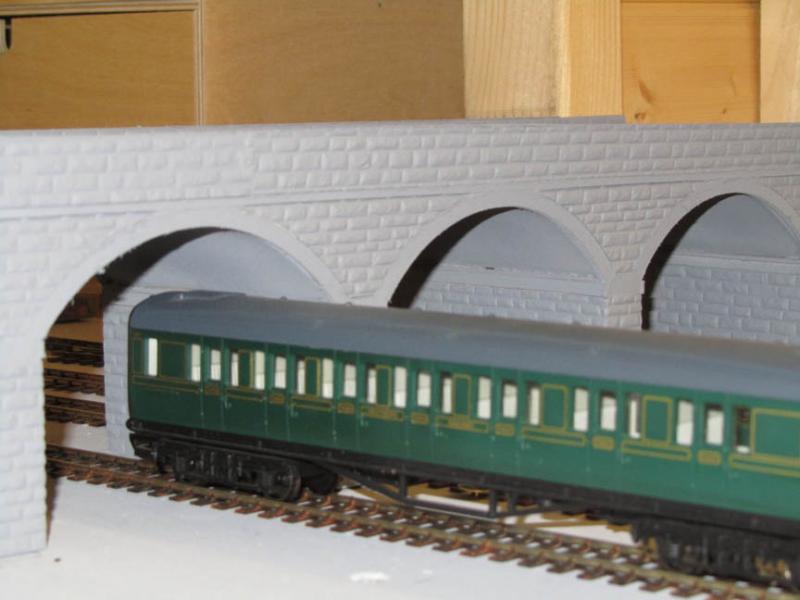
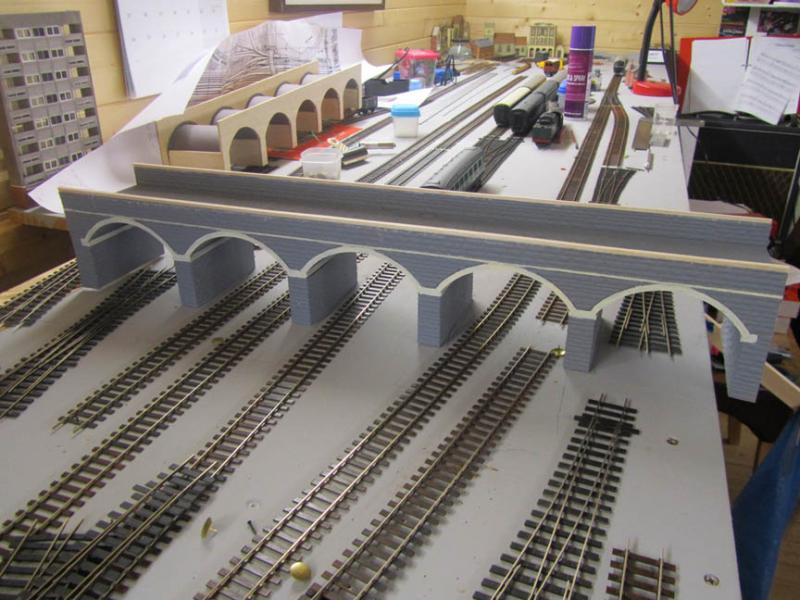
The first bridge I built was balsa wood but that is the one in the background that I abandoned. One of the reasons I abandoned it was because when you see it up close the arches are wobbly because I cut them by hand on my scroll saw following a pencil line.
Then I acquired a plotter cutter and everything suddenly got so much easier. I drew one arch then repeated it in the drawing program then programmed it into the cutter and hey presto: identical arches and two sides exactly the same in 1.3mm card. If you have a quick look under ‘Members Workbenches’ at ‘Plotter Cutter tests’ you’ll see what I mean.
Then I used the same program to cuts the other bits like the Plastikard covering and the arch stones. I original cut separate stones with the intention of gluing them all on individually to show the joints but when I realised there were going to be lots and lots of them I went off the idea and cut it out of card a complete arch at a time as I hope you can see in the photographs. I’ve started painting and then I’ll draw the joints on by hand.
Shunter1: Thanks for your interest, progress is a bit slow at the moment but I’m hoping to get a lot more done shortly, my problem is being so easily sidetracked into other projects. I’m at the moment trying to sort out a system of levers to operate the scissors crossover with one lever. More of a challenge than a necessity, and I’m in the middle of scratch building the signal box at the same time.
Thanks for your interest.
Best regards
Chris
 Last edit: by Brookwood
Posted
Inactive Member
Sorry I've just realised you've all ready seen the plotter cutter tests.
Regards
Chris
Posted
Inactive Member
I feel guilty about the lack of attention to this thread and my only excuse is I got distracted by starting a local Model Railway group and also moving into 1/12 scale modelling.
During lock down for Corvid I got told to get on with 'MY!' railway rather than working on everybody elses.
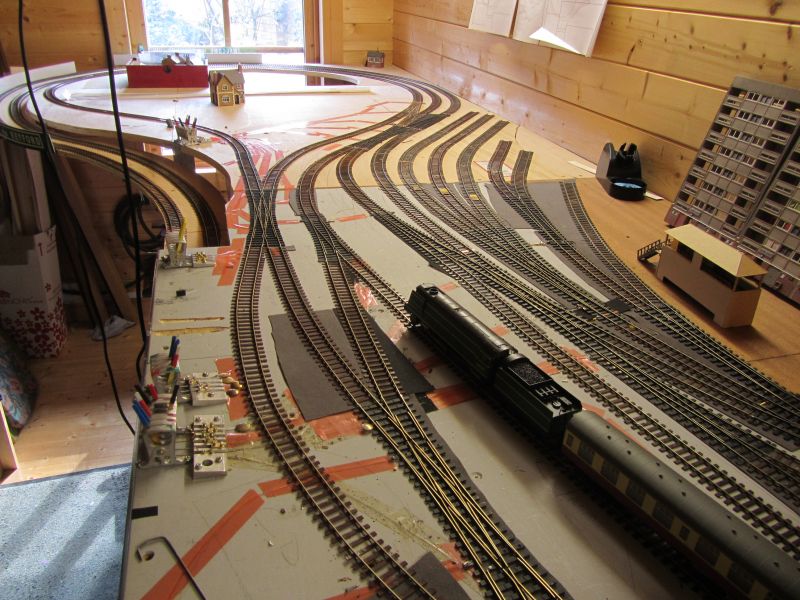
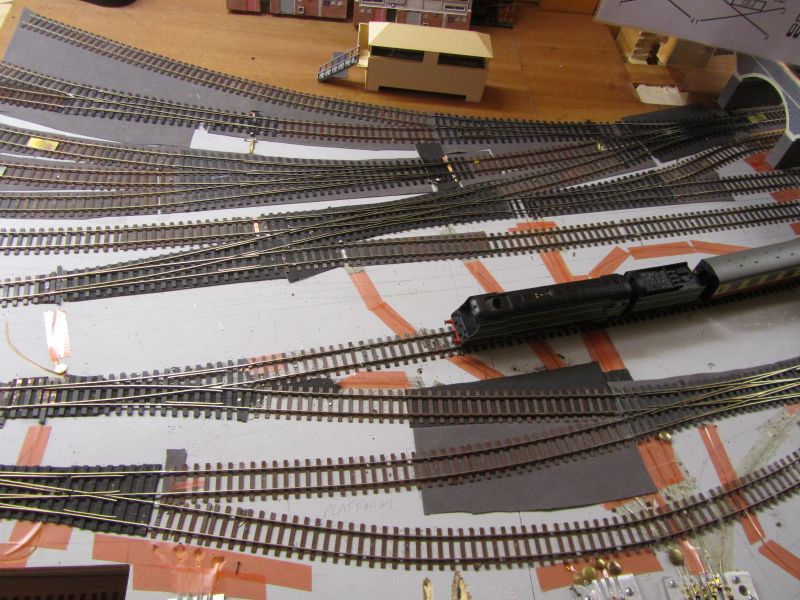
So here are some photos for those of you who like before and after photos.
No scenery yet but the trackwork is all pretty much finished and fully functional. I can run two trains continuously in opposite directions around the two centre main lines, a single track out and back terminous, and as you can hopefully see and extensive goods sidings. I can just about run four trains all at the same time but you do have to keep your wits about you and nimble fingers.
The other thing to note is there is absolutely no electrical wiring to the layout at all so no work under the baseboard was necessary.
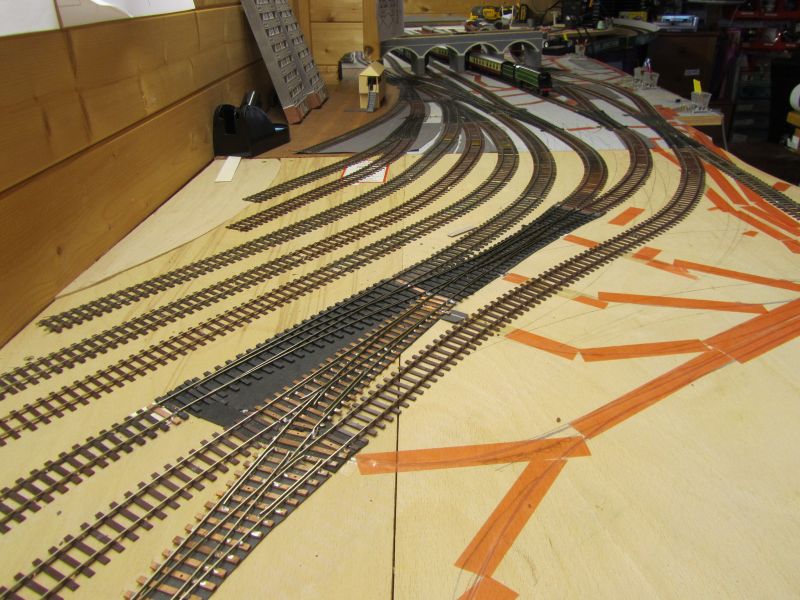
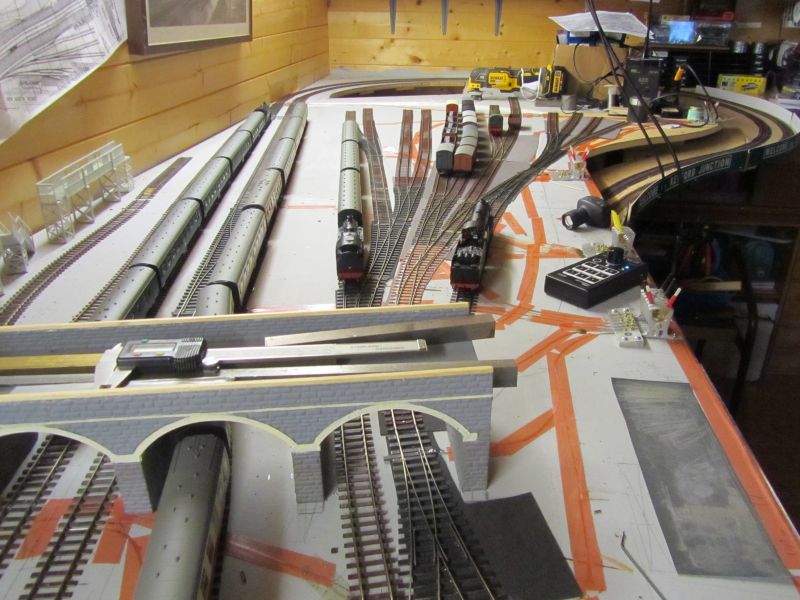
The red, orange or pink strips you seel everywhere are covering the operating wires and will be removed before ballasting and earth covering. The are just there to protect the very sticky double sided tape holding the W.I.T in place


Posted

Full Member
Hi ChrisThe other thing to note is there is absolutely no electrical wiring to the layout at all so no work under the baseboard was necessary.
No wiring (coming from me - see my recent "Going Large…" thread - this question about wire will will get the boys laughing!)?
Are you battery-powered infra-red or have I just misunderstood the comment and your wiring is bang tidy "aerospace" grade?
If you are DC or DCC, a few tips on getting it invisible would be helpful :oops: :oops:
Barry
Shed dweller, Softie Southerner and Meglomaniac
Posted
Inactive Member
Thanks for your interest and sorry to disapoint you I'm a great believer in out of 'sight out of mind' so my layout really is totally wire free as my wiring would be a bird's nest. Me giving tips on wiring to somebody would be like me giving flying lessons to an Astronaut.
My system is radio control battery operated.
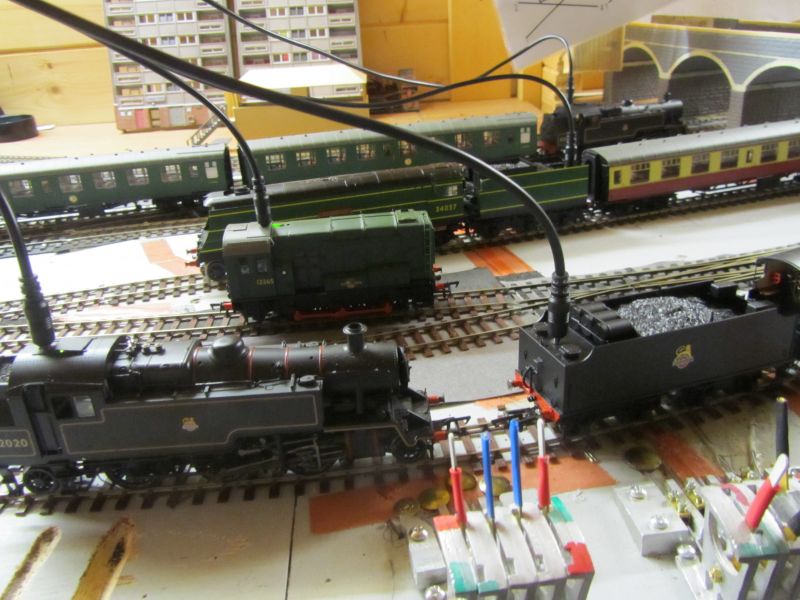
This is the nearest any electrical wiring gets to my layout.
When we moved house and I had dismantle the original layout in the seventies I was horrified at the quantity of wiring underneath and DCC was only just starting then. So when I started this layout I was seduced by the 'only two
wires' in DCC. I very soon discovered the truth and adding wiring for point motors just compounded the problem so I went for wireless and have never regretted the decision.
I have been looking at your layout and thanking my lucky stars ever since but that is mostly because I really don't like wiring and I could never do what you are doing, I just don't have the skills necessary.
Regards
Chris
Posted
Full Member
Fantastic idea!
Closer to real railways than either DC or DCC I guess.
Barry
Shed dweller, Softie Southerner and Meglomaniac
1 guest and 0 members have just viewed this.