00 Gauge - Keyford Junction
Posted
#151900
(In Topic #8451)
Inactive Member
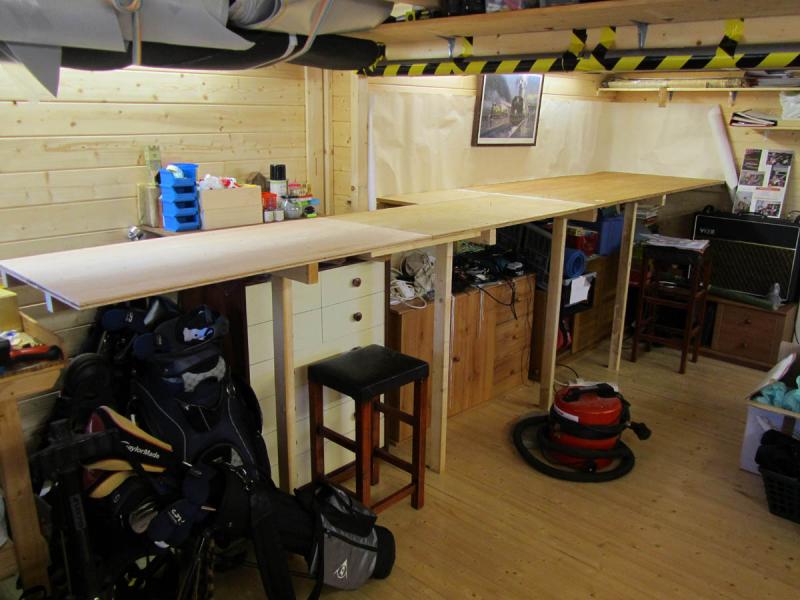
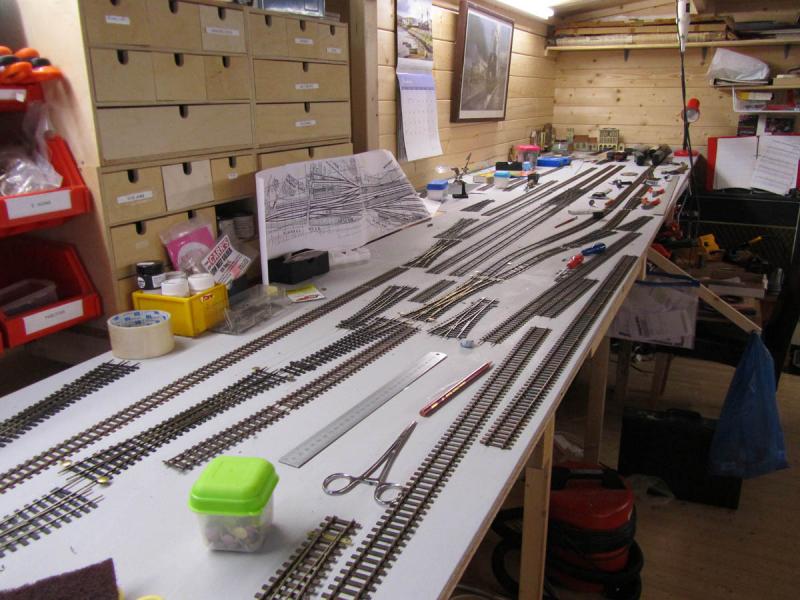
That is 18mm ply sitting on top of CLS studding. Lazy old me wanted to use heavy timber so I didn't have to cut and join too much and the studding was cheap and I all ready had the 18mm ply.
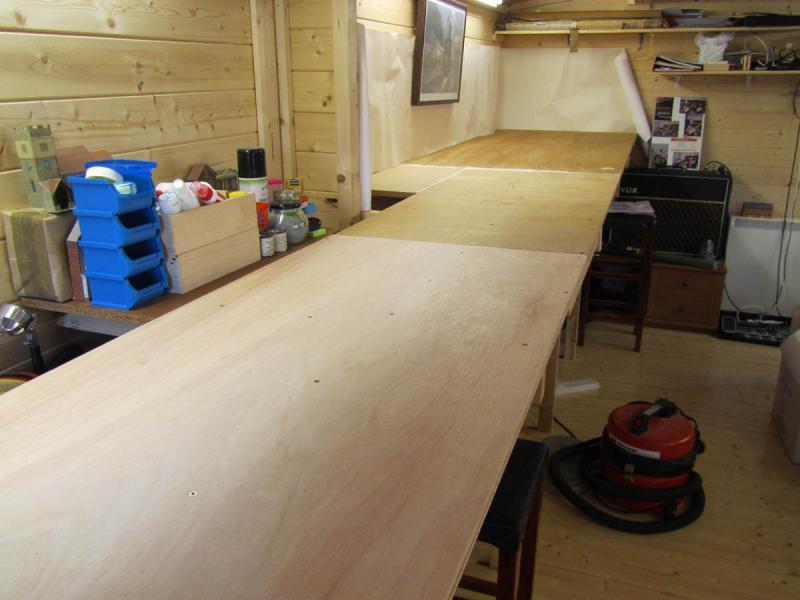
That ply ain't 'alf 'eavy tho'

It looks long enough for a decent sized station but it is still way too short.
Is that track straight or was the laser bent?
I think I've bitten off more than I can chew.
I hope there are some really helpful people on this website I'm beginning to think I'm going to need it. It was all originally plotted out in Templot, a wonderful piece of kit. Then I decided to buy the turnouts and crossing and they didn't quite match so it is all working out slightly different.
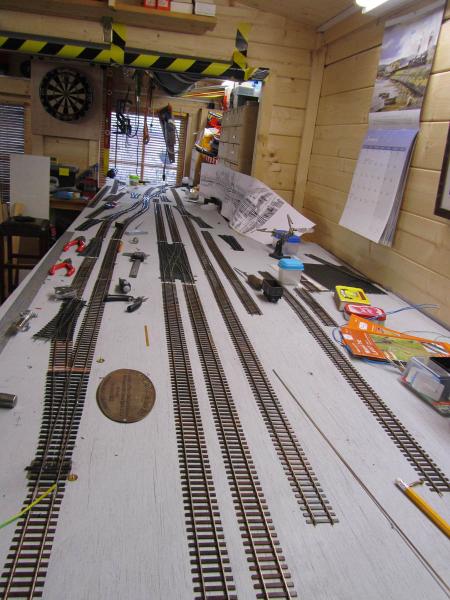
I have got further than this and will up load some more later. This is just to let you know I keep my promises.
At the time of these photographs I was working towards a big error which I will explain shortly.
So the blood came because you shouldn't let me anywhere near a saw and it's difficult to cut wood without. The sweat came because that plywood is pigging heavy and the tears came when I realised my mistake.
At least I hope you will all be able to have a laugh at my expense and it might help others not make the same mistakes.
Regards
Chris
 Last edit: by Brookwood

Posted
Inactive Member
The idea was to recreate Exeter Central station because that is the station I remember the most from my school days and early teens. After studying Mr C.J. Freezer plans I decided to get nearer the original and create my own ideas. So I invested in Templot and spent many happy hours designing, modifying, redrawing, scrapping, starting again, rubbing out, redesigning and generally changing my mind lots of times as things worked out or didn’t at the time.
I managed to get a plan of the track layout but soon realised it wasn’t going to fit any of the rooms available and I couldn’t afford a house big enough to take the whole thing unless I went to ‘N’ gauge. I dismissed that idea as being impractical for someone as clumsy as me with arthritis in both thumbs.
So I tried a two track layout but never was very happy with that. That was a bit too much of a saving, better to shorten than narrow, I thought. So, back to four tracks with suburban lines on both sides as the original.
I soon began to realise that scale length trains were out of the question, so what would be reasonable. I decided that six or seven coaches wouldn’t look too bad and that dictates the length of the platform, plus the scissors crossover in the middle, which was one of the main features of how the station worked and we end up with a platform about eight feet long.
Having constructed the baseboard out of very heavy ply I was hoping that the weight would deaden the sound. I experimented with various materials under some track and none were substantial quieter than the bare board so that made life easier. At least in the station area, elsewhere it might be a different matter. Plus the strength of the plywood cuts down dramatically on the supporting timber which gives so much more room for cupboards and things underneath.
The choice of track was SMP as I had boxes of the stuff ripped up from previous attempts. I also had various assorted homemade turnouts and crossings but they had all suffered somewhat from being lifted from other layouts. I will still be able to use some but perhaps out of sight.
I originally hand built the scissors crossover from rail and PCB strips back in the seventies along with several double slips and crossovers but in those days it was a nightmare trying to get all the stock to go through every joint because of the variations in BTB measurements and the coarseness of the wheels.
This time I decided to go with commercially made ones and change the wheels.
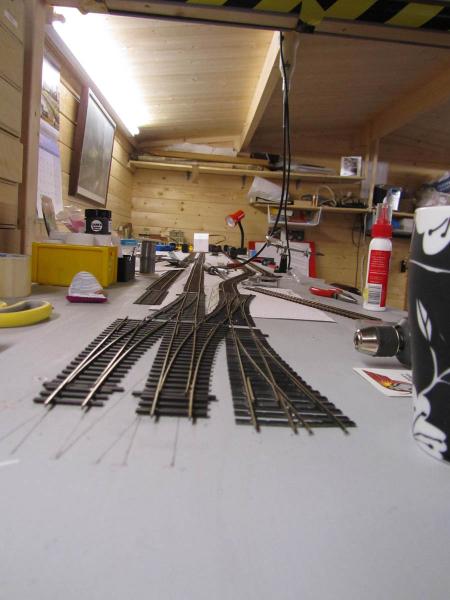
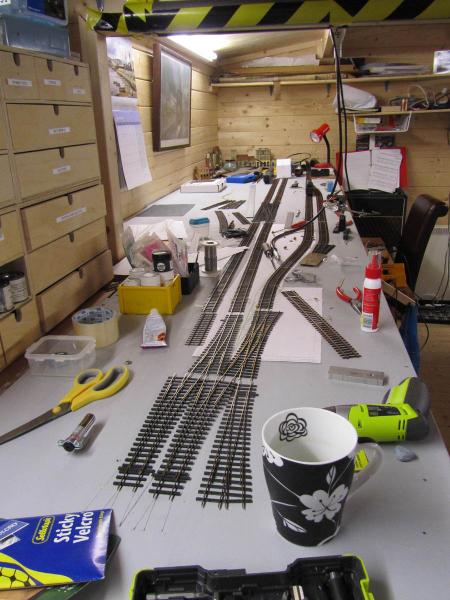
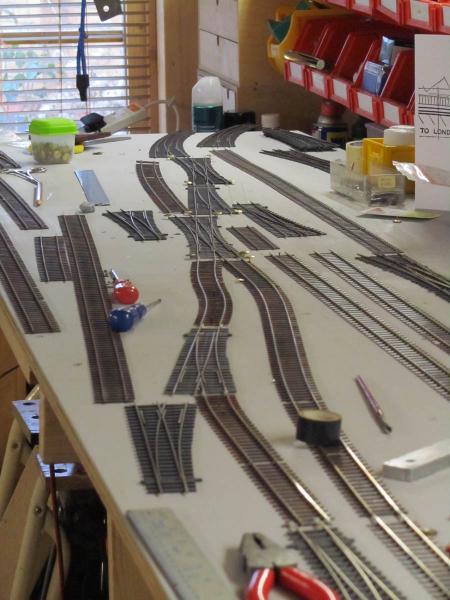
The length of platform still gives plenty of room for all the spaghetti like rail track in the station throat before it disappears off out of sight.
I pinned out all the Templot sheets, all 96 of them, and started throwing track on top. I soon realised there was going to have to be a compromise. The Templot proved it would work but the commercially made turnouts didn’t fit quite what I'd drawn so there has been a little bit of shuffling going on.
To be continued.
Last edit: by Brookwood
Posted
Inactive Member

I had a plan once but it gets altered daily as I find somethings don't work or look wrong.
Regards
Chris
Posted

Full Member
I hope you end up with the plan you want you are certainly trying hard enough.
Regards
Acording to a recent visit to a supermarket at check out time, I an not loosing my memory it has been downgraded which means i am not stupid afterall - Sorted! - What a relief
Posted

Full Member
You seem to have a very cosy railway room ………..:thumbs
Are you going to move it all when the track is down ? I notice, top right in the last photo, the tracks look as if they turn towards a solid wall …………:roll::roll:
'Petermac
Posted
Inactive Member
Petermac: There is going to have to be some rearrangement as I progress but you have to start somewhere. I have found in the past that my grand ideas do tend to get somewhat modified, usually in downward direction. I wish now I'd kept all the photographs from my previous attempts but they were all on 35mm and seem to have disappeared somewhere.
There is actually more room than it looks at the end of the last photograph I'm hoping to get a double track around in large semicircle under a tunnel and a couple of bridges and bring the track back into the centre of the room for the return to the other end. But all that is a vague idea in my mind at the moment.
Regards
Chris
Posted
Inactive Member
I know the feeling when it comes to plans and track laying.
After some 2 years laying down and ripping things up I have switched to trainset mode (Decided to relax) and am finally making some progress.
regards,
Derek
Posted

Site staff
Regards
Alan
Born beside the mighty GWR.
Alan
Born beside the mighty GWR.
Posted

Full Member
My late exhibition layout was a single track branch but still 20ft long (the length of my basement).
I have Templot but haven't really sat down to get to grips with it. I also have Trax2 which enables one to define and print out point templates, but is much simpler.
Is the track Marcway? It looks good.
John
Last edit: by Brossard
John
Posted

Full Member
Mike.
Mike
Pig Hill Yard - a small Inglenook shunting layout for my boys, in 00.
Pig Hill Yard - a small Inglenook shunting layout for my boys, in 00.
Posted
Inactive Member
Brossard: The turnouts and crossings are Marcway and the flexible track is SMP ripped up from previous attempts. It isn't going to be end to end though. The track at the far end is going to disappear down a slope to a different level as the original station went down a slope and round a bend. That was the whole purpose of the scissors crossover in the middle of the station. They couldn't get full length trains up the hill so they brought them up 6 or 7 carriages at a time, put a restaurant car in the middle and joined them up for the journey up to Waterloo.
I found Templot took a lot of full time concentration but once you get stuck in it becomes easier and easier and there is lots of help available from their website and forum.
I will put up some more photographs soon but I have been sidetracked into building a bridge and signal box from scratch because I couldn't find anything commercially that was right. I also got a bit sidetracked but the lovely summer we have had in this part of the World, now Autumn has arrived so I will be spending more time in the cabin on the railway.
Back soon.
Cheers
Chris
Posted
Inactive Member

Just a bit more track laying.

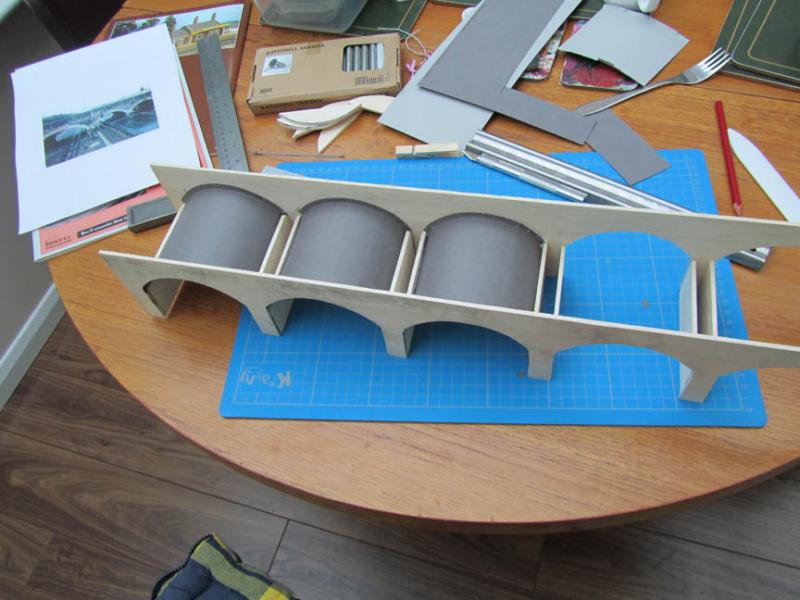
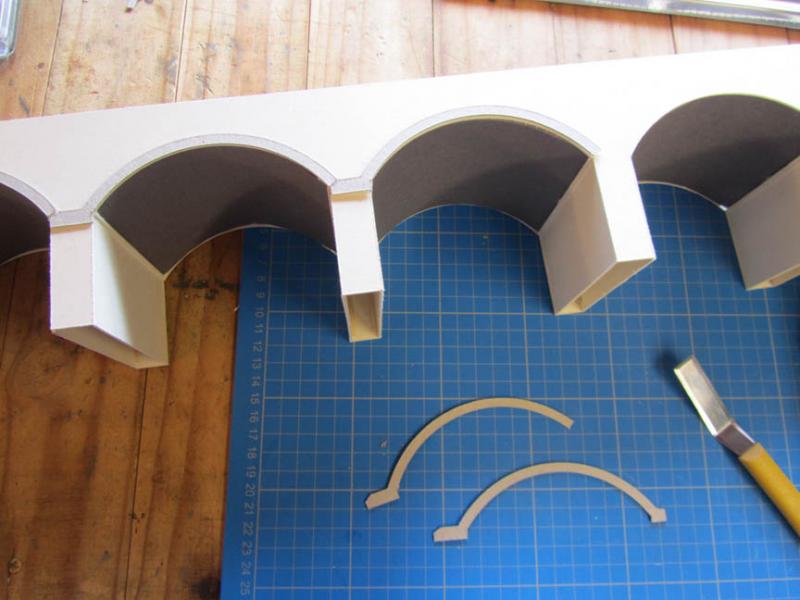
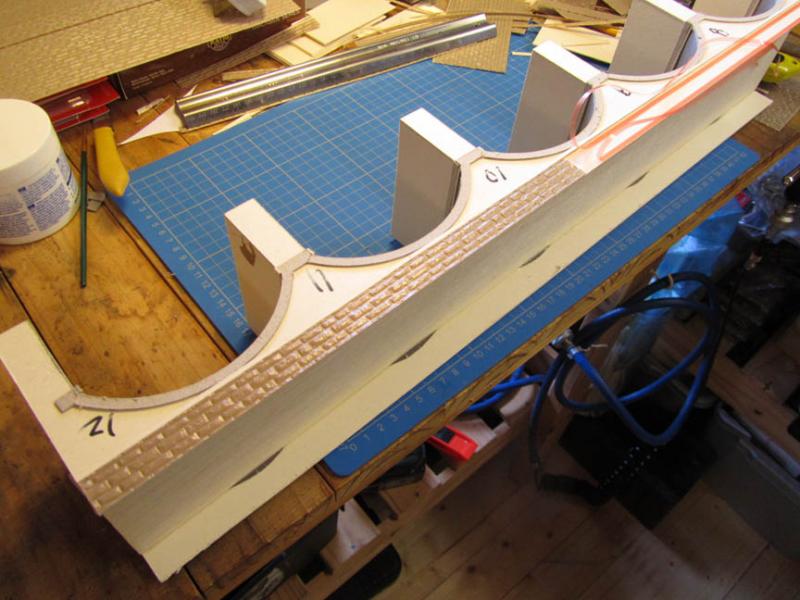
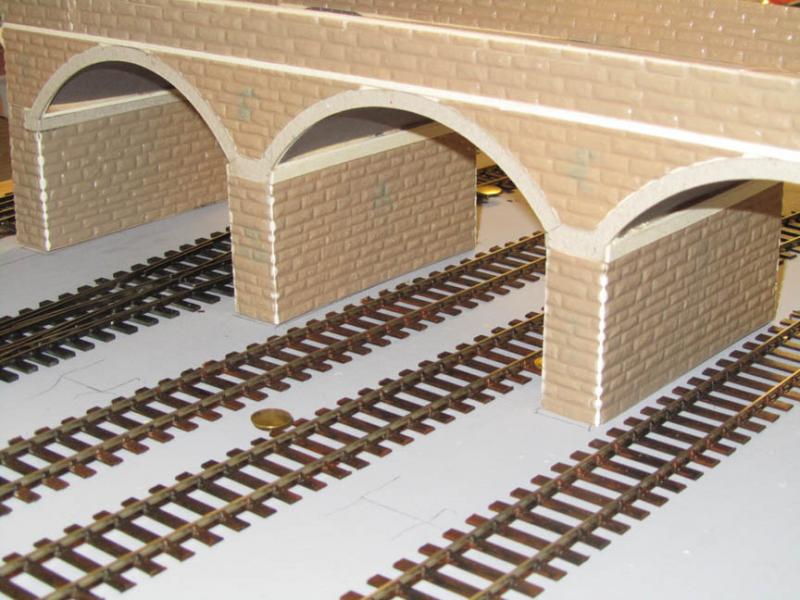
Some bridge building.

Made from Balsa wood but with card for the underside curved arches.
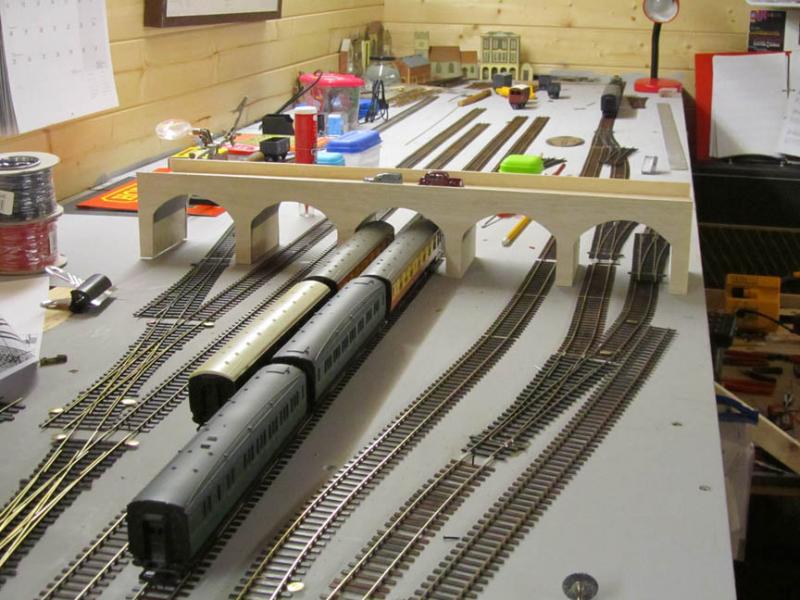
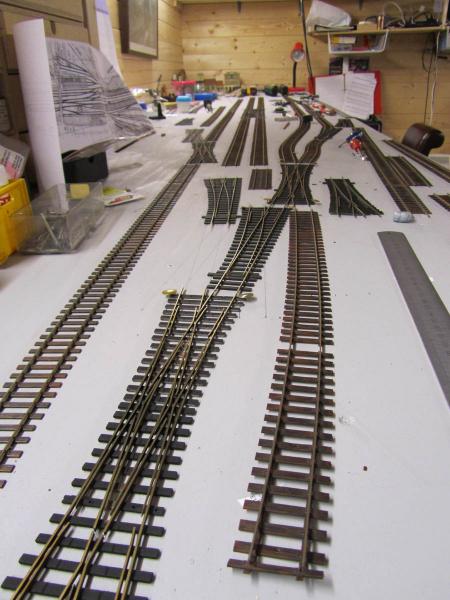
Now I begin to realise what an idiot I am. I rather fancied nice long straight runs of track through the station for those straight through expresses going at full lick but stations aren't like that when there is a bridge across the station throat. The bridge was there before the track so they laid the track through the arches of the bridge and as one track has a platform running under the bridge they had to curve the track to suit.
I'm as dim as a Toc-H lamp.
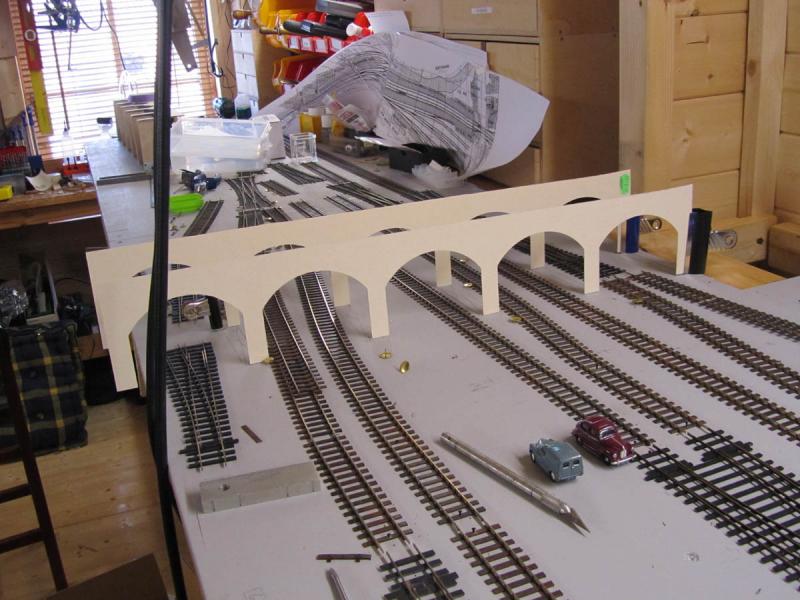
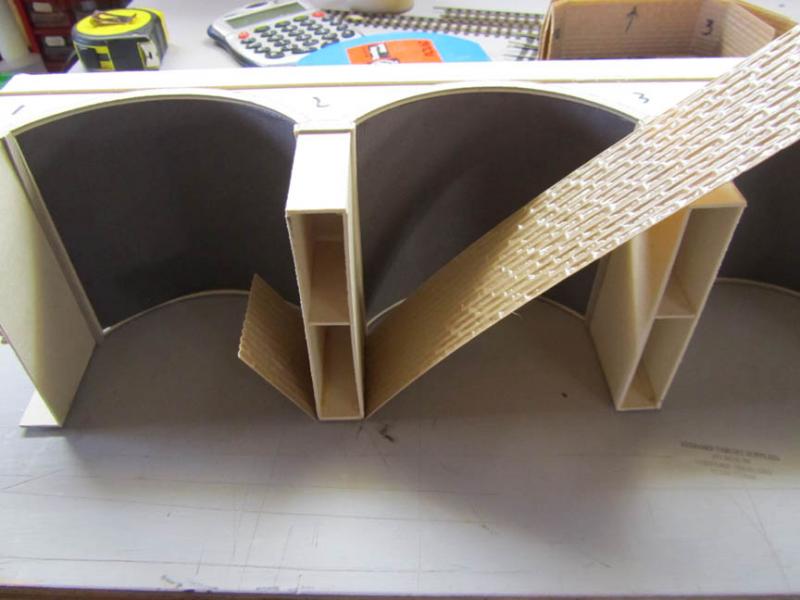
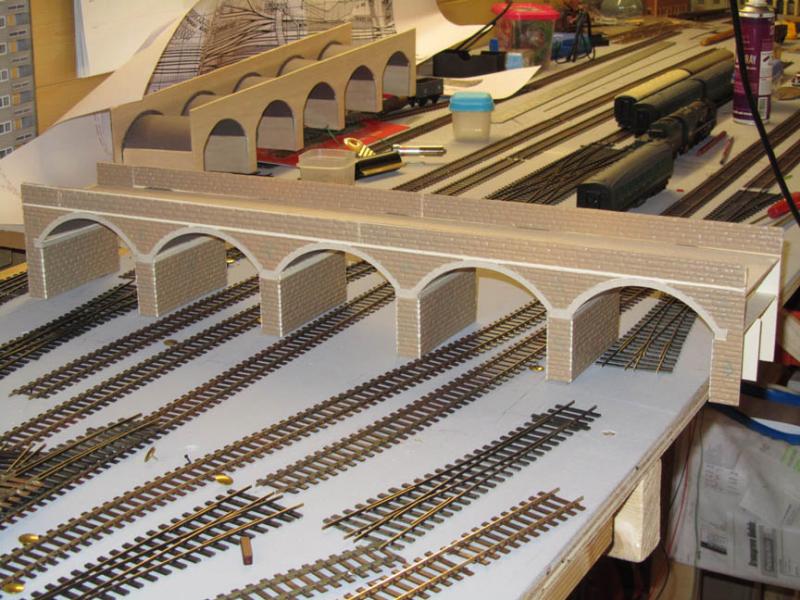
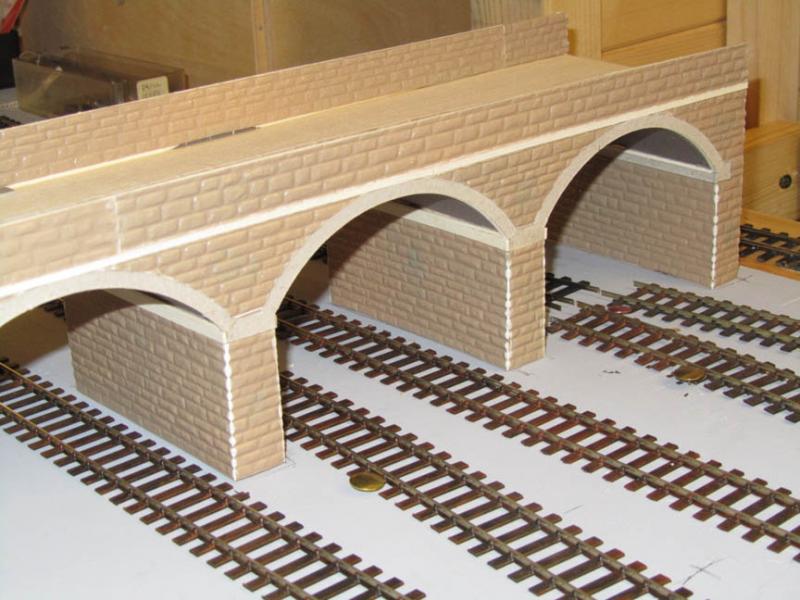
Rip up the track, luckily only temporarily held with drawing pins, and redesign the track layout.
At the same time I decided I didn't like the balsa bridge so I started again in card.
Posted
Full Member
As for buildings and structures, I prefer plastic card and Slaters/Finecast embossed sheet. Scalescenes can make very fine buildings.
John
Last edit: by Brossard
John
Posted
Inactive Member

More shortly.
Regards
Chris
Posted
Full Member
John
John
Posted
Full Member
Terry
Posted
Site staff
Now there's a saying i haven't heard for a few years.
Regards
Alan
Born beside the mighty GWR.
Alan
Born beside the mighty GWR.
Posted
Inactive Member
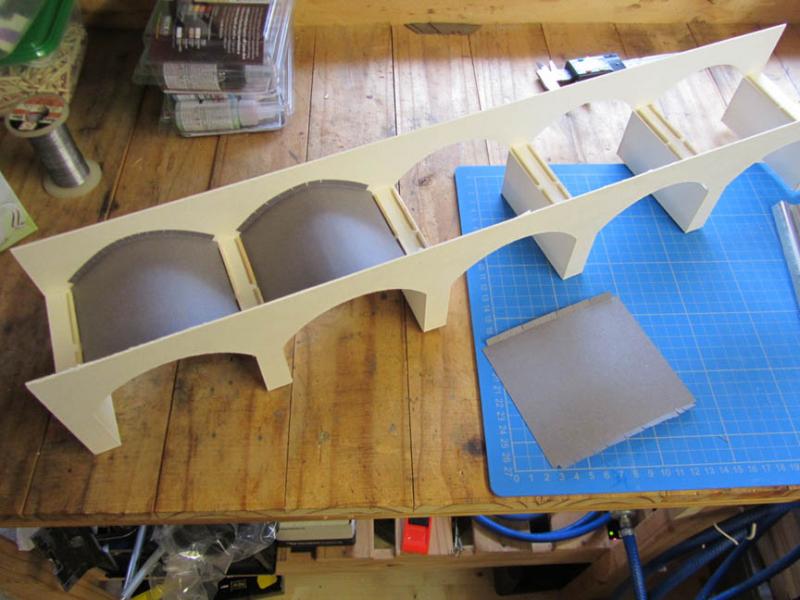
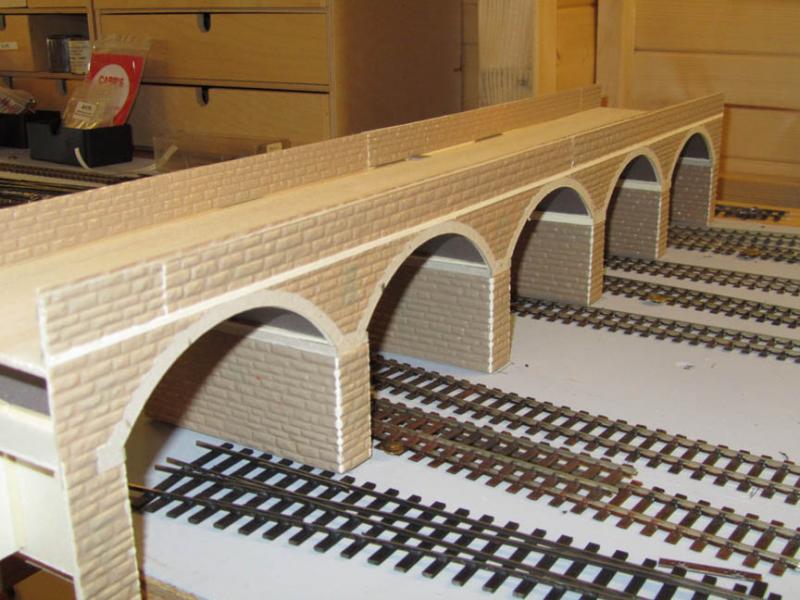
I was very pleasantly surprised as a newcomer to Plastikard how easy it was to bend at a right angle. When I tried cutting and matching the mortar at corners it looked awful so I wrapped the piers in one piece all the way round.
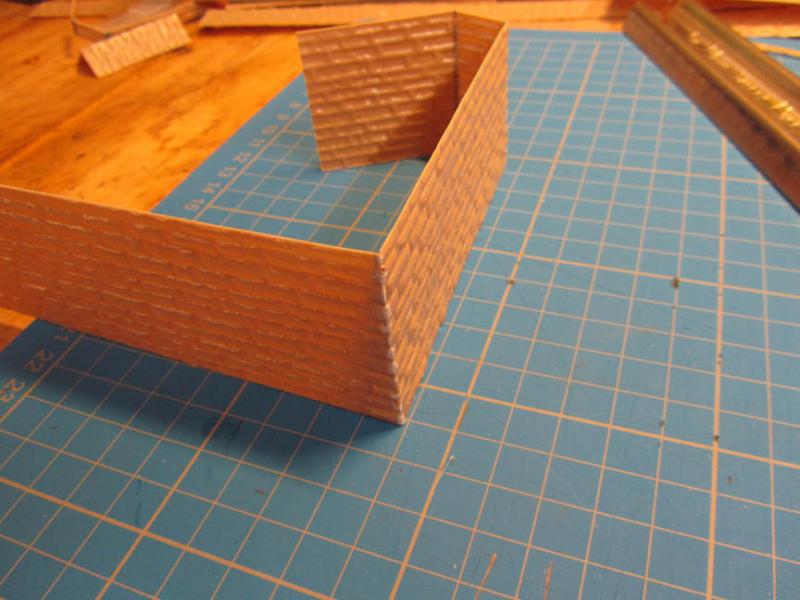

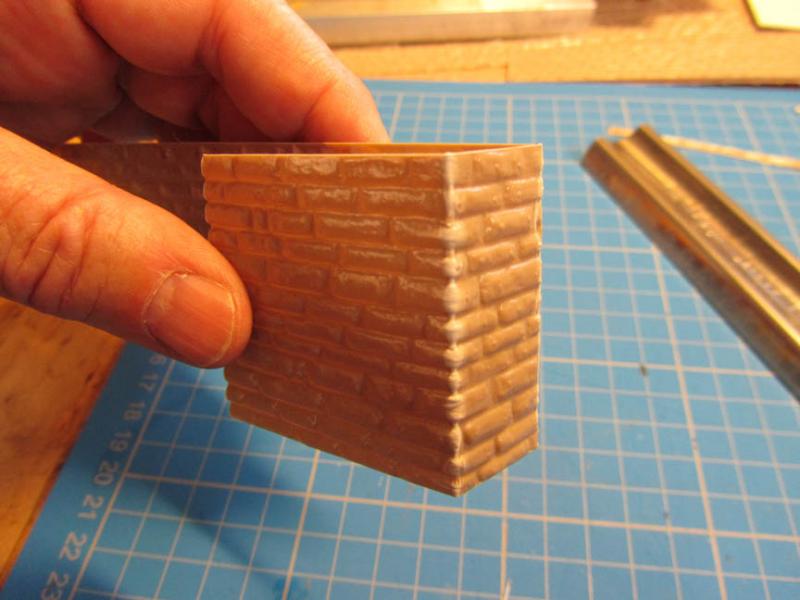
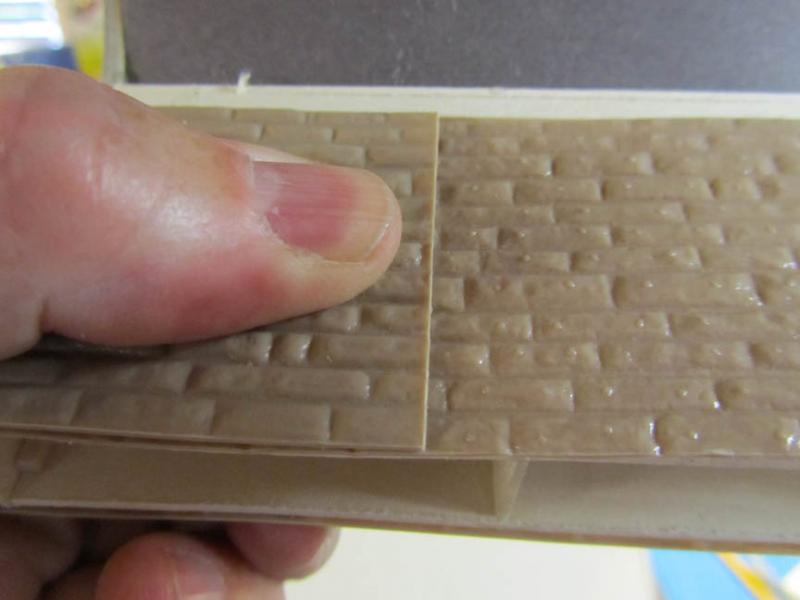
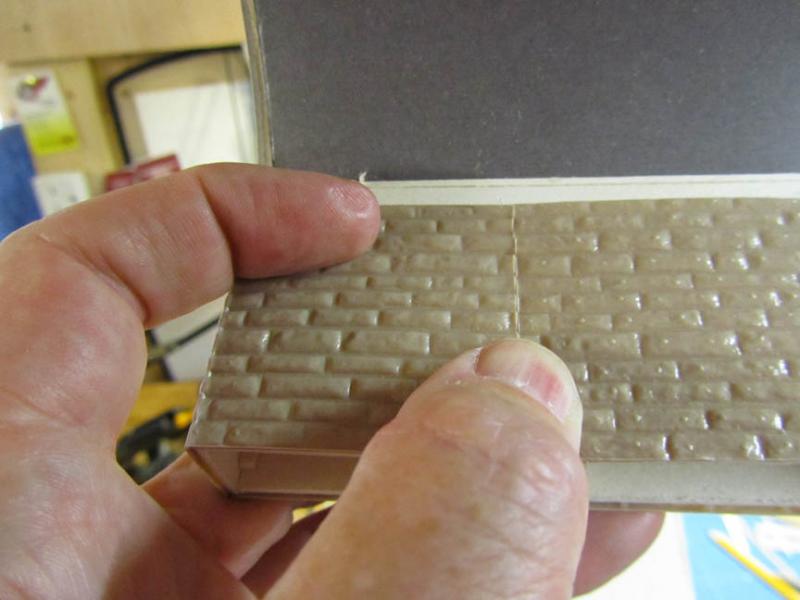
That's got the piers sorted now for the other bits.
Thanks for you kind comments.
As regards the Toc-H lamp I'm a lot older than I look.
Cheers
Chris
Posted
Inactive Member
More shortly.
Cheers
Chris
Posted
Inactive Member
The next step was to give it a good base coat of primer all over so I dashed off to a well known car accessory place for a large aerosol can of their mat grey primer.
regards
Chris
1 guest and 0 members have just viewed this.