Whatsthename new OO steam DC terminus
Posted
#257207
(In Topic #14067)
Full Member
Layout blog
Hi everybody, I am a new member here and here is my current project that presently lacks a name, location etc, suffice to say it is 1920+ Steam.I previously modelled in N so during the planning stage I had to adjust my thinking into what I might fit in a negotiable space so ended up with an L shaped terminus to fiddle yard design as shown in the attached plan.
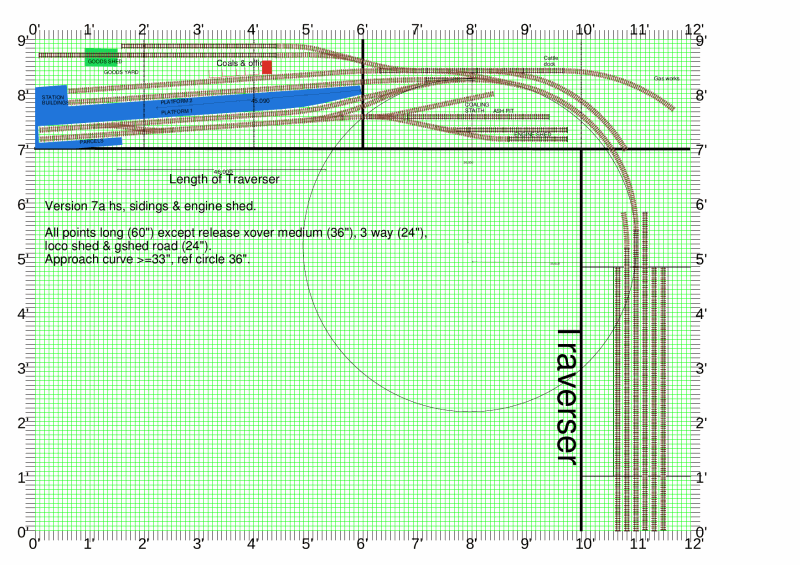
There are no turning facilities so the branch is intended to be primarily run by tanks, there are two platforms, a fairly large MPD and a goods yard so certainly a very busy location, no carriage storage so not a holiday destination although Platform 2 could be used or one of the goods roads at a stretch.
The platform lengths are designed to be compatible with the traverser length, the goods headshunt is a little short but I wanted to scenically break it from the traverser, there is always a problem IMOP of the eye following the train into un-prototypical territory!!
The traverser is arranged to enable locomotives to be swapped from one end of a train to the other without hand in the sky intervention hence there is a 1ft long fixed section after the 4ft long moving section and some stub roads at the entrance end.
The radius of the station approach as ever is limited by the space available and the length of station approach pointwork, this is further complicated by an awkward baseboard joint, much editing has been done to get this far! The platforms are skewed to ease the entry and the goods roads deliberatly left straight to open out the goods yard space. The plan does not really include scenic detail apart from the platforms as I find it esier to add in situe rather then planning it.
To be continued.
Roger OO DC Steam

Posted
Full Member
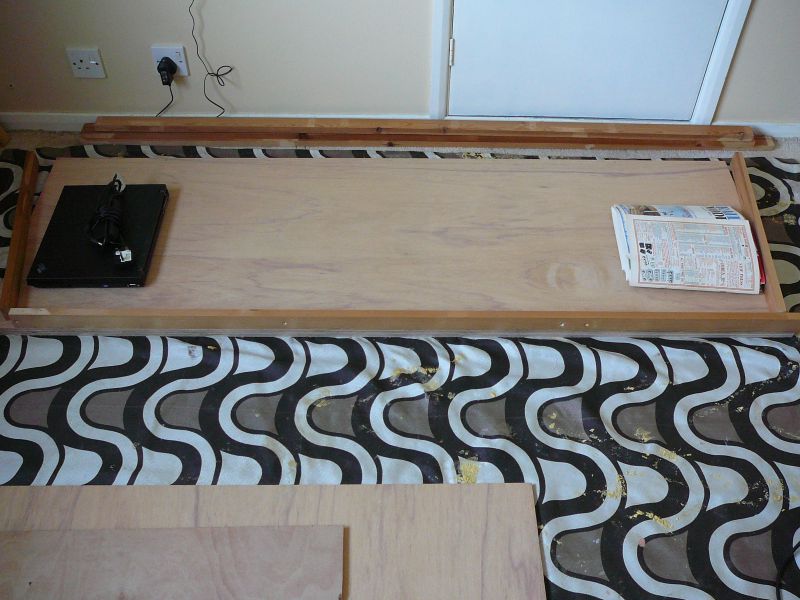
Keeping things flat, any weights will do
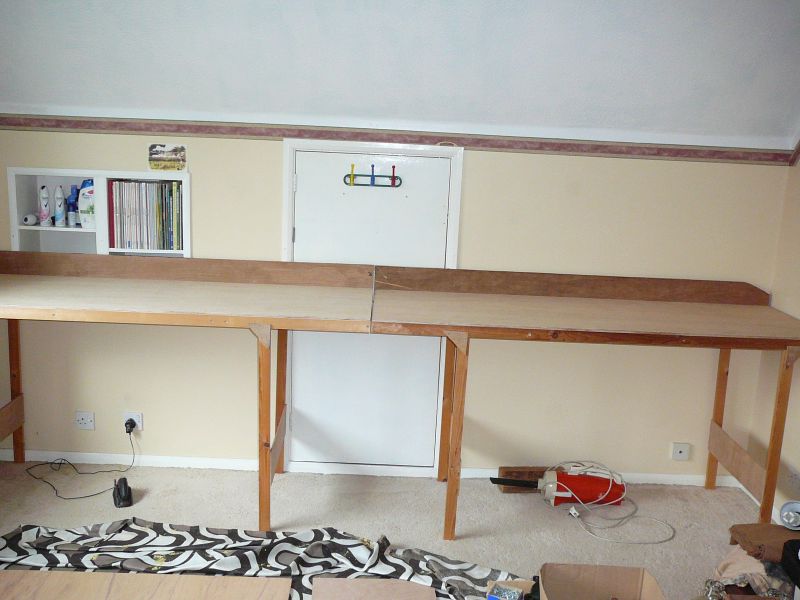
Trial assembly of 1st two modules
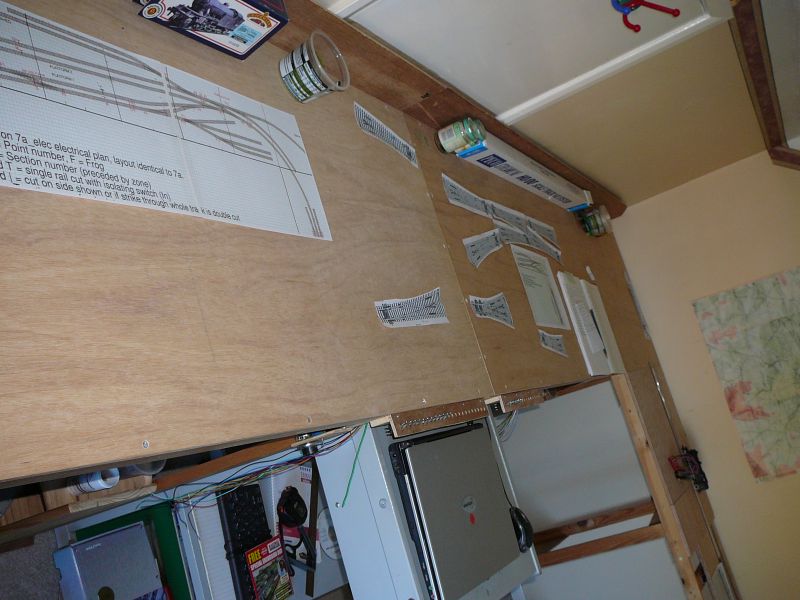
Baseboards assembled, point patterns in place
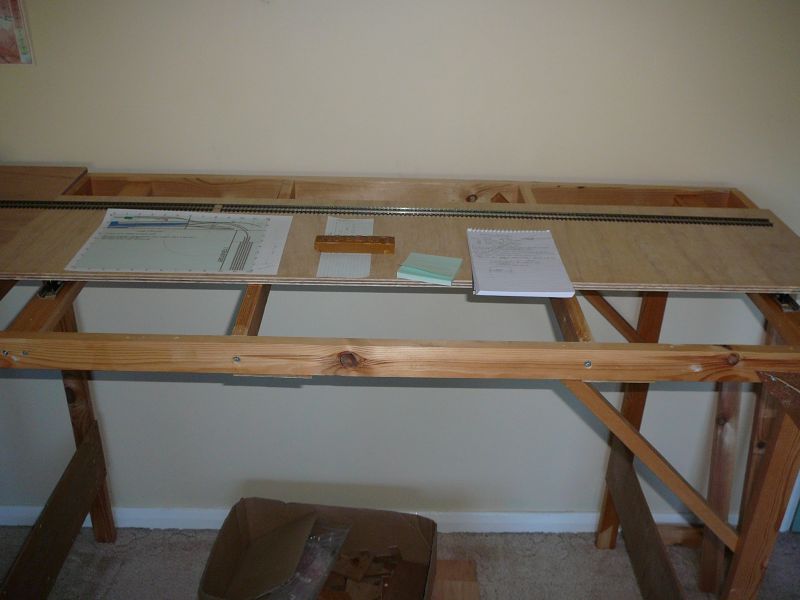
The traverser uses ball race drawer slides modified by removing all the stops so that they are able to extend in both directions from the centre, care is needed to limit the stroke else the balls fall out!!
To be continued
 Last edit: by fourtytwo
Roger OO DC Steam
Posted
Full Member
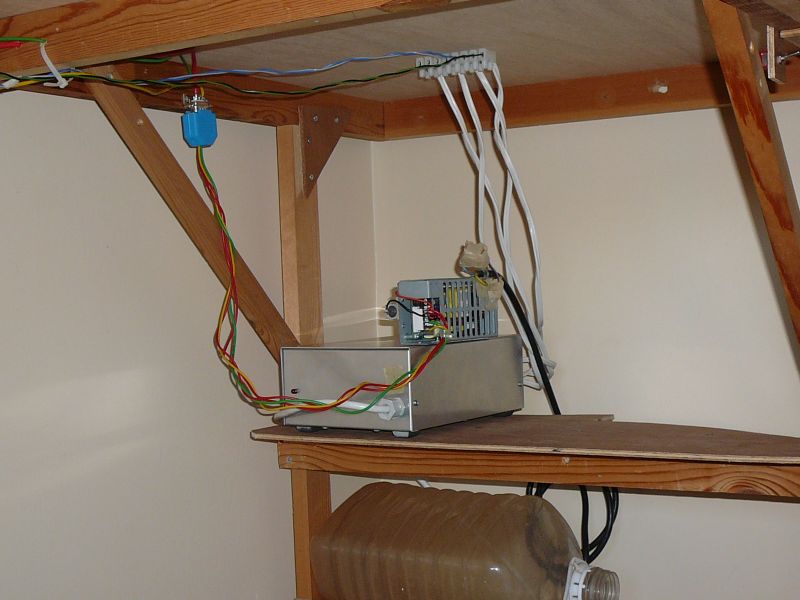
Power supplies
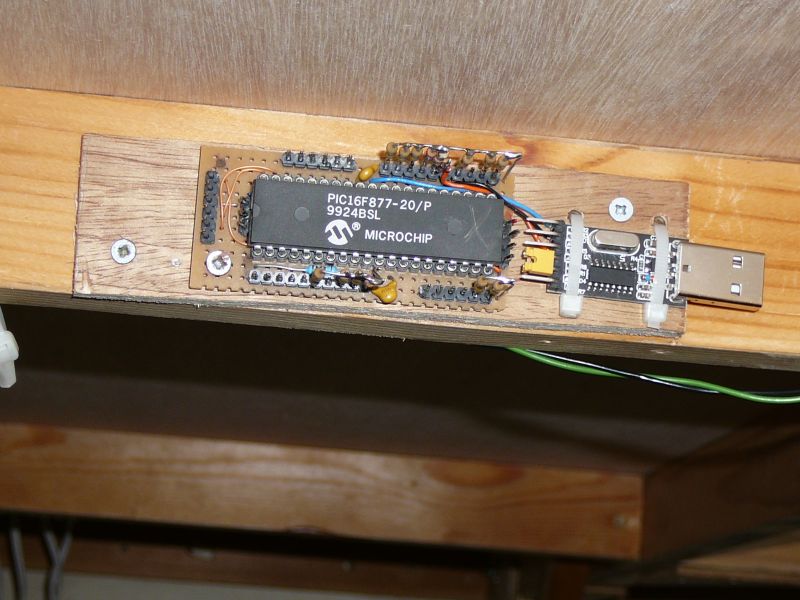
Servo controller
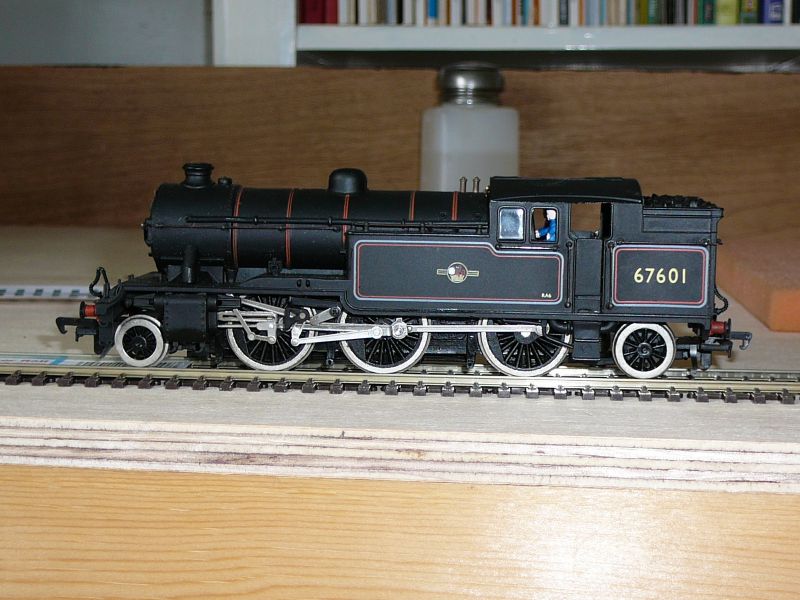
1st Loco
I should mention my version of DC control is rectified 16Vac with no smoothing applied via simple darlington potential divider current amplifier, I know this same circuit is used by many others and certainly in my N gauge experience is far better then any PWM circuit. So the large aluminium box contains many 16Vac transformers, the smaller box perched on top is a 40W fanless SMPS providing +5V for servo's & 12V for ancillaries (like frog relays).
To be continued
Last edit: by fourtytwo
Roger OO DC Steam
Posted

Full Member
Welcome from a fellow BR(NE)R modeller.
I am a fan of the Bachmann V1/3 model and would recommend saving up for one of the new versions - see below;

The difference between these two versions is amazing, particularly the chassis. That said, I have a couple of the old ones and they perform really well.
Your track plan resembles a plan from 1976 appearing in the Railway Modeller (contributed by Philip Knife IIRC) with a Southern theme. It is a plan I have always liked an even started building it once. Where you have a gas works, he had a dairy.
I, like others on here, look forward to watching your layout progress.
Barry
Shed dweller, Softie Southerner and Meglomaniac
Posted

Full Member
Hi everybody, I am a new member here and here is my current project that presently lacks a name, location etc, suffice to say it is 1920+ Steam.
I previously modelled in N so during the planning stage I had to adjust my thinking into what I might fit in a negotiable space so ended up with an L shaped terminus to fiddle yard design as shown in the attached plan.
There are no turning facilities so the branch is intended to be primarily run by tanks, there are two platforms, a fairly large MPD and a goods yard so certainly a very busy location, no carriage storage so not a holiday destination although Platform 2 could be used or one of the goods roads at a stretch.
The platform lengths are designed to be compatible with the traverser length, the goods headshunt is a little short but I wanted to scenically break it from the traverser, there is always a problem IMOP of the eye following the train into un-prototypical territory!!
The traverser is arranged to enable locomotives to be swapped from one end of a train to the other without hand in the sky intervention hence there is a 1ft long fixed section after the 4ft long moving section and some stub roads at the entrance end.
The radius of the station approach as ever is limited by the space available and the length of station approach pointwork, this is further complicated by an awkward baseboard joint, much editing has been done to get this far! The platforms are skewed to ease the entry and the goods roads deliberatly left straight to open out the goods yard space. The plan does not really include scenic detail apart from the platforms as I find it esier to add in situe rather then planning it.
To be continued.
Roger,
I've updated and corrected my comments on Point Geometries and moved them to my Topic here:
Link to comments on Point Geometries
Colin
Posted
Full Member
As for the loco it's interesting to me as I discovered it has a split chassis which for some reason seems to draw adverse comments, in N gauge I found them very useful for increasing weight. Anyway time will tell but I think given an end to end layout the chances of significant wear is much reduced so I am hopeful it will have a long and happy life. Of course one of the risks buying s/hand is you don't know if you are getting something that has been run to death somewhere before, I always look very closely at the wheels and if there are no clear pictures of those pass.
Your new version looks very nice, is it also a split chassis or have they changed that ?
I will probably get around to blackening the tyres one fine day as well :)
Last edit: by fourtytwo
Roger OO DC Steam
Posted
Full Member
Roger,
I've updated and corrected my comments on Point Geometries and moved them to my Topic here:
Link to comments on Point Geometries
Colin
Hi Colin, thank you very much for the information. I am hoping my new points will arrive any day now so will be able to check how well they match the templates I printed earlier, as it's my first outing in OO I don't have the store of experience and parts to re-use that I had in N gauge so it's all a bit of a step in the dark.
Regards
Roger
Last edit: by spurno
Roger OO DC Steam
Posted

Site staff
Cheers
Matt
Wasnie me, a big boy did it and ran away
"Why did you volunteer ? I didn't Sir, the other three stepped backwards"
"Why did you volunteer ? I didn't Sir, the other three stepped backwards"
Posted

Full Member

Regarding the split chassis locos, whilst I may be mistaken, I think the "problems" you refer to are simply to do with converting them to DCC rather than a basic problem with the loco. I have both an old "split chassis" version awaiting conversion and the current DCC version which rides on a completely new chassis - not split. Both run extremely well although I haven't compared the weight - that might be interesting. :hmm
'Petermac
Posted
Full Member
I suppose someone is going to say Covid prevented them keeping the website up to date, what a let down….
My reckoning another week hanging around for an unknown quantity of points followed by another unknown wait for the remainder, it would have been nice to know upfront.
It seems nobody else has code 100 electrofrog points at a reasonable price ATM anyway :sad:
Last edit: by fourtytwo
Roger OO DC Steam
Posted

Full Member
A shame your selected supplier has been dishonest regarding their stock levels. Unfortunately, Peco have not been making trackwork for a while due to the pandemic restrictions, so it may be quite a while before your supplier obtains further stock.
I would be inclined to insist on a return of your money and it may well be worth ringing Great Eastern Railways Home | Model Railway | Norwich | Great Eastern Models who apparently certainly have stock available for Code 75 track (tip thanks to Chris of Teasel Bay fame) and possibly Code 100 as well. Chris says that their service is excellent and they mail orders without delay.
Good luck and I hope you are able to make some progress soon.
Bill
At 6'4'', Bill is a tall chap, then again, when horizontal he is rather long and people often used to trip over him! . . . and so a nickname was born :)
Posted
Full Member
Edit
Just got a reply from Gt Eastern, closed today but pretty sure they have stock, will confirm tomorrow yeyyyy
I will just cancel whatever the other buggers have not shipped 1st time.
Last edit: by fourtytwo
Roger OO DC Steam
Posted
Full Member
I had a similar experience with a Zimo decoder and a German supplier. Their prices looked good and the website said it was in stock. I waited ages before they shipped - "waiting for stock" was the excuse.
Regarding Liverpool and Peco points, I think I'm still on their "inform me when stock arrives" and have been for several months !
I suppose that's what happens when one likes cut-price purchases……..I try to avoid paying list price - something to do with being 50% Scottish and 50% Yorkshire …… :cheers
'Petermac
Posted
Full Member
Why the need for the long siding between the goods shed and the platform? If you removed it you would have a larger goods yard. Removing that extra siding would also save you the cost of a turnout. I would also shorten both the goods shed siding and the rear siding to make space on the rear top left for some scenery - maybe some buildings to denote the town in which the station is located.
Why the curved siding running parallel to the 'main line'? Removing that would save you (and the railway company) the cost of a turnout. The Gas Works line could be used as a headshunt for the goods yard if required.
Just my views Roger. Obviously feel free to ignore them if you wish.
Best wishes,
Terry
Posted
Full Member
The gasworks and goods headshunt are not fixed in stone but rather fluid, I do need a goods headshunt rather than shunting via the mainline as might be prototypical for this size of station as otherwise two operators will get in each others way. I agree about the cattle dock, again at this stage the location is somewhat fluid, I had even thought of using the stub in the platform 1 runround but decided the waiting passengers would not be impressed by the smell.
Regards
Roger
Last edit: by fourtytwo
Roger OO DC Steam
Posted
Full Member

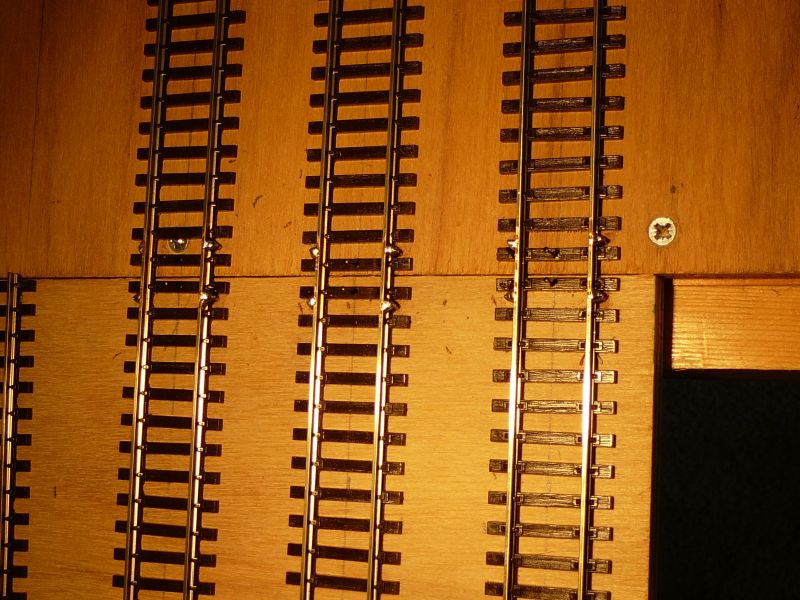
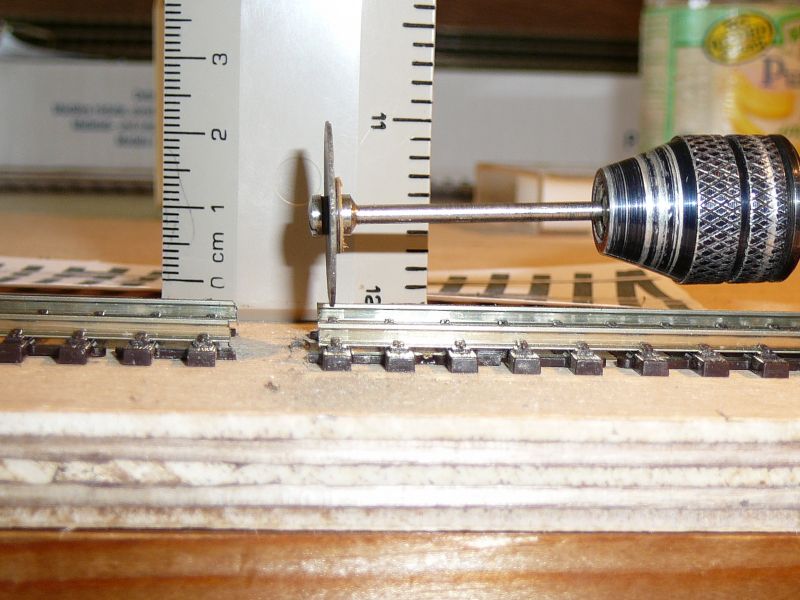
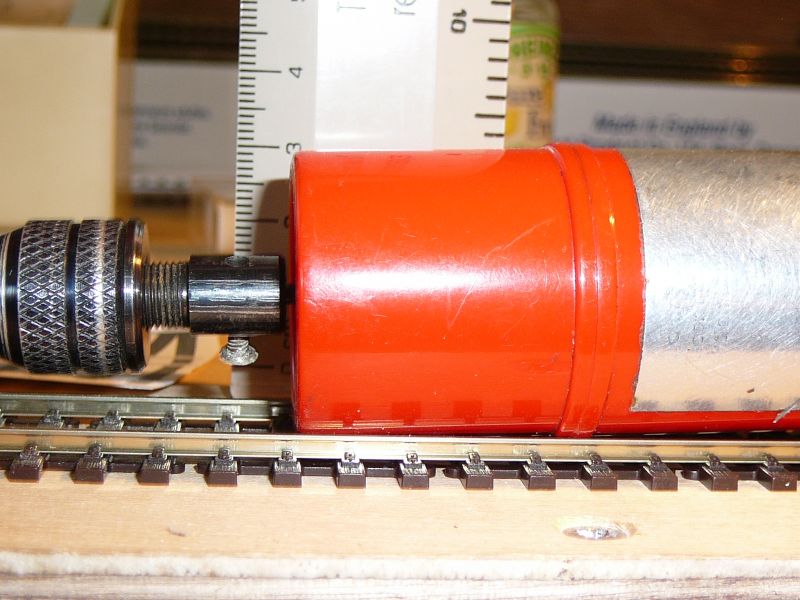
Track cutting is another conundrum, fortunately I have a very ancient small diameter mini-drill so use it in conjunction with 25mm diameter carborundum disks, the resulting angle on the track end is acceptable IMOP, more pictures
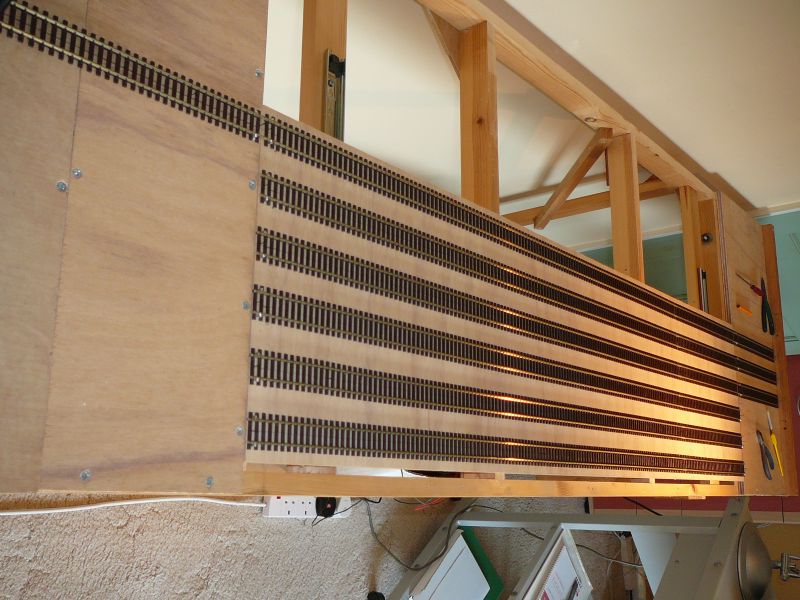
And finally progress today
Roger OO DC Steam
Posted
Full Member
We all have our favourite methods for trackwork at board joints, which hopefully will never get knocked or damaged when parted!
For those trackwork cuts needing extreme accuracy, I like a fine toothed razor saw in conjunction with a small block of wood with two slots cut into one side to hold the rails secure and also as a guide for the saw to do its work. A couple of track pins either side of the intended cut also helps keep the workpiece still. Slow and steady then gives an accurate every time and a few passes with a needle file safeguards against burrs. Job done.
This is my personal choice based on my desire for maximum control of the operation and is not intended as a put-down on the Dremel, which is a fine tool I use often, just not yet on the railway.
The traverser is looking very neat. How are you handling the power transfer?
Bill
At 6'4'', Bill is a tall chap, then again, when horizontal he is rather long and people often used to trip over him! . . . and so a nickname was born :)
Posted
Full Member
Those joints look almost square to me, even though you mentioned "angle"
I too use that method for joins but, using a Dremel, I do indeed get an angled cut - obviously the Dremel body is fatter than your mini-drill ……………. :roll: :roll:
I note you use just a single pin for soldering to - is the track already glued to the baseboard ? In such situations I use 2 small brass screws per rail, screwed down to sleeper top level, under the rail itself thus giving me 2 soldered points per rail either side of my cutting line. Having said that, I never glue my track down, relying initially on track pins to hold it in place until that job is taken over by the ballast.
Bill - your razor saw method is the recommended method but, having used it myself I find it has 2 draw-backs - firstly, it's oh so very slow and I'm so terribly short of patience ……………………….. :oops: and secondly, the resulting gap in the rail is so small, it's hardly a gap at all - fine for "normal" track joints but I'm not too sure it's big enough if you really do want to separate the rails at that point - for a lifting section, sector plate or traverser for example. Even yours Roger, done with a slitting disc, looks very tight on clearance to me …………… :hmm
What did you use to get your track so straight ? Eve n using a long spirit level, I find it difficult over very long lengths …………. :roll:
'Petermac
Posted
Full Member
Terry
Posted

Site staff
https://www.ebay.com.au/itm/163983817550?hash=item262e327b4e:g:tHQAAOSwai5d8LkX&frcectupt=true
Ron
NCE DCC ; 00 scale UK outline.
NCE DCC ; 00 scale UK outline.
1 guest and 0 members have just viewed this.