Teasel Bay
Posted

Full Member
Early construction of a simple 00 garage layout
that's excellent Chris - how did you paint the sea - it looks so good. :thumbs
'Petermac

Posted

Full Member
However, Peter is quite right, the sea looks most welcoming and you really have done it so well.
Michael
 Last edit: by Headmaster
Posted
Full Member
A brilliant PC to study all the details Michael. :thumbs :thumbs
'Petermac
Posted
Full Member
The sea is resin, so has a blue/green pigment. Under there resin if you look back are some shades from sand to deep sea grey to add depth. It is the resin the adds the sparkle though as when you move around you can see through to the groynes etc which is great.that's excellent Chris - how did you paint the sea - it looks so good. :thumbs
Posted
Full Member
 Headmaster[/user] wrote:
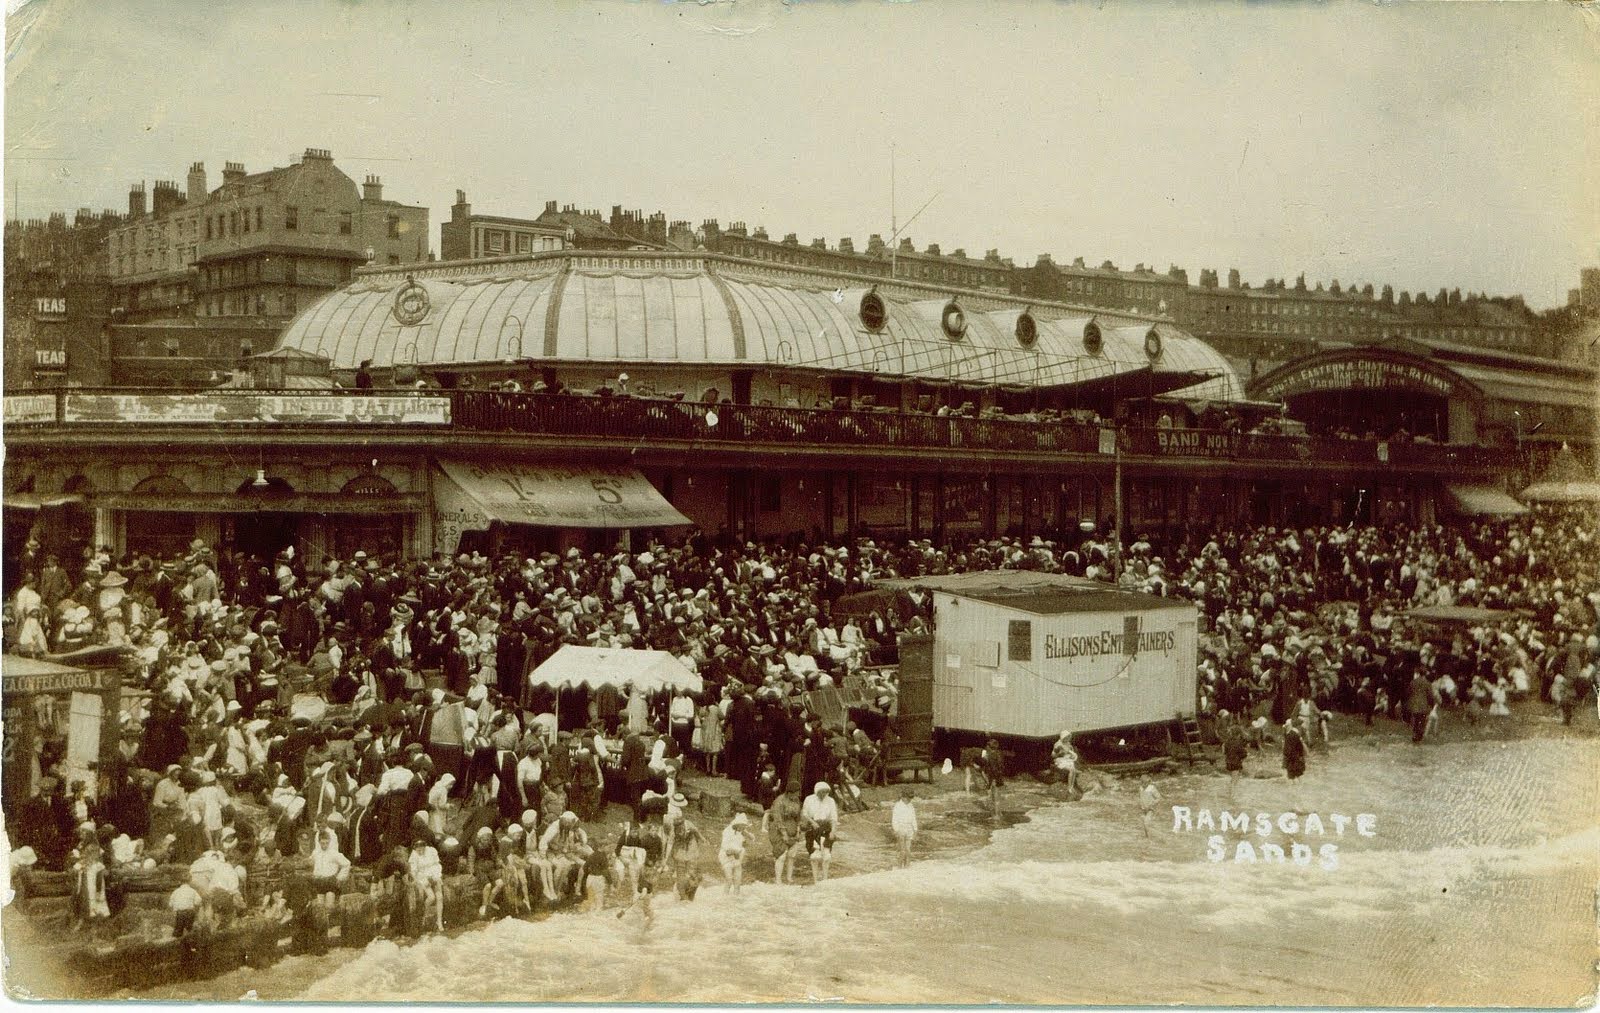
Maybe… but figures are surprising expensive and disappear into the scene. I do get more when I see suitable packs!I'm not sure about the "flocking" to TB, Chris…. This is Ramsgate in its heyday! Will one day be Royal Harbour on the Kent Coast Railway, although perhaps not quite so busy. You can see the station on the right, after SECR took over running the line - it really is on the sands.
However, Peter is quite right, the sea looks most welcoming and you really have done it so well.
Michael
Last edit: by TeaselBay
Posted
Full Member
Michael
Posted
Full Member
Cheers Pete.
Posted
Full Member
Michael
Posted
Full Member
Cheers Pete.
Posted
Full Member
Calm down, calm down!!Oooh what a good idea. We might have to have a preview.. just to make sure they're suitable of course. ;-)
Posted
Full Member
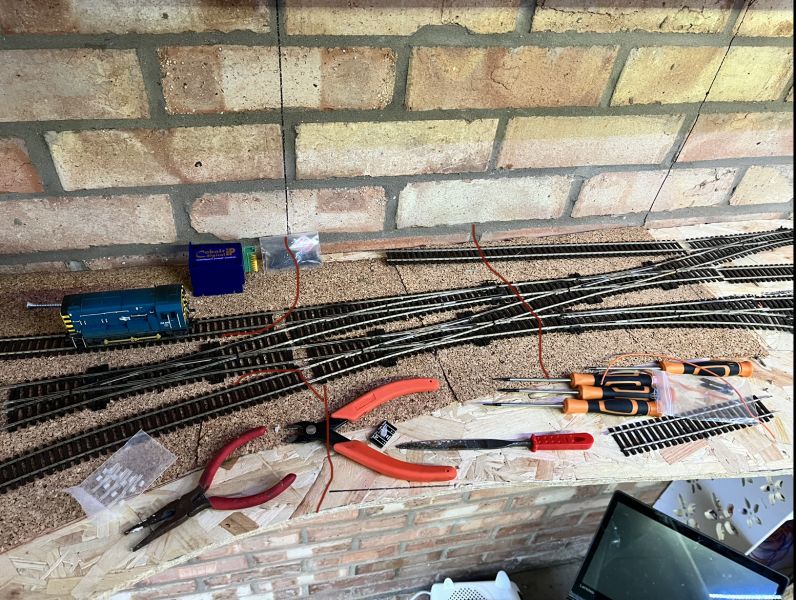
Going to slow down on this front a little now as I’ve only a single point motor left, need to get some more cork for the underlay.
Good fun letting the 08 traverse all the available routes.
Posted
Full Member
Michael
Posted
Full Member
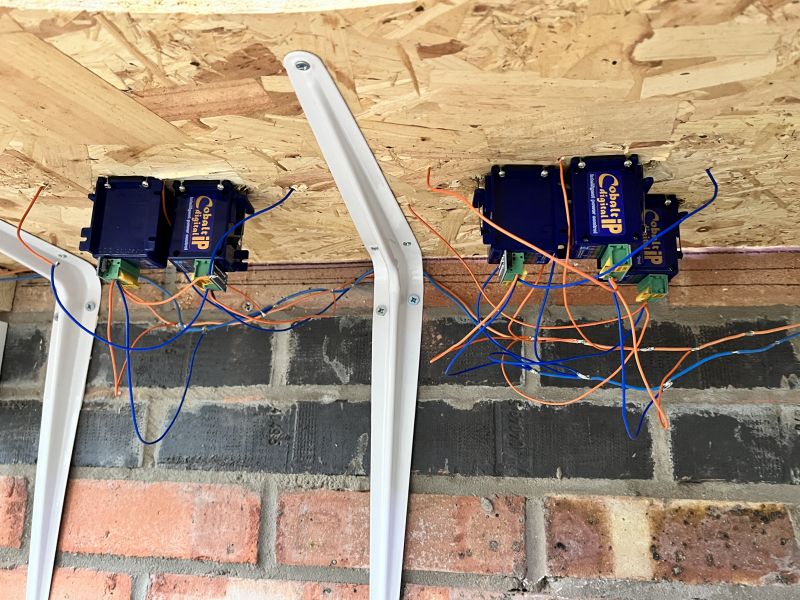
Under the board. I’ve not yet insulated the joints before anyone complains!! The thicker bus runs alone the wall with the droppers soldered. Lazily I used the same colour wire for the frogs!
Posted
Full Member
Cheers Pete.
Posted

Site staff
likewise & my mates stir me up as I was Telephone Exchange installer in which I had oodles of wires & things had to be neat as a pin.I have to admire those people that can make a tidy job of wiring. I'm not one of them.
Ron
NCE DCC ; 00 scale UK outline.
NCE DCC ; 00 scale UK outline.
Posted
Full Member
Going to have to review the lift out bridge and add some way of securing with no movement and probably redo the joins on the bridge.
On a positive note the junction seemed to work well, with a single derailment on the 156 where the track dipped slightly due to lack of sleepers on the join. Once they are filled hopefully that will be resolved.
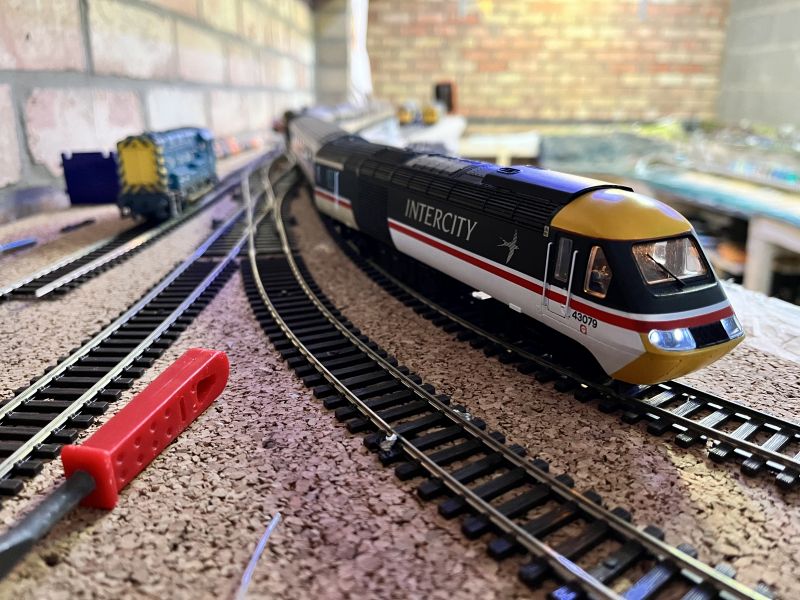
I do like the look of the HST leaving what will be Norcott station. You can see the beach in the distance!
Posted
Full Member
Indeed. I try my best but it gets messy so quickly!I have to admire those people that can make a tidy job of wiring. I'm not one of them.
Posted
Full Member
I have the same problem with my *hinged access bridge. Humidity is the enemy here and we have plenty of that along with huge temperature differences. I've got mine under some sort of control, but unless we use constant air conditioning, I don't think there's a way round it.
*"hinged access bridge" is my registered trade mark. ;-)
That new track work is looking good, Chris.
Cheers Pete.
Posted

Full Member
This has worked nicely for alignment, I don't have any problems with derailments and my track is also on a slight curve.
Cheers
Andy
Andy
Posted
Full Member
Yep, that looks like my wiring too. I really envy those neat underboard layouts that some manage to achieve.It’s hard not to be.
Under the board. I’ve not yet insulated the joints before anyone complains!! The thicker bus runs alone the wall with the droppers soldered. Lazily I used the same colour wire for the frogs!
Sorry to hear about the bridging woes. As my entry to the loft is in the middle of the layout, this is not something I have had to deal with but I am sure it must be something of a nightmare to get consistently right. Another reason why I will never make an exhibition layout, I'm sure I would never get it to light up accurately. I hope you resolve it without having to do too much again.
Michael
1 guest and 0 members have just viewed this.