N Gauge - Newcastle Emlyn****
Posted

Full Member
Hi Colin,
Down to the south-west coast and forests. Little place called Denmark.
Hmmm!
Some very nice rieslings found around that part of the world. We were planning a visit there last September which was cancelled

 Last edit: by Colin W

Posted

Full Member
I get this little beastie out onto the inlet and nothing else matters.
Give me a hoy when you reschedule.
Last edit: by Marty
Posted

Full Member
Michael
Posted

Full Member
It’s a lovely part of the world.
I get this little beastie out onto the inlet and nothing else matters.
Give me a hoy when you reschedule.
Wow - that looks idyllic Marty - I'm giving you a hoy - permission to come aboard Skip ? I wish !!
'Petermac
Posted
Full Member
Thank you Headmaster. I was sick of looking into that corner and seeing bare boards…. landscaping is mandatory.Another classic Marty scene is coming. So impressed with your chicken wire frame - it would have cut my arms to shreds…. well given them a good scratch. Looking forward, along with everyone else, to seeing the next stages… it's always a delight to see the landscape appear.
Michael
Posted
Full Member
Of course Peter, sort out all the other stuff holding you back and head on over. At the builders current rate I reckon you have 2 years to plan and save.
Wow - that looks idyllic Marty - I'm giving you a hoy - permission to come aboard Skip ? I wish !!

Posted
Full Member
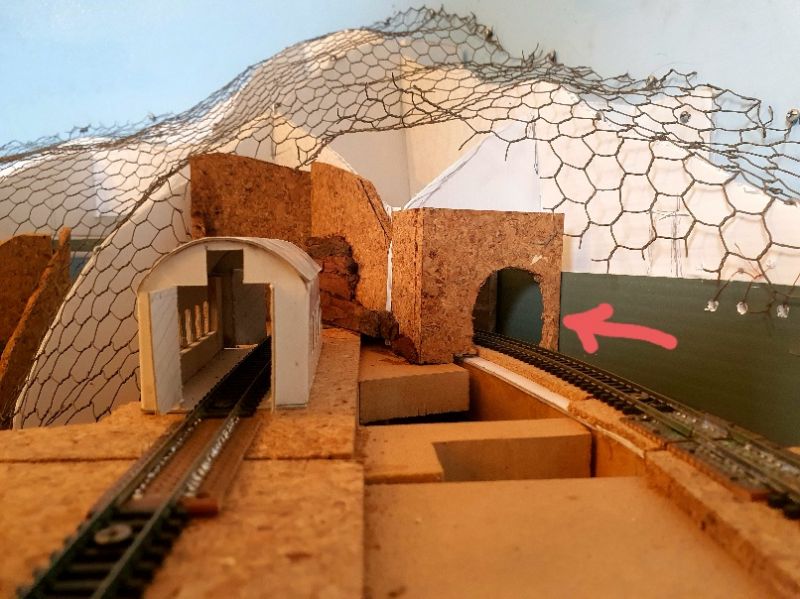
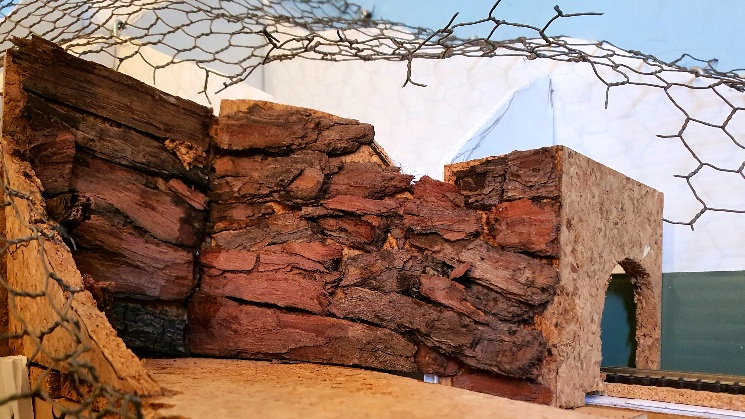
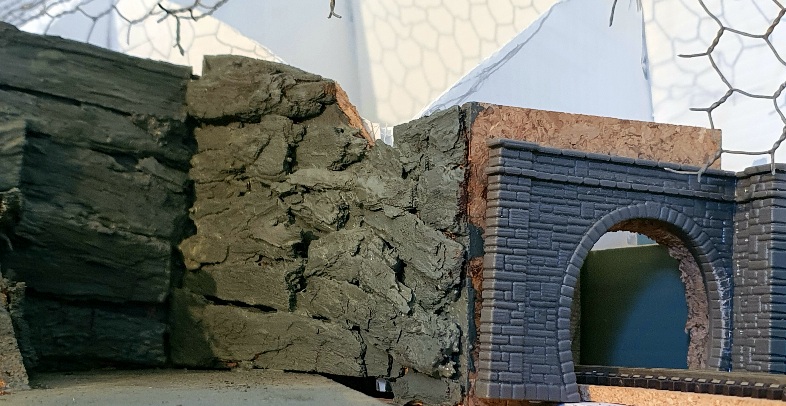
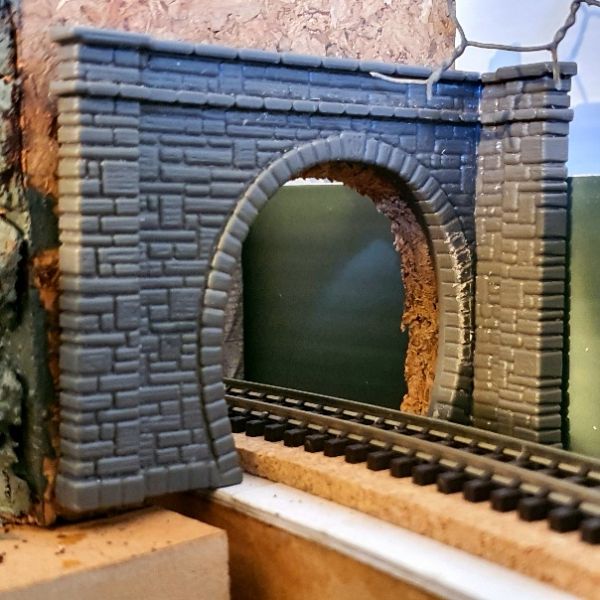
A view towards the engine shed, the quarry and the tunnel mouth. Bark is starting to be glued with PVA to the cork tile quarry wall behind the engine shed. Luckily the bark peels off in strips.
The tunnel mouth and adjacent wall have been cut to size with a Stanley trimmer and glued in place with PVA. The arrow shows the narrow gap between the tunnel and the wall hiding the line down to LLandyfriog Junction. The "in stock" peco tunnel mouth will have to be modified to suit. More on this later.
The bark has been positioned and is now to be left for 24 hours to dry.
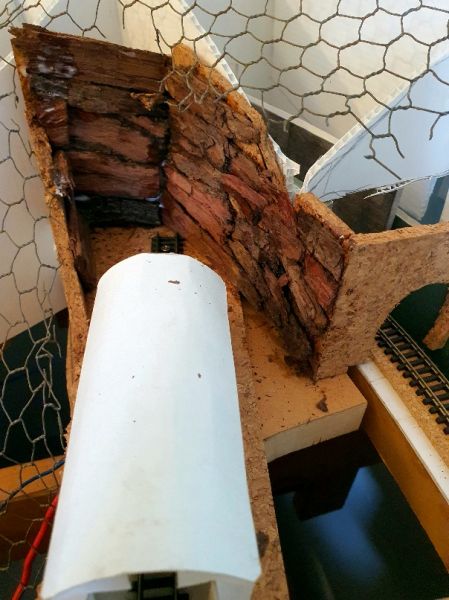
Reckon that will come up nicely with a bit of paint and some vegetation growing in it.
While the bark quarry walls were drying an attempt was made at shaping up a wee mill stream bed between the engine shed and the line coming out of the tunnel.
The home made hot wire cutter was dusted off and pressed into service with an old loco controller. Once again the upsidedownishness beneath the layout was required to mark the shape needed on a block of polystyrene. Windows were opened and the air-conditioning unit was turned to 80% exhaust.
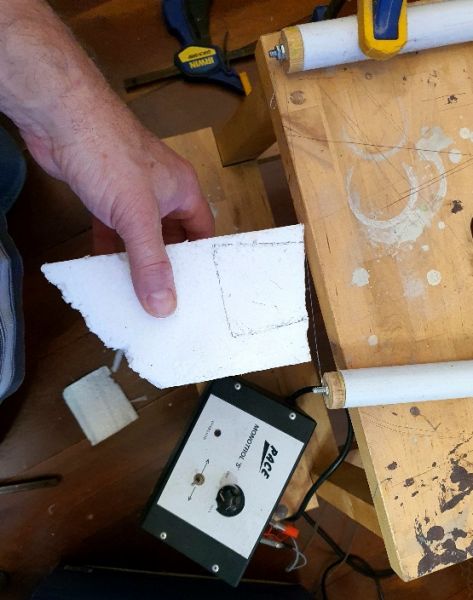
Ending up looking like this…. all that is needed is a framework to build the gloop onto. it goes into the arrowed hole.
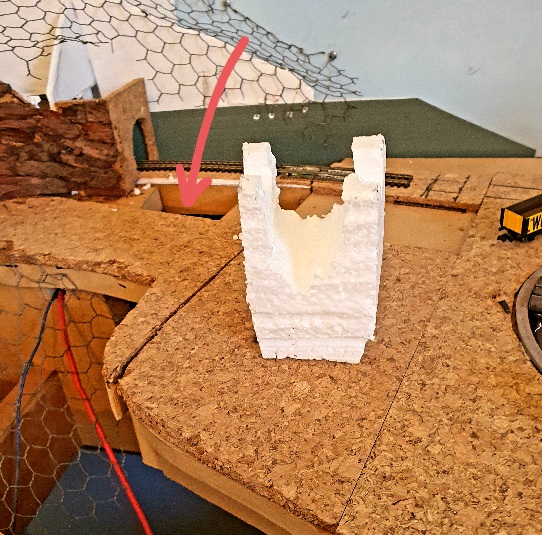
Didn't cut deep enough - arrowed… but the fit isn't bad.
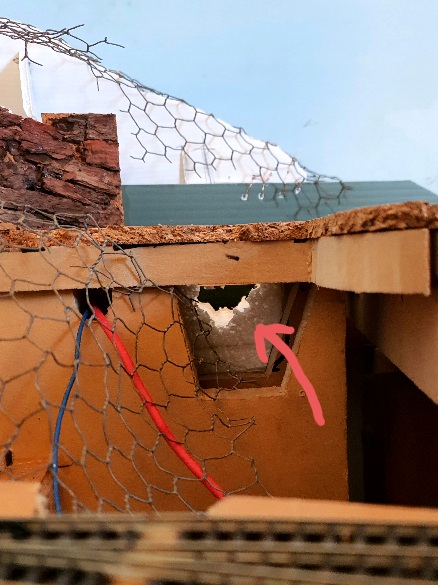
This drone shot shows the mill stream concept with the polystyrene block resting lightly, but not too tightly, in place.
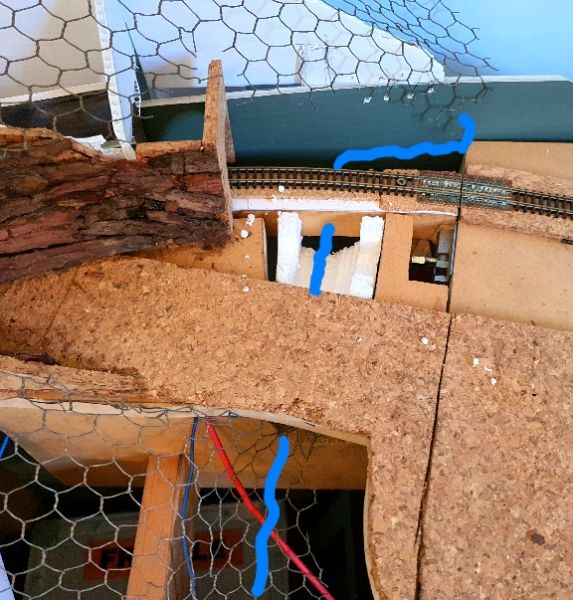
Using the hot wire cutter there was surprisingly little mess.
But the engineer has had a word and said that it is very unlikely that he would have left the mill stream to such a random cut under both the railway and the engine shed. Far more likely he would have engaged that excellent stone mason responsible for the other bridges and tunnels along the line and would have had an engineered stone wall cut built instead.
Last edit: by Marty
Posted
Full Member
A base grey/green coat to start with. The "baby poo" (actually Willow) background colour is one of 3 background colours used throughout the layout. The concept being that more than one base colours will be present in the landscape, but too many base colours make a mess.
Mix in some black and see what kind of grey we get.
The "artist's palette" is an offcut of Masonite with a roughly torn off sheet of grease proof paper bull dog clipped to it. Mix paints, use paints, let dry, bin grease proof paper. Simple, cheap, tidy.
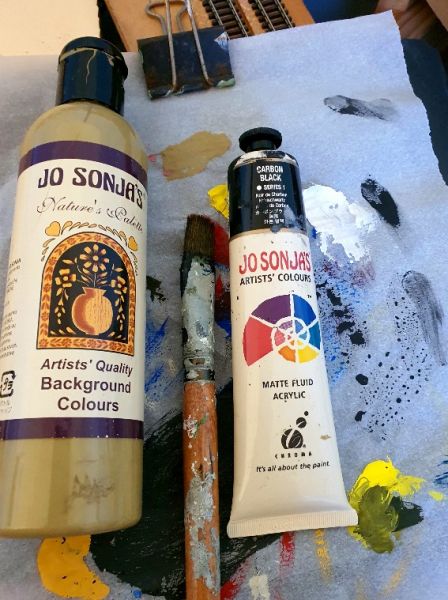
A generous blob of Willow, a couple of drops of black and a drop of Prussian Blue. Hopefully enough to cover the quarry walls in one go.

Mix, but not too much, some variance in colour is desirable… and it will mix more as it is applied.
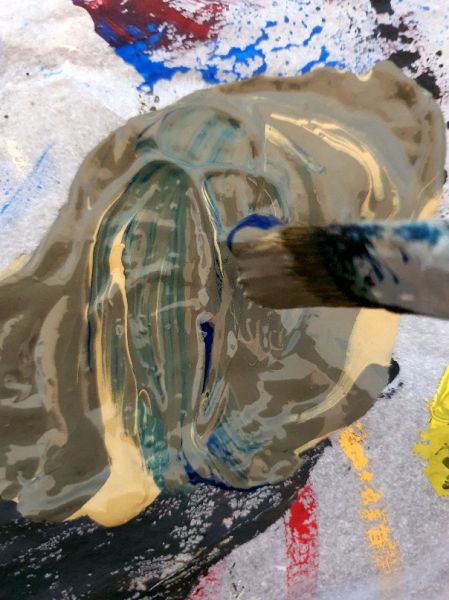
Apply with brush, pushing the mix into valleys and gullies. The red bottle is a mist sprayer with water in it. Stops the paint on palette and subject drying out before you are finished.
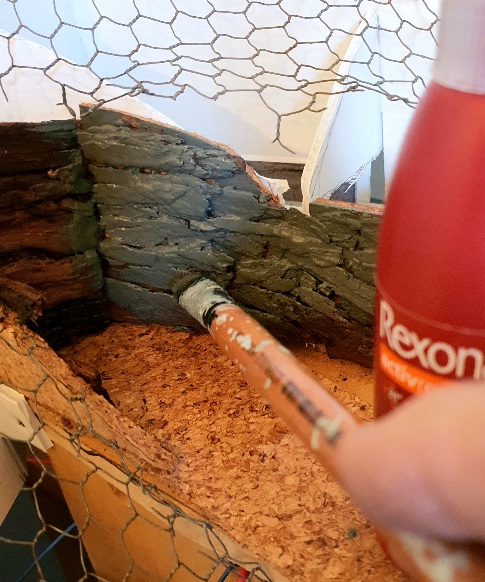
Base colour applied. Next will be a black wash and then some dry brush highlights in grey and white. Now… that tunnel mouth….
Last edit: by Marty
Posted
Full Member
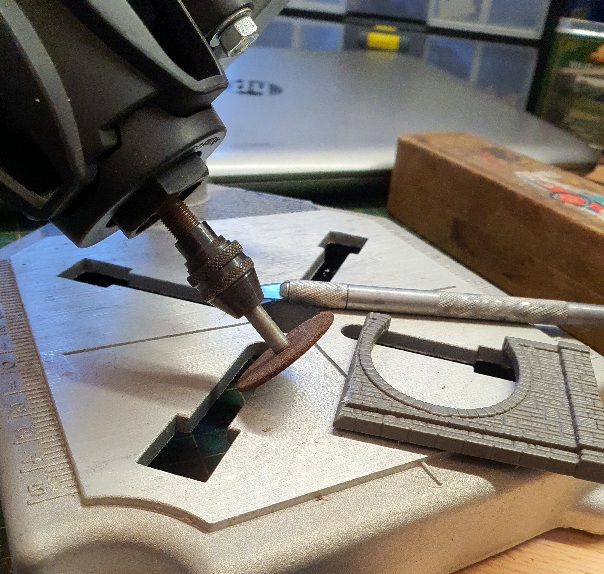
The dremel tool was fitted with a cutting disc and mounted in it's drill press/cradle at 45°. The common plastic edge of the two parts was carefully bevelled to get a clean join. Unwanted plastic debris removed with the craft blade. Final tidy up completed with a flat file and then some emery paper on a block of wood.
A Heath-Robinson affair of scrounged bits and pieces was put together to hold the two parts at right angles and liquid glue (tetra) was brushed in and left to dry. (OK, yes, a little bit of pressure was applied to help the molten plastic weld together)
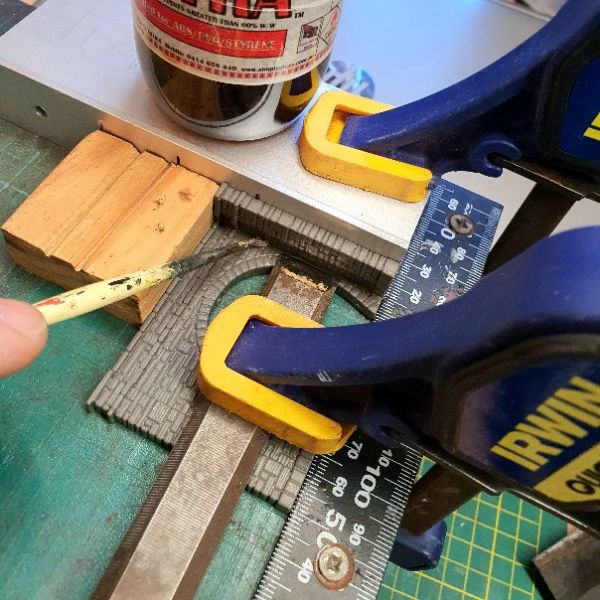
Seems to fit OK and looks the part. Not sure if it is prototypical but I'm happy with it. Work needs to be done to provide the tunnel with both a firm base to rest on and a rock face to blend into.
Oh… and paint it… mustn't forget to paint it BEFORE it's glued into position… and inside the tunnel too.
Posted

Full Member
. . . well, with a high degree of finese that is :thumbs
A lovely peice of work Marty and you must be getting close to the day of the gloop.
Best,
Bill
Last edit: by Longchap
At 6'4'', Bill is a tall chap, then again, when horizontal he is rather long and people often used to trip over him! . . . and so a nickname was born :)
Posted
Full Member
You say a "cutting disc" or is this just an ordinary slitting disc ? In my experience, the latter are very fragile ……………… :roll:
'Petermac
Posted
Full Member
Michael
Posted
Full Member
Thanks Bill, It was certainly bashed…Simple and effective creative bashing!
. . . well, with a high degree of finese that is :thumbs
A lovely peice of work Marty and you must be getting close to the day of the gloop.
Best,
Bill
You inspired the NE stonemason with your right angle precision when assembling your buildings.The gloop is coming… every step brings me closer. :)
Posted
Full Member
It was the thinner of the two cutting discs that came with the Dremel kit Peter. Probably not the ultra thin cutting disc that can be bought as an accessory. I probably should have used the thicker of the two discs to avoid it shattering but by being gentle and not wanting to take too much off ('cause it's really hard to get back on again afterwards) it worked fine.That fits the bill perfectly Marty - thinking outside the box re the use of the Dremel and stand. :thumbs
You say a "cutting disc" or is this just an ordinary slitting disc ? In my experience, the latter are very fragile ……………… :roll:
Posted
Full Member
Thanks Michael. Visitors to the layout rarely get down and as close to the modelling as the camera does. It's their loss but as time is finite I'm starting to lean towards the broad brush approach where ever possible.It's all looking very good Marty. The rock face has come up well, even before the flourish of dry brushing. As always, I have to keep reminding myself that this is all in 2mm scale!
Michael
Posted
Full Member
As always this is a "what I dun"… warts and all… hopefully it helps someone.
Start by bringing out the depths and work up to the surface. First, the depths, a black wash, more water than paint. It needs to run into the gaps and dry with more paint in the nooks and crannies than on the surfaces. It doesn't matter if it does dry on some of the surfaces. 1) it makes a more variable finish and 2) it's likely to be covered by a lighter colour dry brushed over the top.
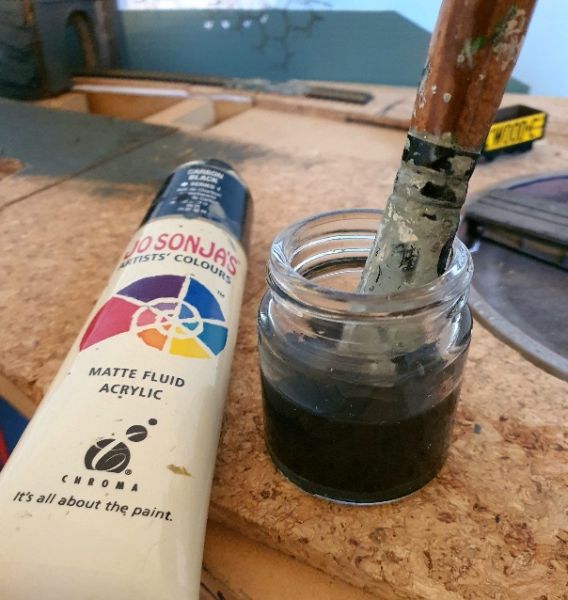
So… little jar, some water and a couple of blobs of acrylic carbon black… suitable broad brush…

Mix…. and soak brush… in this case, with nothing else surrounding the work area to get damaged by a bold black wash, it didn't hurt to apply with a loaded brush.
Fill the gaps and hollows, let it run along the cracks, mop up the occasional overspill on an upper surface if it felt like too much.
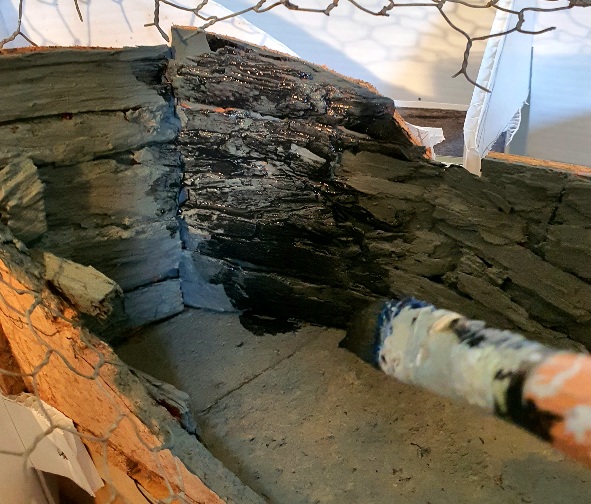
Let it dry, as the wash was fairly light on paint, apply a second coat and in some places a third until it looked right. A purely subjective state but :roll: the little voices in my head were in agreement.
Then the lighter highlights with a dry brush, and it really is a DRY brush, dip the brush lightly into the edge of a blob of paint and then wipe the paint off again on the grease proof paper, once, twice, three times, and test on the work piece gently. To start with, not enough was wiped off the brush and an urgent thumb was need smear and reduce the splash of lighter colour. Yes, it could have been repainted or black washed again… but who want's to do that.
In the end the first dry brush was Nimbus Grey and the next two the other layout background colours Vellum and Linen in that order of lightest last. Not pure white, never white, it is too stark for a model.
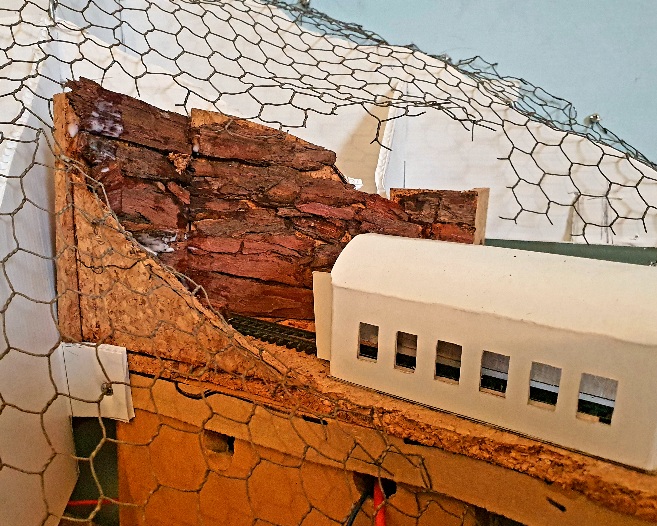
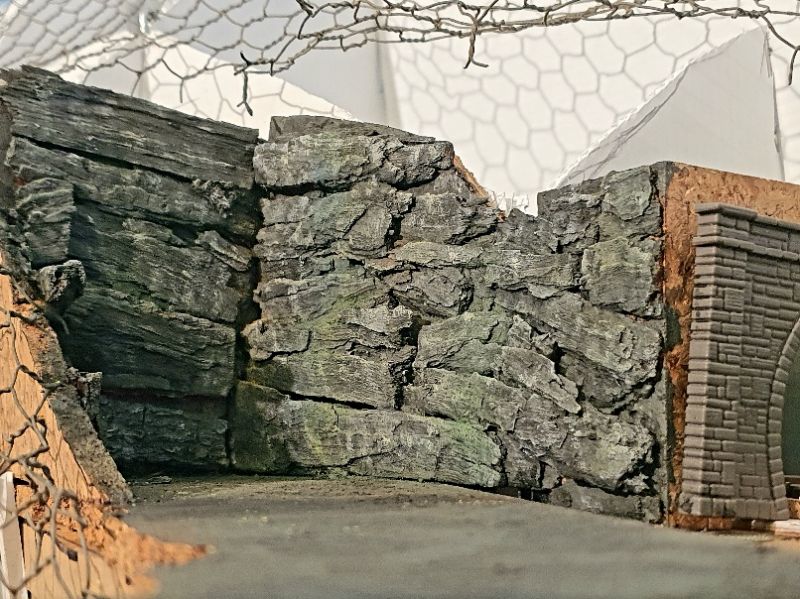
Below is now black washed two or three times and dry brush highlighted.
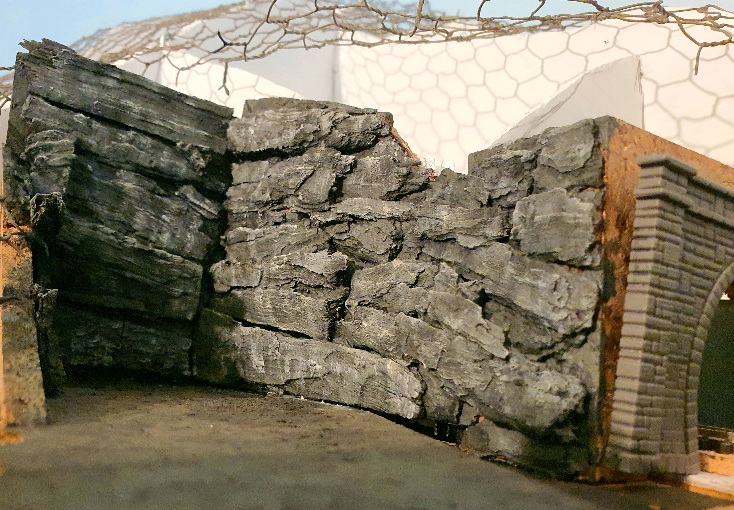
Then some colour. The box of artist chalks was turned to with black, brown, mustard and bright green scraped off as a powder and applied with a dry brush. Oops… a little too bright.

An old welsh quarry wall with lichen and water marking was the aim. The brighter colours were thinned by dry brushing the existing powder as much as possible and then it was out with the Tamiya weathering powders and a black powder collected from a model show a long time ago.
Great care needs to be taken with the black weathering powder that is in the NE yard store. Less is more, in fact, much less is more. It has a greasy consistency and sticks like the proverbial to a blanket. On more than one occasion harsh words have been spoken when injudicious application of said black has all but ruined work that needed nothing but a LIGHT dusting of black. :roll:
The other thing that needs acknowledging is when to STOP. It looks OK. No-one, except for the forum lads who get the cruel camera close ups, will ever peer closely into this 2mm scale quarry and critique the finish.
This is where it stops for the time being. When the hillside is vegetated and grassed, so will vegetation find it's way into the nooks and crannies and around the base of the walls. Until then, on with the tunnel mouth weathering.
Stay safe
Posted

Full Member
Cheers,
Claus
www.flickr.com/photos/ellef/
Claus
www.flickr.com/photos/ellef/
Posted
Full Member
The fact that I enjoy it too is a bonus.
Thanks for the thoughts mate, they are appreciated.
Posted

Full Member
Cheers,John.B.:thumbs
Posted

Full Member
MORE!
Doug
'You may share the labours of the great, but you will not share the spoil…' Aesop's Fables
"Beer is proof that God loves us and wants us to be happy" - Benjamin Franklin
In the land of the slap-dash and implausible, mediocrity is king
"Beer is proof that God loves us and wants us to be happy" - Benjamin Franklin
In the land of the slap-dash and implausible, mediocrity is king
1 guest and 0 members have just viewed this.