Stu's working signals (hopefully)
Posted
#134170
(In Topic #7131)

Full Member
An attempt at the February project
Rather than clutter Geoff's superb thread with my fledgling attempts, I'll post my progress here.Ratio GWR signal pack has been bought, as have a pack of 16BA bolts, nuts and washers.
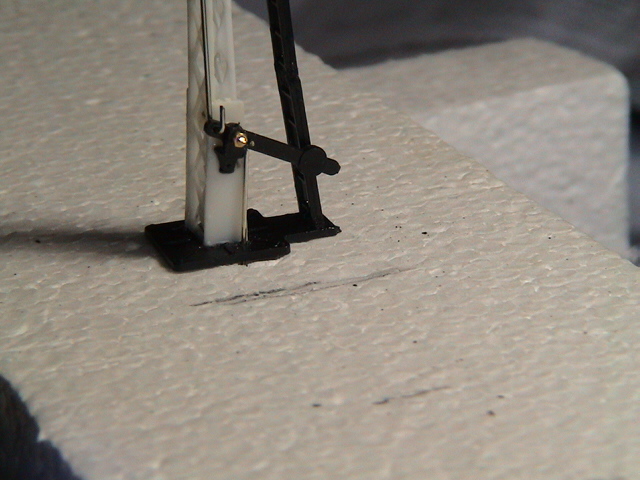
I've drilled out the lower bracket boss and fitted the bolt and nut with the necessary parts.
Next is to add the signal arm and an operating wire.
Stubby47's Bespoke Model Buildings
All photos I post are ©Stu Hilton, but are free for use by anyone.

Posted
Full Member
Posted
Full Member
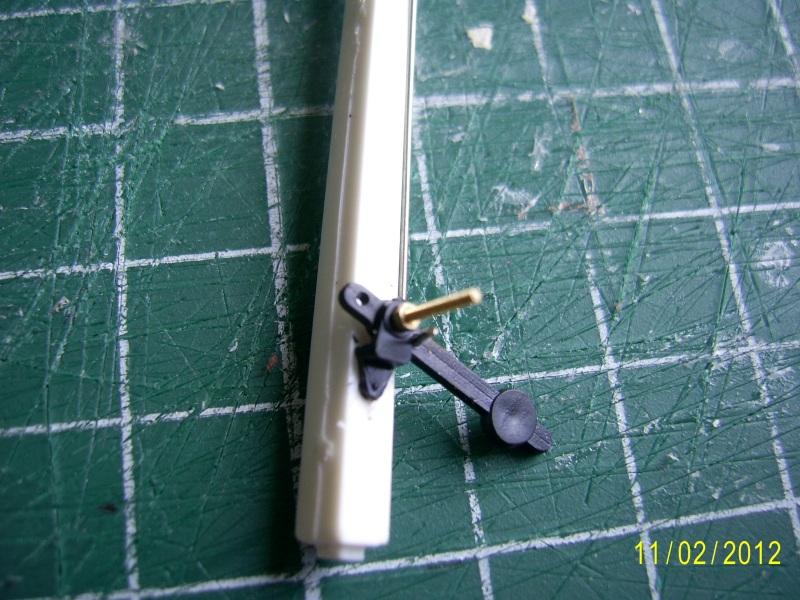
Have now got the arm on, and the funny 'anchor' on the back. I used another 16BA bolt for this, instead of the wire.
I've also added an operating wire connecting balance weight and arm, and it works!
Not sure as yet how to fix the ends of the operating wire so the don't fall out of the holes at each end, as the bent bits are over length.
Stubby47's Bespoke Model Buildings
All photos I post are ©Stu Hilton, but are free for use by anyone.
Posted
Full Member
Posted
Full Member
I wasn't sure about the compromise between looking realistic and being operational - but I'll follow your advice.
So, the first piccies :
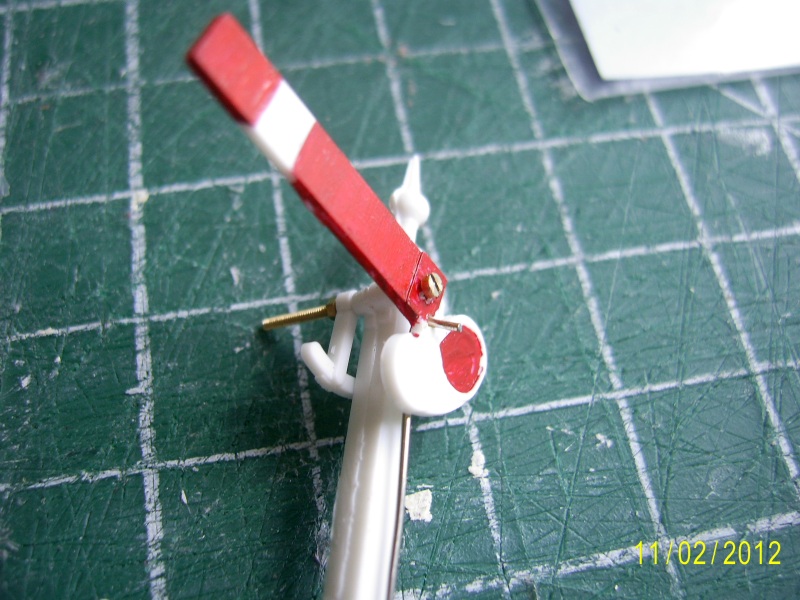
This needs a little more paint on the lens and frame, and the back of the arm and the anchor-thingy, but it does work !
Notice I've used the opposite hole in the balance weight for the operating wire - this is because the signal arms are lower quadrant, so the weight needs to be low when the signal is horizontal.
 Last edit: by Stubby47
Stubby47's Bespoke Model Buildings
All photos I post are ©Stu Hilton, but are free for use by anyone.
Posted
Full Member
In actual fact, the balance weight is low for a horizontal arm in the case of upper quadrant as well. It is just that the operating control wire has to push up for horizontal, thus the need to be on the opposite side of the balance lever pivot to the weight.
How have you fixed the arm to the bolt? Is it glued on?
Posted
Full Member
Stubby47's Bespoke Model Buildings
All photos I post are ©Stu Hilton, but are free for use by anyone.
Posted
Full Member
When the arm is OFF, the back blinder moves round so that light does not project from the rear of the lamp.
Posted
Full Member
I was hoping to make the light work too ( this is the first signal to give me an understanding of how to do things), but the spectacle plate is quite thick.
Stubby47's Bespoke Model Buildings
All photos I post are ©Stu Hilton, but are free for use by anyone.
Posted
Full Member
Last edit: by Bod
Posted
Full Member
I need to investigate the MSE website and purchase some appropriate arms.
Edit : Pack S0014 looks suitable :mrgreen:
Last edit: by Stubby47
Stubby47's Bespoke Model Buildings
All photos I post are ©Stu Hilton, but are free for use by anyone.
Posted
Full Member
I am going to show the use of kit S4/KE1 which will be very similar to S4/KW2 if you want to try a GWR one. This is a tubular post and not a square wooden one, but you may find it easier as a starter kit.
I started with tubular myself before moving on to the more demanding lattice posts.
Posted
Full Member
Obviously the aim is to have a signal for use on a layout but there is a certain beauty about the signals in their original 'bare' brass. I won't throw any of my pics here on your thread but you can see the finished results on my layout thread.
Last edit: by Bod
Posted
Full Member
But, I will have a go in the future, and thanks for the encouragement.
Last edit: by Stubby47
Stubby47's Bespoke Model Buildings
All photos I post are ©Stu Hilton, but are free for use by anyone.
1 guest and 0 members have just viewed this.