Stu's March Project
Posted
#116461
(In Topic #6059)

Full Member
The Perry Shed
I thought I'd have a go at this. So, following the master's directions, here are the pieces cut to size.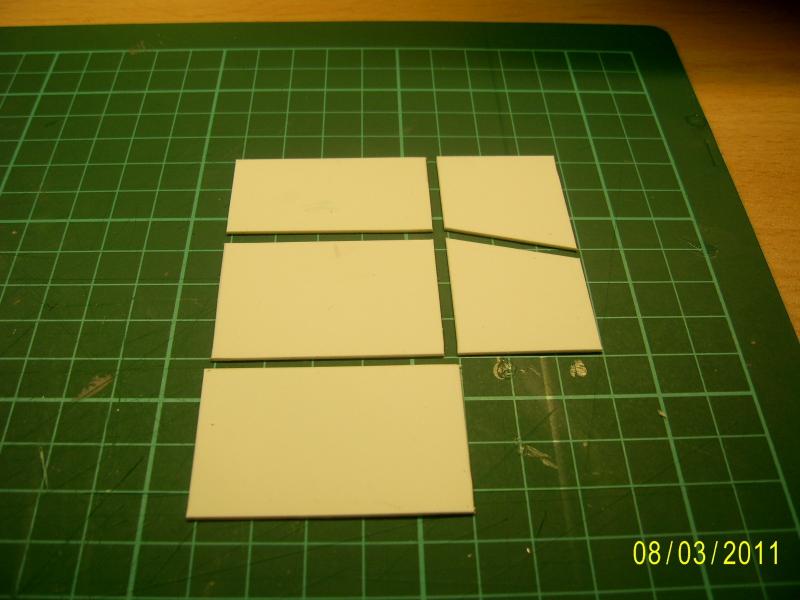
Stubby47's Bespoke Model Buildings
All photos I post are ©Stu Hilton, but are free for use by anyone.

Posted

Full Member
It's nice to know that someone is actually having a go.
:doublethumb:doublethumb:doublethumb
Perry
Due to cutbacks, the light at the end of the tunnel has been switched off.
Posted
Full Member
I also laid the pieces out as shown above for cutting out (except the roof), so the height of the front and rear wall was transferred directly to the split between the side walls. All it needed then was to mark the other side of the side walls and mark the diagonal roof line (if that makes sense…).
Next chapter please !
Stubby47's Bespoke Model Buildings
All photos I post are ©Stu Hilton, but are free for use by anyone.
Posted
Full Member
There is no right way or wrong way of setting out the various parts. You should do it the way that you find the most convenient - as indeed you have.
The next part, cutting out the door and window openings, is now ready.
Perry
Due to cutbacks, the light at the end of the tunnel has been switched off.
Posted
Full Member
However, whereas I used to use pencil to mark the openings, and was thus able to draw as far across the wall as required, I felt that I needed to be more careful as to where I marked using the blade.
As such, I found it much harder to mark out the openings, so will probably have another go. I also realised that I was marking on the 'outside' face, and this would probably have been better on the 'inside'.
Stu
Stubby47's Bespoke Model Buildings
All photos I post are ©Stu Hilton, but are free for use by anyone.
Posted
Full Member
Marking on the inside is a good idea, Stu, but you'll find that it's not always practical. Your marking out with a knife should be so light that a coat of paint will eventually hide the marks anyway. It's only the actual cutting lines that need to be deeper.I cut the door & window out last night, following the instructions.
However, whereas I used to use pencil to mark the openings, and was thus able to draw as far across the wall as required, I felt that I needed to be more careful as to where I marked using the blade.
As such, I found it much harder to mark out the openings, so will probably have another go. I also realised that I was marking on the 'outside' face, and this would probably have been better on the 'inside'.
Stu
Perry
Due to cutbacks, the light at the end of the tunnel has been switched off.
Posted
Full Member
Stubby47's Bespoke Model Buildings
All photos I post are ©Stu Hilton, but are free for use by anyone.
Posted

Full Member
Just in passing, I put the method of side/front walls elsewhere on the forum - at least the way I like to do it.
I find it preferable to put side walls behind the front and back as any little imperfections and joins might be less noticable.
The side walls would be cut higher by the thickness of the facing wall so that the roof fits.
However, it's not compulsory - just my preference.
Posted
Full Member
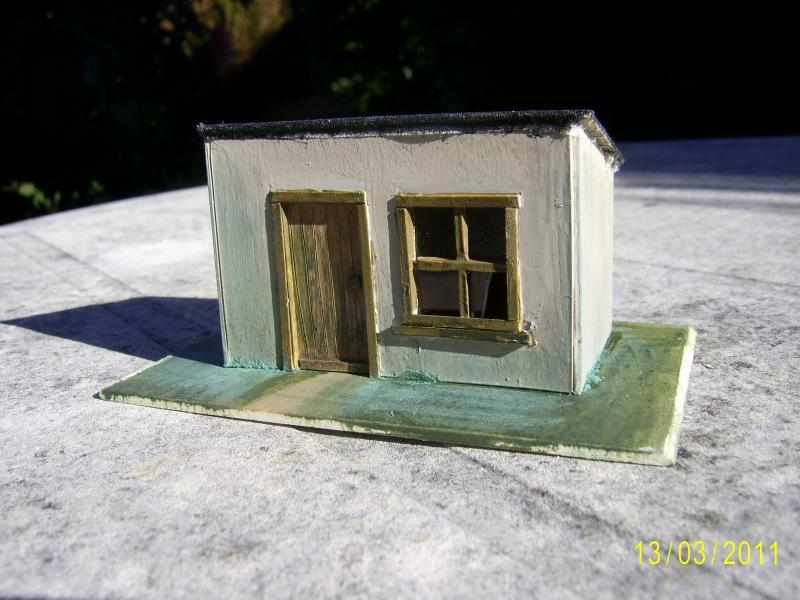
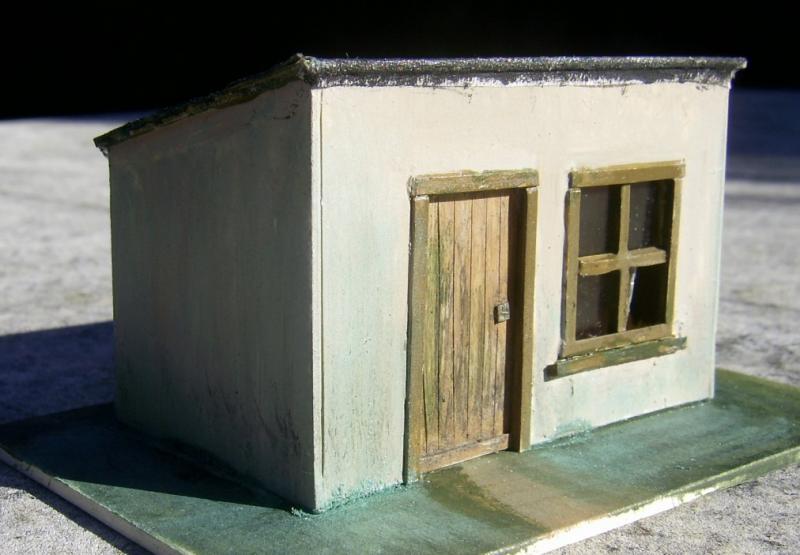
The walls are 'Cement Render', plus lots of weathering powder (sorry, cheap eye-shadow) whilst the paint was a bit tacky. The door was done similarly, Humbroll #118 with dry-brushed grey and black, and then green powder.
Stubby47's Bespoke Model Buildings
All photos I post are ©Stu Hilton, but are free for use by anyone.
Posted
Full Member
Glad to see you got it finished.
The project wasn't technically a good build. There are several things that could be done better or differently. I did it the way I did just to keep it simple and to make it easy to demonstrate a few little 'tips and wrinkles'.
Thanks for taking part. :cheers
Perry
Due to cutbacks, the light at the end of the tunnel has been switched off.
Posted
Full Member
A choice can also be made depending on the intended viewing direction when the building is placed onto the layout.………..I find it prefeable to put side walls behind the front and back as any little imperfections and joins might be less noticable.
The side walls would be cut higher by the thickness of the facing wall so that the roof fits.
However, it's not compulsory - just my preference.
I've done it both ways in the past. I did it like this on this particular occasion just to keep the build as simple as possible.
One could say there shouldn't be any 'little imperfections'……..
 but in truth a few usually creep in.:thud :roll:
Perry
Due to cutbacks, the light at the end of the tunnel has been switched off.
1 guest and 0 members have just viewed this.