Stu's Boxfile Layout
Posted

Full Member
(This is just my size)
Having followed your harbour boxfile build on RMWeb and now this one Stu, I have to say you are a master in the art of creating an illusion of space in tiny areas.It feels like a major industrial complex on the footprint of a couple of A4 sheets. AMAZING :cool wink

Posted
Legacy Member
Wagon turntables are something a lot of people think about but never get to complete successfully .
I know as I have been thinking about a way of doing it simply and cheaply as I am going to need at least four for the second stage of Llanynys .
Perhaps you should think about going into production for I am sure there would be a lot of interest.
Richard. A sorely missed member who lost a brave battle in 2012.
Posted

Full Member
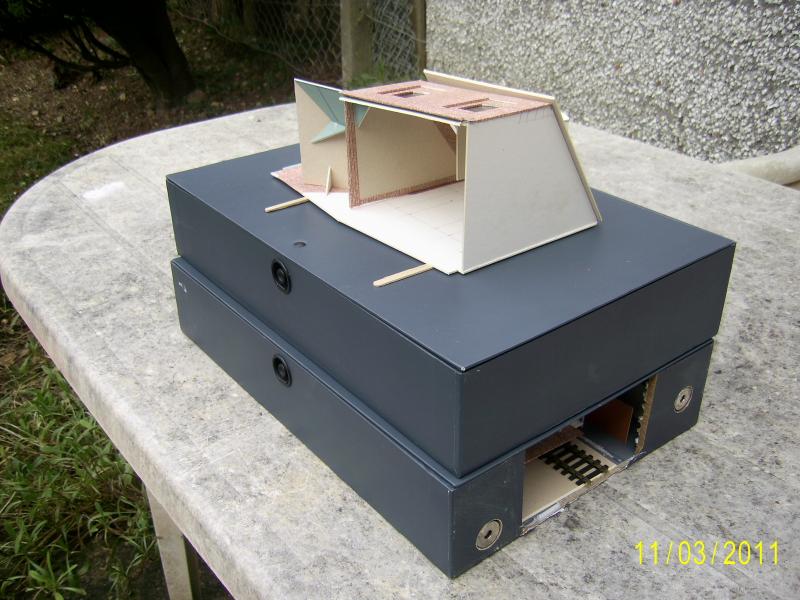
I needed to find a solution that would fit in as little as vertical space as possible - so whilst Son No2 was not looking (he was in school !) I pinched one of the rotating plates from one of his Lego Star Wars models.
Next time I'll consider how to fix the table proper to the rotating part with a bit more intelligence, but this one is stuck on and works.
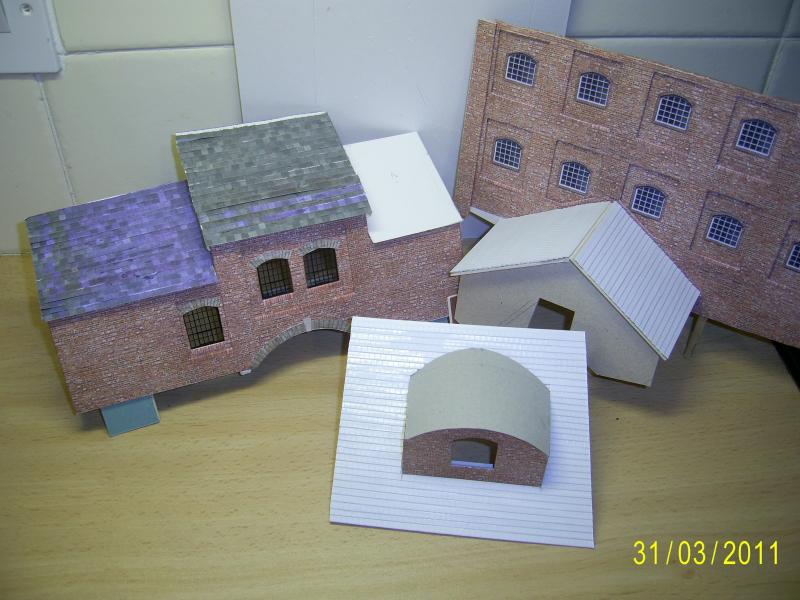
Other progress now. I've made an upper floor and roof sections for the section over the internal unloading bay, plus covered the third section of the backscene with more of the Scalescenes Aged Brick paper.

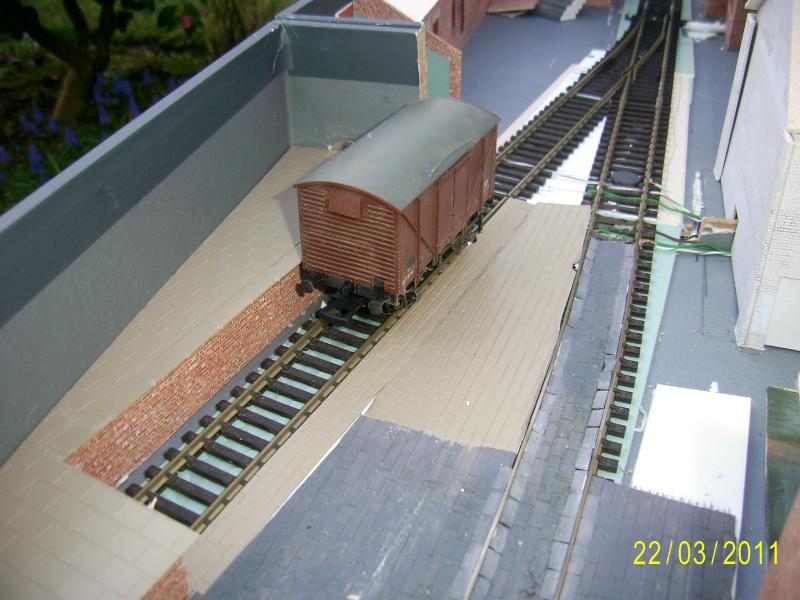
I also thought I'd include a shot of the layout all packed up. I'll need a small fold-up crate to ship it in, but most of the layout pieces still fit inside the two scenic boxes.
By the way, I'm still wondering what to call this, does anyone have any suggestions ?
Stubby47's Bespoke Model Buildings
All photos I post are ©Stu Hilton, but are free for use by anyone.
Posted

Full Member
Box Hill?
Posted
Full Member
By the way, I'm still wondering what to call this, does anyone have any suggestions ?
It could be an extension of Eldavos Cramdin Yard and be called Cramdinside

Posted
Full Member
Following a raft of suggestions ( on the other forum…) I've decided on Laterite & Co Ltd.
Stubby47's Bespoke Model Buildings
All photos I post are ©Stu Hilton, but are free for use by anyone.
Posted
Full Member
All the track is now laid, the magnets glued in position, the temporary wiring connected and trains have been moving and uncoupling!
I'll need to solder the wires in permenantly, all 5 of them, before I can continue with the ground cover, but I feel it's a big milestone to have reached.
Stubby47's Bespoke Model Buildings
All photos I post are ©Stu Hilton, but are free for use by anyone.
Posted
Full Member
Track wiring is now complete, the outside loading dock is mostly constructed, just got a couple of small ground areas to fill, then it's on to the detailing.
3 weeks and counting….
Stubby47's Bespoke Model Buildings
All photos I post are ©Stu Hilton, but are free for use by anyone.
Posted
Full Member
Posted
Full Member
As this last weekend was taken up with re-building the wall in the shower cubicle where the water had got behind the tiles and dissolved the plasterboard, it was deemed politically prudent to suspend any daytime modelling and associated activites, in order to not lose any previously gained brownie points (and/or permission slips) to allow attendance at the extremely local NG show this coming weekend.
Suffice to say, if I can organise myself properly, lunchtime modelling sessions will soon return, during which suitable photographic recording of progress can be achieved.
Indeed, yesterdays's lunch period did see a venture away from the desk to a rather well known model railway emporium in the nearby metropolis of Camborne, where paper tokens were exhanged for some suitable detailing items. These too will be soon appearing in digital recorded form in the near future.
Actual progress has seen the completion of the wiring in both boxes - I just need to find a suitable plug/socket combinations to ease the complexities of setting up this layout. It would also enable me to introduce building lighting, something I've not yet attempted, but which needs to be pondered about somewhat beforehand, to ensure I can still dismantle the buildings at close of play.
Stubby47's Bespoke Model Buildings
All photos I post are ©Stu Hilton, but are free for use by anyone.
Posted
Full Member
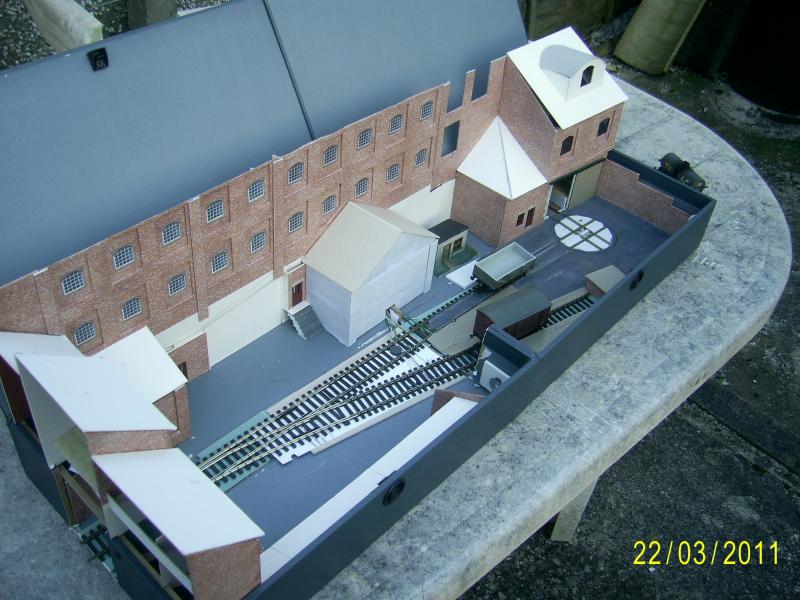
This view shows the new unloading dock, and the extended ground cover. The stones up to the rails are the paper chad from a multi-hole punch machine for adding the plastic loops to documents.
This is yet another overall shot, showing the new roof for the central office-type building and the completed trackwork. There have also been some doors added to the main factory - some sort of extended building will appear in this area between the doors, probably quite low in height, maybe a canteen style with kitchen chimneys and vents.
In the far right corner, beside the turntable, I'm thinking of a small warehouse, with a door opening onto the loading dock. The little 'Perry' shed is merely being stored there for the time being, it really deserves it's own little diorama.
Stubby47's Bespoke Model Buildings
All photos I post are ©Stu Hilton, but are free for use by anyone.
Posted
Full Member
A flash of inspiration (having seen Nick's Much Murkle layout in the nominations for this week's piccy, and remembering his little shed with the empty sacks), I've created this :
In no way is it a copy of Nick's lean-to shed, but it gave me the idea of what to make. I wanted something low enough to not hide the turntable, but still be a useful building.
This is it in situ :

It obviously needs more weathering, bedding in properly, the cage fencing & door added to the far end and some supports for the metal, not to mention all of the consumables actually stored in the shed.
But it's a good start - all four legs touched the ground 1st time too !
Stubby47's Bespoke Model Buildings
All photos I post are ©Stu Hilton, but are free for use by anyone.
Posted
Full Member
Posted
Full Member
Glad that something I've done has helped. Looking good so far and when you've added the details it will no doubt be a superb addition.
Also a good use of recycled bullhead rail by the look of it :cool wink:thumbs
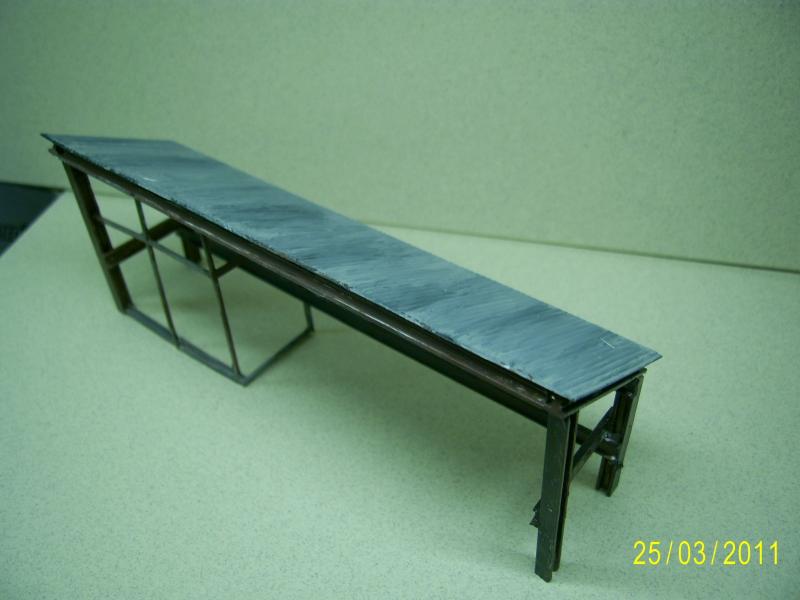
Posted
Full Member
No, sorry, it's not bullhead rail, just bits of plastruct in various shapes, mainly I-beam and half I-beam (like a C-beam I guess).
It all went together with a bit of Plastic weld so it was easy to construct (once I'd worked out that the plastic weld sticks to the cutting mat, so I need to find something else - I did consider our glass cutting board, but wimped out in case I got found out !).
Stubby47's Bespoke Model Buildings
All photos I post are ©Stu Hilton, but are free for use by anyone.
Posted

Full Member
I invariably do all my gluing up on a sheet of glass. Very little sticks to it - at least not permanently - and any excess glue or solvent scrapes off very easily. It's also a nice flat surface to build on.
Cutting the parts out on a cutting mat to look after your blades is a very good idea, but if you can, I would certainly advise you to get a piece of glass for actually building on.
Mine is an old sliding door from a piece of furniture and has nice rounded, smoothed edges.
Perry
Due to cutbacks, the light at the end of the tunnel has been switched off.
Posted
Full Member
Thanks for the tip - I'd noticed you using a piece and it's on my to-do list. I'd not thought about re-cycling a one though - good idea !
Stu
Stubby47's Bespoke Model Buildings
All photos I post are ©Stu Hilton, but are free for use by anyone.
Posted
Full Member
Herein lies a lesson - before you start adding paper slates to a building, sat in the lounge, watching the tele, tray on lap, subdued lighting, check that the printing you've done is the correct colour…
I spent a happy couple of hours cutting the slate strips, applying the glue, lining the strips up, checking the overlap of each row, etc. It wasn't until I moved into the kitchen to trim the overlap I realised that purple is not usually a shade of slate.
The other two roofs have been covered in Slaters tiles instead, until such time as I can get to a printer ink supplier…
Stubby47's Bespoke Model Buildings
All photos I post are ©Stu Hilton, but are free for use by anyone.
Posted

Inactive Member
Max
Port Elderley
Port Elderley
Posted
Full Member
1 guest and 0 members have just viewed this.