Members Monthly Project - July 2012
Posted
#139990
(In Topic #7535)

Legacy Member

Posted

Full Member
 )
)My new layout is to be based upon the ex-LNWR North Wales Coast Line between Chester and Holyhead, although my locations are purely fictitious.
One feature of this line and the LNWR is the building styles of their signal boxes. This project will feature a "Tall" style large signal box of the type found at Chester No. 2 box (although this was curved I think, mine is straight).
This example may be seen here (Photos 2 and 4):-
Railways of North Wales 1975-1983: chester:Chester No 2.
To be continued…
Regards
Rhiwderin_Ray
Rhiwderin_Ray
Posted
Legacy Member
Posted
Full Member
Hope this works !
Railways of North Wales 1975-1983: chester:Chester No 2
Success!
Actually this is a very useful site for me and any LMS/LNWR modellers.
 Last edit: by rhiwderin_ray
Regards
Rhiwderin_Ray
Rhiwderin_Ray
Posted
Legacy Member
Posted

Full Member
I'm going to enjoy this project. It's a spectacular signal box. Why did they build them like that ? Maybe being Cheshire, ground rents were high ………………..
'Petermac
Posted
Full Member
I printed out some of the photos of the box from the website.
Also the Book by Jack Nelson "THE LNWR PORTRAYED" is very useful for all modellers not just LNWR/LMS modellers.
I bought some brass LNWR Signal Box Window etchings (Brassmasters?)and downloaded the Scalescenes Signal Box R010 plus some Brick Paper TX02.
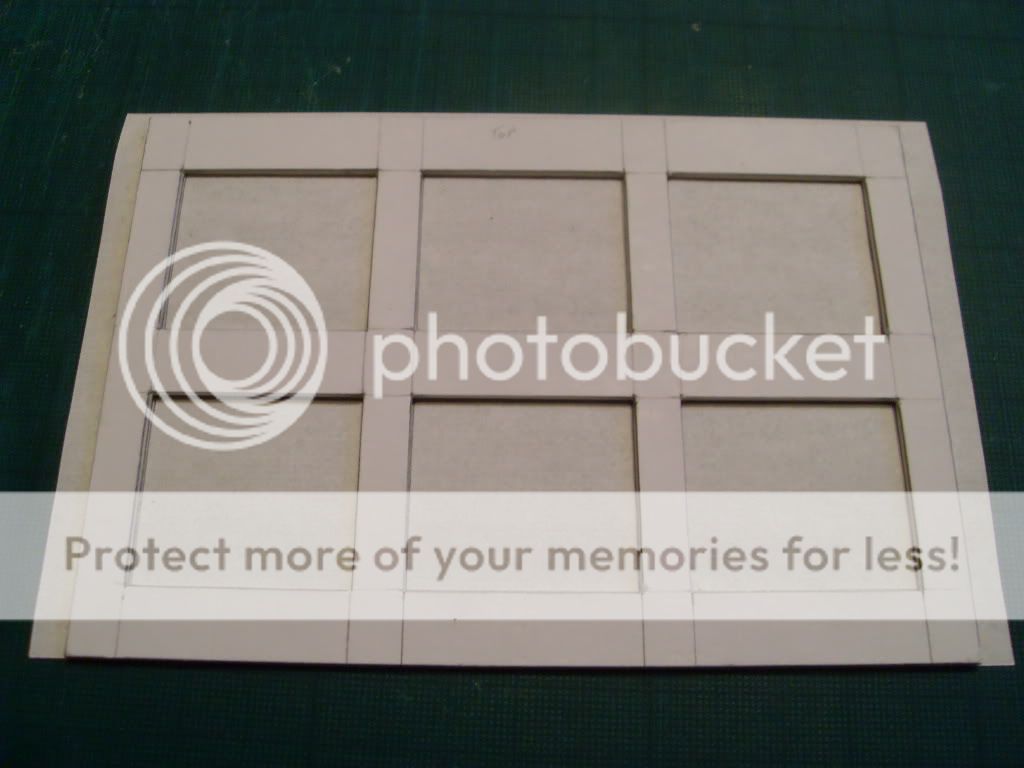
With Drawings and Photos to hand plus the etches, I drew out some elevations of the signal box using the etches as a size guide for the window frames.
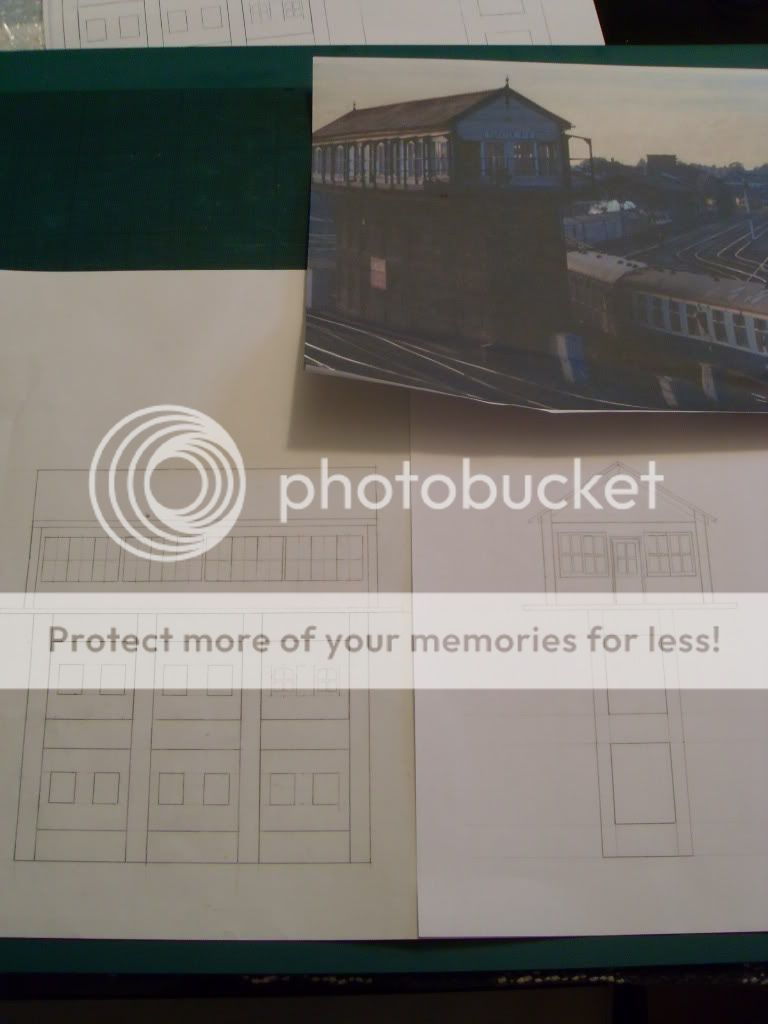
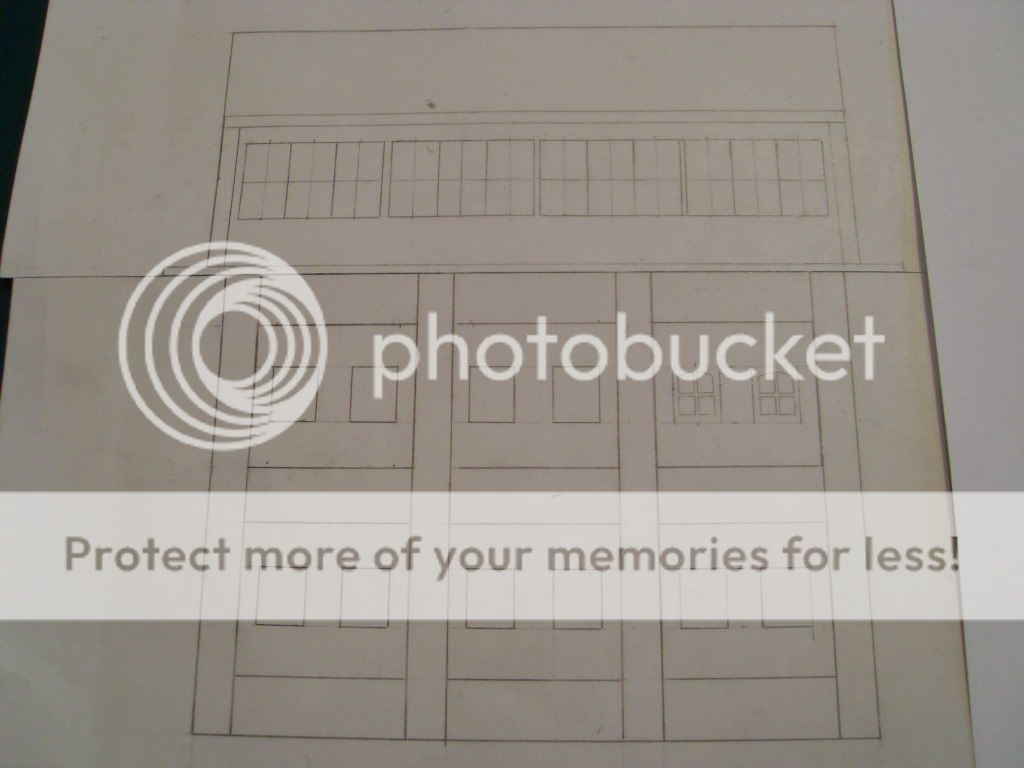
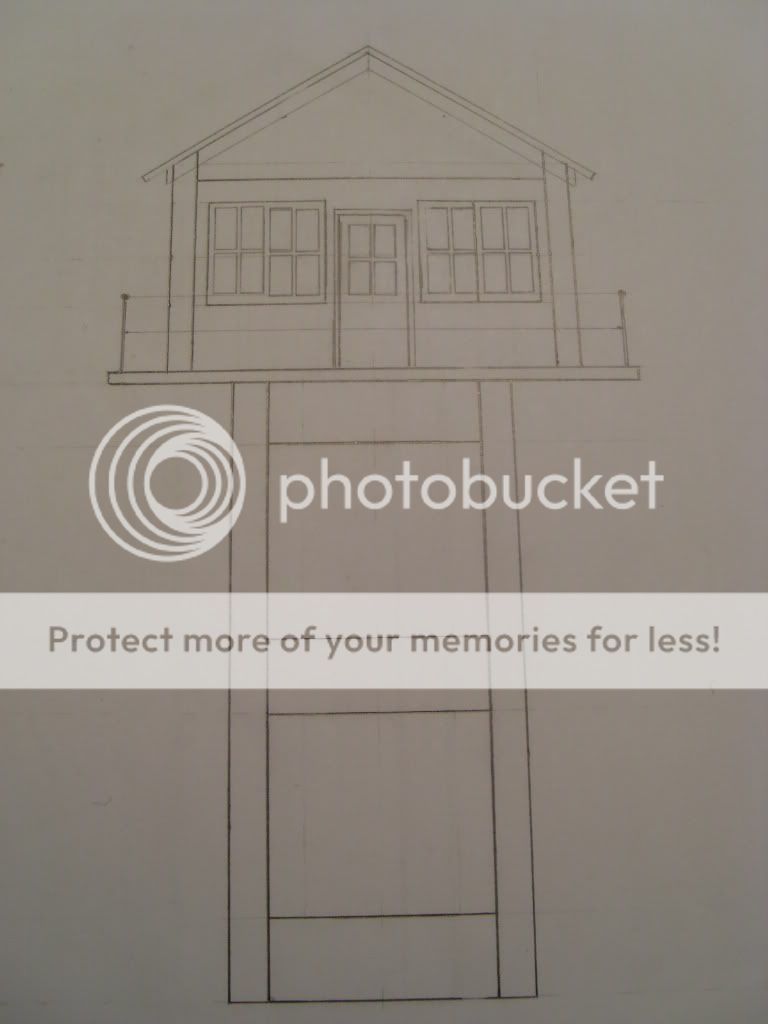
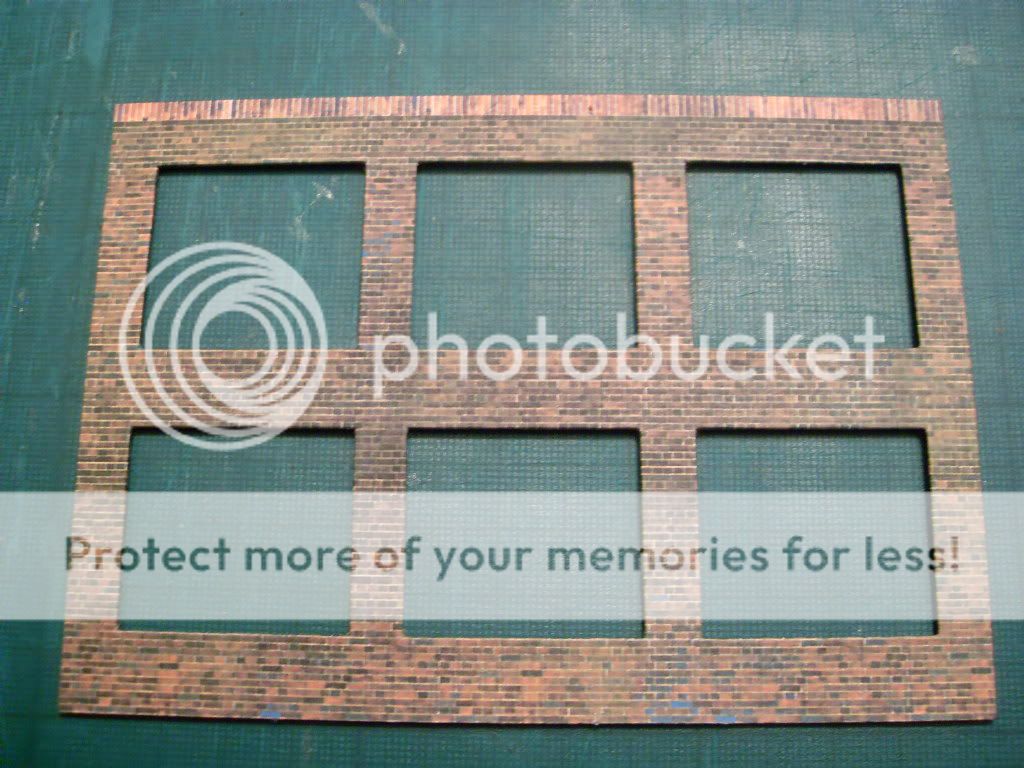
After some adjustment and rubbing out, I was happy and the main components were drawn out on artists Mounting board and cut out.
Note that some wall sections and window sections are "indented" and need to but cut with a "surround" for glueing behind other components. The angled strips on the left are wall corner cappings.
To be continued…
Regards
Rhiwderin_Ray
Rhiwderin_Ray
Posted

Full Member
Watching with interest mate!
Cheers,John.B.:thumbs
Posted
Full Member
'Petermac
Posted
Full Member
I have nothing more sophisticated than a "self healing" green plastic cutting mat, a sharp scalpel or Stanley knife and a steel rule. For windows, I cut all the horizontals left to right, then right to left. Turn 90 degrees and repeat!
For right angled capping strips I simply score lightly on the centreline and fold using the edge of the steel rule as a guide.
All edges are square butt joints as they are covered later by the cappings.
Last edit: by rhiwderin_ray
Regards
Rhiwderin_Ray
Rhiwderin_Ray
Posted

Full Member
Posted
Full Member

How thick is the mountboard ?
'Petermac
Posted
Full Member
Regards
Rhiwderin_Ray
Rhiwderin_Ray
Posted
Full Member
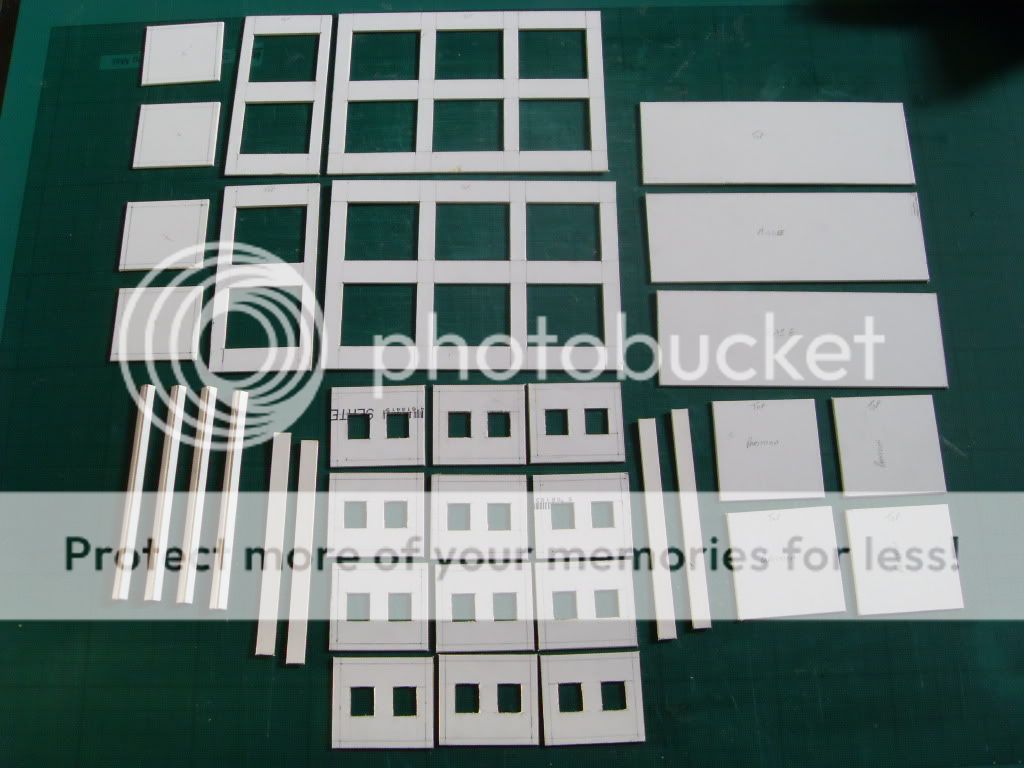
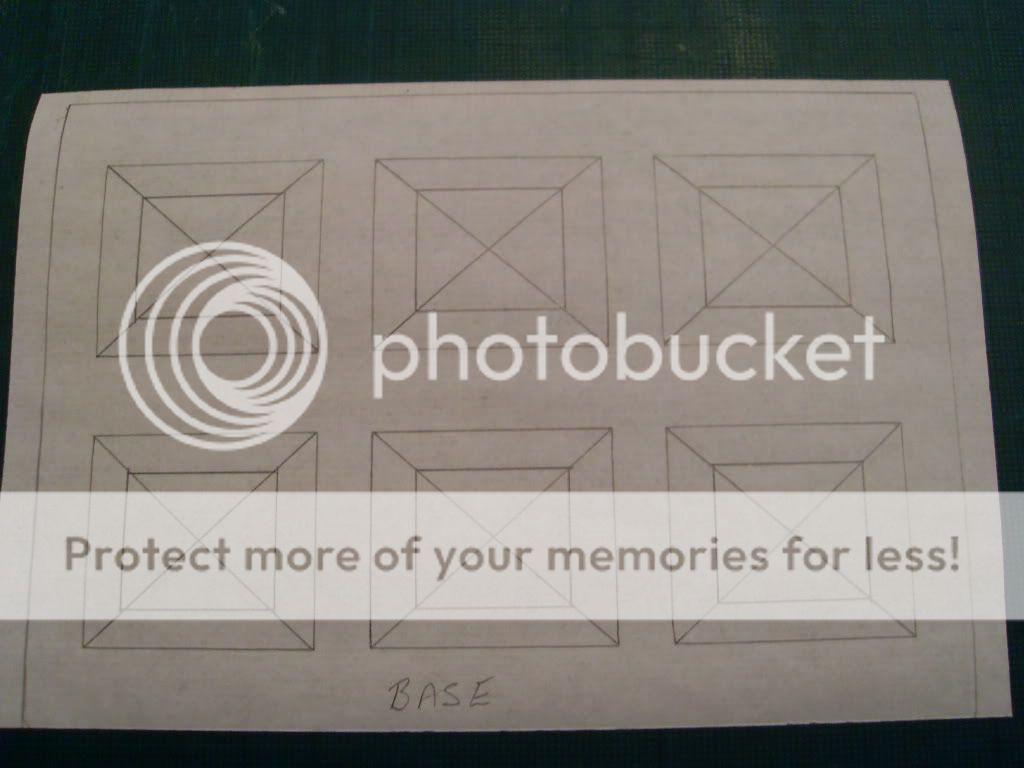
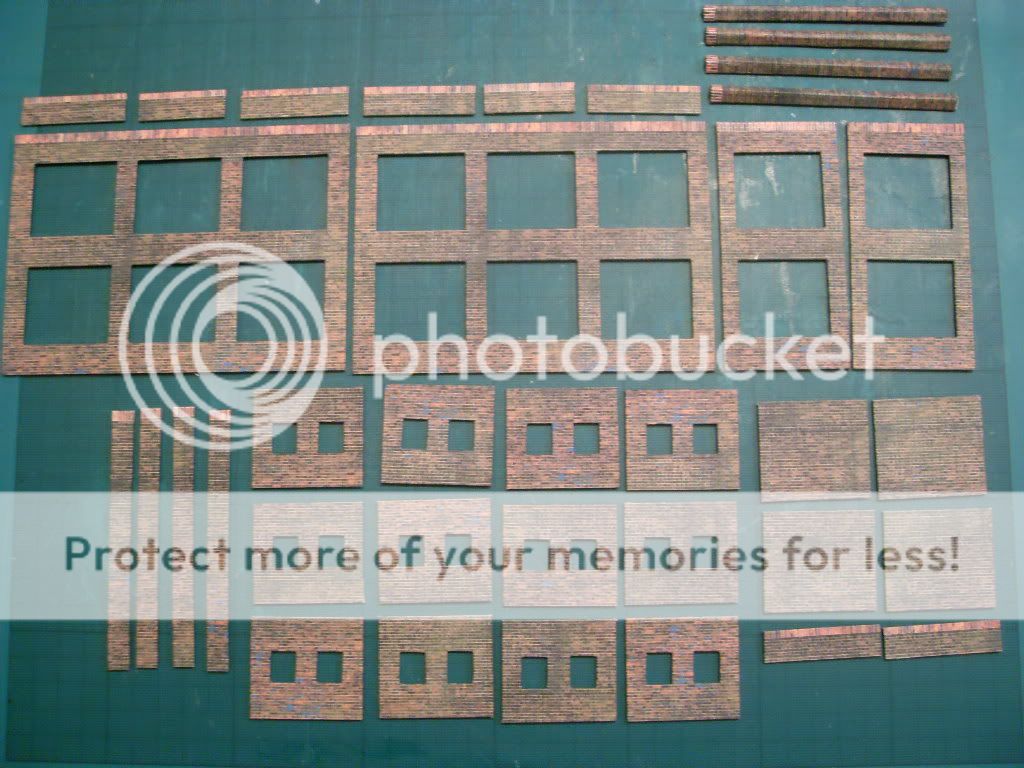
I forgot to mention the cut out pieces are as follows:
2 long side walls
2 narrow end walls
12 window recessed walls
4 end recessed walls
4 brick columns
4 corner caps (90 degree shape)
3 floors
4 interior partitions
6 lower wall plinths (not shown)
I write the names on the reverse so I know what is what!
Here is how I add my brick paper.
Place the brickpaper face down and place the card on top. Then trace around the outlines with a fine propelling pencil. (I use a Rotring)
Next, Remove the card piece and mark out the cutting lines
Cut along the required lines with a sharp scalpel and remove cut outs. (Cutting all lines that are in the same direction saves turning the piece around all the time)
Then, glue the card onto the paper using the outline pencil lines as a guide.
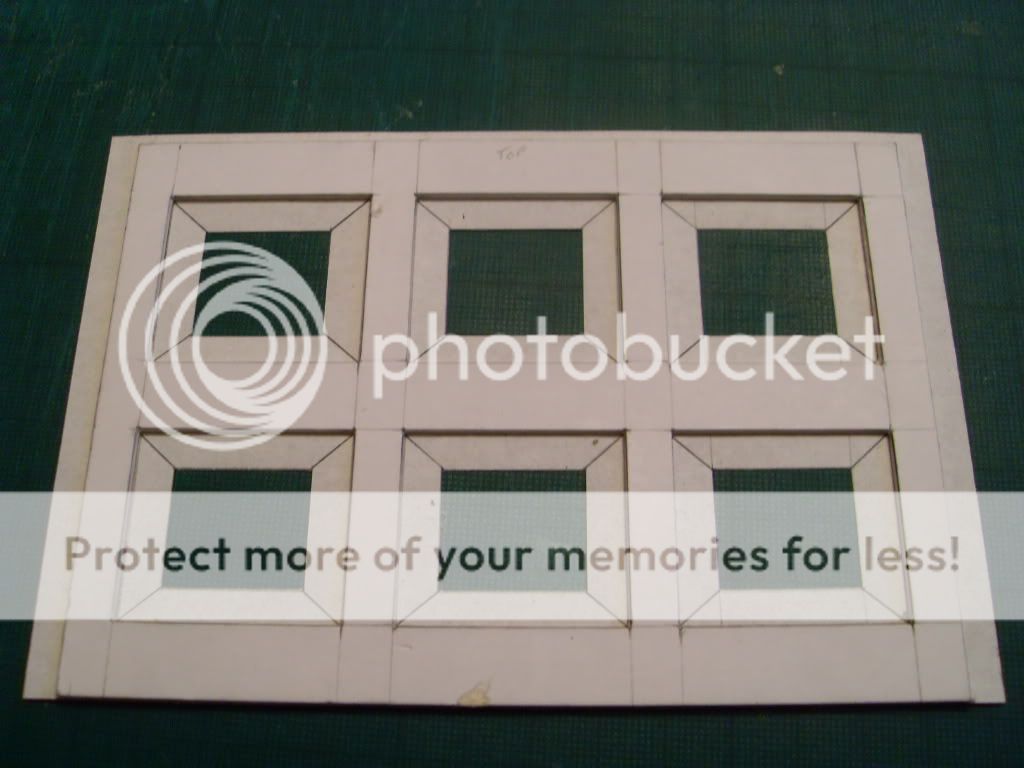
Bend the remaining flaps around the card and glue in place.
Finished piece - this one took about 10 minutes
All pieces covered…
Sills and lintels to be added !
To be continued….
Regards
Rhiwderin_Ray
Rhiwderin_Ray
Posted
Full Member
Bob
Posted
Full Member
Nicely done. I have always hesitated over using card and paper, but the your brickwork does look very effective. Have you decided how to make the windows yet?
Bob
Hi Bob. Yes, it is all completed. All will be revealed.. soon!
Regards
Rhiwderin_Ray
Rhiwderin_Ray
Posted
Full Member
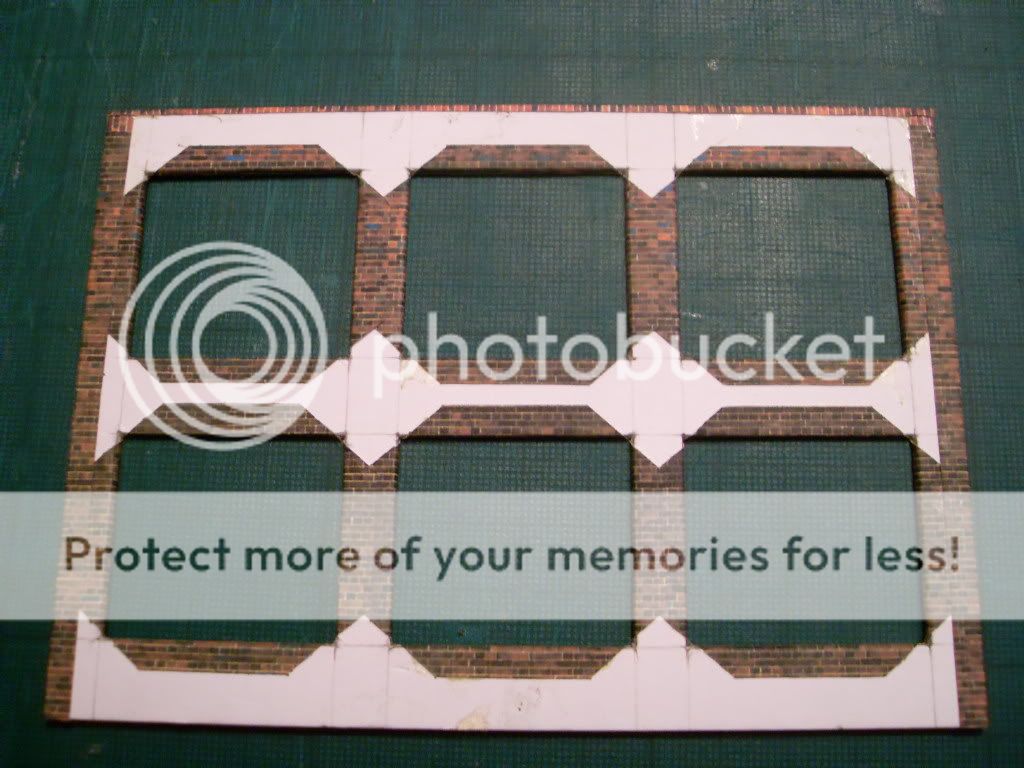
First job is to cut out some brickpaper and do all of the sills and the lintels. Simple but boring job!

Having first cut out, primed and painted one side of all of the window etchings, cut out some acetate to the required size (Larger than the window) and glue on place. (I used evo-stick impact dabbed on with a cocktail stick).
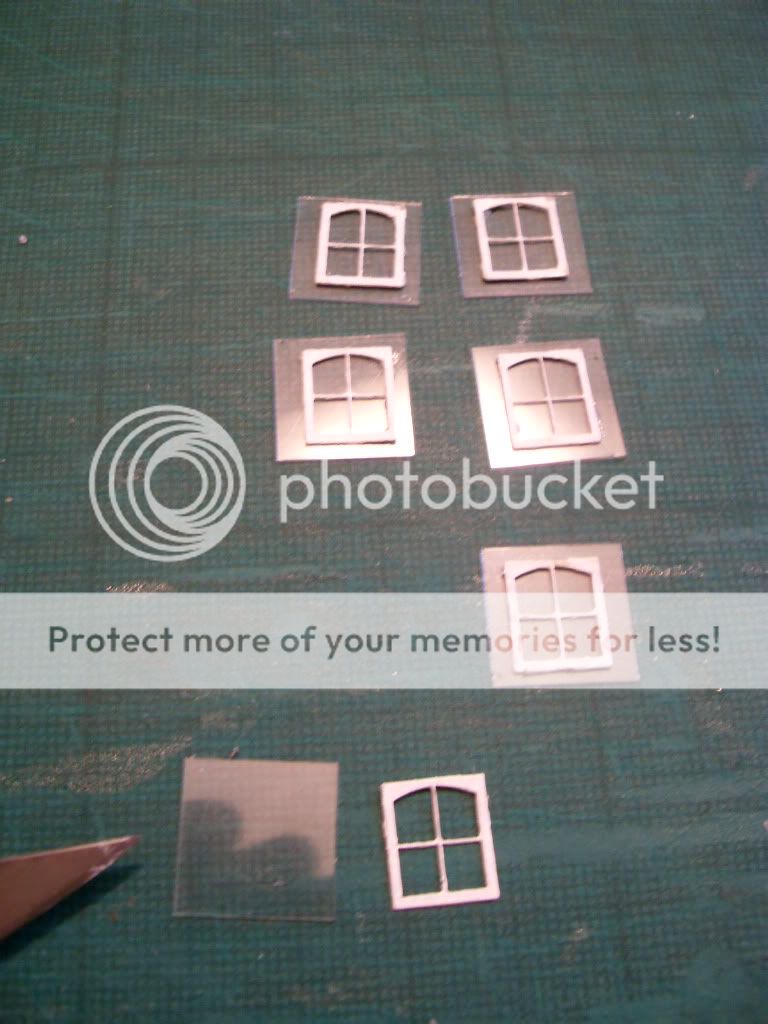
Once dry, apply some glue to the back of the window aperture and position the windows carefully in place. Remove any surplus glue immediately.
The same approach is used for doors - glue door onto a larger backing piece of card and then glue in place. Card strip is used for the door frame.

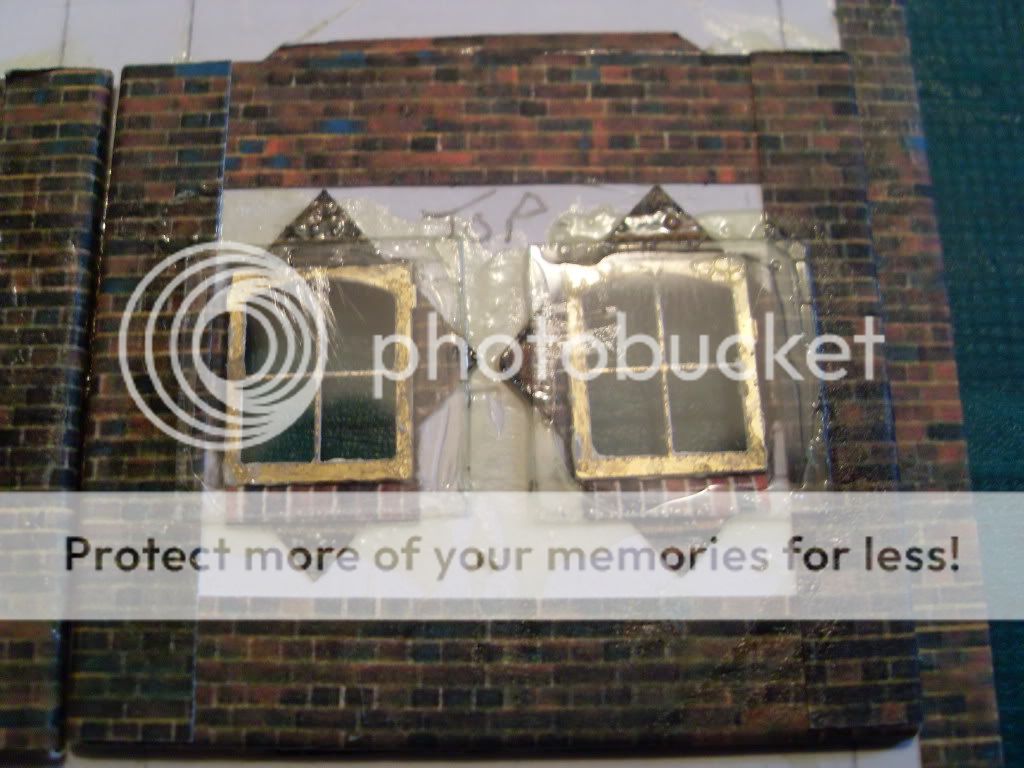
View of one completed side.

To be continued …
Regards
Rhiwderin_Ray
Rhiwderin_Ray
Posted

Full Member
Stubby47's Bespoke Model Buildings
All photos I post are ©Stu Hilton, but are free for use by anyone.
Posted
Full Member
1. I seem to recall that "Evo-Stick Impact" is a solvent based contact adhesive. Doesn't that attack the acetate ?
2. The brick courses on the corners line up perfectly on the left hand corner and also, at the top on the right hand corner. They then start to "creep" a little on the right hand corner. Is there a joint in the paper somewhere (I have no idea how tall this building is) or has the paper stretched - I can't understand why it can line up in one section but then start to "unline" :hmm
Was the lining up by design (in which case, it's excellent) or by luck (in which case, you're a very luycky b…..) :thumbs
Sorry - that's 3 questions ………………
p.s. I love your cill brickwork - does that come with the Scalescenes download ? (That's 4 now …………
):cheers
'Petermac
Posted
Full Member
As I built the signal box six months ago I will do my best to answer!
1. Evo-Stick - not had a problem with acetate.
2. If you are talking of the photo with the door. Then there are 2 plinths added to the base of the wall and the r/h one isn't aligned. However, it is hard to spot in reality at normal viewing distance.
3. Again if you are talking about the lining up of the inset wall with the outer wall then yes, there was sufficient "play" in the size of the inner wall to align the brick courses with the outer ones.
4. I seem to remember that the sills come as part of a separate window download.
Hope that helps!
Regards
Rhiwderin_Ray
Rhiwderin_Ray
1 guest and 0 members have just viewed this.