Trying out N Gauge
Posted

Site staff
4' x 2' small layout
Thanks JamesEd

Posted

Full Member
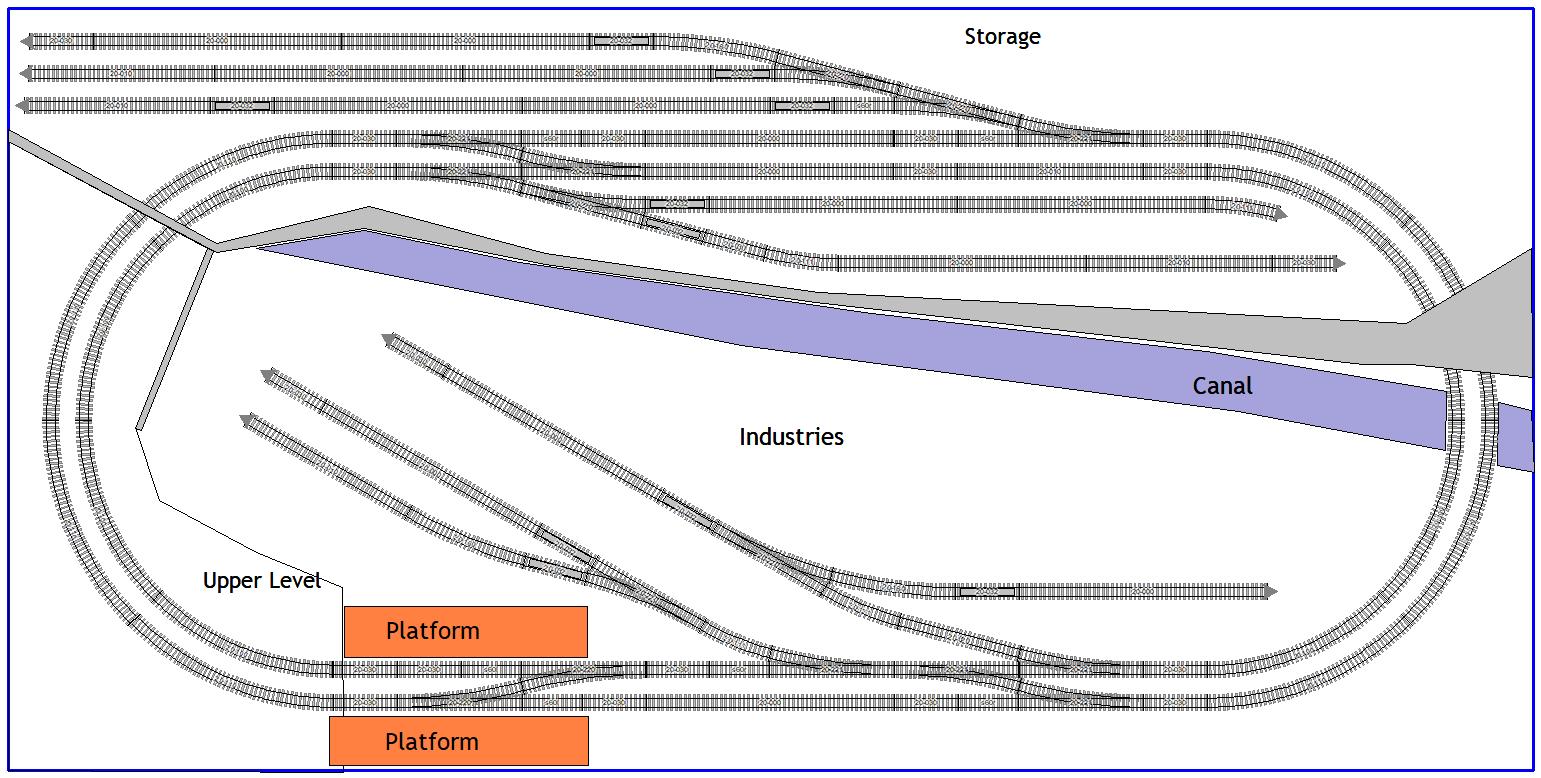
Running lines, storage, run around and shunting sidings. Back scene break and all on a board that can be flipped over or leant against a wall to work on the electrics.
That should keep you busy.
cheers
Posted
Site staff
It's been five weeks, time to chase them I think :dry:
Ed
Posted
Site staff
Arthritis in my back and hands doesn't help either

Ed
Posted
Full Member
Sorry to hear that your arthritis is playing up. I'm starting to get a bit of it now, not as nimble as I used to be.
Looking forward to following along on this project.
cheers
Posted
Full Member
Cheers Pete.
Posted
Site staff
Might try cutting some sort of canal/ditch as per the plan posted earlier.
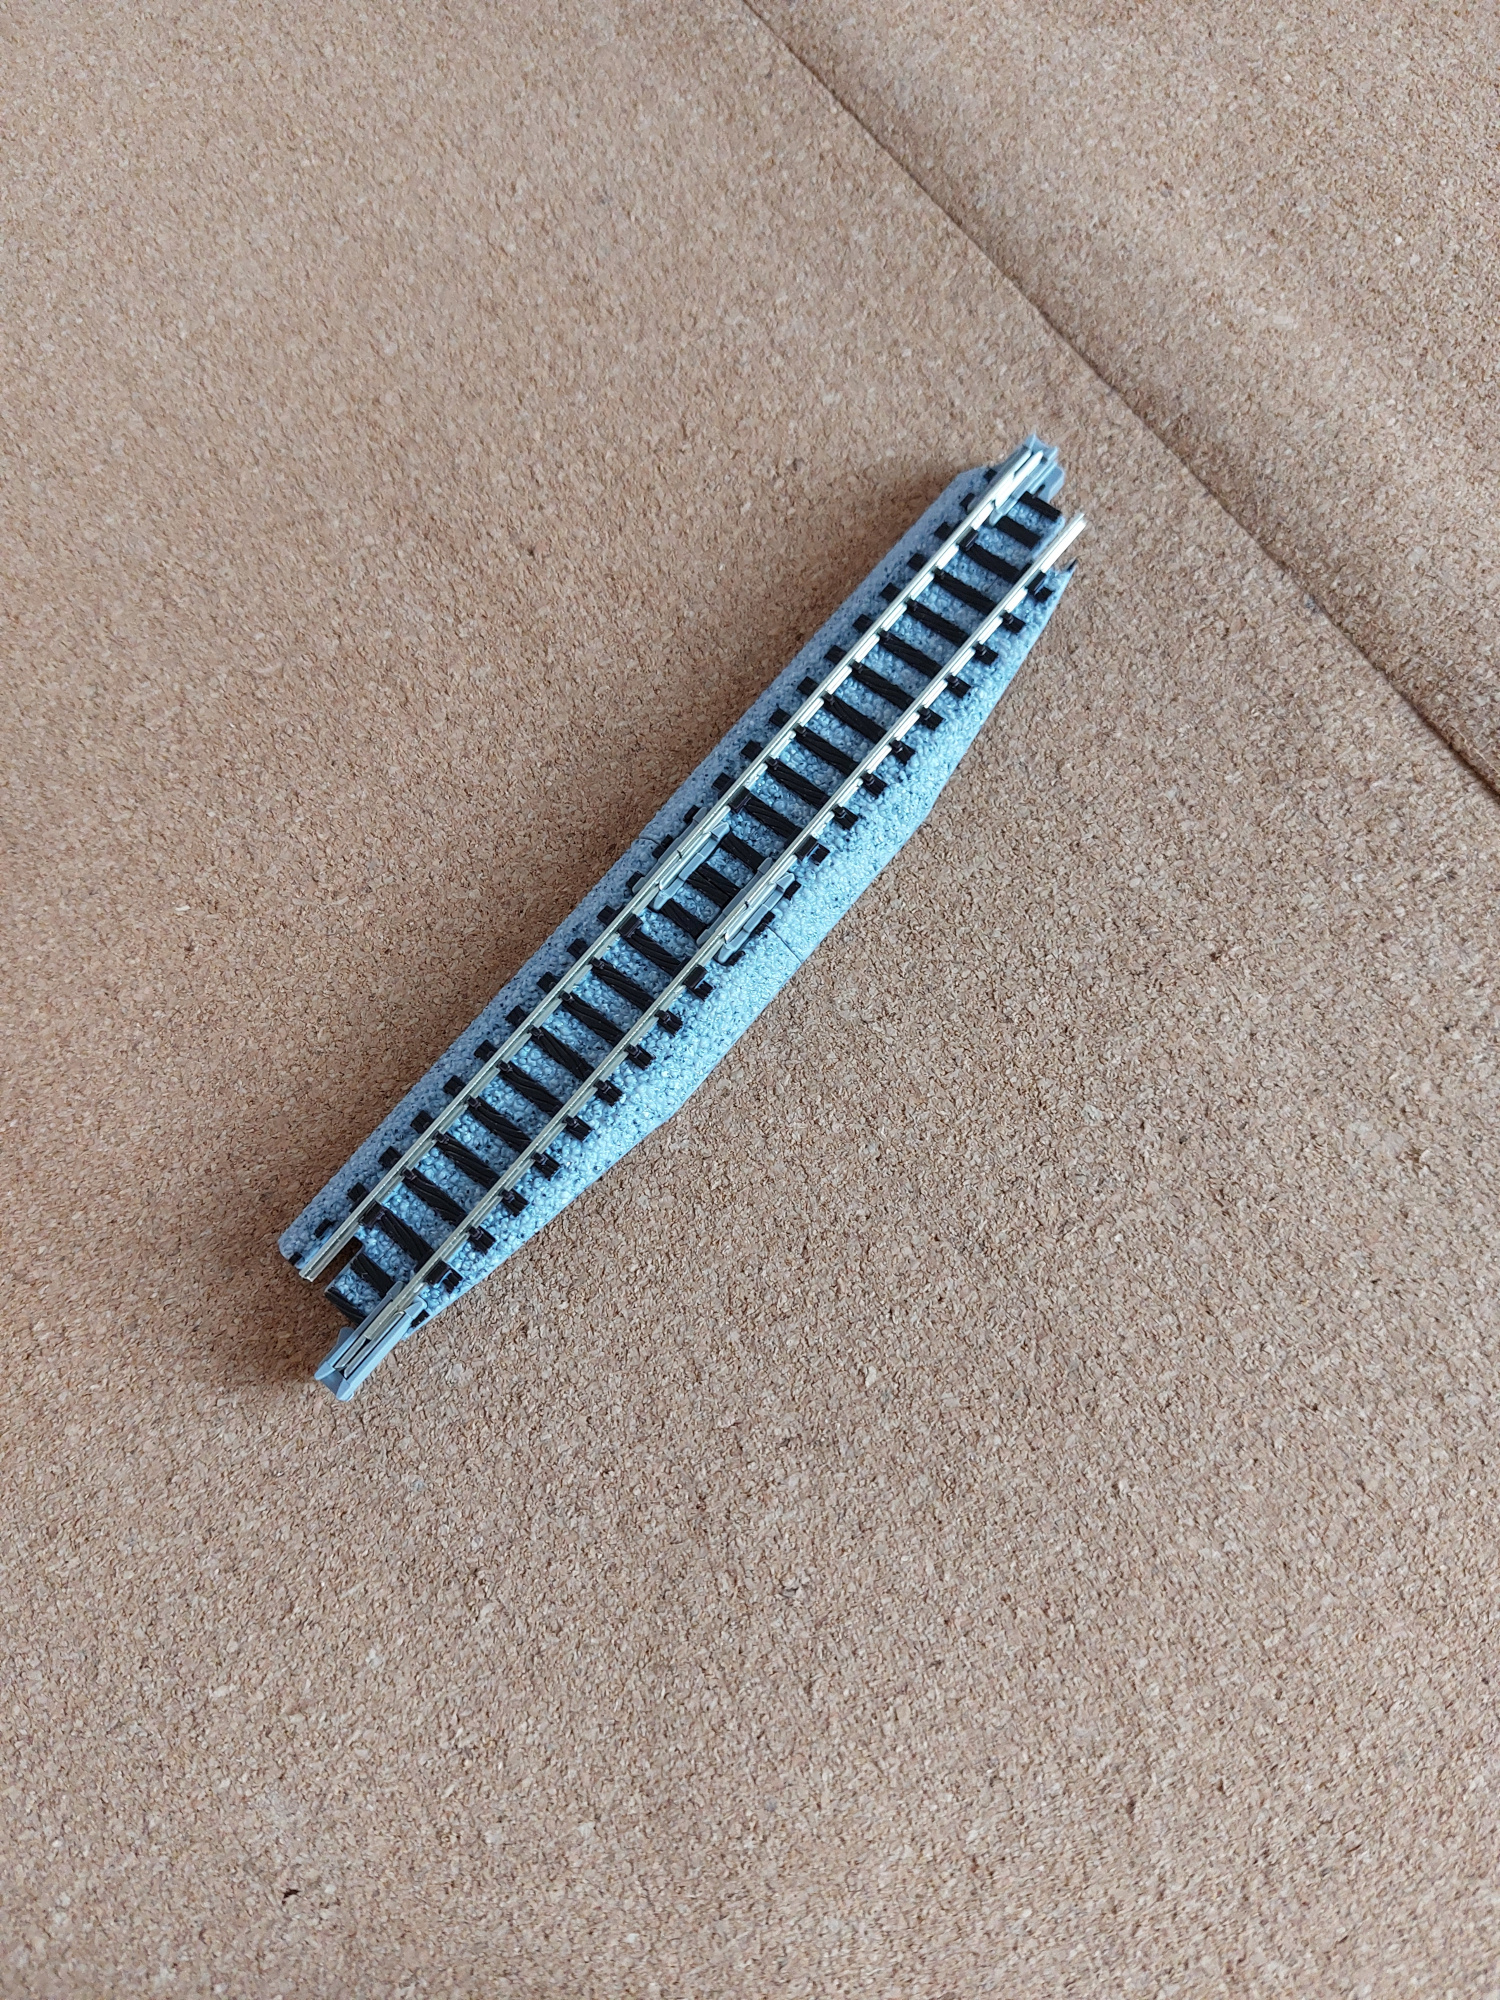
I'm using Kato track Marty and the point motors are built in to the large ballast shoulder, so I shouldn't need to worry about anything clashing with the joists (famous last words) 😆
Ed
Posted
Site staff
The first thing that went wrong was a screwdriver bit getting stuck in the chuck of my very old Black and Decker electric screwdriver. Couldn't get it out, however hard I tried and there was no way I was going to try and screw the amount of screws necessary for the baseboard construction by hand, so new electric screwdriver was ordered from Amazon to arrive the following day.
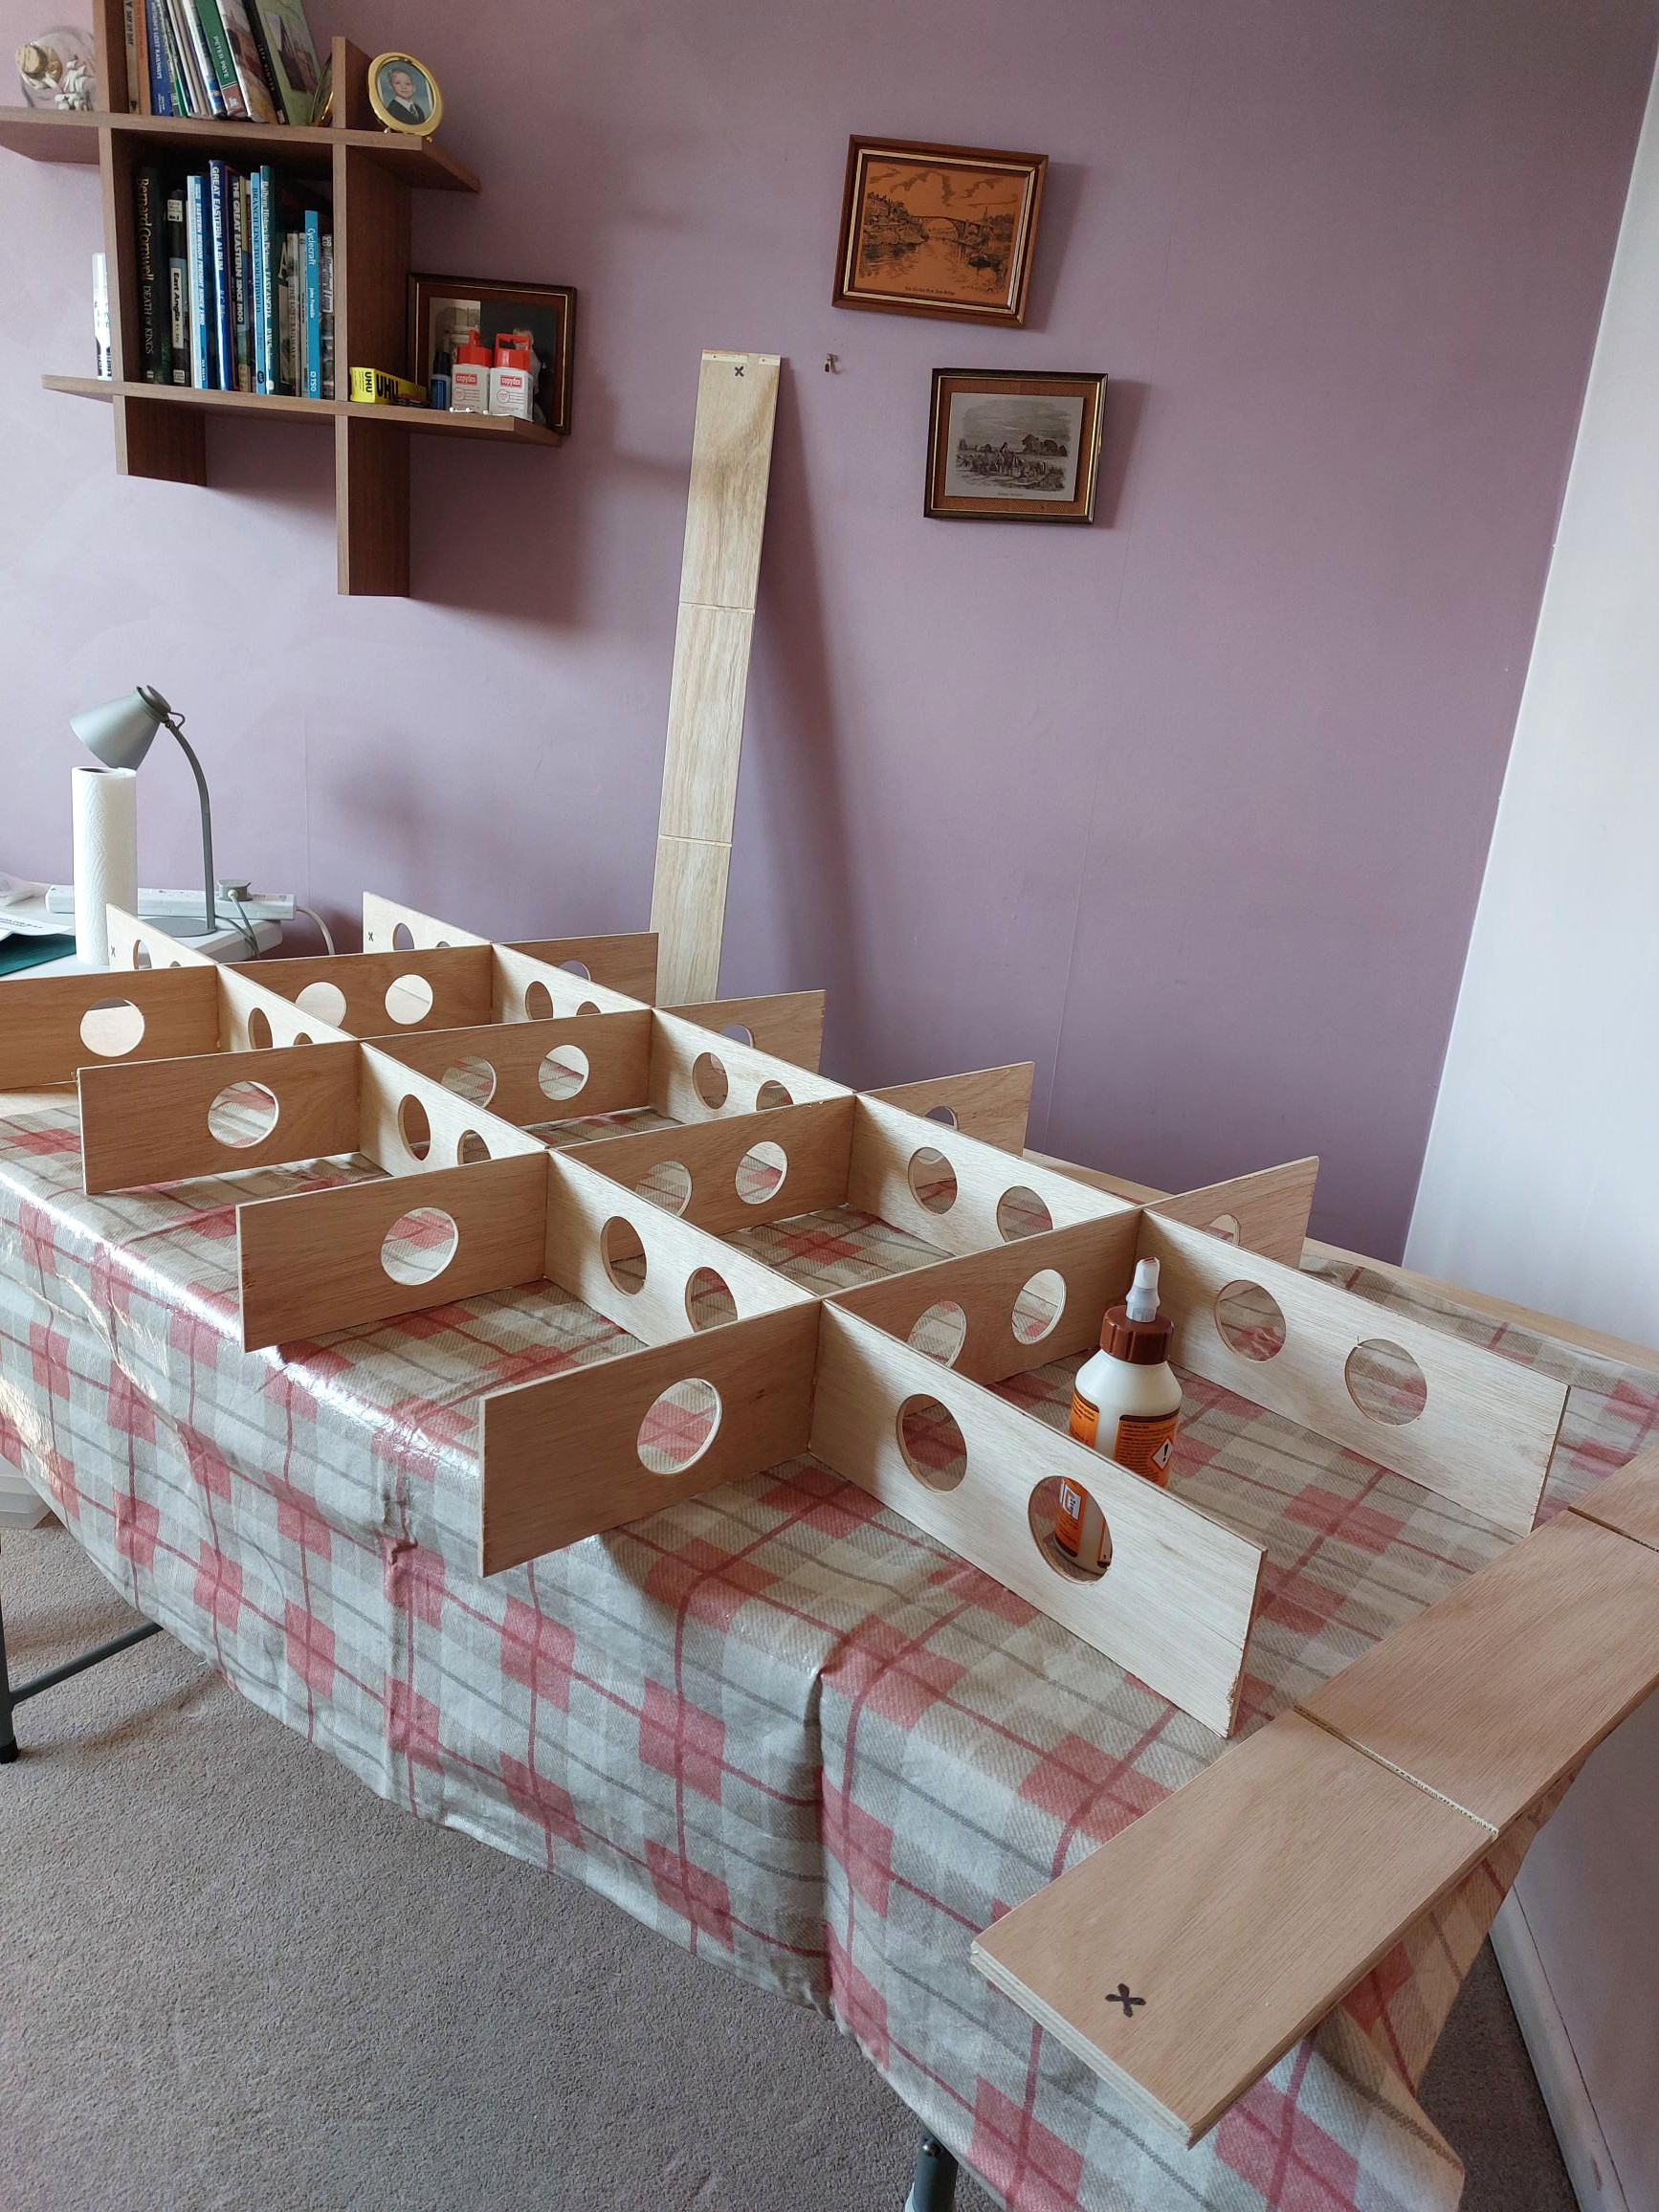
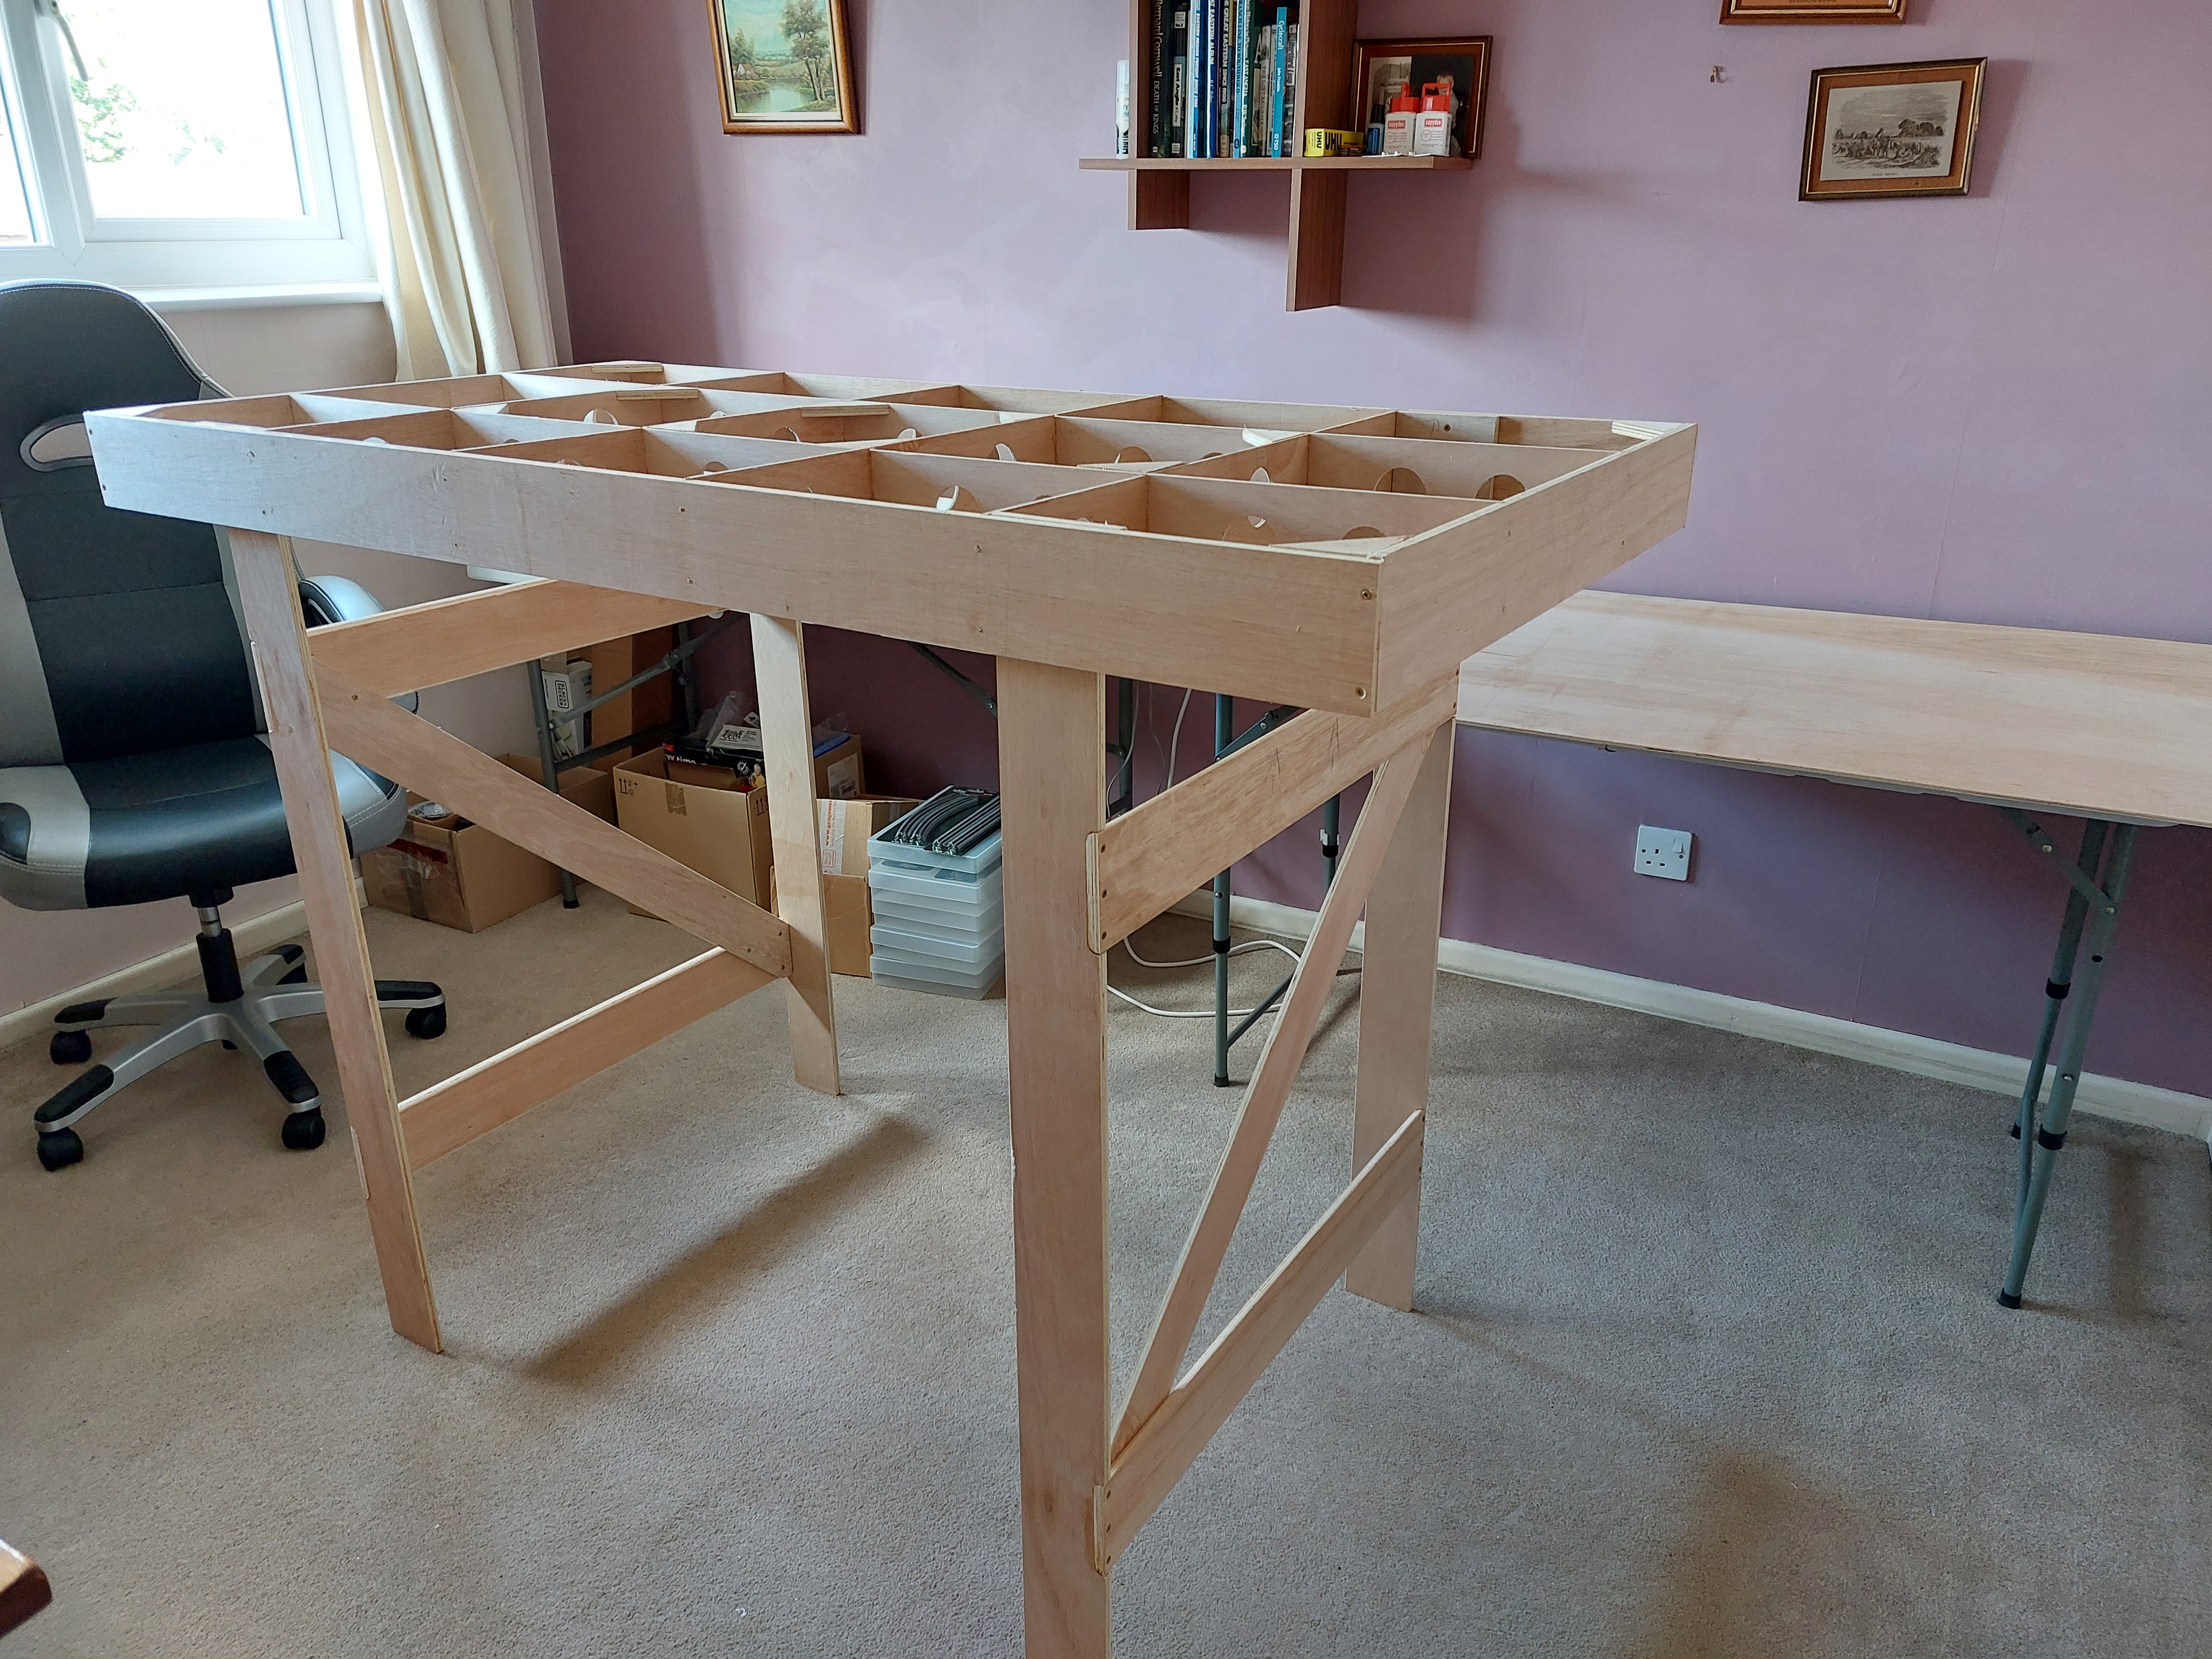
After assembling the frame, by gluing and screwing with my new Bosch IXO electric screwdriver, I realised that I had been sent only 6 small triangular fillets which are used to strengthen the corners and the middle of the framework, whereas I calculated I needed in excess of 20. A quick phone call to Model Railway Solutions and another six were posted, as I was told I didn’t actually need them for all the joints.
I'd also bought two braced leg sets so that the baseboard would eventually be free standing and not have to sit on top of a less than flat 4 foot x 2 foot plastic table. On reading the instructions I was going to have to drill some 10mm holes to attach the legs to the baseboard frame and as the only 10mm wood bit I had was rather worn another was ordered from Amazon to again arrive the following day. I also decided it would probably be easier to attach the leg sets to the frame prior to attaching the baseboard top.
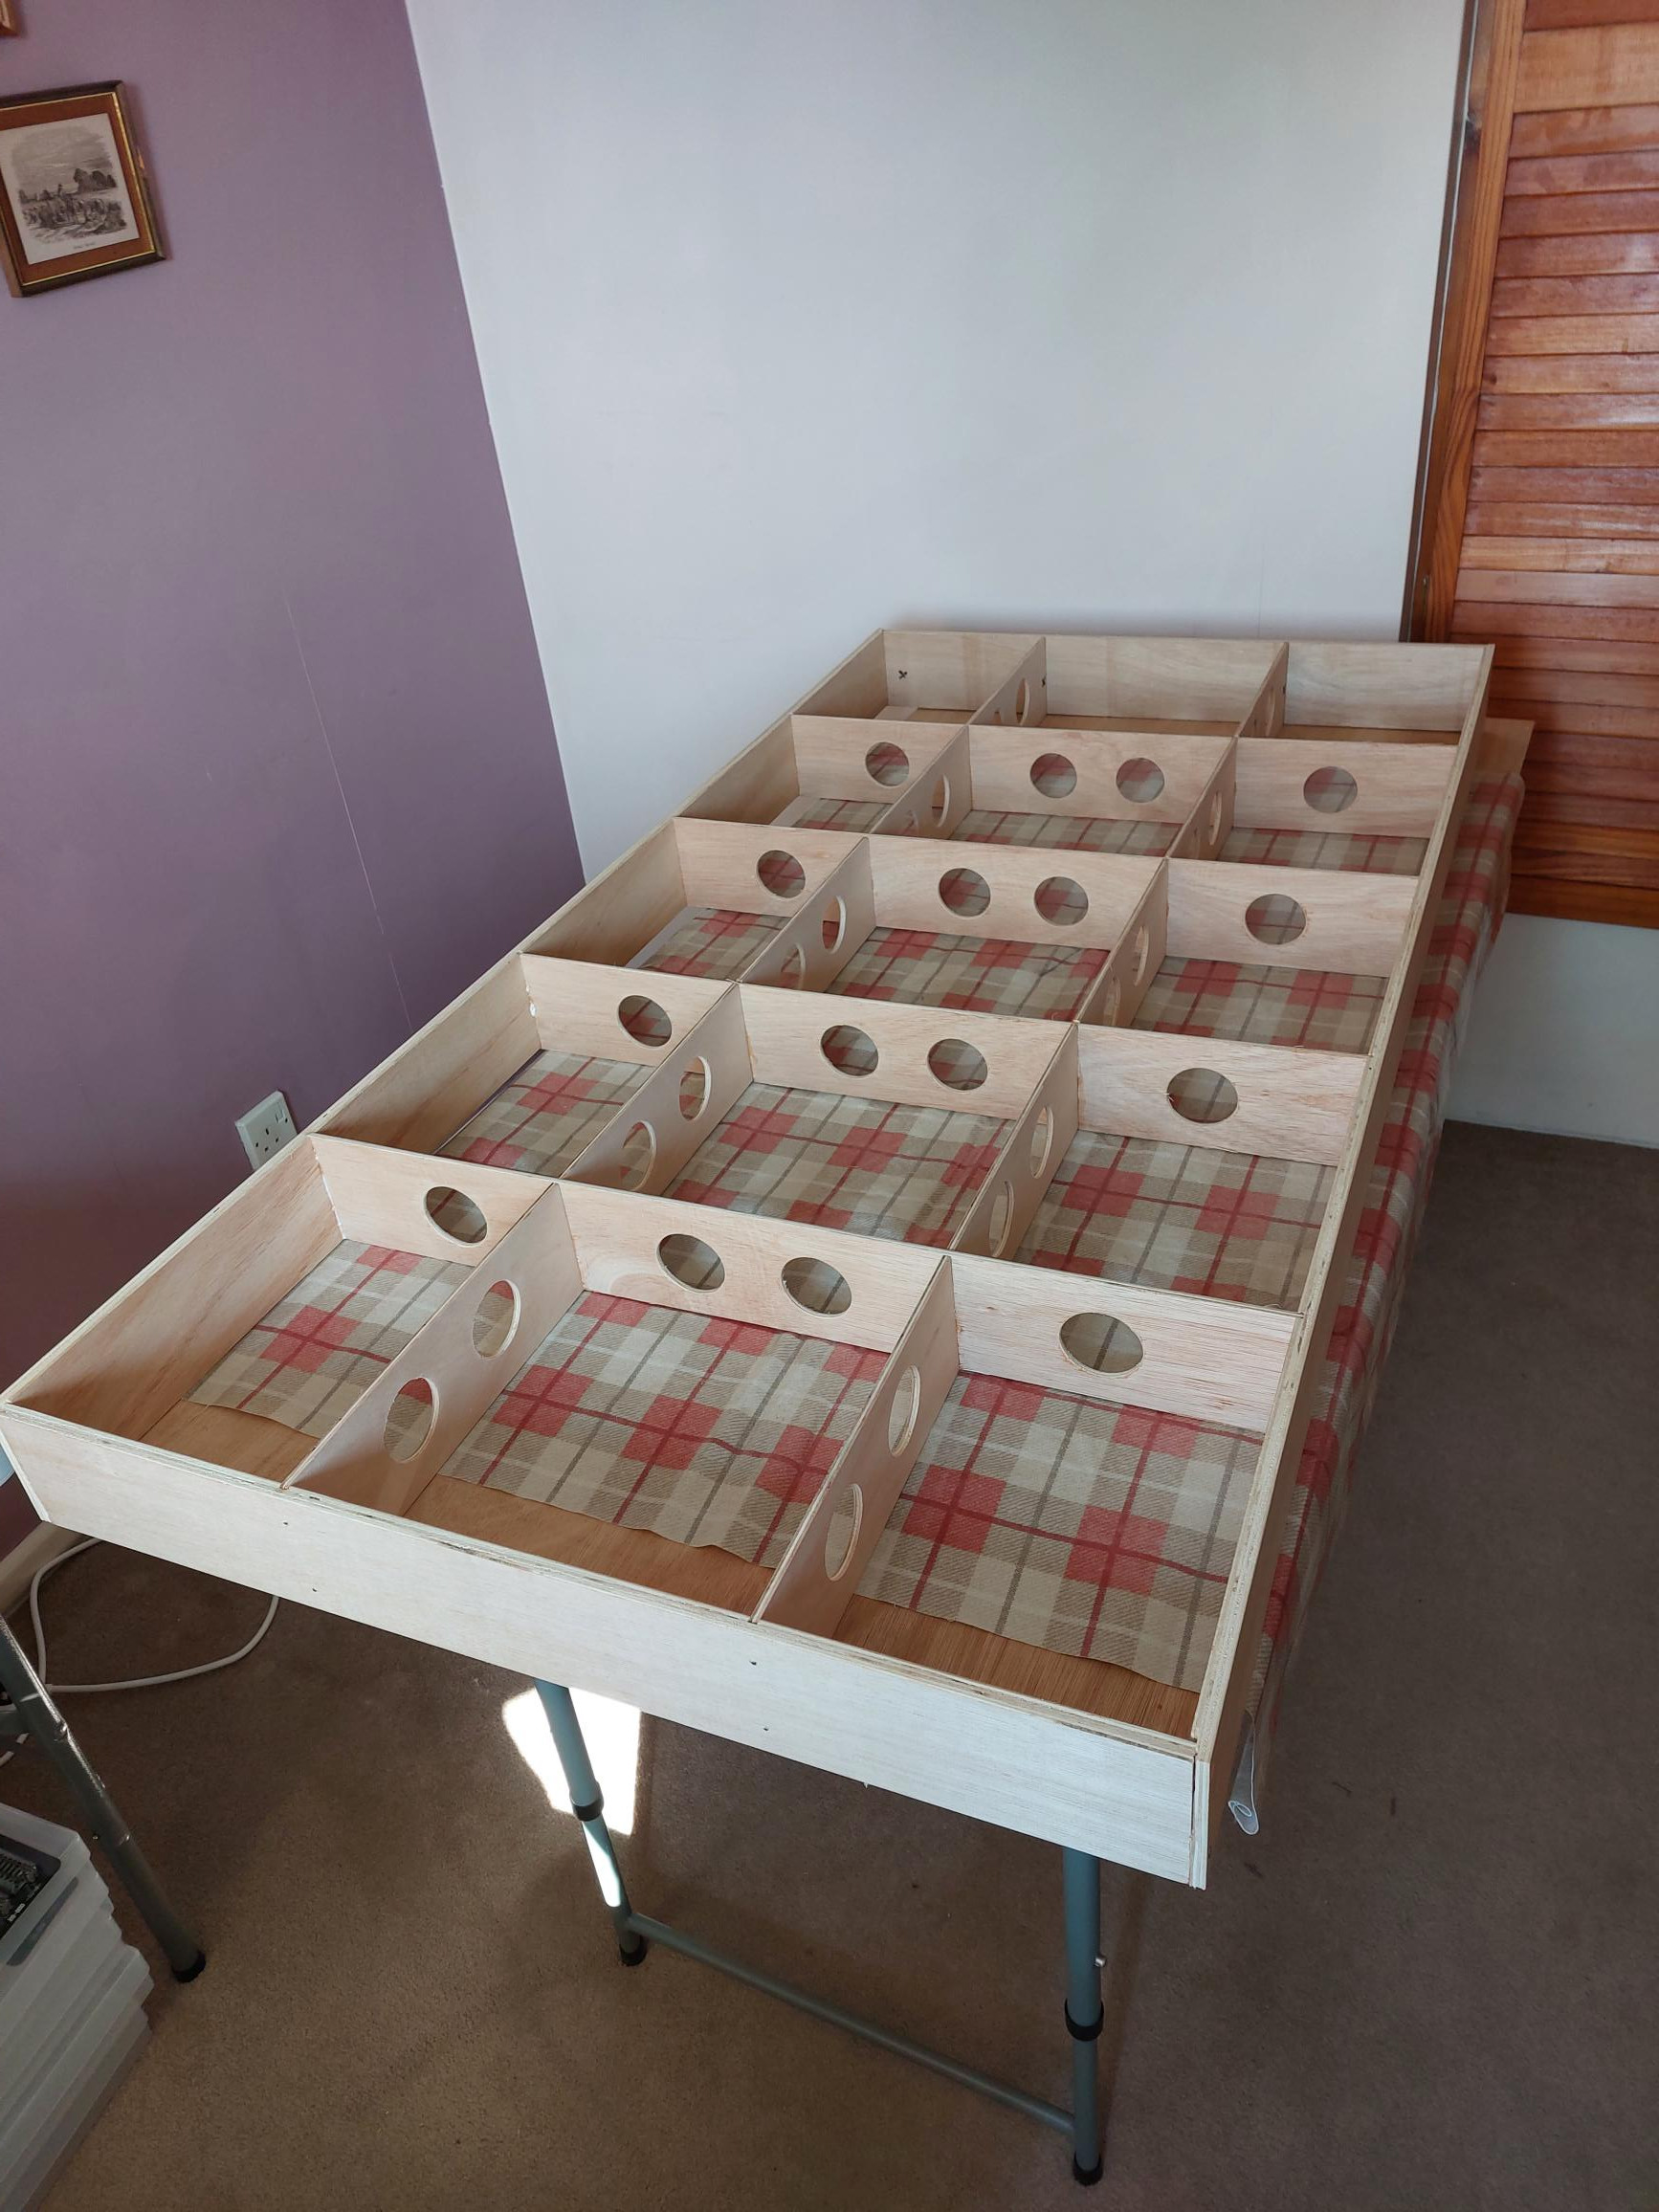
The extra wooden fillets arrived in the post after two days and were carefully glued in place a few at a time ensuring they were flush with the top of the framework where the baseboard top would be glued and screwed. As I was building this on the less than flat 4 foot x 2 foot plastic table, as my arthritis wouldn’t let me build it on the floor, I had to glue some fillets and then let the glue dry, before rotating the frame and gluing the other fillets, to ensure gravity kept them in place while the glue dried.
Over the following couple of days I then assembled the braced leg sets, again on the plastic table. No real problems, they went together reasonably well, just took a while as I had to stop every now and again when my back pain said take a rest.
The leg set slot into a cup made of an ‘L’ shaped piece of ply and part of the frame and are then bolted to the frame. There are also two braces required for each leg set, which go between the leg sets and the baseboard frame, which I hadn’t got. Another phone call to Model Railway Solutions and after a quick explanation of which bits were missing they were posted and arrived yesterday.
Also yesterday, doing a dry run I had found the baseboard was a bit high at 1130mm (44.48”), basically eye-level when sitting down.
On checking the Model Railway Solutions website, I realised I should have specified the leg size I wanted as otherwise the default was the standard height of 1100mm (43”), Ooops
So a week after I had started this job, I had to cut 4” from the top of each leg and 7” from the bottom, which was the maximum I could cut without damaging the bracing of the already assembled leg sets, with a rather blunt tenon saw and wonky eyesight, after measuring as best I could with a ruler and set square.
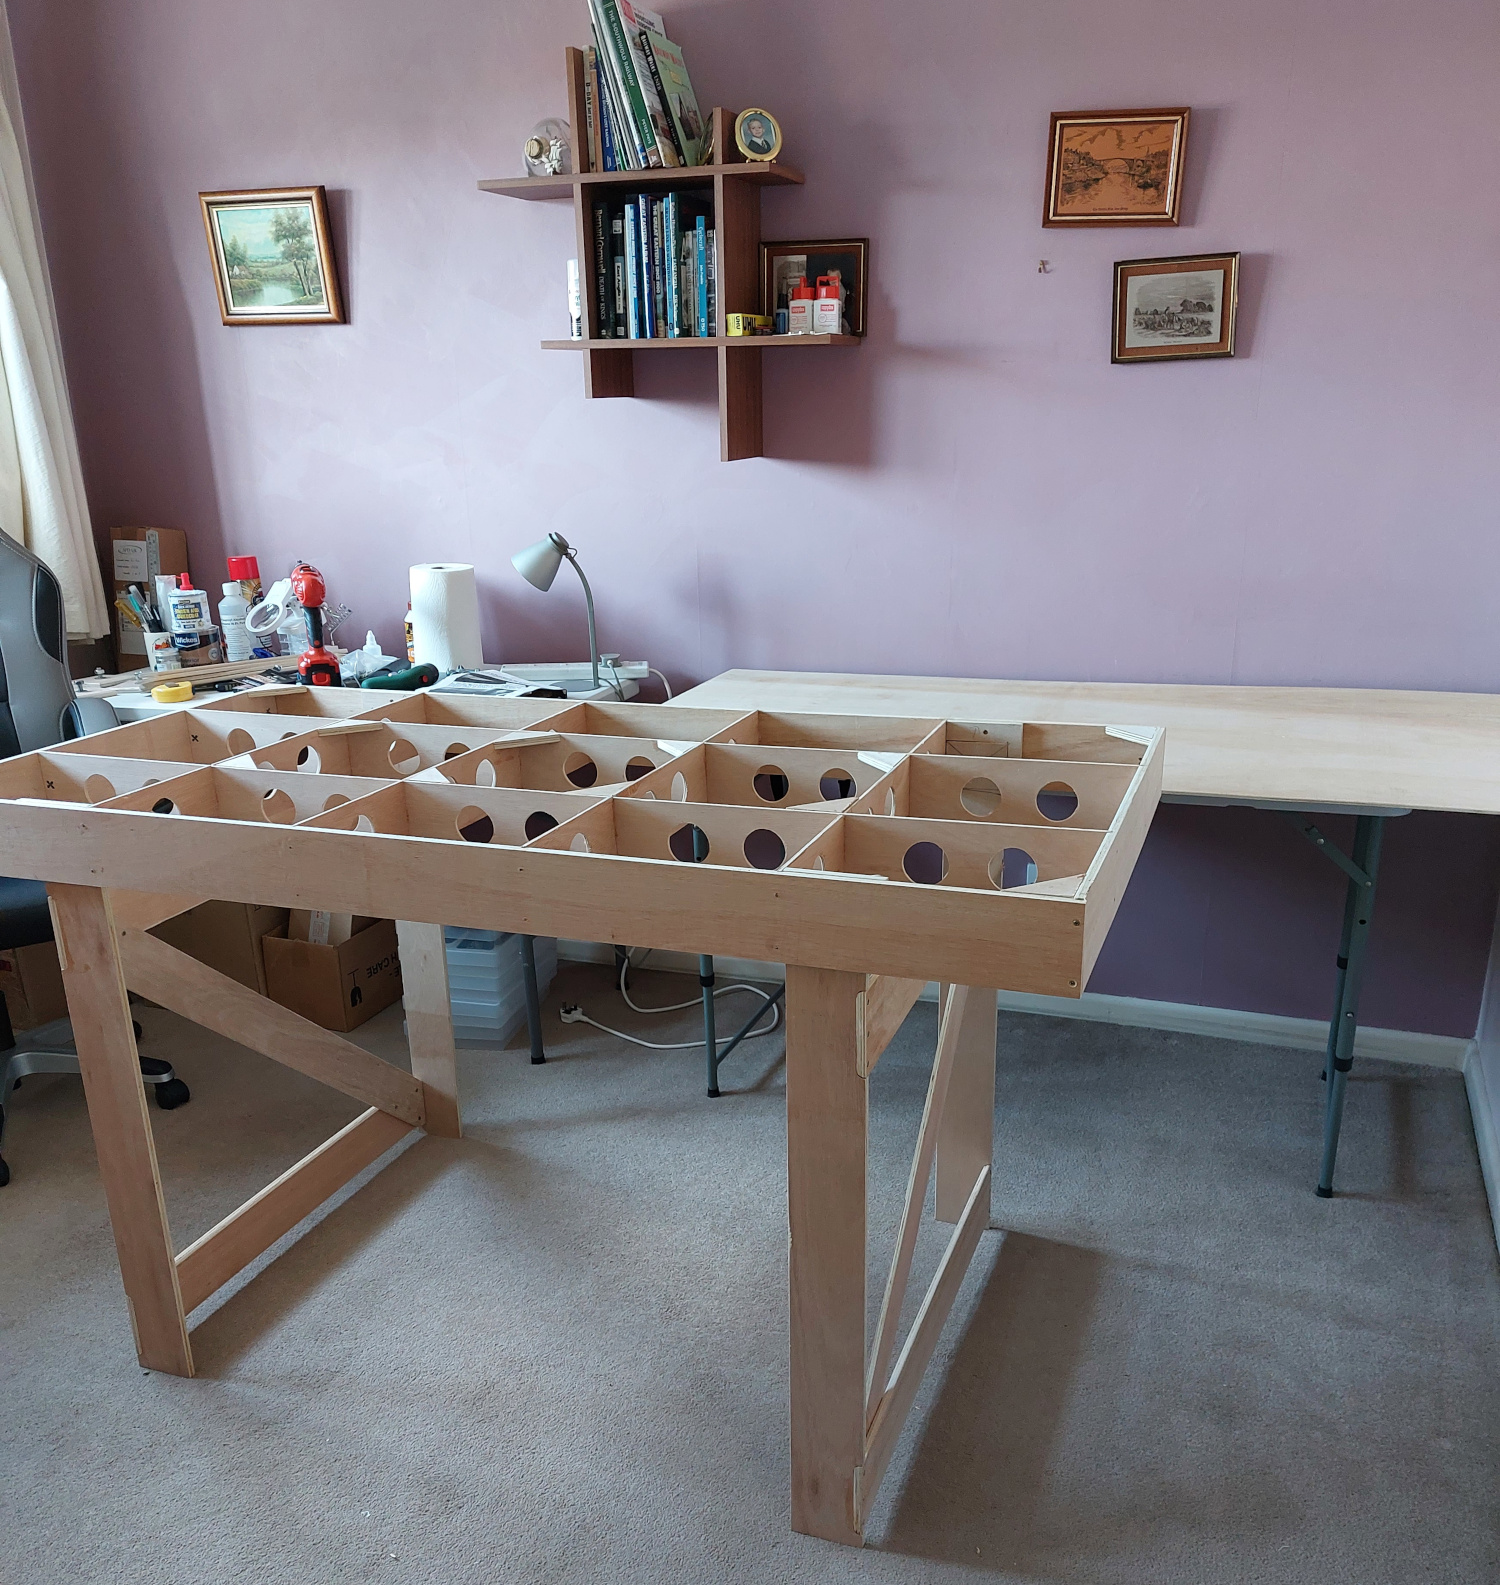
It’s now Friday and with the baseboard at a more acceptable height I looked at drilling the 10mm holes to attach the legs to the baseboard frame. However it was obvious that my large electric drill was never going to fit within the framework to allow me to drill the holes. I need something smaller that will fit within the framework just to drill a pilot hole, so that the large electric drill can drill the 10mm hole from the outside of the frame.
Annoyingly my old now broken Black and Decker electric screwdriver was able to be used as a drill as well, but my new Bosch IXO electric screwdriver doesn’t without a Bosch 1600A00B9P Home and Garden Drill Attachment. One has now been ordered from Amazon and should arrive tomorrow.
This has all taken just over a week so far and I haven’t even got any of the wood painted yet.
Ed
Posted

Full Member
John
John
Posted
Site staff
That's why the layout I had in the garage had to go, I couldn't stand up to operate it as my back got gradually more painful over the years as the arthritis got worse.
Almost everything I do now has to be done sitting down. If I go out I can't walk so it's a mobility scooter.
I've been pushing to get some steroid painkiller injections in my back for over eight months and have managed to get referred to a private hospital to hopefully get this done in the near future.
These injections may or may not work, but at certainly for now I'm a sit down modeler.
Ed
Posted
Full Member
John
John
Posted
Site staff
Well, for some reason Amazon decided to use Royal Mail to deliver my Bosch 1600A00B9P Home and Garden Drill Attachment.
I received an email from Royal Mail at 9:04am to say my Amazon parcel would be delivered today between 9:28 and 1:28pm, which was fine as I could then drill the holes for the baseboard legs.
At 10:54am I got another email from Royal Mail stating:
"Sorry, we were unable to deliver your parcel from Amazon today, Saturday, 16 September 2023.
We’ll attempt to deliver it the next working day."
So I won't be drilling any holes until Monday 😠
At this rate this is going to be the longest small baseboard assembly in model railway history.
So I've started painting it instead.
Ed
Posted
Full Member
Cheers Pete.
Posted
Full Member
Following along. All the best.
Posted
Site staff
Posted
Site staff
My Bosch 1600A00B9P Home Drill Attachment did finally arrive Monday lunchtime, but I've been painting all the bare wood so I haven't tried it out yet.
Looks like most of the painting will be done by today, so I may be drilling holes tomorrow, two weeks after I started all this.
I do hope track laying goes more smoothly :)
Ed
Posted
Site staff
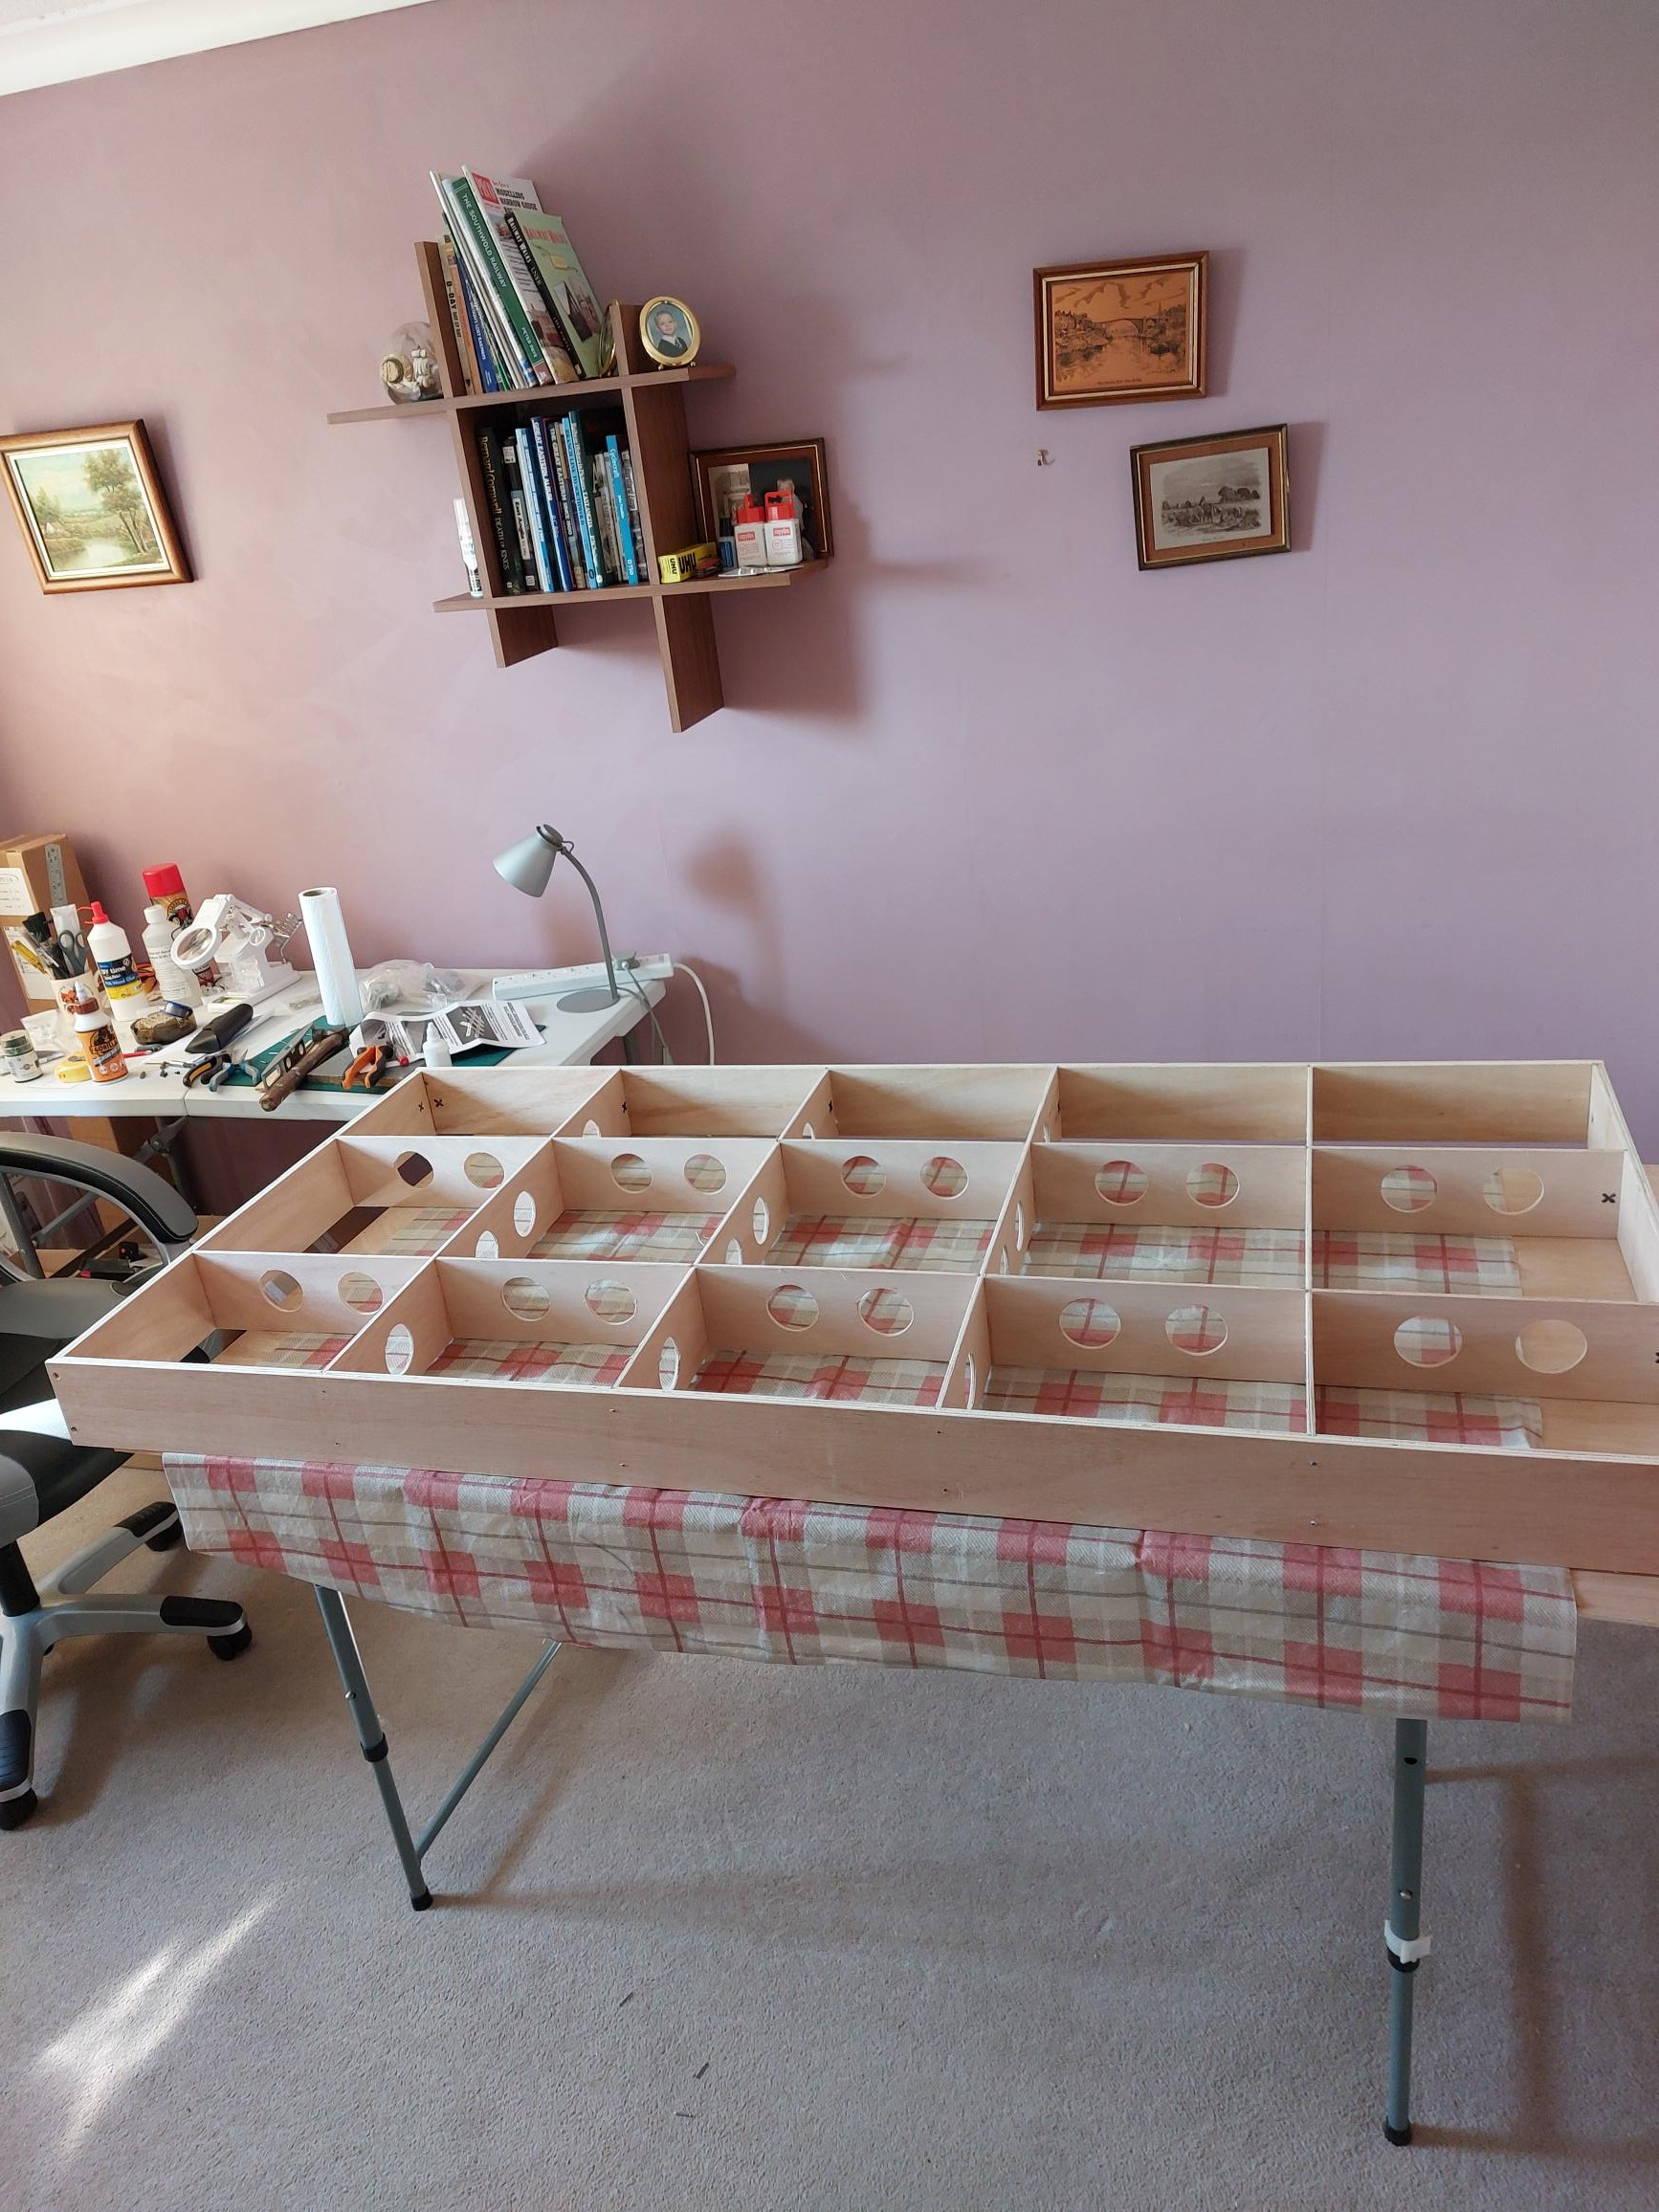
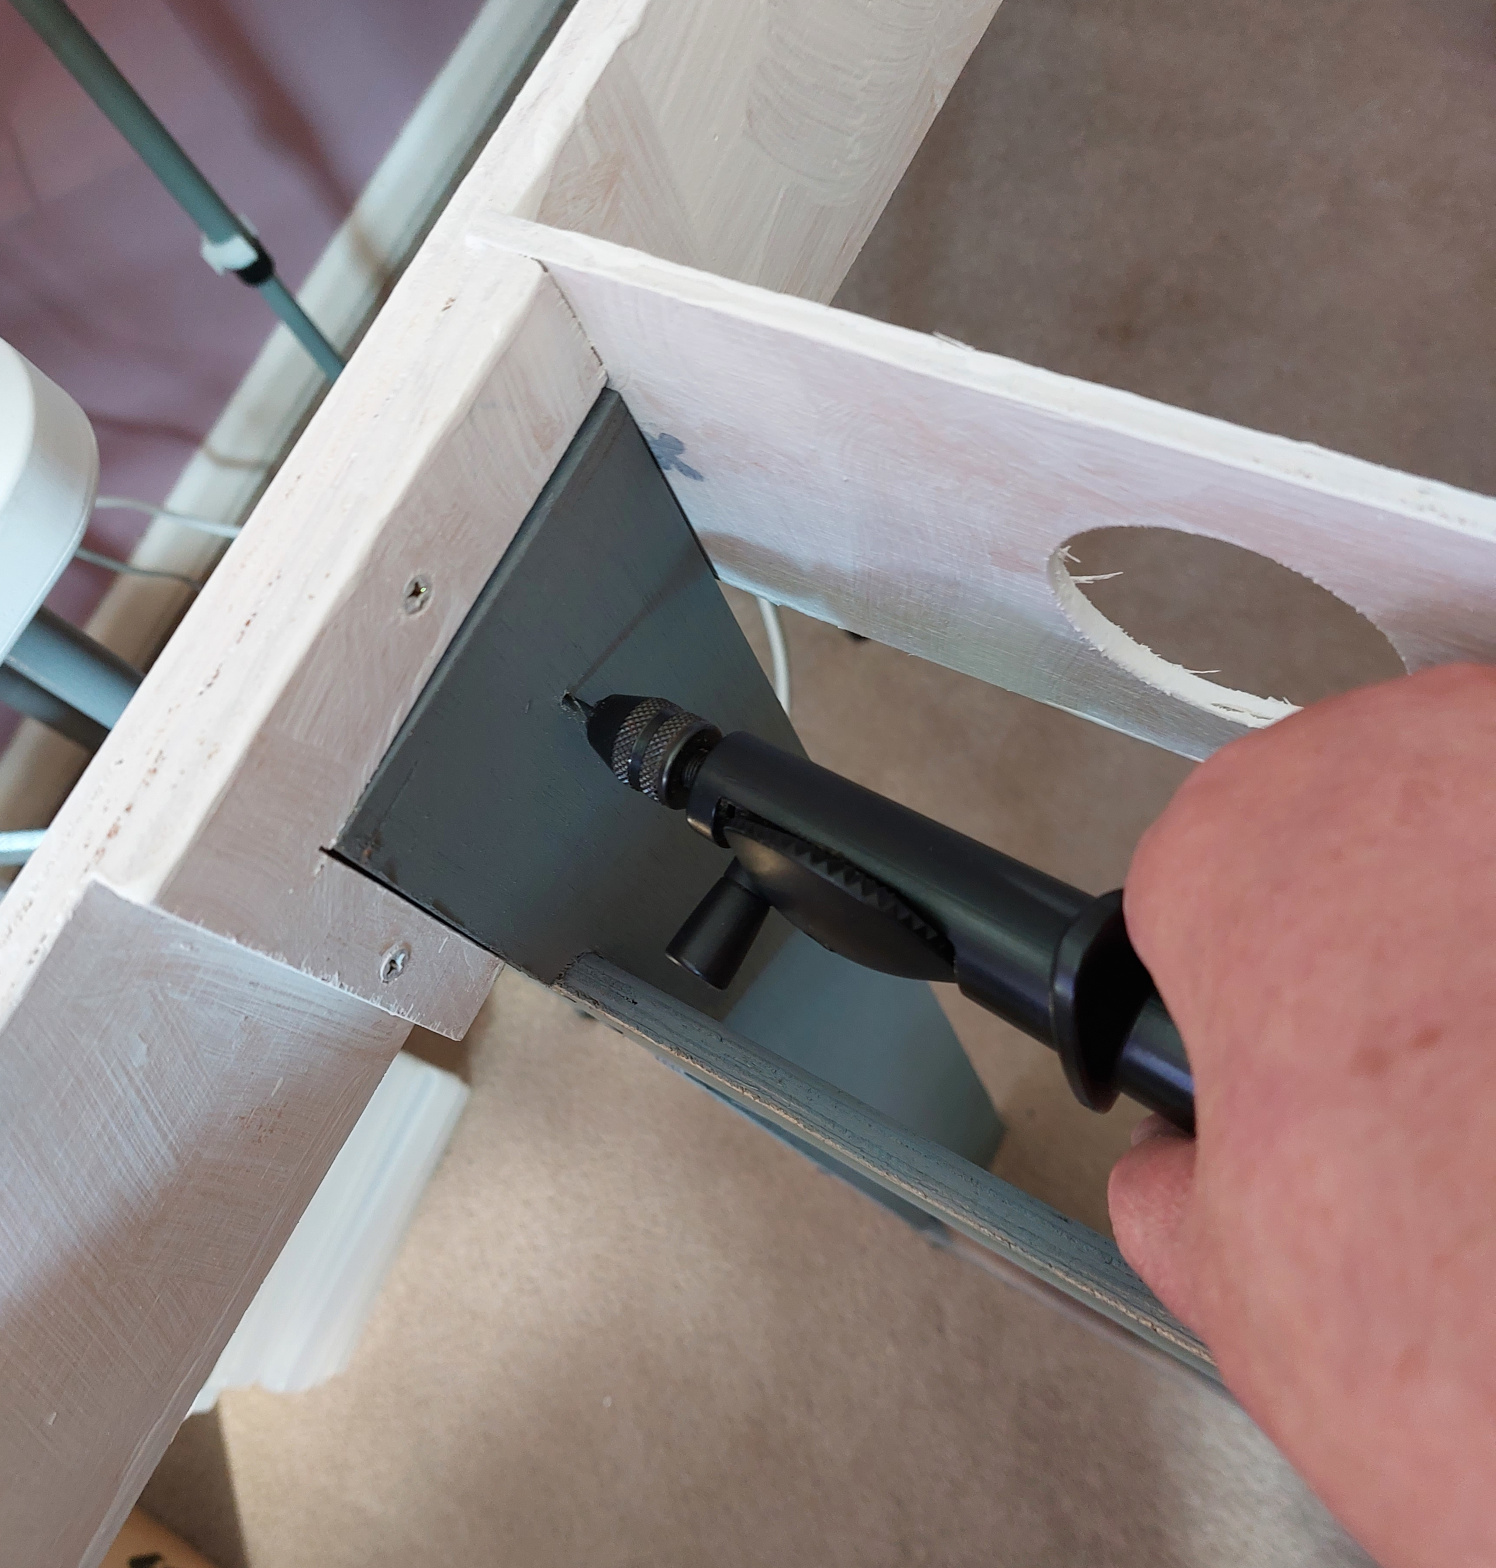
Finally got all the bare wood roughly covered with a bit of paint, just to protect the wood a bit.
Used some aerosol paint on the legs which is why they’re grey and all the rest is white.
Actually ran out of the grey paint on Wednesday, but fortunately had some more on order which arrived the next day.
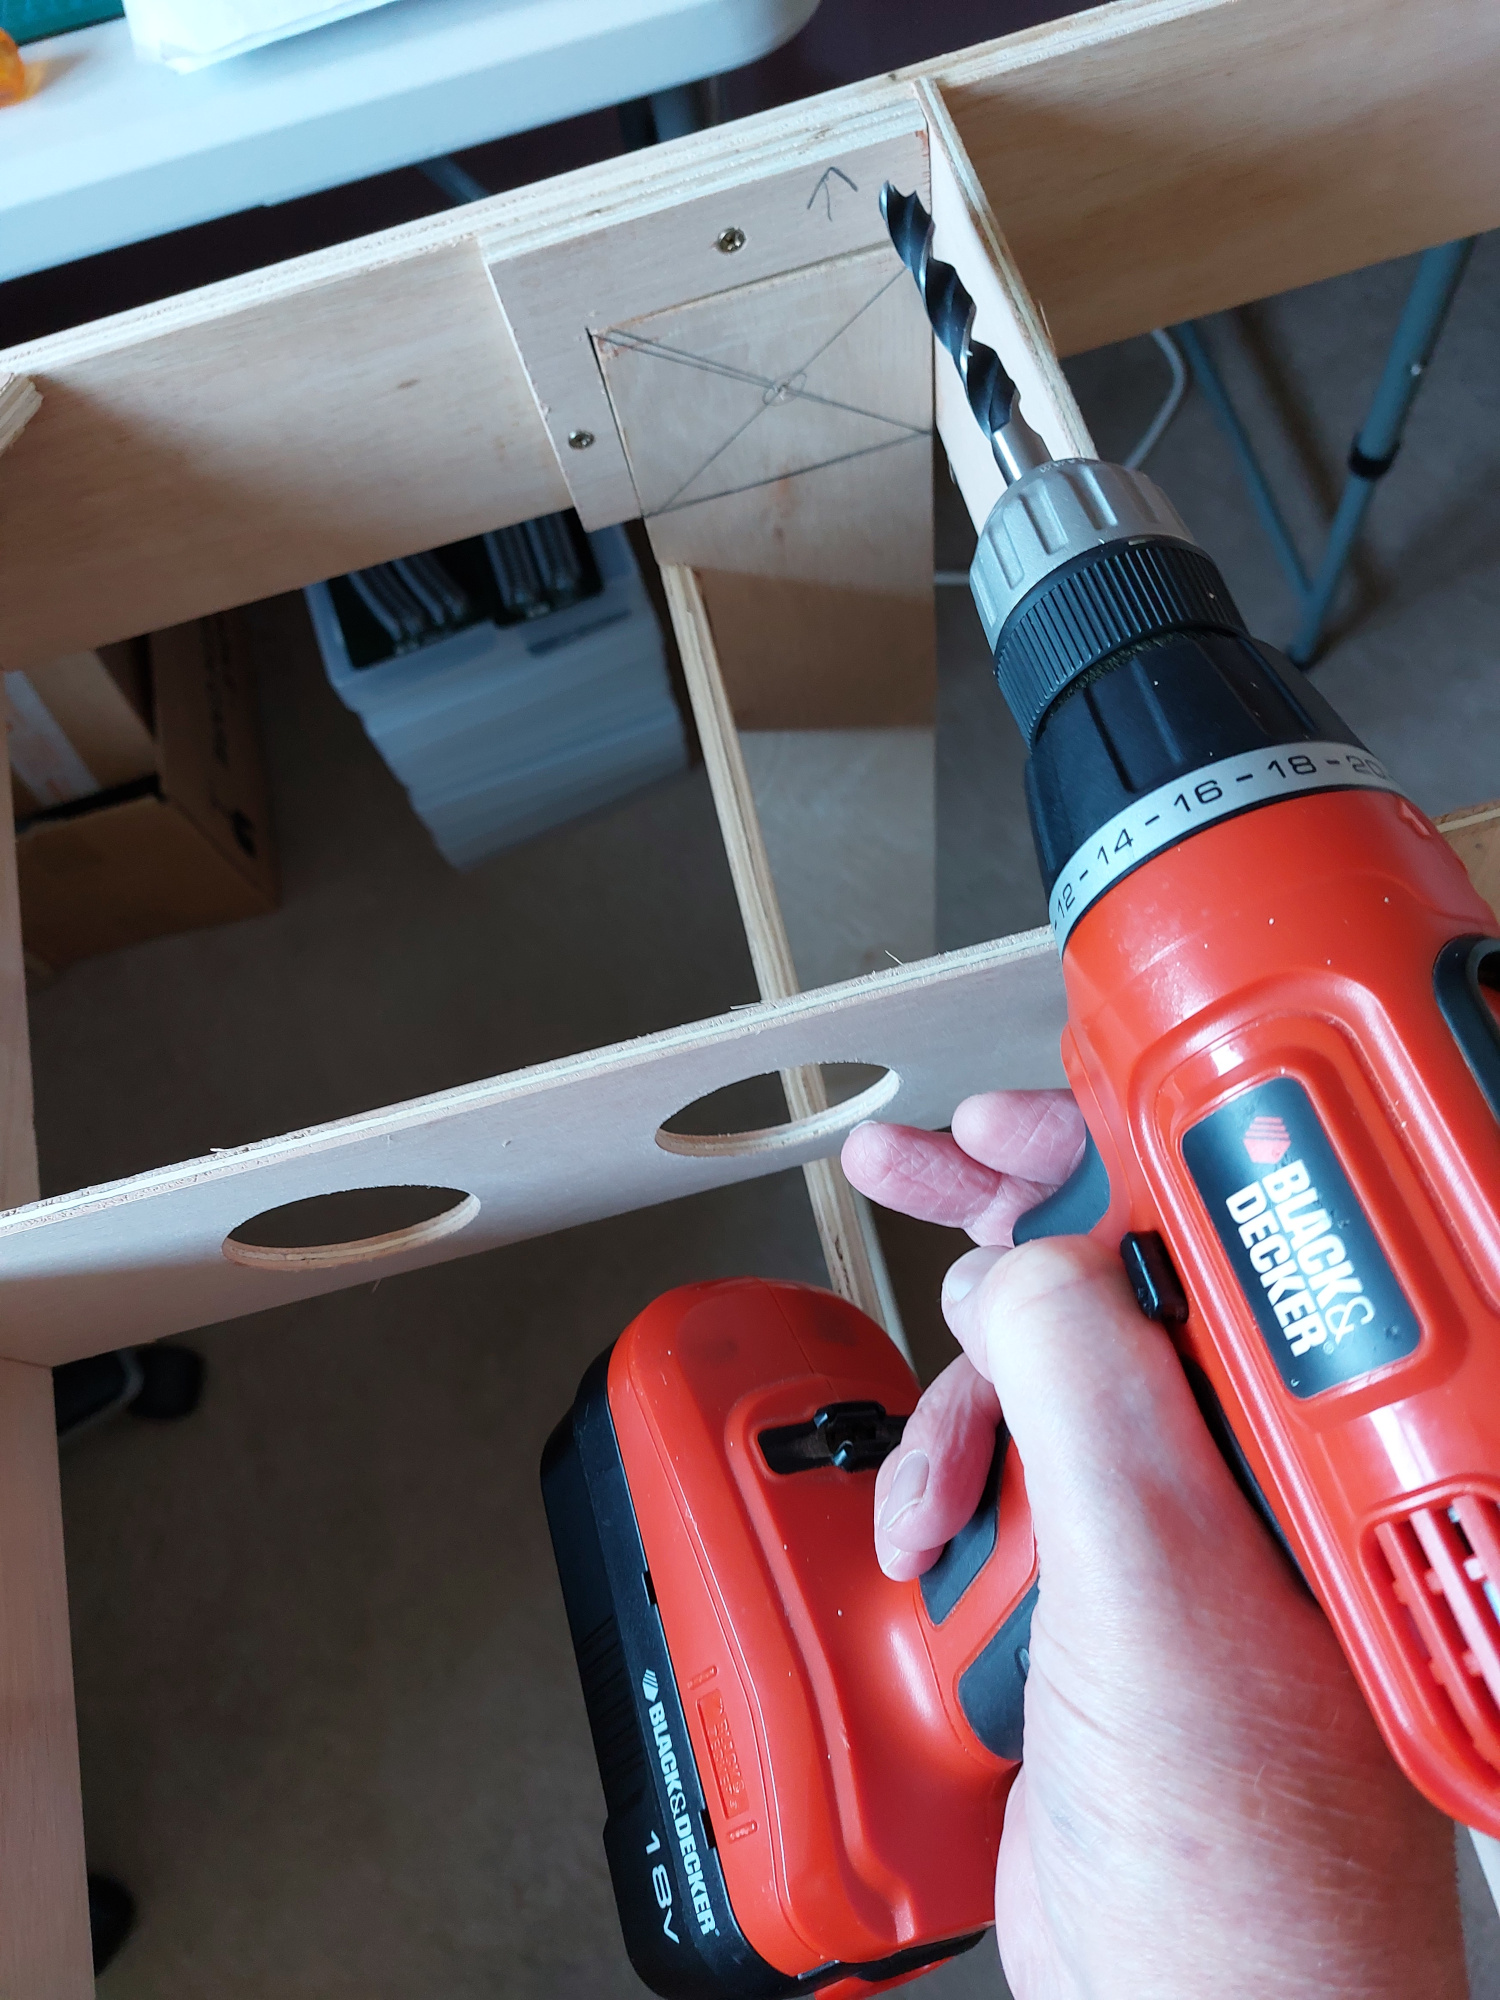
Got it all loosely assembled and ready to drill the holes yesterday (Friday) and found that my new Bosch IXO electric screwdriver with drill attachment, was still too big to fit within the framework to drill the holes.
After a quick Victor Meldrew impersonation (I do not believe it), I resorted to a very small hand drill to drill a pilot hole from within the frame, so that I could then drill the 10mm hole required from the outside of the frame.
Just as I finished drilling the last hole the 10mm drill bit fell out of my cordless Black and Decker drill and I found the chuck has now broken. Can’t move the jaws very easily and I was getting a grinding noise as they do move. Another Victor Meldrew moment!
The bolt were loosely fitted, but Model Railway Solutions had supplied hexagonal nuts rather than wing nuts as per the instructions.
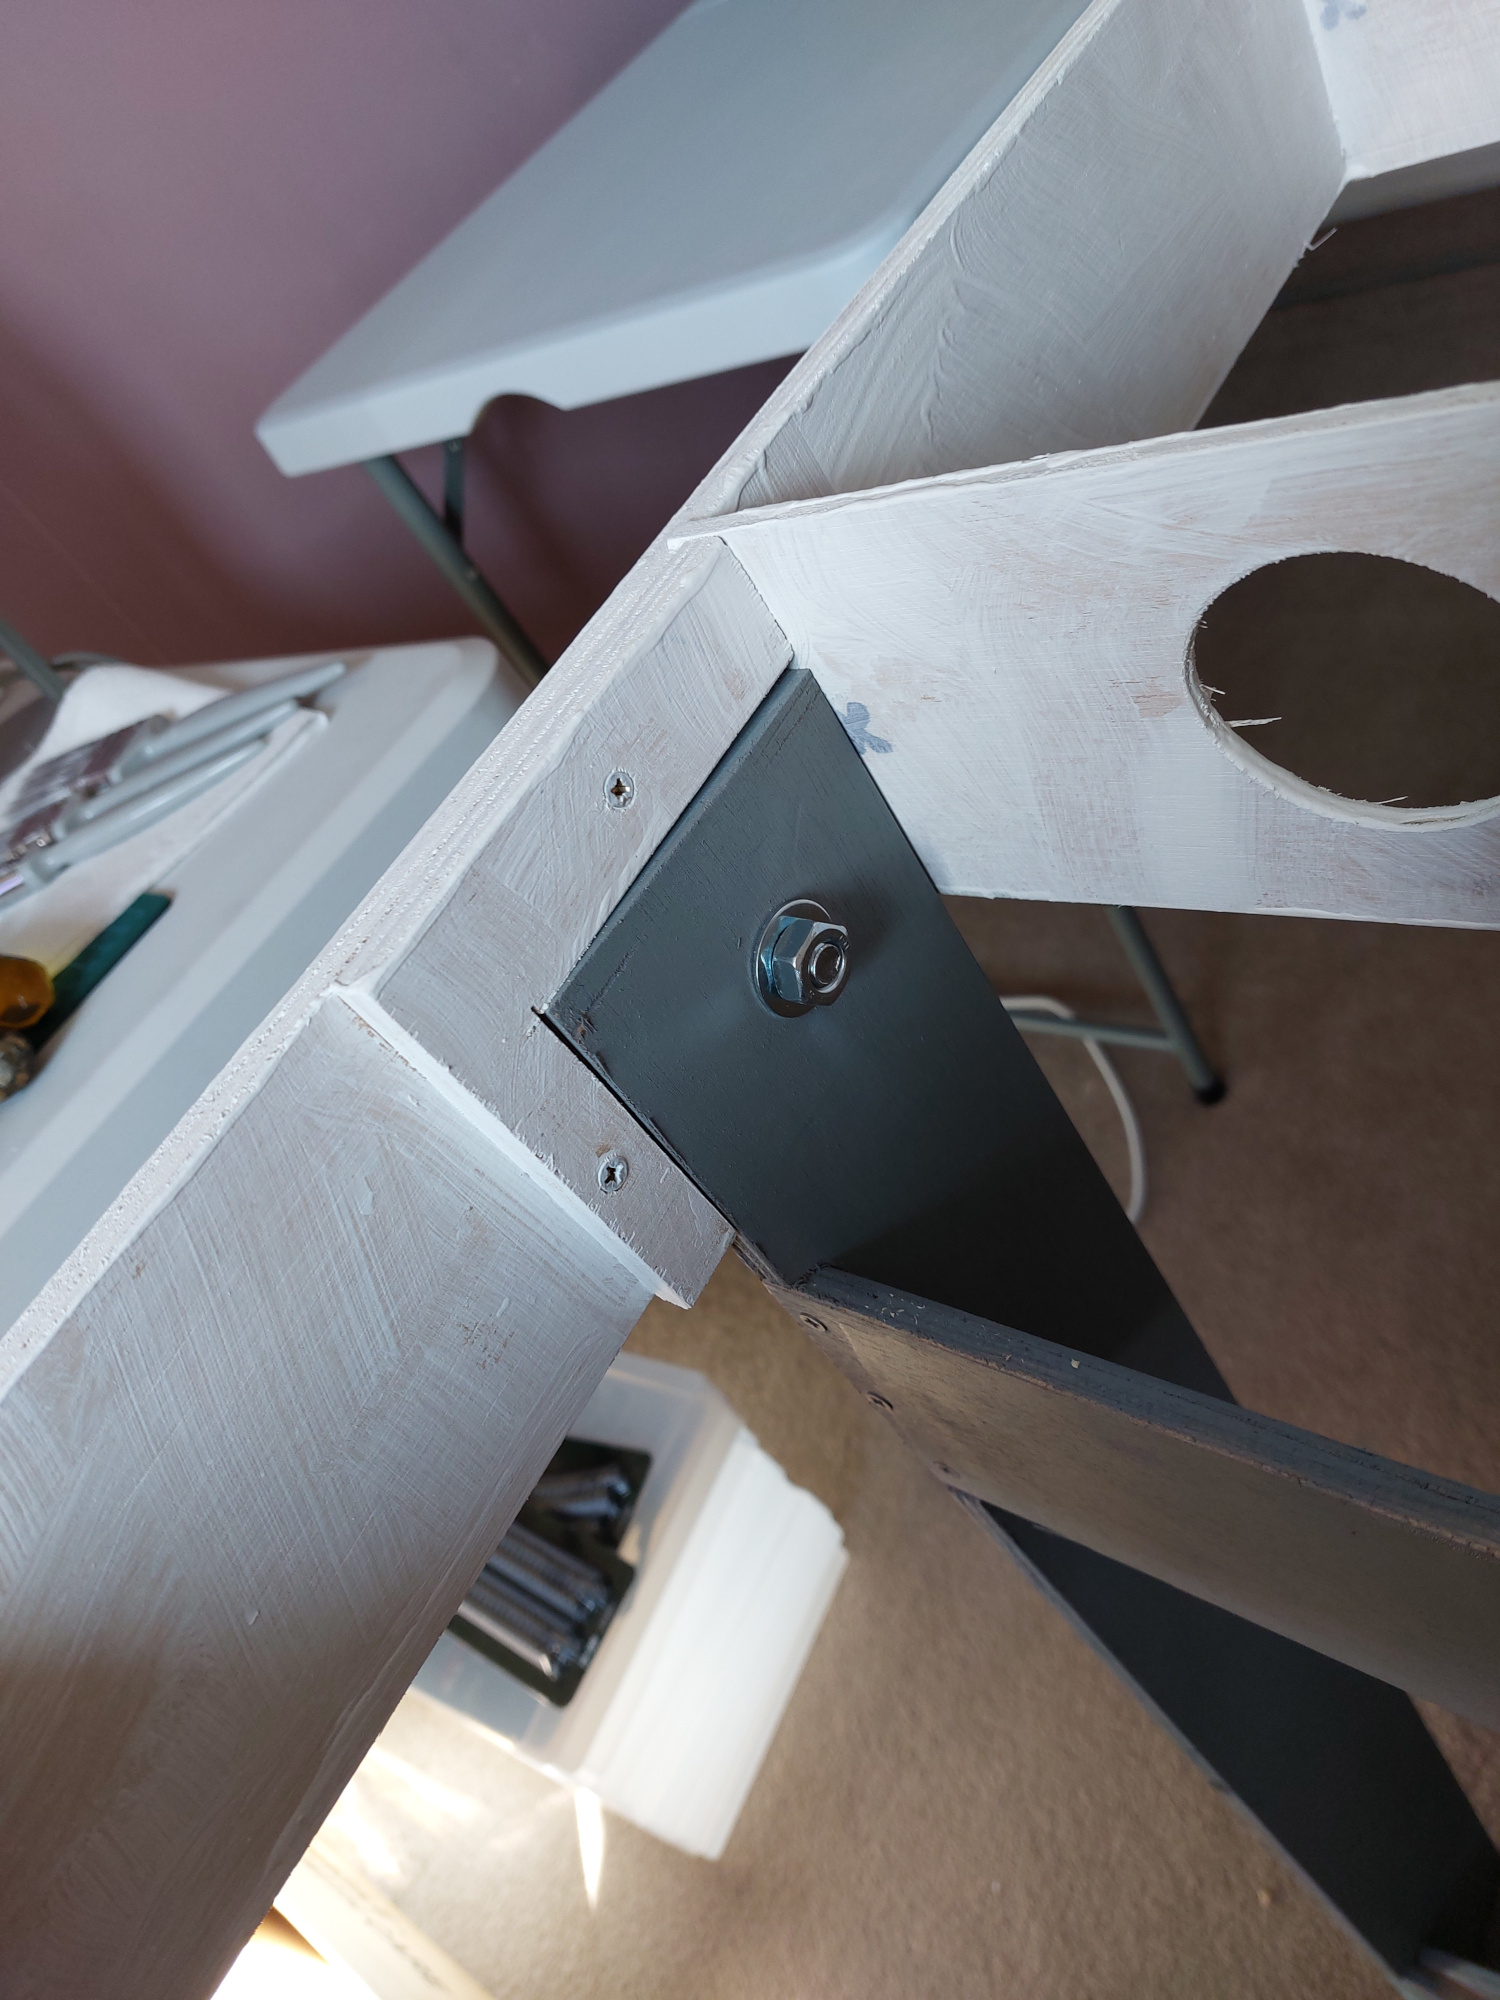
They also supply bolts with a square shank just under the head, which gets pulled into the wood as nut is tightened.
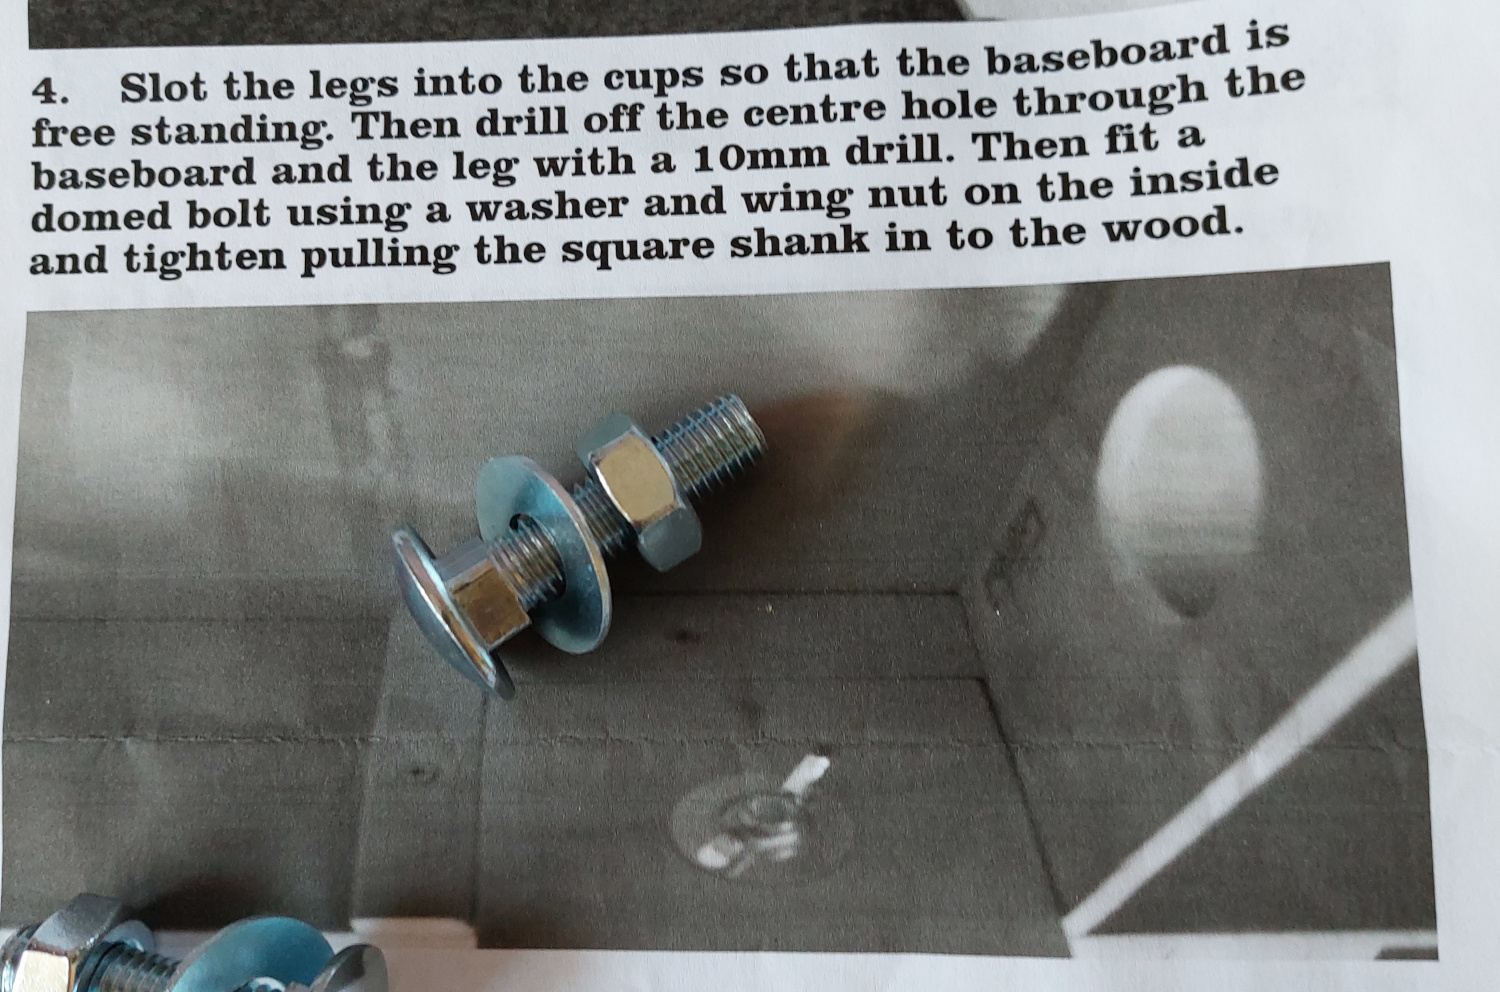
I’ve bought some 10mm bolts, wing nuts and spring washers to replace these, as I don’t like the idea of pulling the shank into the wood if the legs are to be removable.
I haven’t fitted the top yet, as it’s been easier to drill the holes and fit the bolts without the top on.
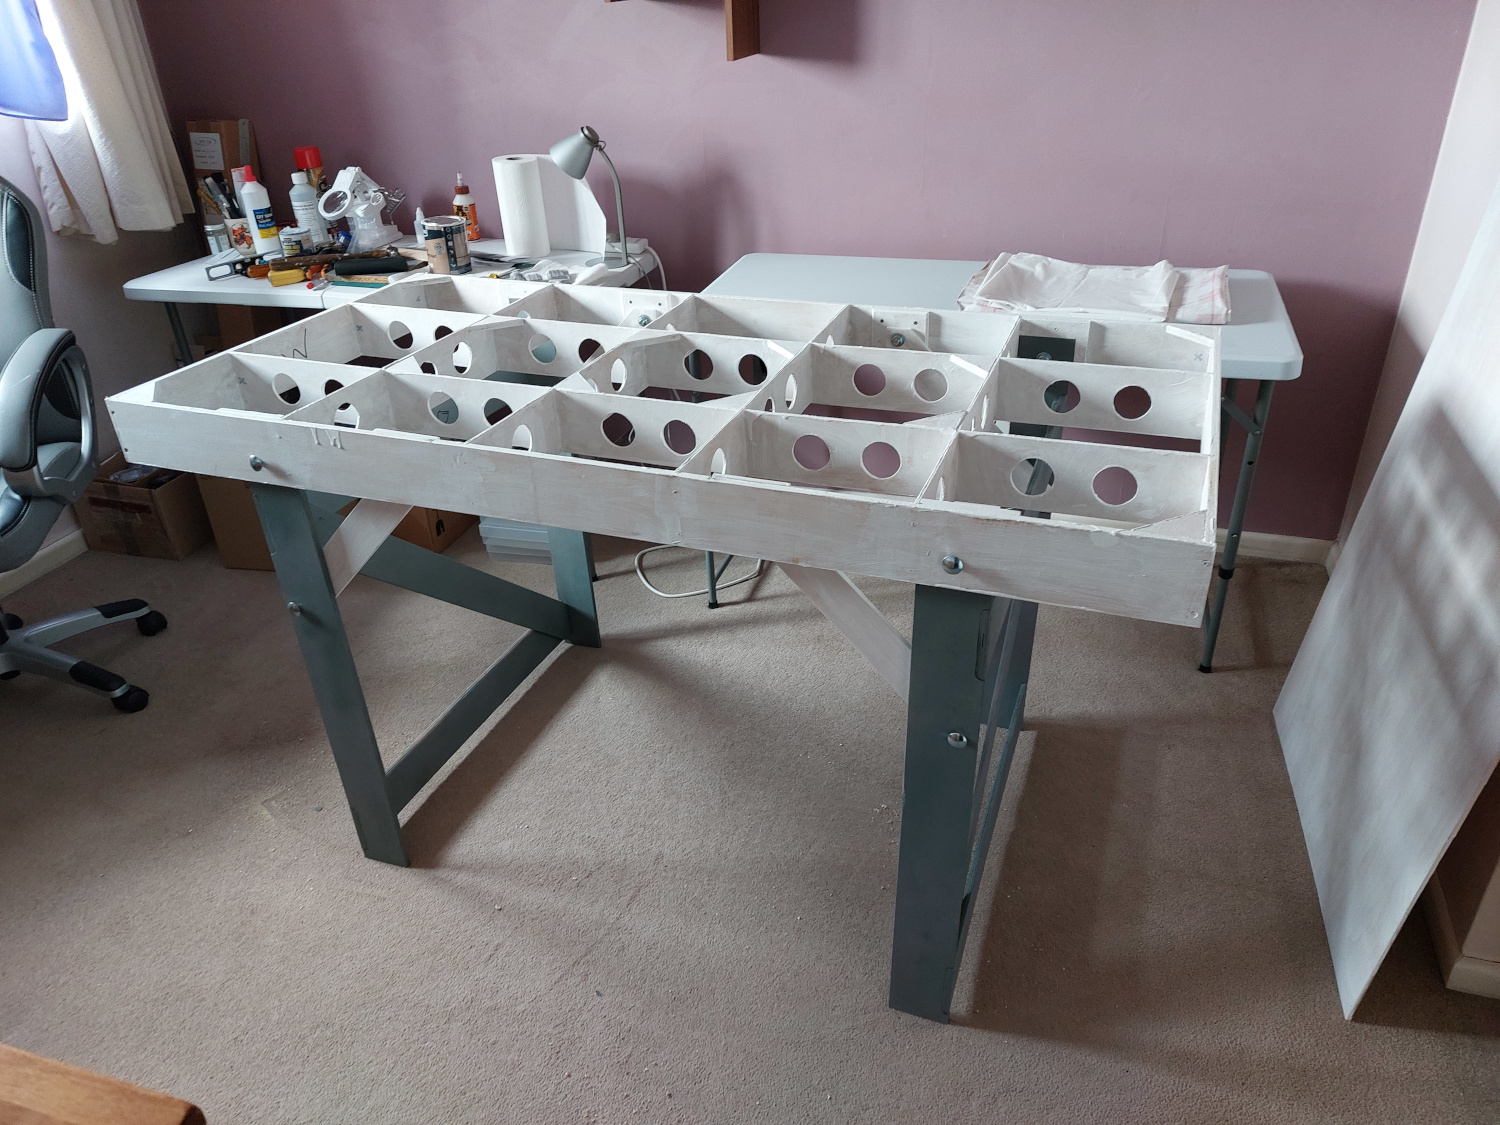
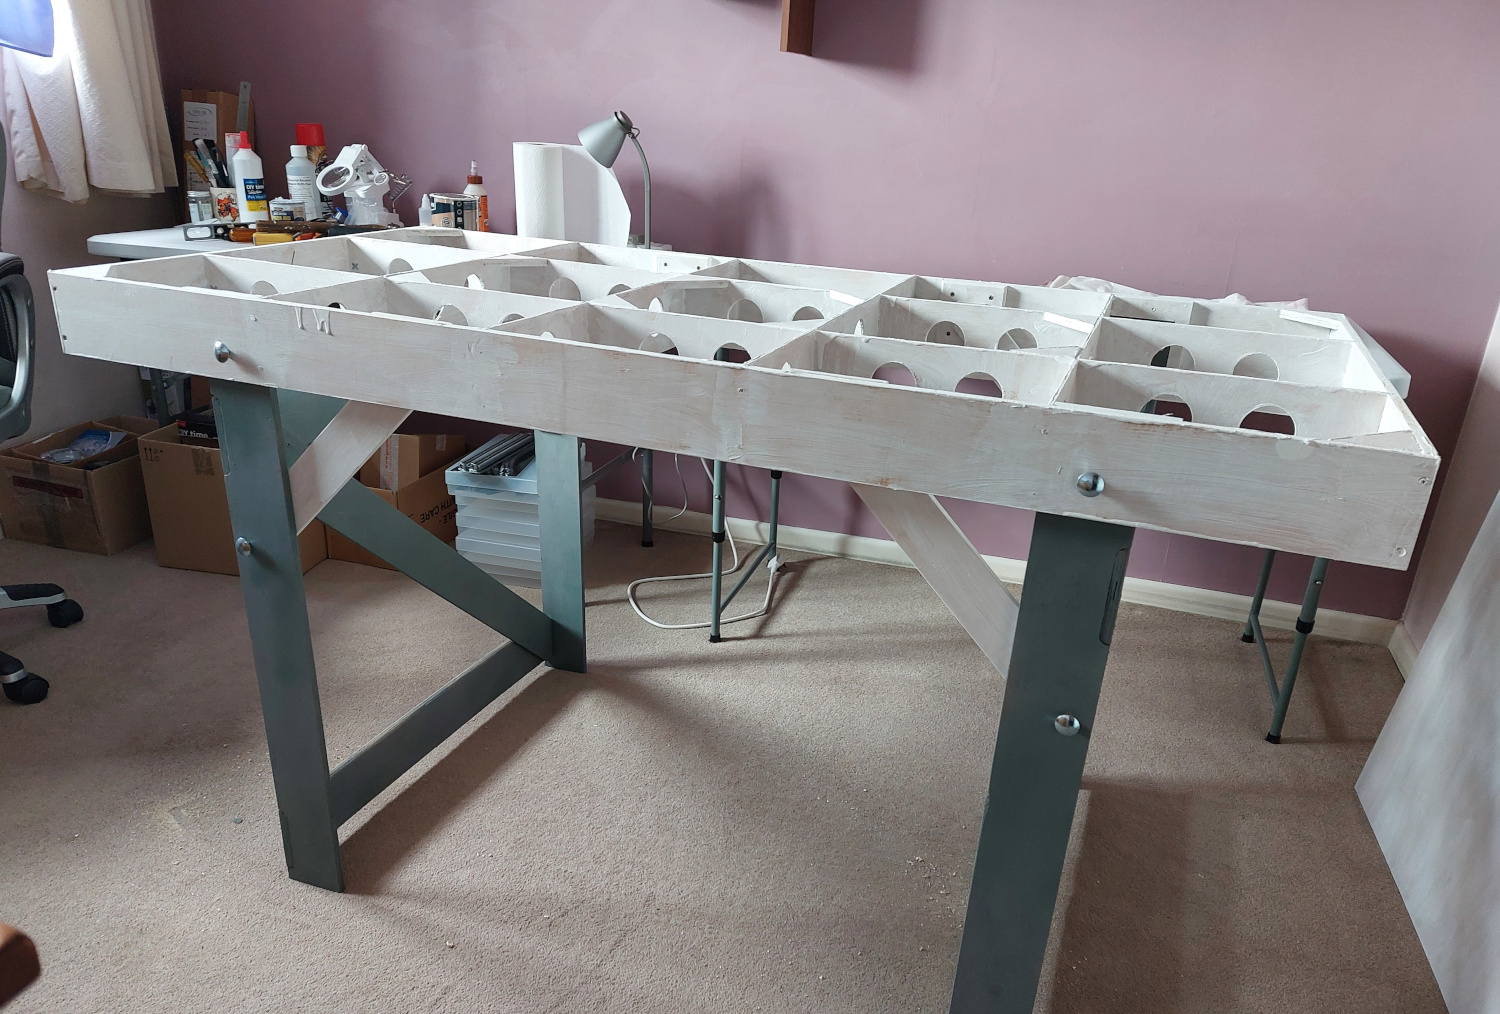
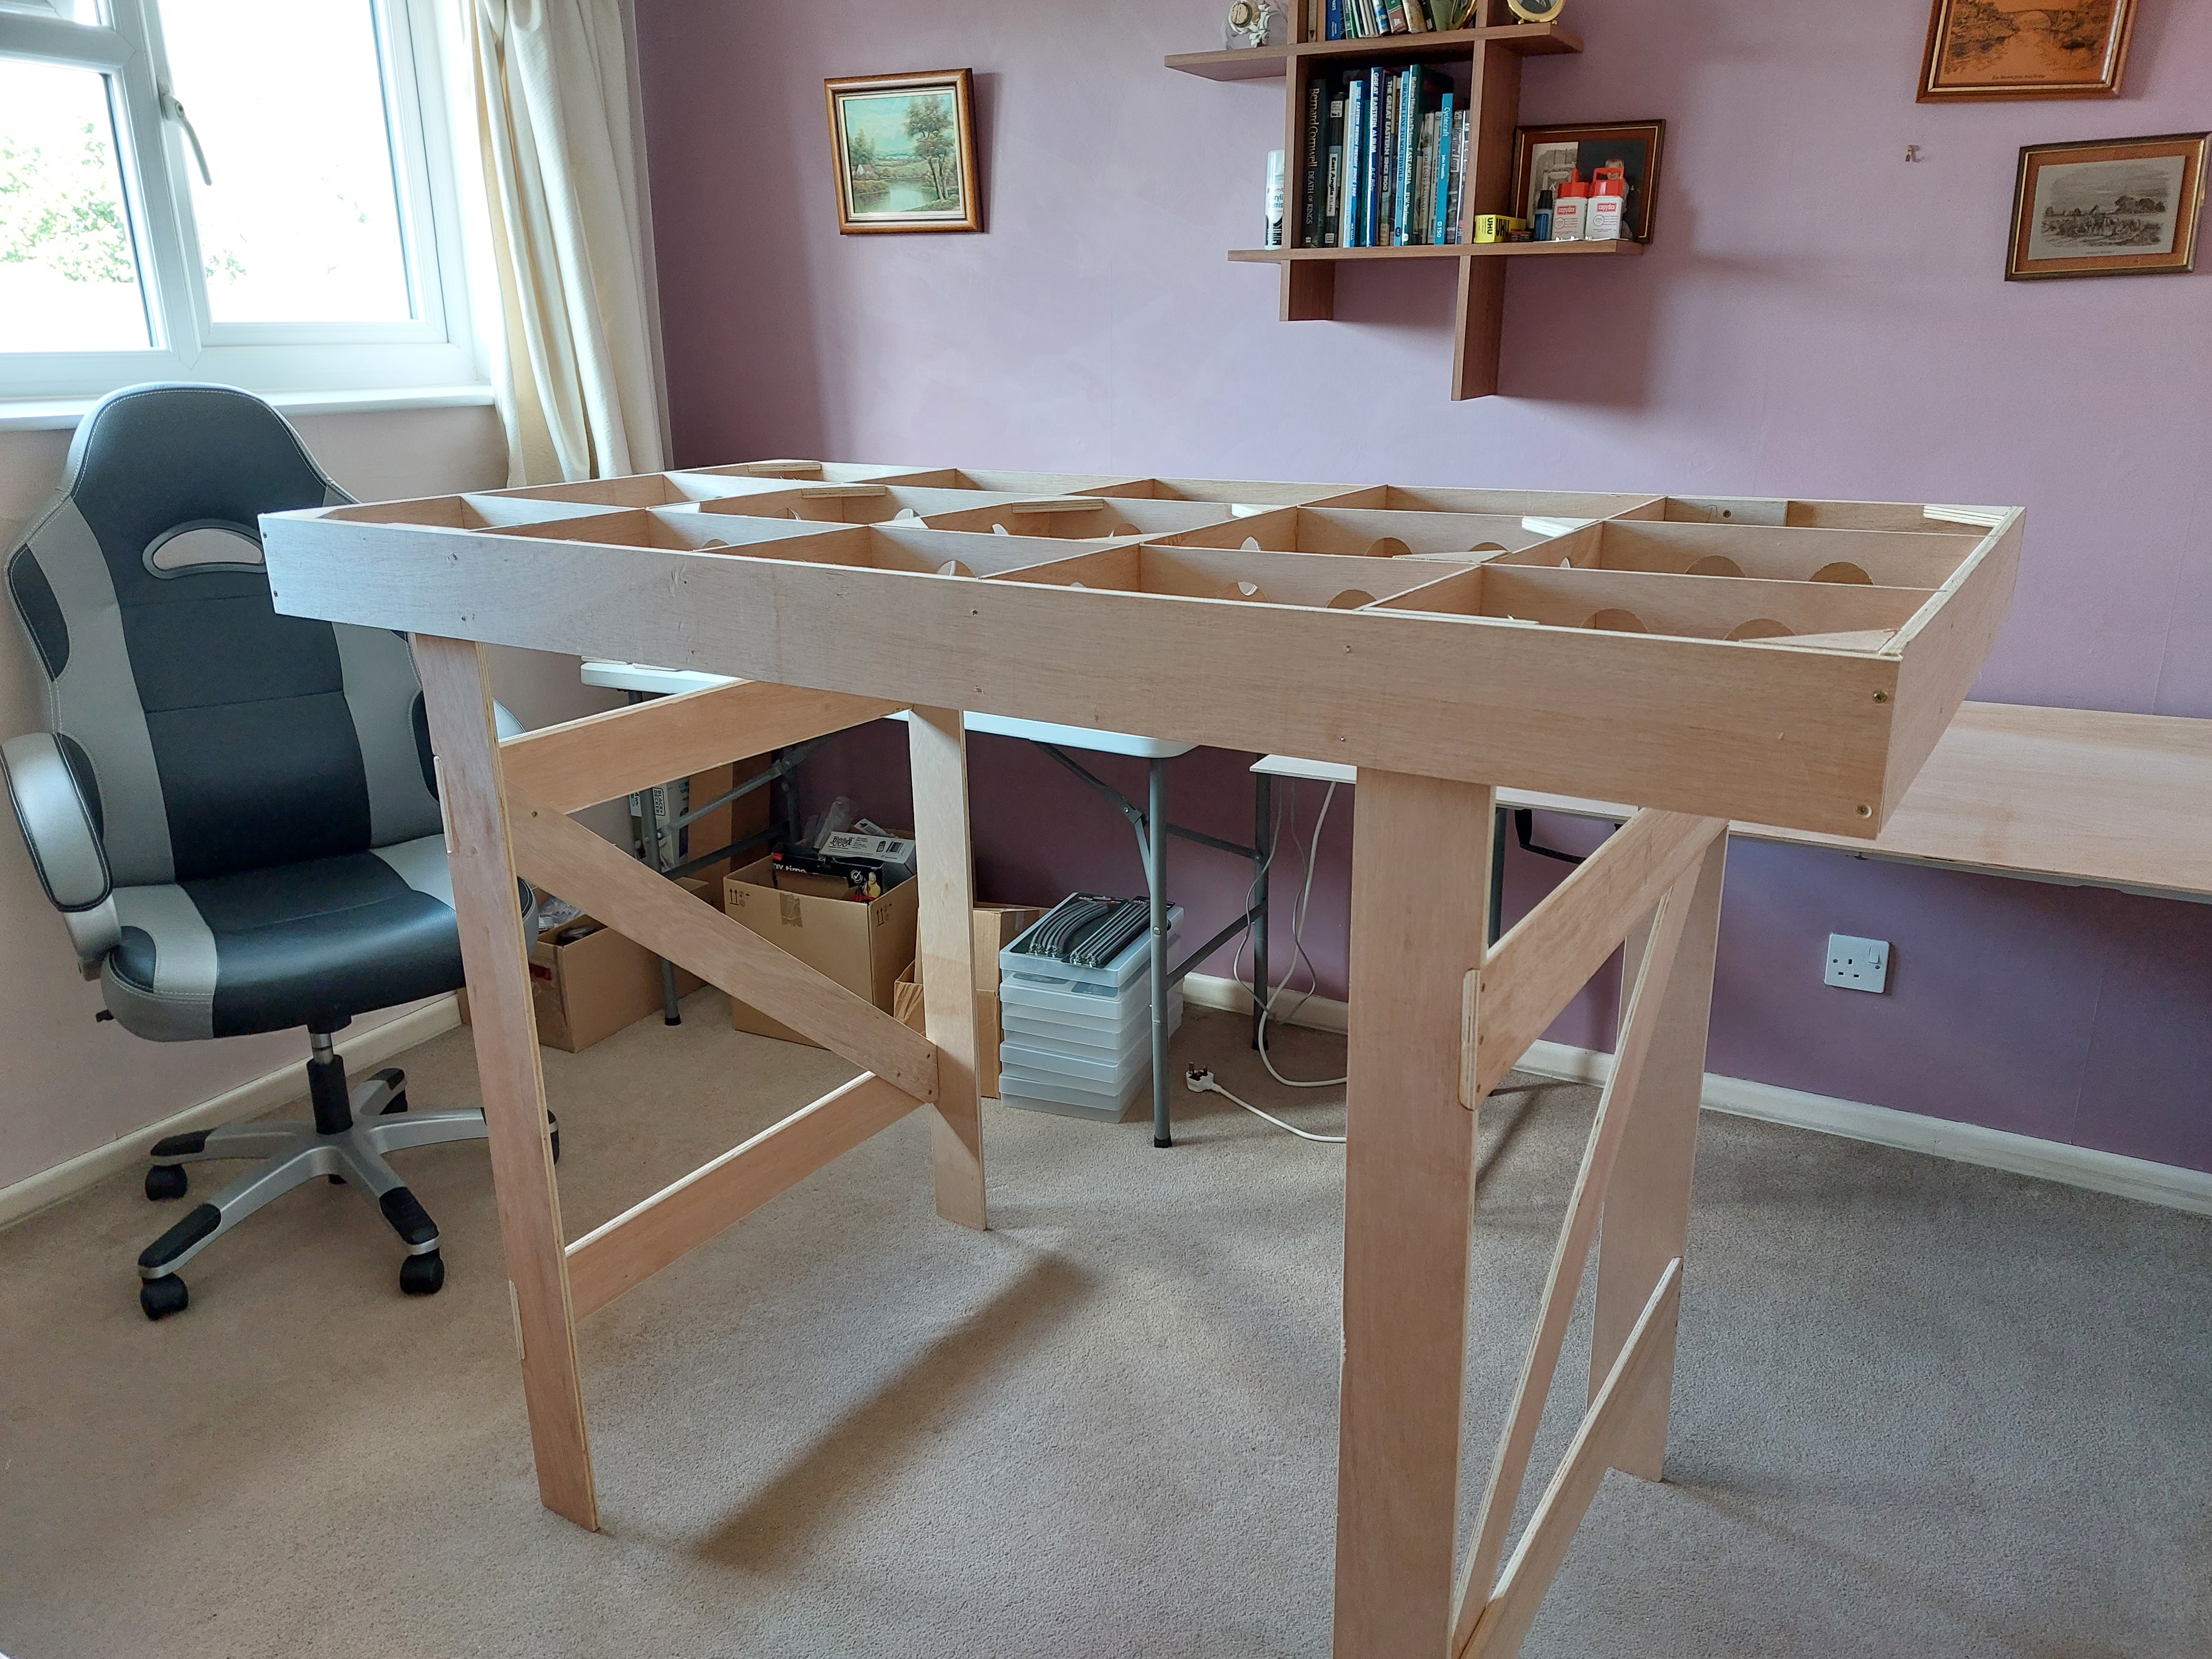
I’ve now removed the legs and will screw the top on and I’m planning on gluing some XPS foam onto that, to create the ground level to lay the track on.
The board will sit on top of a 4’ x 2’ plastic table which will enable me to put it on it’s side while installing the electrics, as there is no way I can crawl about on the floor under the board if it was on it’s legs.
So ends the saga of the baseboard.
Thanks for following and I’ll create a layout thread when I start track laying.
Ed
Posted
Full Member
Having the layout able to lift off for wiring is a good idea, no-one wants to scrabble about underneath the layout.
John
John
Posted
Site staff
Well I did say, maybe 😆 Unlike Peco track where you can trim sleepers to get track to fit the points, it doesn't quite work like that with Kato track.Ed said
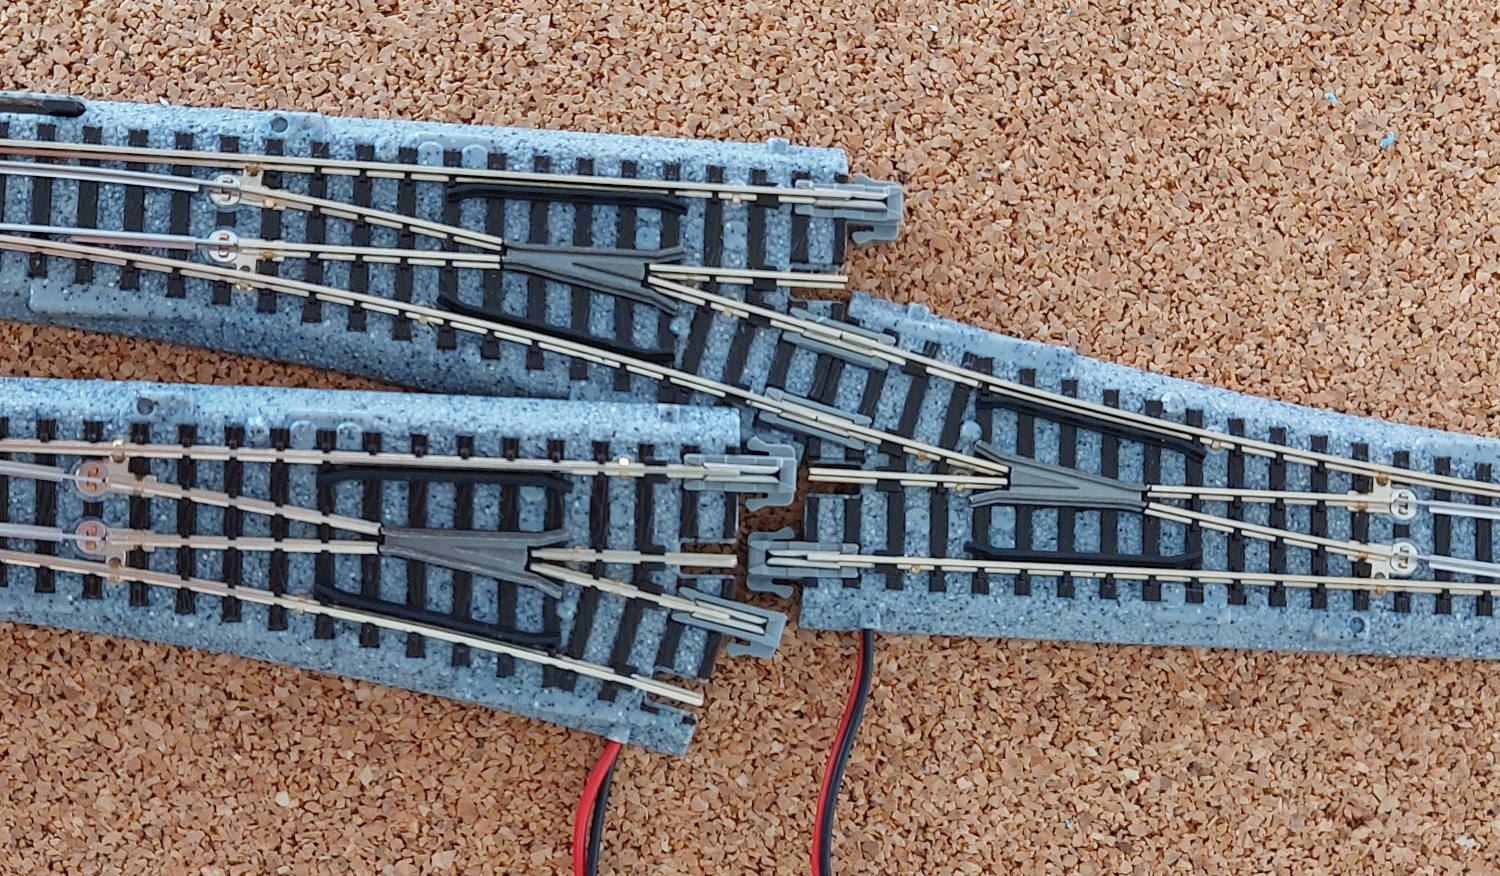 I've had to add some of the specially shaped bits of track where I had a number of points joined together.
 I'll upload the revised plan next.
Ed
I'll upload the revised plan next.
Ed
Posted
Site staff
Adding extra pieces of track meant the passing loop just outside the station platforms became a bit smaller, so to try keep it as large as possible, the facing crossover on the right hand side of the loop in the earlier plan has been changed to trailing.
I've also added some extra storage sidings in the fiddle yard area.
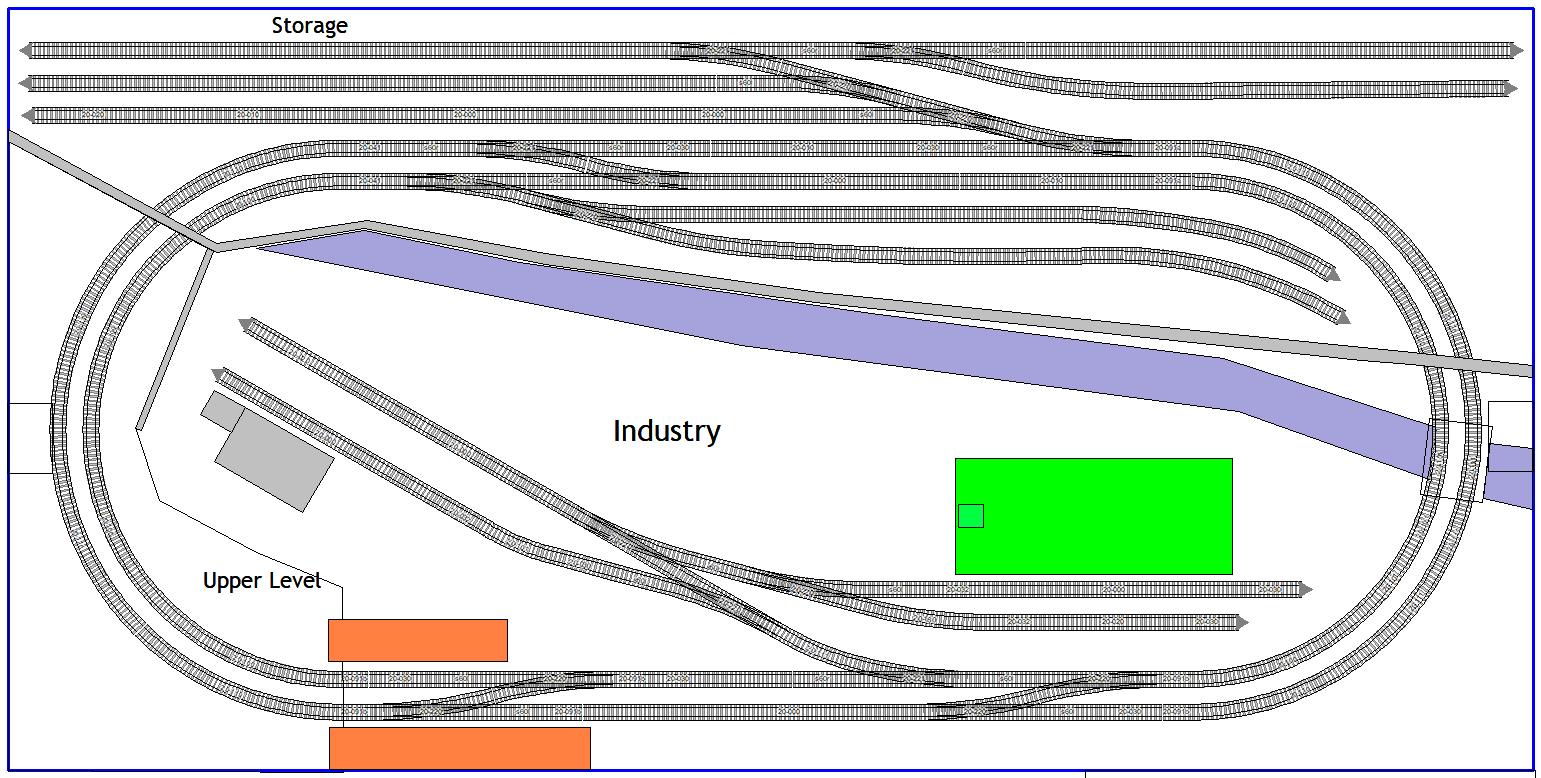
Hopefully, this is now the final plan.
Ed
1 guest and 0 members have just viewed this.