Twobolt John`s winter regression loco build
Posted
#223491
(In Topic #12195)

Full Member
First produced in 1979 I might have entered the realms of 7mm modelling back then if I could have afforded one.
I`m not going to tell you what it is at this stage and will let you guess as construction proceeds. The kit actually won a design award back then for it`s innovative design and construction methods. I`m very impressed with the quality and fit of the parts.
As I`ve already stated it is a complete kit with nothing extra to purchase in.

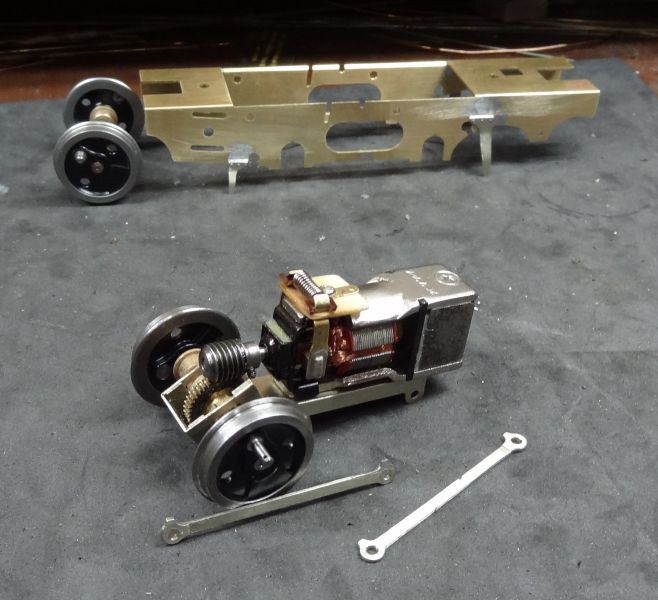
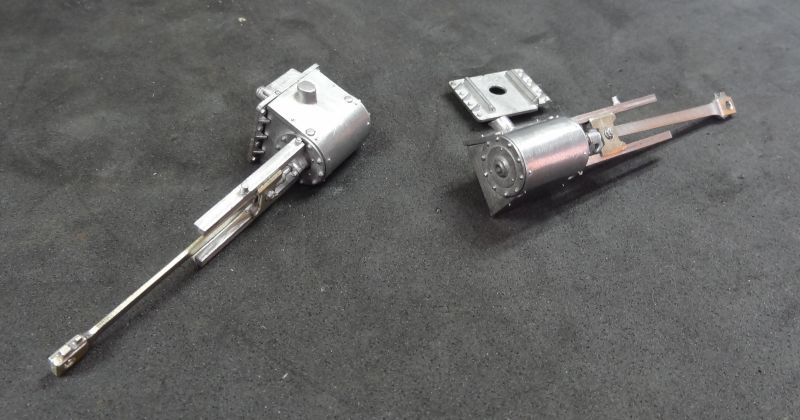
This is the first `regressive part……… A Japanese open frame quality KTM motor. Fully fitted with thrust washers and a 5 pole armature with absolutely no sloppiness in the motor bearings whatsoever. I didn`t think there was a need to upgrade to a Mashima or Cannon motor as she runs very smoothly and quietly.
As my intention is to use DCC sound I tested the motor and she draws 0.4 amps running and 0.8 amp on stall so no problems using a Zimo 645 sound decoder.

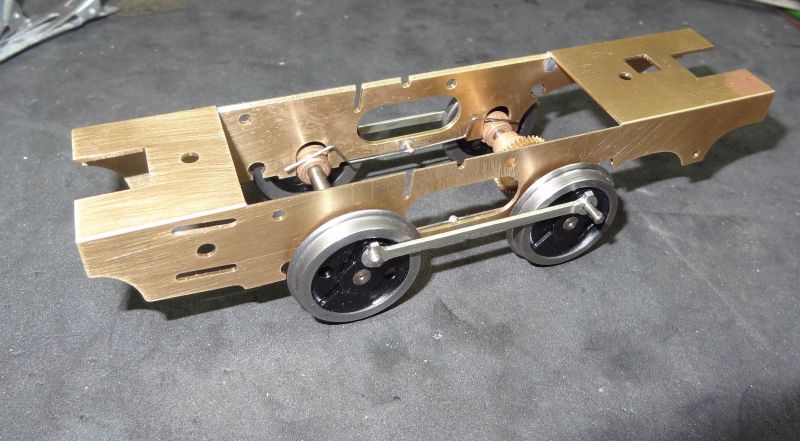
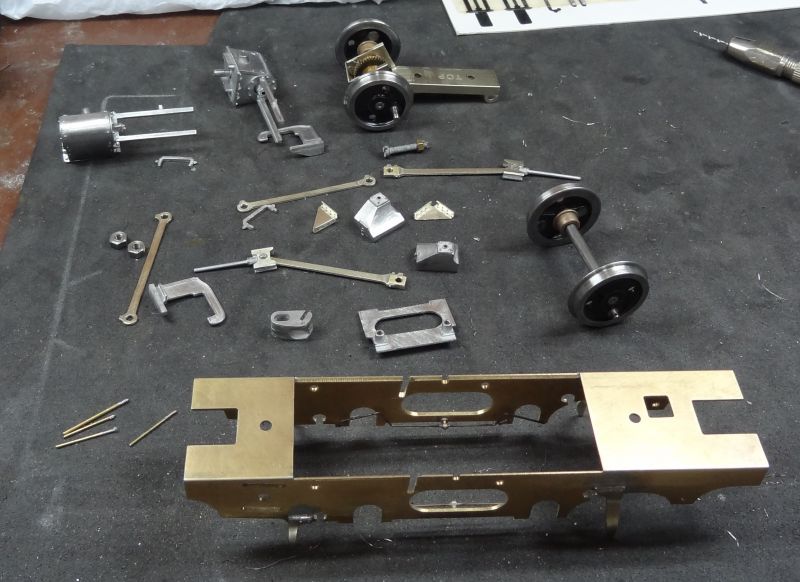
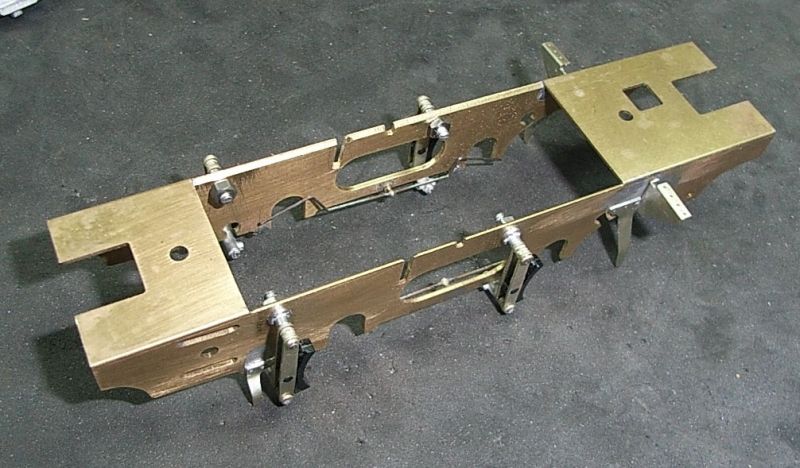
The kit has the wheels and bearings already fitted and quarterd and their is a very cleverly designed fold up gearbox.
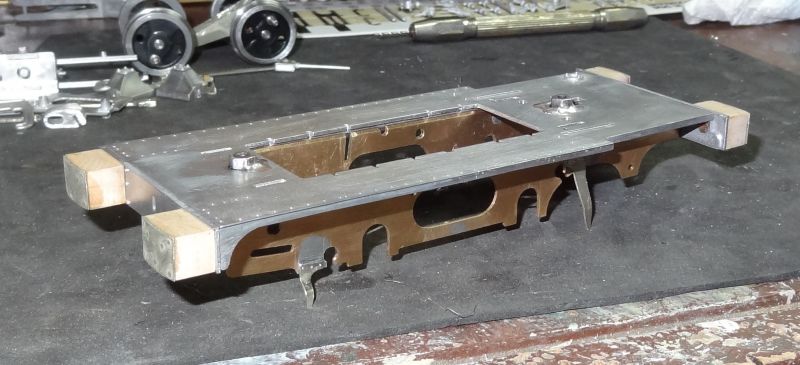
This is a first for me ….. a very accurately milled fold up thick brass chassis. I decided to use the `Joanna Wire` method of sprung suspension and all that was needed was some slight filing of the wheel bearing slots for a smooth action.
Twobolt John

Posted

Full Member
John
John
Posted

Full Member
With those old KTM motors it's not so much the start/stall current, it's the back EMF. You might want to think again about a new can motor. I've a draw full of these dinasaurs.
Nice design with the motor over both axles.
What is it? Inside frame, outside sloped cylinder 0-4-0. With the motor position I'd guess side tanks. If this is 7mm scale small industrial loco? Although those dimples at the right could be for a trailing pony.
Givusaclue - what's the gauge? Those cut out frames and outside frame sloped cylinders were much beloved by Manning Wardle.
Nigel
©Nigel C. Phillips
Posted

Full Member
Hmm, outside cylinders, side tanks? Adams B4 dock tank?
Bill
At 6'4'', Bill is a tall chap, then again, when horizontal he is rather long and people often used to trip over him! . . . and so a nickname was born :)
Posted
Full Member
Hi John,As my intention is to use DCC sound I tested the motor and she draws 0.4 amps running and 0.8 amp on stall so no problems using a Zimo 645 sound decoder.
Does that KMT motor depend on one brush having direct pick-up from the chassis? That black metal piece at the bottom of the nearest brush and only one terminal at the top in the first photo looks like it does. If so you'll need to isolate the motor completely from the frame. (Plus 2 of those wheels will be non-insulated). Hope I'm wrong.
Bit of elaboration on my previous comment about BEMF. That motor has straight cut armature windings, not skewed as in a modern motor (open frame or can), and the magnet is at the ends with steel plates carrying the field (unlike modern motors where the magnets are over the armatures and the field is completed via the steel frame). Straight cut armature motors generate pulsed torque (even with 5 armatures), and often have erratic BEMF, especially at low revs. Which is just when you need a smooth running motor.
I have one of these KMT motors in a brass coffee grinder (4-6-2 Pacific), it runs for good reasons with a cheap Digitrax decoder. $150+ sound decoders are not allowed anywhere near this model unless until I get around to putting a modern can or open frame motor with at least 5 (or 7 skewed) armatures in. BTW, don't discount open frame motors as being old fashioned, they run a lot cooler than the equivalent can motor (which is an open frame motor in a can). Coreless motors are another another subject.
Next guess: Avonside 0-4-0?
Nigel
Save
©Nigel C. Phillips
Posted
Full Member
Go on admit it! you still run yours on an H&M Duette or Clipper……….
 and get cogging
Too much / wrong sort of feedback and they whine and hum like mad and overheat…… BUT with thr right choice of controller they run well…….
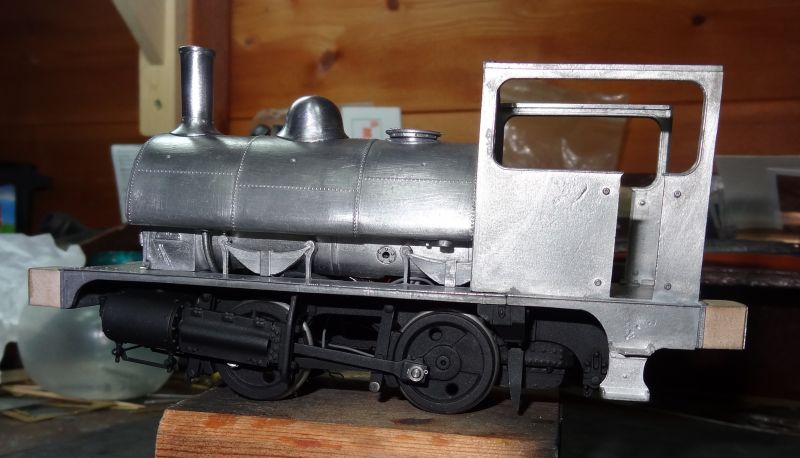
Now your right about it being an 0-4-0 and it was an `industrial` in later life perhaps……. but think along the lines of a mainline 0-4-0.
Here are a selection of castings from the kit……..

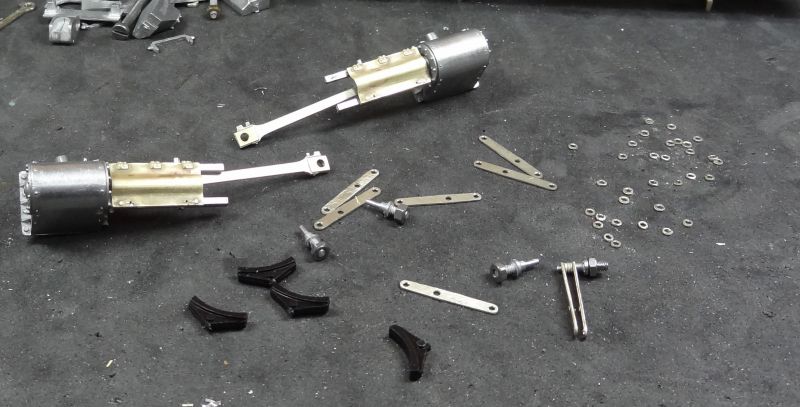
Todays work has been about putting together the kits sprung plunger pickups…………….
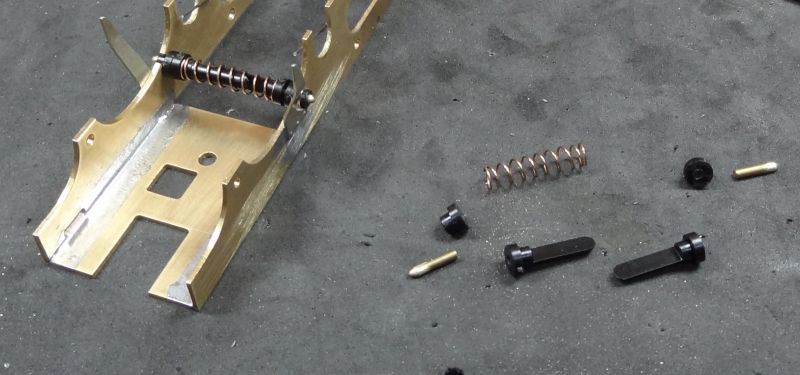
And then a quick set up on the bench……..
What no cogging ???? !!
Twobolt John
Posted
Full Member
John
John
Posted
Full Member
H&M - had to look that up, being brought up proper like on DCC.
KTM are a step up from that list of forgettable motors, even so , they do have a bit of a reputation for torque chatter at low RPM due to the straight armatures and wide spacing. Getting a flywheel in there would help, as would balancing that worm shaft.
Interesting plunger design.
Mainline 0-4-0? UK or US?
If it's not an Avonside, how about a Beyer Peakock saddle tank? How about one of the GWR absorbed lines? (I can think of at least one 0-4-0 saddle tank - Swansea Harbour Trust)?
Sevenscal packed their bits like that, but it doesn't look like a Pug. Or is it. I'll take a punt - it's a Pug! (L&YR 0-4-0 ST to be exact).
Nigel
©Nigel C. Phillips
Posted
Full Member
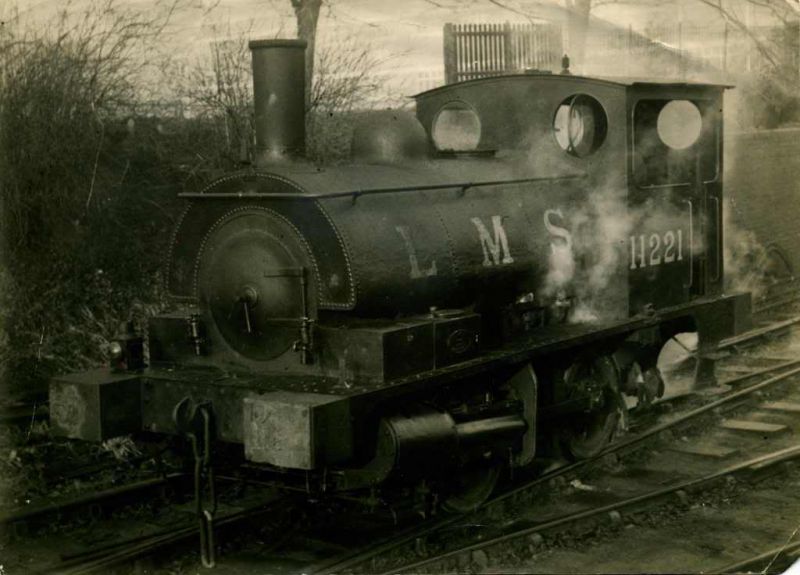
Hopefully she will come out like this…………………………………….
Twobolt John
Posted
Full Member
John
John
Posted
Full Member
Well I built the LMS1F to keep the LMS1P company…… the 0F LMS Pug is to keep the 1F company….. so what do I do to keep the Pug happy??
I might build an `industrial` roundy roundy in my workshop shed………
John
Twobolt John
Posted
Full Member
John
John
Posted
Full Member
Prize?
Nigel
©Nigel C. Phillips
Posted
Full Member
I have the Scalescenes factory set although it would all have to be low relief.
John
John
Posted
Full Member
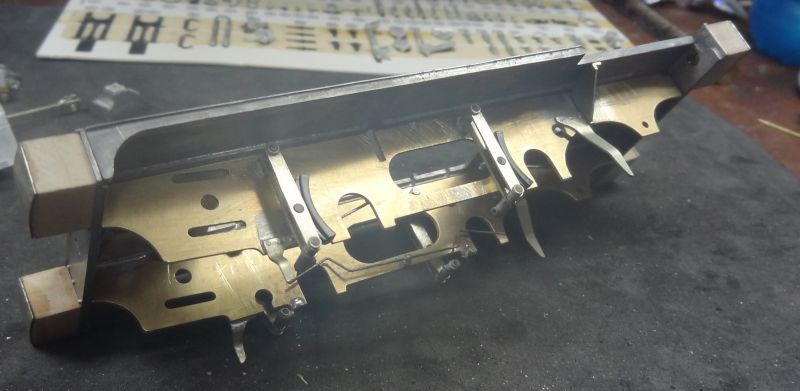
There are a lot of parts to the chassis and thoughts about how I am going to paint it came into mind, so to do it justice I have disassembled things in preperation to painting before reassembly.
Cylinders and crossheads plus connecting rods fabricated. Some easy fettling to get things running sweetly.
The fitting of some chassis parts need reference to the footplate assembly, so this has been fettled and squared up.
I would have preferred brass 6BA nuts and bolts but I managed to use Carrs 100deg low melt solder after tinning the steel nuts first.
The kit provides wood to be made into dumb buffers with some lovely etched front plates.
Twobolt John
Posted

Inactive Member
Max
Port Elderley
Port Elderley
Posted
Full Member
John
John
Posted
Full Member
I very much like the design of the brakegear and plastic brake blocks which will prevent any shorting out against the wheel treads.
I have also added the crosshead covers which needed annealing before shaping and then some work to make sure the piston worked smoothly.
First time I`ve ever come across bolt on brake hangers…………………………….
The firebox grate was fettled and soldered into place this evening…………………………………….

I`ll just be fitting the brake operating cylinder and mechanism tomorrow and then I am ready to spray paint before the reassembly of the working chassis……
Twobolt John
Posted
Full Member
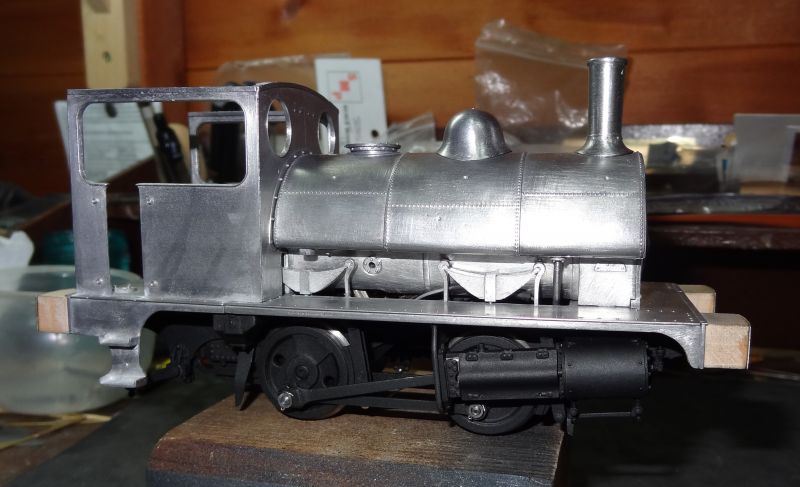
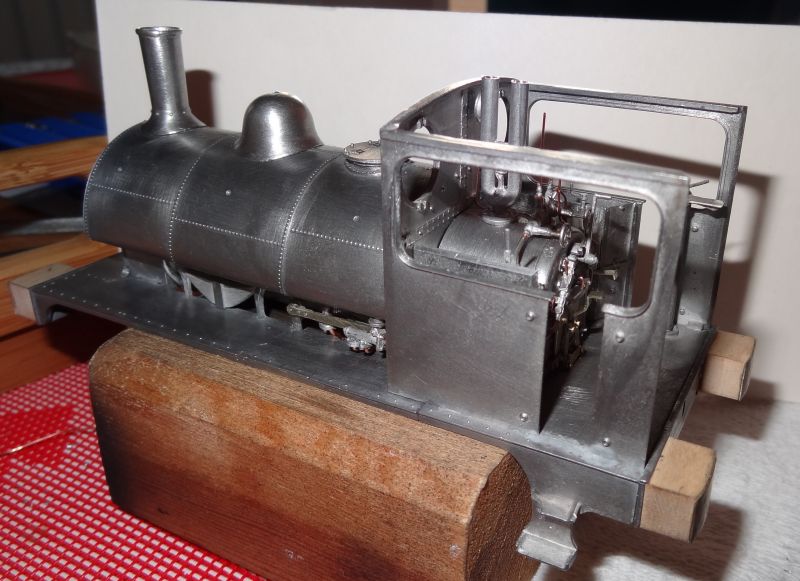
The provision of assembling opening windows has appealed to me so this has taken time to get right.


All the main superstructure has been fettled and soldered up. The decoder and (sugar cube) speaker will fit in the smokebox end.
This kit has a highly detailed cab interior with many parts to assemble so that will absorb my time this week.
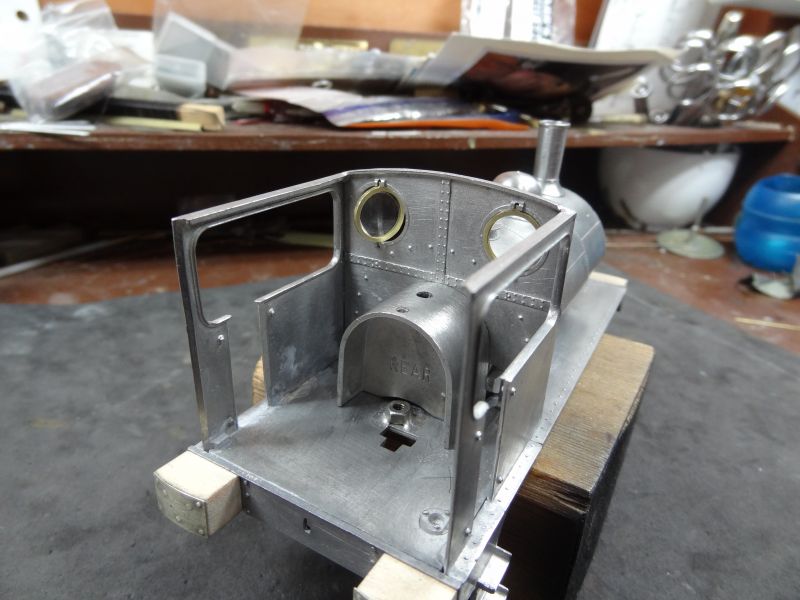
The firebox needed to be drilled and tapped 8BA so as to be removable to help with assembly of all the parts…………………… it even allows for working firebox doors…. so maybe a flickering firebox glow ???
The chassis has been stripped down and sprayed with Clostermanns black etch primer a favourite of mine.

I still have a lot of brakegear to fit as well as a lot of superstructure detailing to complete……………………
Twobolt John
Posted
Full Member
Finally finished the central heating !!………………………………………….
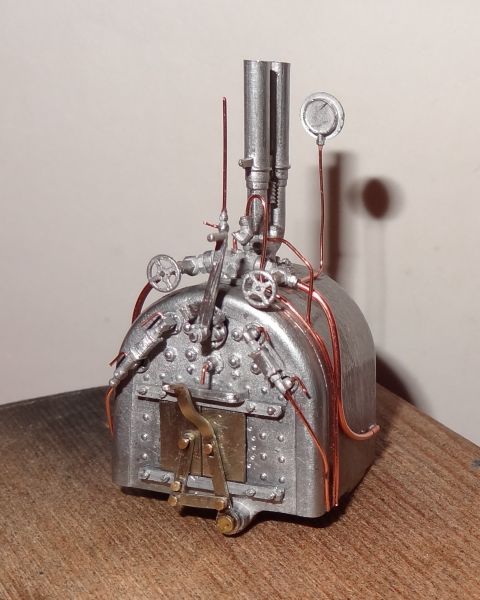
A handy removable unit that will make painting a lot easier…………also managed working firebox doors……..

nothing more satisfying than a well detailed cab…….pity the parts are not lost wax castings as some of these are very small and fragile in whitemetal.
Should make a very busy cab…………………………………………………………………………………………………………..
Twobolt John
1 guest and 0 members have just viewed this.