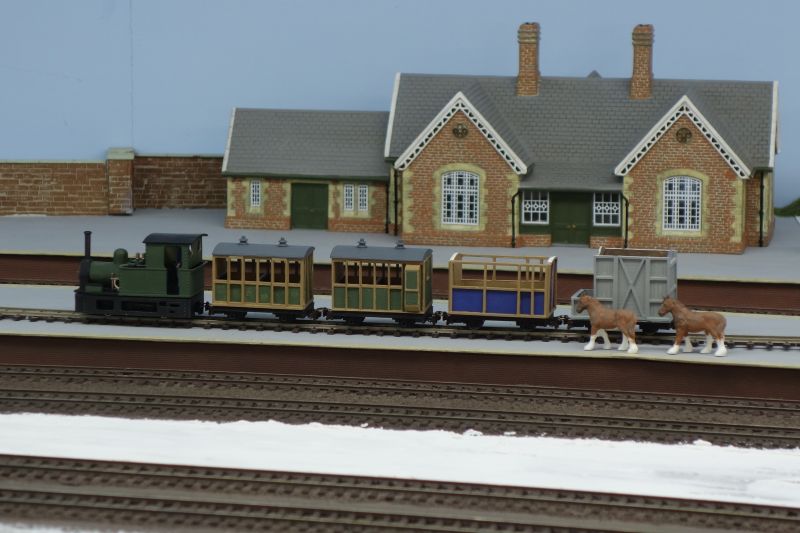
Going large - building large layouts
Posted

Full Member
Yes Peter - bought them at Lasky's in Tottenham Court Road in 1978 and they haven't put a foot wrong since - depsite my best efforts!!Looking good, but I can't help but notice that you're using Wharfddale speakers. What a good choice.
Shed dweller, Softie Southerner and Meglomaniac

Posted
Full Member
Cheers Pete.
Posted
Full Member

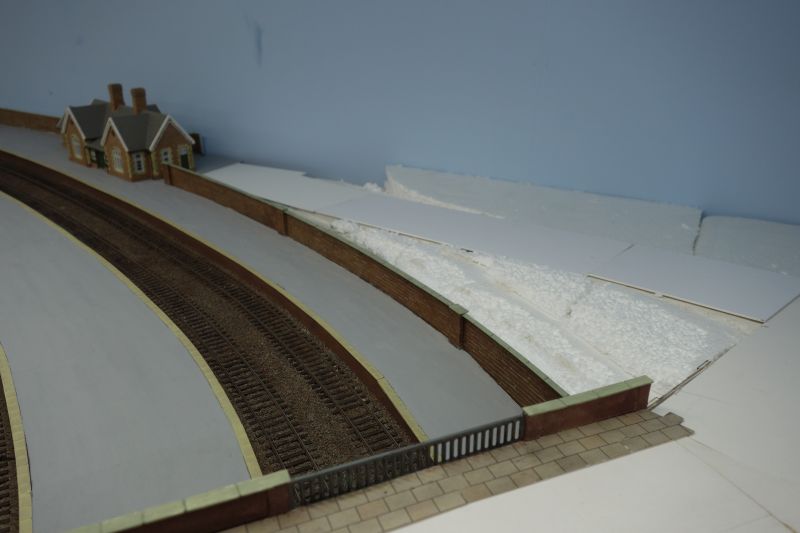
Well the thumb turned out to be a likely fracture and it still hurts so light duties only. Fortunately that has included re-weathering the track with some "Sleeper grime" - it looks much better now and the yellow colour of the ballast in the sidings has gone. The platform tops are shown here under construction. 40thou card covered with 250 grit sandpaper. Underneath the platform is a network of supporting cross pieces as can be seen on the Down platform in the foreground. When cut, joined, tested and sandpapered, the tops are stuck down with Evo-Stick.
One bad aside from this sandpaper job - I have worn my fingerprints away on my right hand and so my iPhone finger-recognition doesn't work :sad:

Here is a close up of the texture. I shall have to add some patches/repairs to break up the uniformity of it all but I am pleased with the outcome. 10 sheets of A4 sandpaper cost about £10.
After one coat of grey emulsion, this is what I have. I think it needs another lighter coat but overall, not too bad. The joints between the platform surface and the back wall will be filled with weeds etc. The building also needs "bedding in" with weeds etc but it sits better than the one I did at Butterbump when I used ballast for the surface. I am not too bothered about the joints in the sandpaper as Tarmac in real life is never laid in one continuous pour anyway.
The edges are cut strips from a Slaters 0414 paving slab sheet. A nick between each slab is enough to allow the strip to bend as required. Before sticking down, I feather the edge of the 40thou to present a thinner edge. This will disappear when the slabs are painted (probably not white - that was a wartime thing).
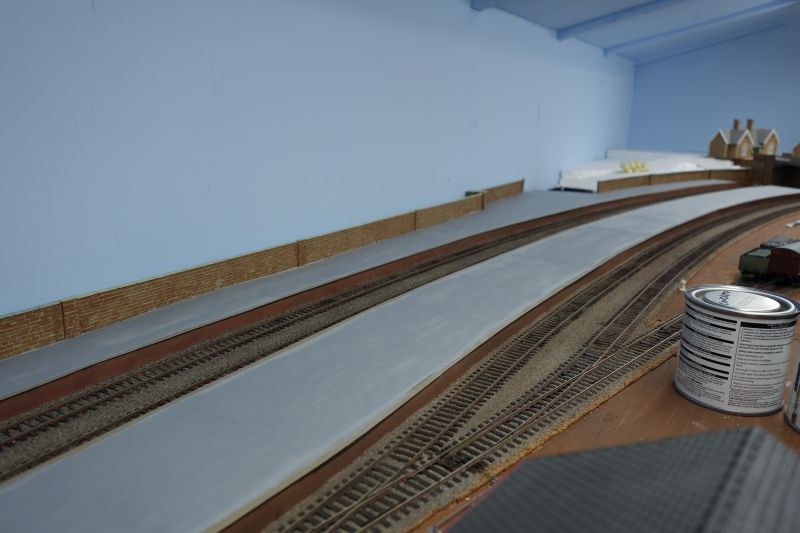
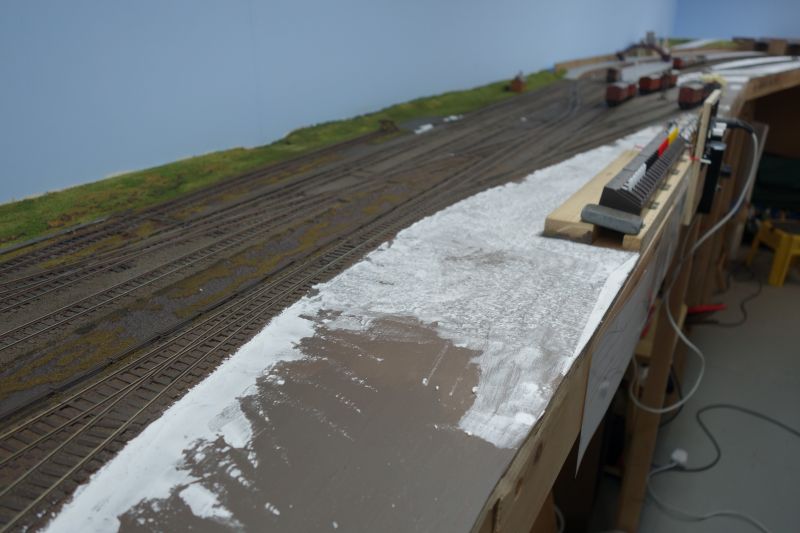
Finally, a look down the length of Yarslow showing that the basic scenery has been painted brown and is waiting for the first layer of scatter - this week's job. Less obvious (until you compare this view with one taken a month ago) is that I have now installed a 4th, 4ft LED striplight above this scene, moving the centre one over a bit to make room. This new arrangement gives a much better light here and avoids that light-dark-light thing I had earlier. I have 2 more to add over Trinity Square.
To reward myself for getting this far, I have ordered a Dapol Class 21 in green with yellow ends. They were, by the time period I am modelling, confined to Scotland to be near their maker (literally) owing to poor reliability. The appearance of one on a Through Freight in North Lincolnshire/South Yorkshire is probably the result of an adventurous Shed Foreman! At least the train it will haul is Northbound.
Bashing on….
 Last edit: by Barry Miltenburg
Shed dweller, Softie Southerner and Meglomaniac
Posted
Full Member
Cheers Pete.
Posted
Full Member
A simple picture of 2 painted platforms. However, the journey to this point is somewhat convoluted. I painted the up platform with a colour which looked like Tarmac on the colour swatch but it turned out to be a light, almost concrete colour. A second trip to the paint supplier yielded 2 options - a blue/grey (slate?) and a plain grey. The former turned out to be the right one and here are the 2 platforms duly repainted. I have subsequently painted the coping stones with Humbrol 113 and will weather the whole thing in over the weekend.
Meanwhile, I have finished the basic scenic shell at the down end of the station and have started with a base layer of scatter material. That will be fully dry tomorrow and I can add a second colour - a quiet green to accompany the green/brown tone already applied. Thereafter I will go to clump foliage and other clump scatter to give the area some depth before reaching for the static grass.
If I sound like an expert, forgive me - I am copying Richard at Everard Junction (see his YouTube channel). He makes a very good job of basic scenery that looks very convincing to me. I have done a few scenic sections in my time and none looks as good as his so I have decided to simply copy his techniques. So far so good.
We paint the fields and scatter…………..

Shed dweller, Softie Southerner and Meglomaniac
Posted
Full Member
Cheers Pete.
Posted
Full Member
Shed dweller, Softie Southerner and Meglomaniac
Posted
Full Member
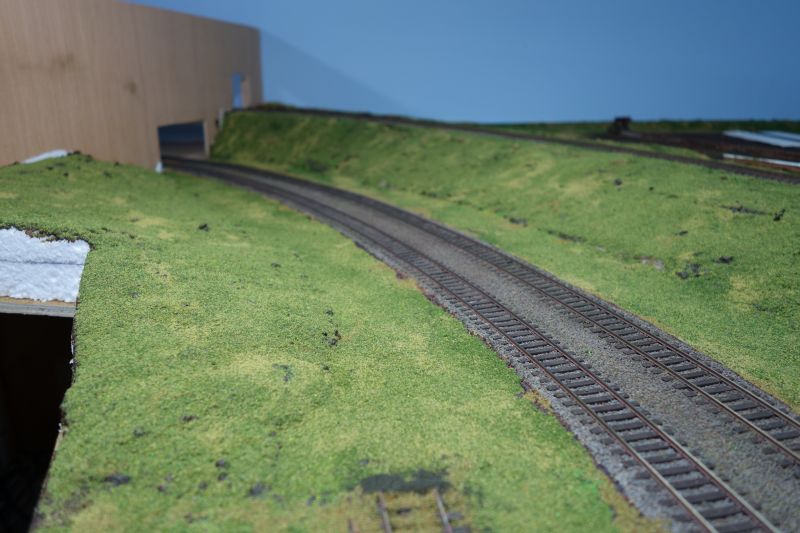
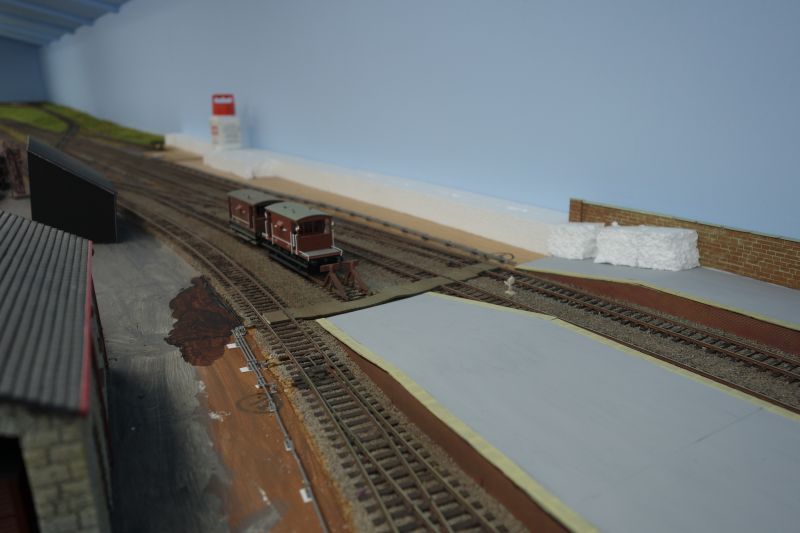
A few hours over the weekend gave me the scenic base layer for the Down end of Yarslow. This is various scatters over a 50/50 PVA and water mix. The area around the engine shed (top right) will be painted dark grey before a heavy weathering of coal dust as befits such an area. I will add clump foliage to this whole scene before starting on the lineside fencing, trees, bushes and shrubs. The brown lines are meant to be rocky outcrops which will be painted lighter tones in due course. They do not look like parallel lines in real life - this picture does show that off rather badly

I also need to paint the backscene blue, add some clouds all over and then add a front facia. This facia will rise above the landform to help block the "hole on the sky" exit.
To the left of this picture, it is possible to see the main and branch lines approach as well as the end of the Trinity Square approach curve by looking through the gap between this unpainted backscene and the backscene behind the TSQ overbridge. I need to fix this although cannot cover up the gap as I need it to be able to reach the Master Cab Control Panel. Some kind of screen will be required but, for now, I will let that stew.
The approach road down from the overbridge to the station platform level has been cut in card and will be glued shortly. Thereafter, a layer of filler will create the road surface. The area between this road and the rear wall of the platform will be covered with filler and scatter, bushes and overgrown stuff.
The link between the two sections covered in the 2 pictures above is here. Groundwork has had an initial coat of brown paint/PVA mix and I have added some polystyrene lumps from which the last of the scenic landform will be carved. It will be quite low but will give a slight rise on which to site the perimeter fencing and thus frame the view.
I am hoping to have this whole area at the stage of basic scenic base layer by the end of October. Then I will make a start on the point rodding :thud for the second signal box and the area around the PW yard. My aim is to be progressing Trinity Square by the time the boys from the Model Railway Society make their annual Xmas visit. That will also involve a mass tidy-up for the shed. One of the problems with an intense work schedule is the mess you make and the lack of time you allocate to cleaning up!!!
My new Dapol Class 21 has now arrived and I will post a picture shortly. Initial impressions are that it runs beautifully, pulls well and looks good. Interestingly, the old Hornby version (from yonks ago - possibly 1980's???) doesn't look that bad although clearly not up to modern detailing standards. I was going to sell it but on reflection, it might do for some of the more junior visitors and those older ones who run stuff too quickly!!
Bashing on……
Last edit: by Barry Miltenburg
Shed dweller, Softie Southerner and Meglomaniac
Posted

Full Member
I can assure you this problem is not restricted to those with "an intense work schedule".
… My aim is to be progressing Trinity Square by the time the boys from the Model Railway Society make their annual Xmas visit. That will also involve a mass tidy-up for the shed. One of the problems with an intense work schedule is the mess you make and the lack of time you allocate to cleaning up!!!
……
I gave those up 20 years ago this Friday when I retired and now, to quote the late Douglas Adams, "enjoy that lovely wooshing sound as deadlines go passing by!"
Mess on UH will no doubt match yours measured on a per sq metre basis even if my output rate cannot.
Great pics of the sweeping curves BTW, excellent progress being made.
Last edit: by Colin W
Posted
Full Member
I regret that my schedule is entirely my own doing - if I don't set little goals and milestones, I tend to wander aound doing all random stuff whilst putting off the jobs I really have to do next!!
I enjoy the scenic side because it changes bare baseboards into a model but it is rather tedious I find - the green bits have had 3 layers so far and will probably get at least 2 more before trees, fences etc start to appear. If I could do it all in one pass, I surely would, but I have tried that in the past and it looks rubbish so I have to find the patience to do it properly.
The up-side is that, whilst the glue is drying, I get to do all the random stuff - useful though it is. I sorted out a volt-drop on the Down main this morning, painted an old CooperCraft AEC lorry kit, added the transfers to a whitemetal delivery van, sorted out a train for the new Dapol Class 21, put out my latest YouTube video and had a clear out of old useless power supply transformers (lap-top, PC speakers etc) that I had collected but have not used. I kept a couple of 6V and 12V ones just in case.
So my random jobs are all useful in a way!!
Scenically, the polystyrene behind the signalbox is now carved, poly-rippled and painted brown so when that dries, I can start the scatter layers along the next section right up to the platform ends.
Bashing on….
Shed dweller, Softie Southerner and Meglomaniac
Posted

Full Member
I have a pair of Wharfdale speakers rigged in my garage/workshop but can't for the life of me, work out how you get them into a OO Gauge locomotive !! :hmm They're currently rigged to my old cassette deck via a Pioneer or Akai amp (can't remember which I used).[user=1120]peterm[/user] wrote:Yes Peter - bought them at Lasky's in Tottenham Court Road in 1978 and they haven't put a foot wrong since - depsite my best efforts!!Looking good, but I can't help but notice that you're using Wharfddale speakers. What a good choice.
It really is beginning to look the part Barry, your club mates will be very impressed. As others have said, those long sweeping curves look fantastic. If Hornby had go their act together 10 years ago and launched TT 120, or I'd stayed with OO in our old house, I could have had similar curves.
'Petermac
Posted
Full Member
………..The up-side is that, whilst the glue is drying, I get to do all the random stuff - useful though it is. I sorted out a volt-drop on the Down main this morning, painted an old CooperCraft AEC lorry kit, added the transfers to a whitemetal delivery van, sorted out a train for the new Dapol Class 21, put out my latest YouTube video and had a clear out of old useless power supply transformers (lap-top, PC speakers etc) that I had collected but have not used……………
Good heavens - how long are your mornings ?
This morning, I got up, thought for a while, made a coffee, thought for another while, made a list of what I planned to do and then, suddenly, it was lunchtime …… :cheers :cheers
'Petermac
Posted
Full Member
We are closer to the Arctic Circle in the North West so perhaps time moves more slowly
Shed dweller, Softie Southerner and Meglomaniac
Posted
Full Member
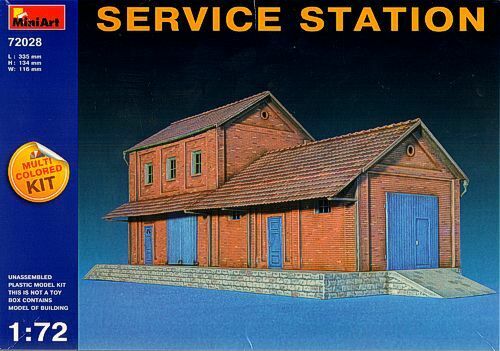
Its a kit by MiniArt, a Ukranian outfit (a lot of plastic kits are made there apparently). The instructions are in picture form which is handy as the text options do not include English. The footprint is about 30cm x 12cm (12 x 5 inches in English) and looks to be ideal as the old wagon works that is now the PW depot at Yarslow. I will attempt to build it with the single storey on the left i.e. swapped left-for-right as the the picture has it.
The walls are made up of 8 or 10 small panels so construction should be fun!!
I will post some pictures and thoughts when I get it together.
Barry
Shed dweller, Softie Southerner and Meglomaniac
Posted
Full Member
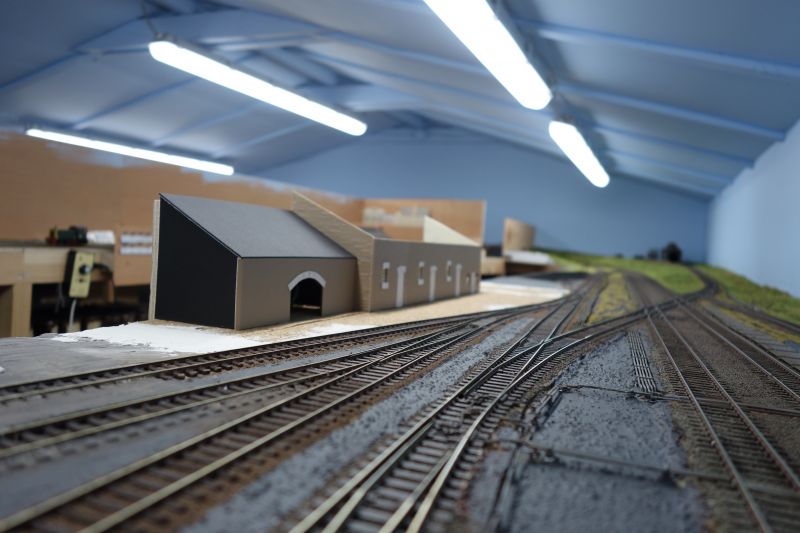
I have been scratchbuilding today - the building that sits over the lever frame at Yarslow needed a suitable purpose and I decided on a set of stable for shunting horses. Originally I was going for a warehouse and found, amongst my magazine collection, a write-up of John Flann's Hintock that included the local Traders building. Next to it is his small stable block (see photo above). Construction is framer's card with plasticard embossed brick stuck on using EvoStick. Windows from an old Metcalf kit. Details from Wills and Evergreen.

Here is the start of the front - the influence of John's stable is, I hope, evident. I chose to keep my doors closed as I did not want to reveal the lever frame. Dimensions for doors for horses came from another article. The tack room is on the right.
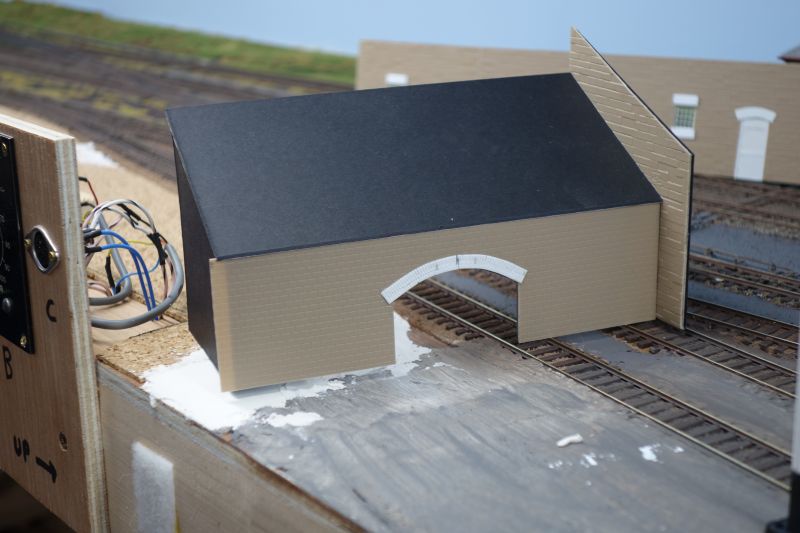
On the end, covering the controllers, is the feed store. I have a pair of heavy timber doors (cut down from an old goods shed) to fit under the arch.
Here is the whole thing mocked up and, as yet, without a roof. I think it will look OK.
Bashing on….
Last edit: by Barry Miltenburg
Shed dweller, Softie Southerner and Meglomaniac
Posted

Full Member
Cheers MIKE
I'm like my avatar - a local ruin!
I'm like my avatar - a local ruin!
Posted
Full Member
Barry
Shed dweller, Softie Southerner and Meglomaniac
Posted
Full Member
The basic scenery shape has now been given some "base coat" treatment behind the station wall at Yarslow. Original plans suggested a building at the top of the slope facing the roadway but I have decided to keep a more rural feel here and have a building on the other side of the road facing the down ramp. This area will have trees and bushes added.
The old stables for the shunting horses has now been painted and is having its end wall glued on here. I have started to paint the hay store and need to weather the brickwork after painted the double doors. Outside the stables is a small water tank made from a cylinder that came from a Ratio coach kit underframe (gas tank?) and a tap made from an inverted wagon vacuum pipe.
This close up shows the tank sitting on a small brick plinth. A whitemetal drain cover can be seen waiting to be set into the surface.
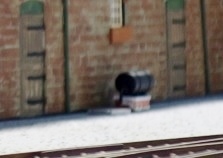
At this point, let me admit to having gone off at something of a tangent. My local Model Railway Society is currently in the final stages of prepping for our annual exhibition and we are demonstrating a "Work-in-progress" 4mm layout that I have been contributing to. It comprises a micro ex-GNoS terminus in BR days (hence my involvement) and a OO9 section serving a whisky distillery - a copy of Talisker - original on the Isle of Skye. We have a few bits of OO9 stock and I will be providing some of the standard gauge stuff but I thought I would investigate an OO9 loco. I found a Rye & Bagnall 3D printed body to fit the ubiquitous Kato 11-109 chassis - all in for under £50 and therefore took the plunge. A couple of 4-wheeleed coaches followed from the same manufacturer. A quick trip to the paintshop produced this……..
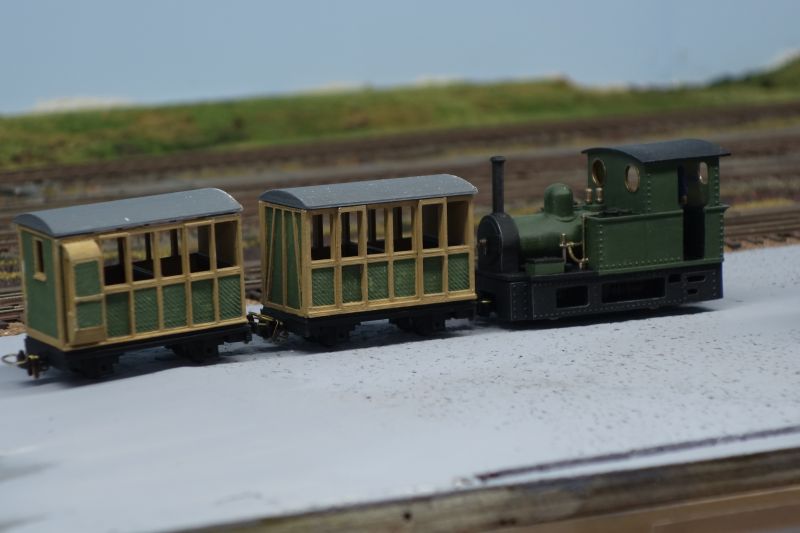
A second coat for the coaches wouldn't go amis and the rooves are not yet fitted (pending a couple of passengers). The coach chassis are 3D printed and come as a rolling unit, complete with couplings.
I must say that its VERY small and I will not be ripping up my Yarslow empire to go OO9 anytime soon, but it has been a fun couple of weeks playing with this. The Scottish-based layout will get a "castle" at one end and we have included a private halt for the Laird. We thought it would be fun if he had a private coach but in the absence of any suitable model available, I built a body from 50thou plastic card and 40x40thou Evergreen strip. The result (in mid construction) is pictured below. It will sit on one of the rolling chassis.
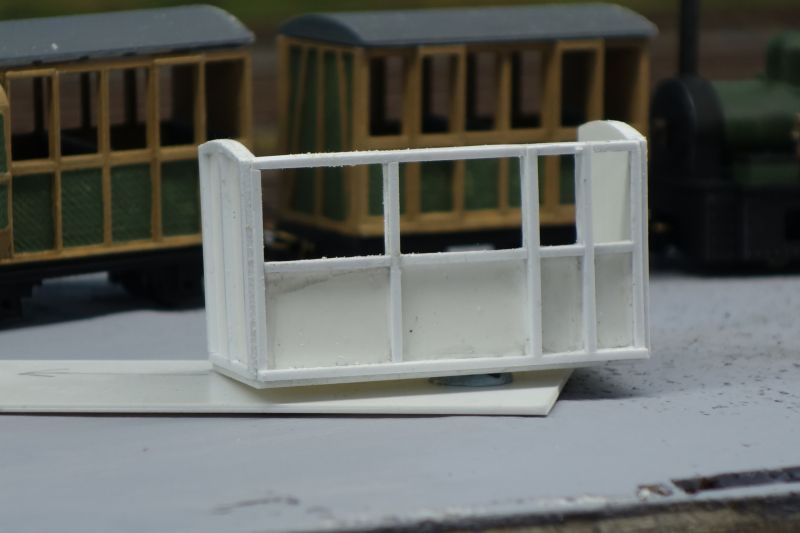
The influence (and sizing) from the original coaches is obvious.
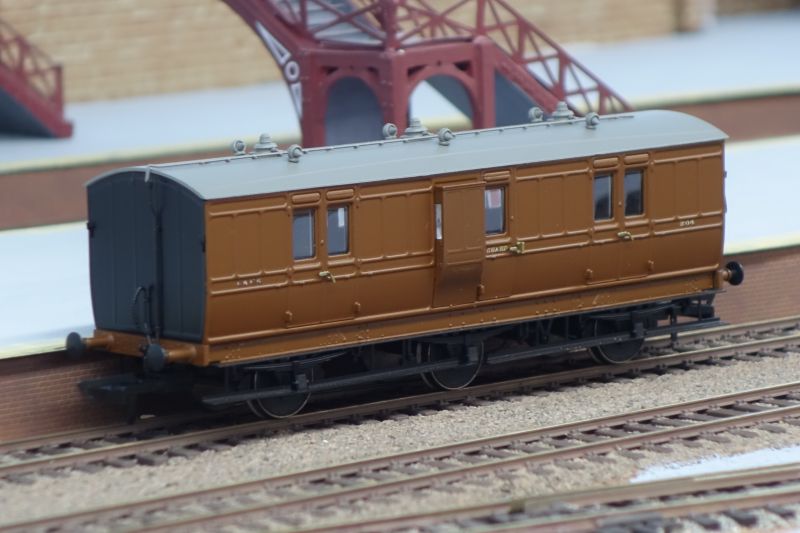
Finally, getting back to Yarslow, I have taken delivery of a Hattons Genesis 6-wheeled coach. I ordered an LNER brake in brown to use amongst my PW stock and have added it to the small crane train. It will have to be heavily weathered (and that will be a shame) but its a beautiful little thing and well detailed. In view of its intended use, I avoided the extra cost of the lighted version.
Next job, finish off some layout details ahead of the club boys visiting for the annual Xmas Mince Pie & Trains morning - hot mulled wine has been requested and I am not intending to disappoint!
Bashing on (hic!)……………..
Last edit: by Barry Miltenburg
Shed dweller, Softie Southerner and Meglomaniac
Posted
Full Member
The OO9 distraction is coming to an end as the loco and coaches have been painted. The coaches need glazing but that can wait. The "Laird's coach" is fininshed and painted and may get a roof if there is time before the exhibition. I have the internal seat and the Laird to go inside. The last vehicle is a scratchbuilt horsebox to fit a couple of animals found amongst the club's collection of "stuff we ought to keep". The ends are part glazed and I have a "lad" painted up to ride on the open verandah. Construction is the same as the blue coach - 50 thou body, 40x40thou framing and a RTR 3D printed chassis. The roof will be part solid, part sheeting - an influence from the Irish narrow gauge cattle wagons that seem to have been built that way.
One big advantage of this OO9 episode is that I have come back to Yarslow with a fresh pair of eyes and have been disturbed by the unrealistic nature of the basic groundworks. Cork sheet that looks like cork sheet and ballast edges that are very sharp, straight and therefore obvious.
I have therefore attacked all offending areas with filler to make the ground a whole lot better. The area in the upper photo is cork sheet and, although painted, looked awful. Below, I have had a go at the area between the platform loop line and the exchange sidings as well as around the goods shed.

Once dry and sanded, I will go over this with my basic ground colour - a blend of blue and grey and brown. Its a difficult colour to get right and I have had plenty of tries and failures. Old colour photos of the trackwork and surrounding areas can help but old film types, the effect of the sun and the practice of tinting old pictures to get the loco/subject to look right don't help either. In nearly all cases, the photo is not taken to show the ground colour anyway. Whilst I keep one eye on the cricket/rugby league/rugby union/baseball currently on the TV, I can happily spend an evening browsing through my books looking at the colour of the trackside.
I must get out more………………
Shed dweller, Softie Southerner and Meglomaniac
Posted
Full Member

Here is the view from the doorway of the shed with about 3/4 of the job done. Once the rods have been completed through the trackwork, I will ballast this area.

A closer look at the PW yard ground frame that can be seen in the upper picture. The two rods heading left and right operate the points whilst the one running out under the track is the locking rod from the signal box. Ideally, this should be the first rod but hey ho! Before the ground frame is fixed down I will repaint the levers into the right colours.
Completing the job and getting the ballasting done unlocks the possibility of getting the groundwork done and coloured to match the rest of the station although the old wagon works yard will have a lighter grey base colour. I haven't started the MiniArt building yet but hope to do so before the Xmas period.
Bashing on….
Shed dweller, Softie Southerner and Meglomaniac
1 guest and 0 members have just viewed this.